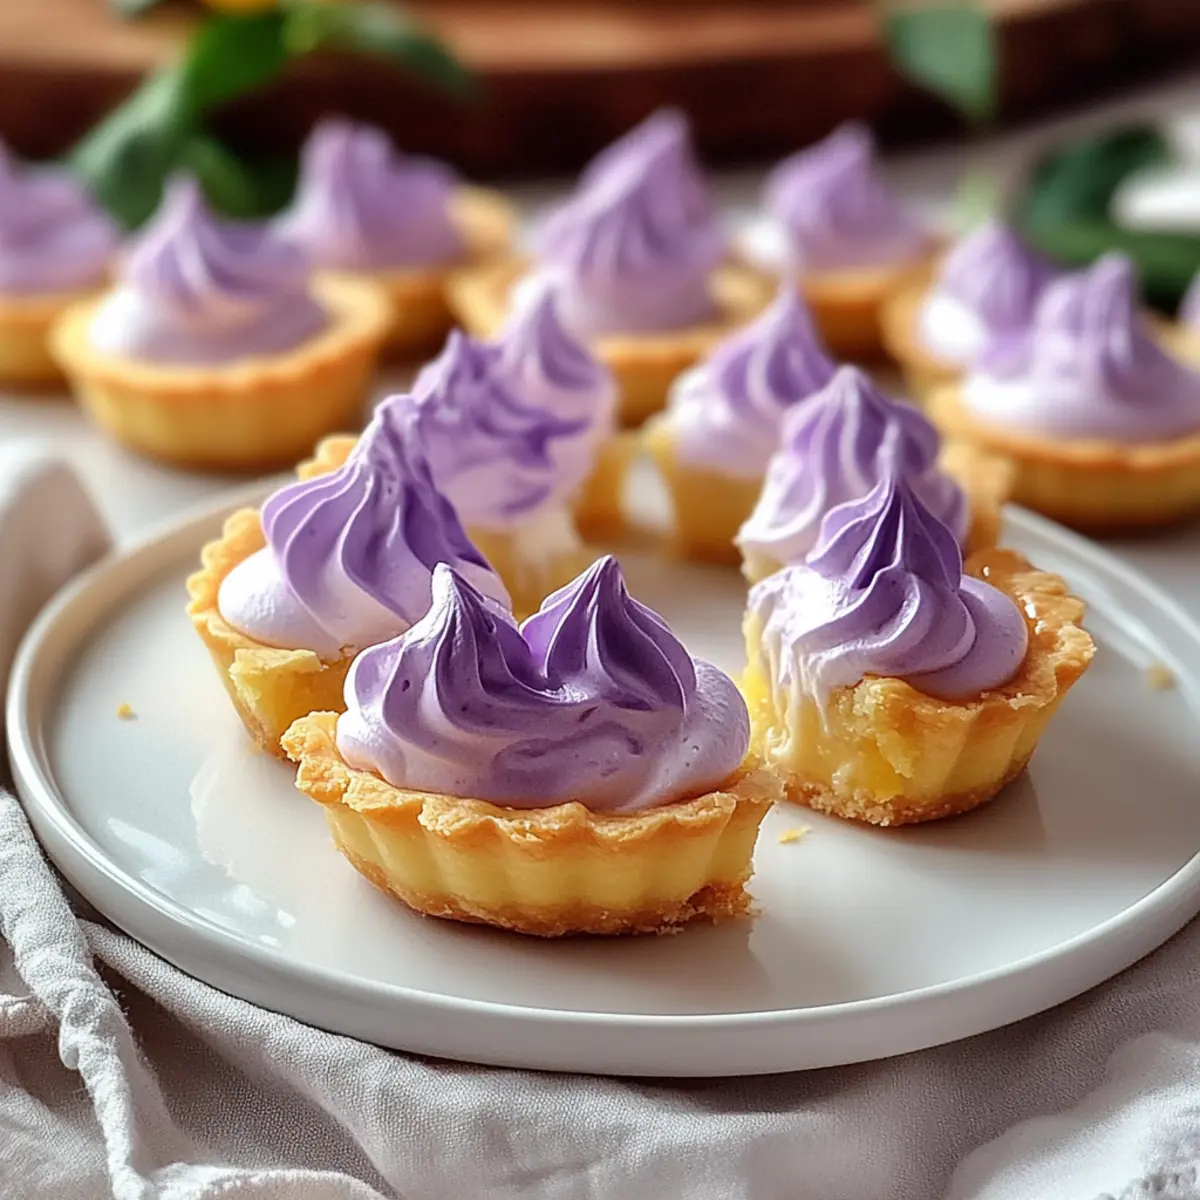
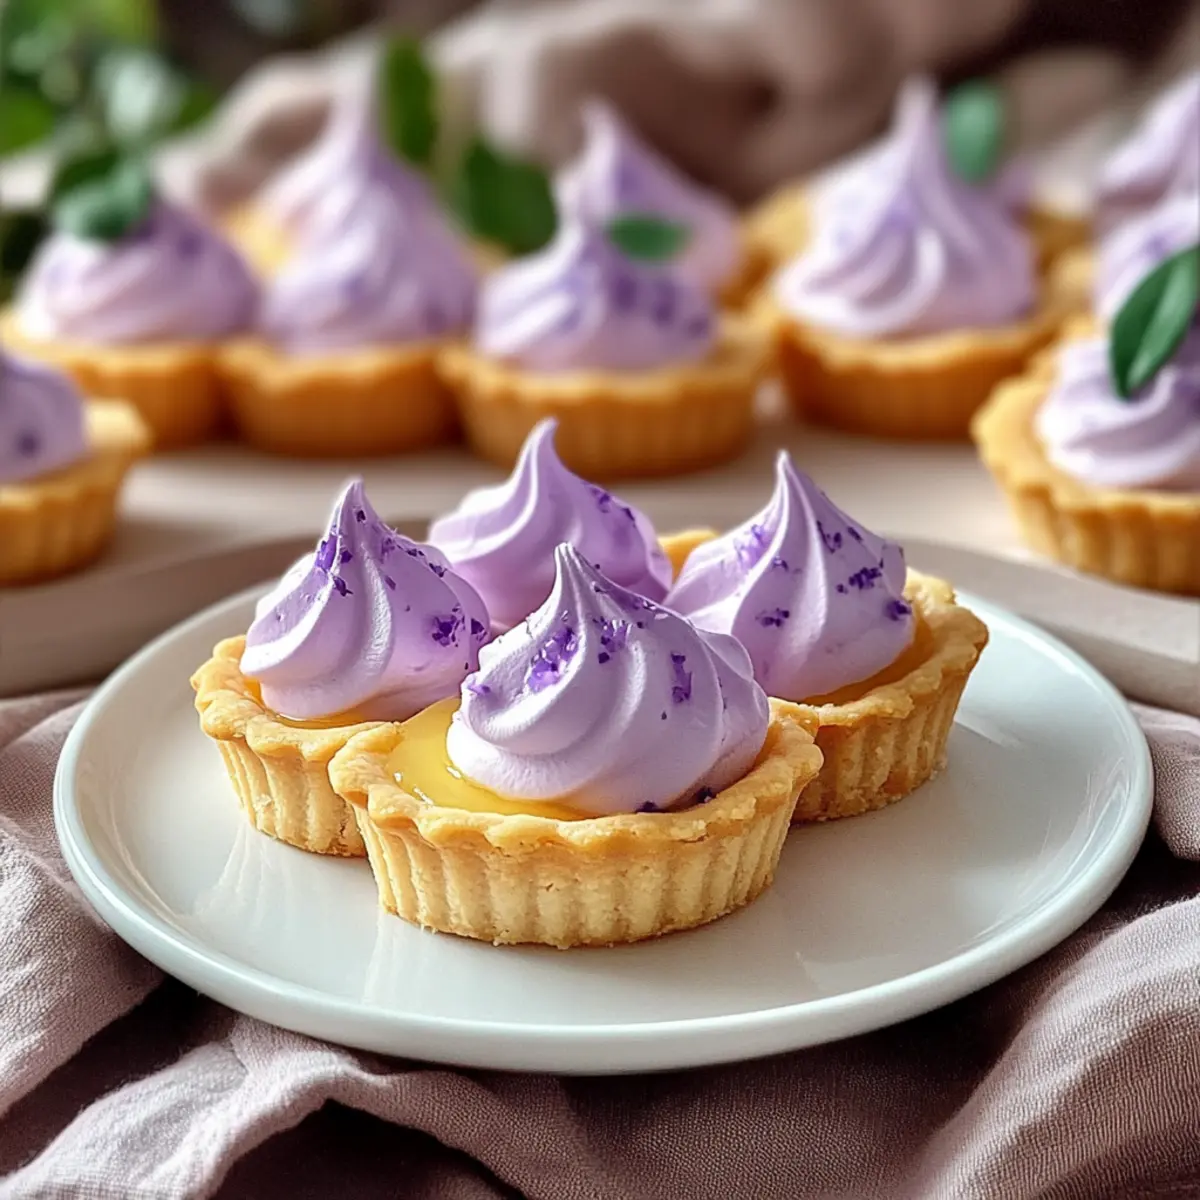
As I stood in my kitchen, the scent of bright lemon wafted through the air, transforming my space into a citrus wonderland. There’s something almost whimsical about crafting a Mini Lemon Tart with Lilac Meringue that instantly uplifts the spirit. These petite desserts are not only visually stunning, but they also deliver a delightful balance of tangy and sweet flavors. With a buttery, flaky crust and a creamy lemon filling topped with a fluffy, lilac meringue, they’re perfect for impressing guests at any gathering or simply indulging in a personal treat. What makes them even better? They’re quick to whip up and sure to become a staple you’ll want to share. Ready to brighten your dessert table? Let’s dive into this charming recipe!
Why is this mini tart a must-try?
Taste Sensation: Each bite packs a zesty punch, balancing tanginess and sweetness perfectly.
Visual Delight: The whimsical lilac meringue not only looks enchanting but elevates the dessert’s appeal.
Easy to Make: With simple ingredients and straightforward steps, you’ll be a pro in no time!
Versatile Twist: Feel free to experiment by adding hints of ginger or lavender to the lemon curd for a unique touch. If you love citrus-based desserts, you might also enjoy these Mini Apple Pies for a delightful change of pace!
Crowd-Pleaser: Perfect for gatherings or just a sweet treat at home—your friends and family will adore them!
Mini Lemon Tart with Lilac Meringue Ingredients
For the Tart Crust
- All-purpose flour – Essential for creating the structure of the tart crust.
- Powdered sugar – Provides a softer sweetness and texture compared to granulated sugar.
- Salt – Enhances sweetness and balances the overall flavor.
- Butter – Use chilled for the best flaky, rich crust.
For the Lemon Curd
- Eggs – Vital for both the richness of the lemon curd and the meringue; use at room temperature.
- Granulated sugar – Adds sweetness and stability to the lemon curd.
- Fresh lemon juice – The main source of tanginess; opt for freshly squeezed for maximum flavor.
- Lemon zest – Adds aromatic lemon notes to enhance the curd.
- Vanilla extract – Enhances the depth of flavor in the lemon curd.
For the Meringue
- Egg whites – Essential for creating a fluffy texture in the meringue.
- Granulated sugar – Used to create stability and sweetness in the meringue.
- Food coloring (lilac) – Optional for adding a whimsical touch to the meringue.
Remember, making a Mini Lemon Tart with Lilac Meringue isn’t just about the flavors—it’s about turning simple ingredients into a stunning dessert!
Step‑by‑Step Instructions for Mini Lemon Tart with Lilac Meringue
Step 1: Prepare the Tart Crust
In a mixing bowl, combine all-purpose flour, powdered sugar, and salt. Cut in chilled butter using a pastry cutter or your fingers until the mixture resembles coarse crumbs. Gently knead the dough just until it holds together, then roll it out on a floured surface. Cut out circles for mini tart pans, prick the bases with a fork, and chill in the refrigerator for 30 minutes.
Step 2: Bake the Crust
Preheat your oven to 350°F (175°C). Once chilled, remove the tart crusts from the fridge and line them with parchment paper. Fill with pie weights or dried beans. Bake for 15-18 minutes, or until the edges turn lightly golden. Carefully remove the weights and parchment, then bake for an additional 5 minutes until the crust is fully set. Let the crusts cool completely.
Step 3: Make the Lemon Curd
In a saucepan over medium heat, whisk together fresh lemon juice, granulated sugar, eggs, lemon zest, and vanilla extract. Cook the mixture, stirring continuously, until it thickens and coats the back of a spoon—this should take about 8-10 minutes. Remove from heat, allowing it to cool slightly before pouring it into the cooled tart shells.
Step 4: Prepare the Meringue
Using a clean mixing bowl, beat room temperature egg whites with a hand mixer on medium speed until soft peaks form. Gradually add granulated sugar, one tablespoon at a time, while continuing to beat for about 5 minutes until stiff peaks form and the mixture is glossy. If desired, add a few drops of lilac food coloring and gently fold to incorporate.
Step 5: Pipe the Meringue
Transfer the meringue to a piping bag fitted with a star-shaped tip. Start from the edges of each mini tart, piping the meringue in a circular motion, and then fill the center, creating a lovely swirl. Alternatively, use a spatula to spread the meringue, ensuring it covers the lemon curd completely.
Step 6: Finish the Tarts
Lightly toast the meringue on the mini lemon tarts using a kitchen torch until golden brown, which should take just a minute or two. If you don’t have a torch, place the tarts under the broiler for 1-2 minutes, watching closely to prevent burning. Once done, let the mini lemon tarts with lilac meringue cool before serving.

Expert Tips for Mini Lemon Tart with Lilac Meringue
-
Ingredient Temperature: Ensure all ingredients are at room temperature for the best blending, especially the eggs for the lemon curd and meringue.
-
Don’t Overmix Dough: Take care not to over-mix the tart dough. This can lead to a tough crust instead of a flaky, tender one.
-
Watch the Meringue: When toasting the lilac meringue, keep a close eye on it to avoid burning. It should turn a lovely golden brown.
-
Chill the Crust: Always chill the tart crust before baking. This helps maintain its shape and prevents shrinking during the baking process.
-
Freshly Squeeze Lemons: For maximum flavor, use freshly squeezed lemon juice in your mini lemon tart with lilac meringue; it makes a noticeable difference.
-
Creative Fillings: Feel free to experiment! Adding a hint of lavender or a splash of orange juice can create a unique twist on this classic dessert.
Mini Lemon Tart with Lilac Meringue Variations
Feel free to explore these delightful tweaks to make your dessert truly your own!
-
Lavender Infusion: Add a hint of lavender to the lemon curd for a delightful floral note. Just a teaspoon of lavender extract or a few dried buds will transform the flavor beautifully.
-
Ginger Zest: Incorporate grated ginger into the lemon curd for a warm, spicy undertone that harmonizes with the tangy lemon. It’s a surprising twist that your guests will love!
-
Lime Twist: Swap the fresh lemon juice for lime juice for a zesty lime curd instead. This bright variation still delivers that refreshing citrus kick!
-
Italian Meringue: Use Italian meringue for a sturdier topping. This method involves cooking the sugar syrup and gradually adding it to egg whites, creating a silky smooth finish.
-
Fruit Toppings: Garnish your mini tarts with fresh berries such as raspberries or blueberries. This not only adds a burst of color but offers a lovely contrast in flavor.
-
Chocolate Drizzle: For a decadent touch, drizzle melted dark chocolate over the meringue before serving. This rich addition harmonizes beautifully with the lemon’s brightness.
-
Coconut Cream: Substitute coconut cream in place of some of the butter in the tart crust. This will add a tropical element while keeping that delightful flakiness intact!
-
Szechuan Pepper: If you’re adventurous, try adding a pinch of Szechuan pepper to the lemon curd for a unique spicy kick that will surprise and delight your taste buds.
These variations will surely keep your dessert game exciting. And if you’re looking for more delightful treats, don’t forget to try these charming Mini Apple Pies or our zesty Orange Creamsicle Minis. Enjoy your culinary adventure!
How to Store and Freeze Mini Lemon Tart with Lilac Meringue
Fridge: Store any leftover mini tarts in an airtight container in the refrigerator for up to 3 days. This will help maintain the freshness of the lemon curd and prevent the crust from becoming soggy.
Freezer: If you need to freeze the tarts, wrap them individually in plastic wrap and place them in an airtight freezer bag. They can be frozen for up to 1 month. Just remember, the texture may change slightly upon thawing.
Reheating: When you’re ready to enjoy a frozen tart, let it thaw in the fridge overnight before serving. If desired, you can lightly toast the meringue under a broiler for a minute to regain that lovely golden finish.
Make-Ahead: For best results, make the crust and lemon curd a day in advance, then assemble and add the lilac meringue the same day you plan to serve your mini lemon tarts.
What to Serve with Mini Lemon Tart with Lilac Meringue
Indulging in a mini lemon tart is a heavenly experience, and the right pairings can elevate it to epicurean perfection.
- Fresh Berries: A medley of strawberries, blueberries, and raspberries adds a pop of color and complements the tartness with their natural sweetness.
- Whipped Cream: Light and fluffy, a dollop of vanilla whipped cream enhances the dessert’s creamy texture, creating a delightful contrast with the meringue.
- Mint Sprigs: Fresh mint leaves not only offer vibrant color but also a refreshing herbal note that balances the citrusy flavors beautifully.
- Coconut Macaroons: Chewy, sweet macaroons provide a lovely texture contrast and an additional layer of sweetness that pairs wonderfully with citrus desserts.
- A Sweet Riesling: The fruity notes and gentle sweetness of a Riesling wine can enhance the tart without overpowering it, making for a perfect dessert wine pairing.
- Lemon Sorbet: A scoop of lemon sorbet can serve as a palate cleanser, refreshing your taste buds while harmonizing with the zesty lemon tart.
- Pistachio Ice Cream: Rich, creamy pistachio ice cream brings a delightful nutty flavor that contrasts perfectly with the tart lemon and fluffy meringue.
- Ginger Cookies: The spiciness of ginger cookies brings warmth to the platter, pairing beautifully with the zesty notes of the dessert while offering a satisfying crunch.
Make Ahead Options
These Mini Lemon Tarts with Lilac Meringue are perfect for busy home cooks looking to streamline their dessert prep! You can prepare the tart crust and lemon curd up to 24 hours in advance. Simply store the cooled tart shells in an airtight container to maintain their texture, and keep the lemon curd refrigerated. When you’re ready to serve, fill the tarts with the lemon curd, whip up the meringue, and pipe it on top. For best results, toast the meringue just before serving; it will be just as delicious and visually stunning as if made fresh! This make-ahead approach allows you to impress your guests effortlessly while saving time.
Mini Lemon Tart with Lilac Meringue Recipe FAQs
How do I choose ripe lemons for my Mini Lemon Tart?
Absolutely! When selecting lemons, look for bright yellow, firm fruit with a slight give when gently squeezed. Avoid lemons with dark spots or a dull color, as they may be overripe. Freshly squeezed lemon juice is crucial for rich flavor—aim for the juiciest ones you can find!
How should I store leftover Mini Lemon Tarts?
After your delightful feast, store any uneaten mini tarts in an airtight container in the refrigerator for up to 3 days. This is essential to keep the lemon curd fresh and the crust intact. Be sure to separate layers with parchment paper if stacking, to maintain that lovely presentation!
Can I freeze my Mini Lemon Tarts?
Yes, you can! To freeze, wrap each tart tightly in plastic wrap, then place them in an airtight freezer bag. They can be frozen for up to 1 month. When you’re ready to enjoy them, allow them to thaw in the fridge overnight. If desired, briefly toast the meringue under a broiler before serving for that roasted flavor!
What if my meringue isn’t forming stiff peaks?
Very! If your meringue isn’t reaching stiff peaks after a few minutes of beating, make sure your mixing bowl and beaters are completely clean—a drop of egg yolk or grease can hinder the process. Additionally, try adding a pinch of cream of tartar to stabilize the meringue. Keep beating until you achieve that glossy, fluffy texture, which should only take about 5-7 minutes.
Are there any dietary considerations for this dessert?
Yes, it’s important to note that the Mini Lemon Tart contains eggs and dairy, which may not be suitable for those with allergies. For a vegan twist, consider substituting aquafaba (the liquid from canned chickpeas) for egg whites in the meringue, along with a plant-based butter in the crust. This way, everyone can indulge in this delightful treat!

Delightful Mini Lemon Tart with Lilac Meringue Perfection
Ingredients
Equipment
Method
- In a mixing bowl, combine all-purpose flour, powdered sugar, and salt. Cut in chilled butter using a pastry cutter or your fingers until the mixture resembles coarse crumbs. Gently knead the dough just until it holds together, then roll it out on a floured surface. Cut out circles for mini tart pans, prick the bases with a fork, and chill in the refrigerator for 30 minutes.
- Preheat your oven to 350°F (175°C). Once chilled, remove the tart crusts from the fridge and line them with parchment paper. Fill with pie weights or dried beans. Bake for 15-18 minutes, or until the edges turn lightly golden. Carefully remove the weights and parchment, then bake for an additional 5 minutes until the crust is fully set. Let the crusts cool completely.
- In a saucepan over medium heat, whisk together fresh lemon juice, granulated sugar, eggs, lemon zest, and vanilla extract. Cook the mixture, stirring continuously, until it thickens and coats the back of a spoon—this should take about 8-10 minutes. Remove from heat, allowing it to cool slightly before pouring it into the cooled tart shells.
- Using a clean mixing bowl, beat room temperature egg whites with a hand mixer on medium speed until soft peaks form. Gradually add granulated sugar, one tablespoon at a time, while continuing to beat for about 5 minutes until stiff peaks form and the mixture is glossy. If desired, add a few drops of lilac food coloring and gently fold to incorporate.
- Transfer the meringue to a piping bag fitted with a star-shaped tip. Start from the edges of each mini tart, piping the meringue in a circular motion, and then fill the center, creating a lovely swirl. Alternatively, use a spatula to spread the meringue, ensuring it covers the lemon curd completely.
- Lightly toast the meringue on the mini lemon tarts using a kitchen torch until golden brown, which should take just a minute or two. If you don’t have a torch, place the tarts under the broiler for 1-2 minutes, watching closely to prevent burning. Once done, let the mini lemon tarts with lilac meringue cool before serving.
Leave a Reply