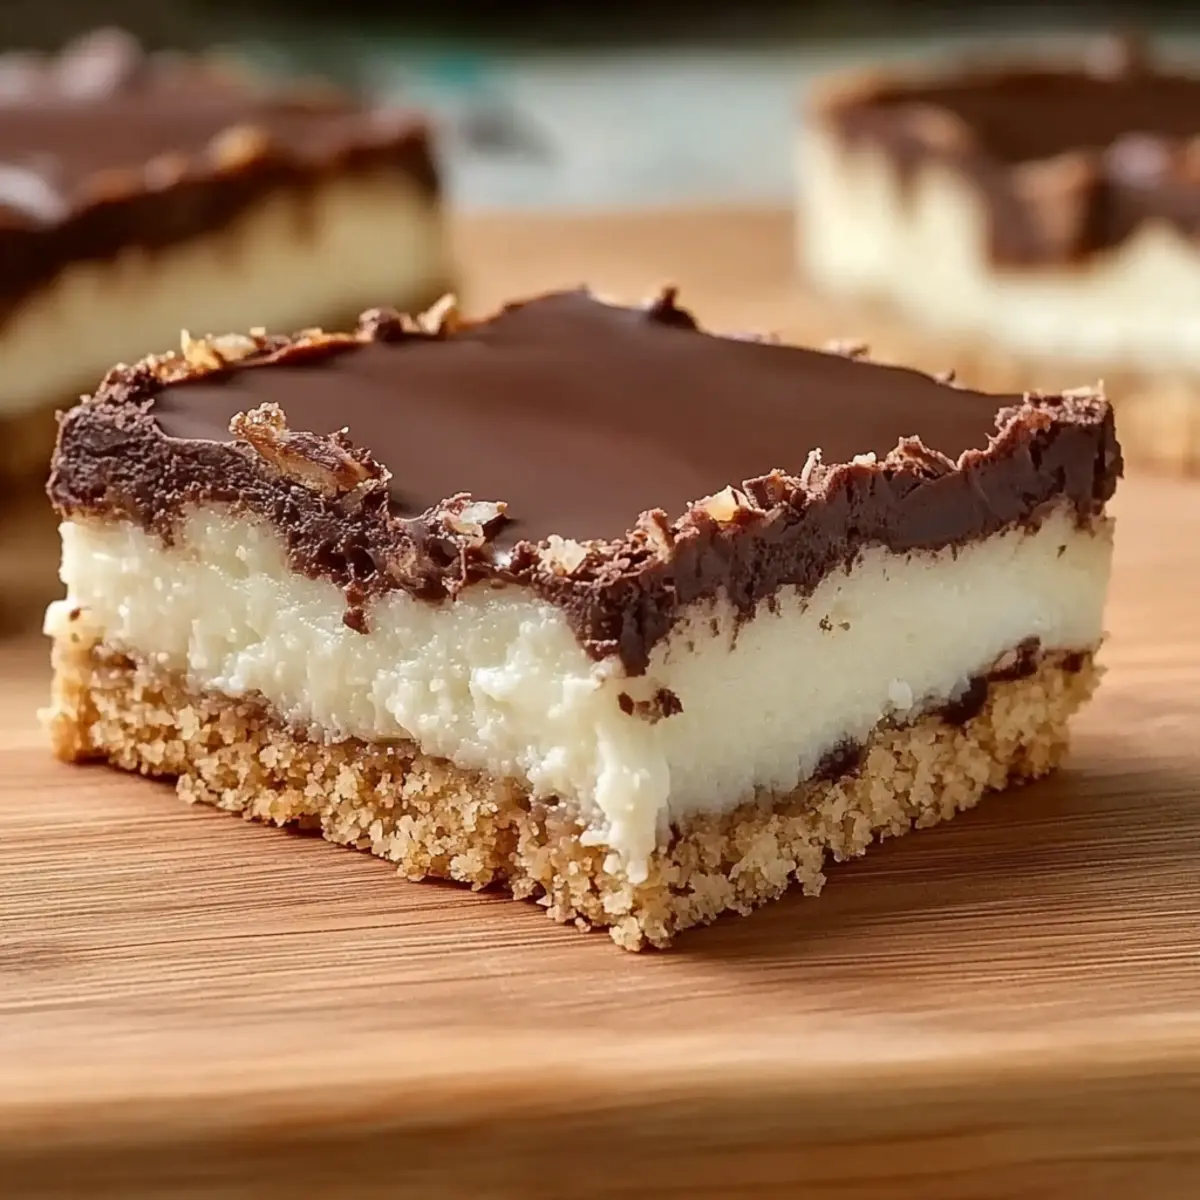
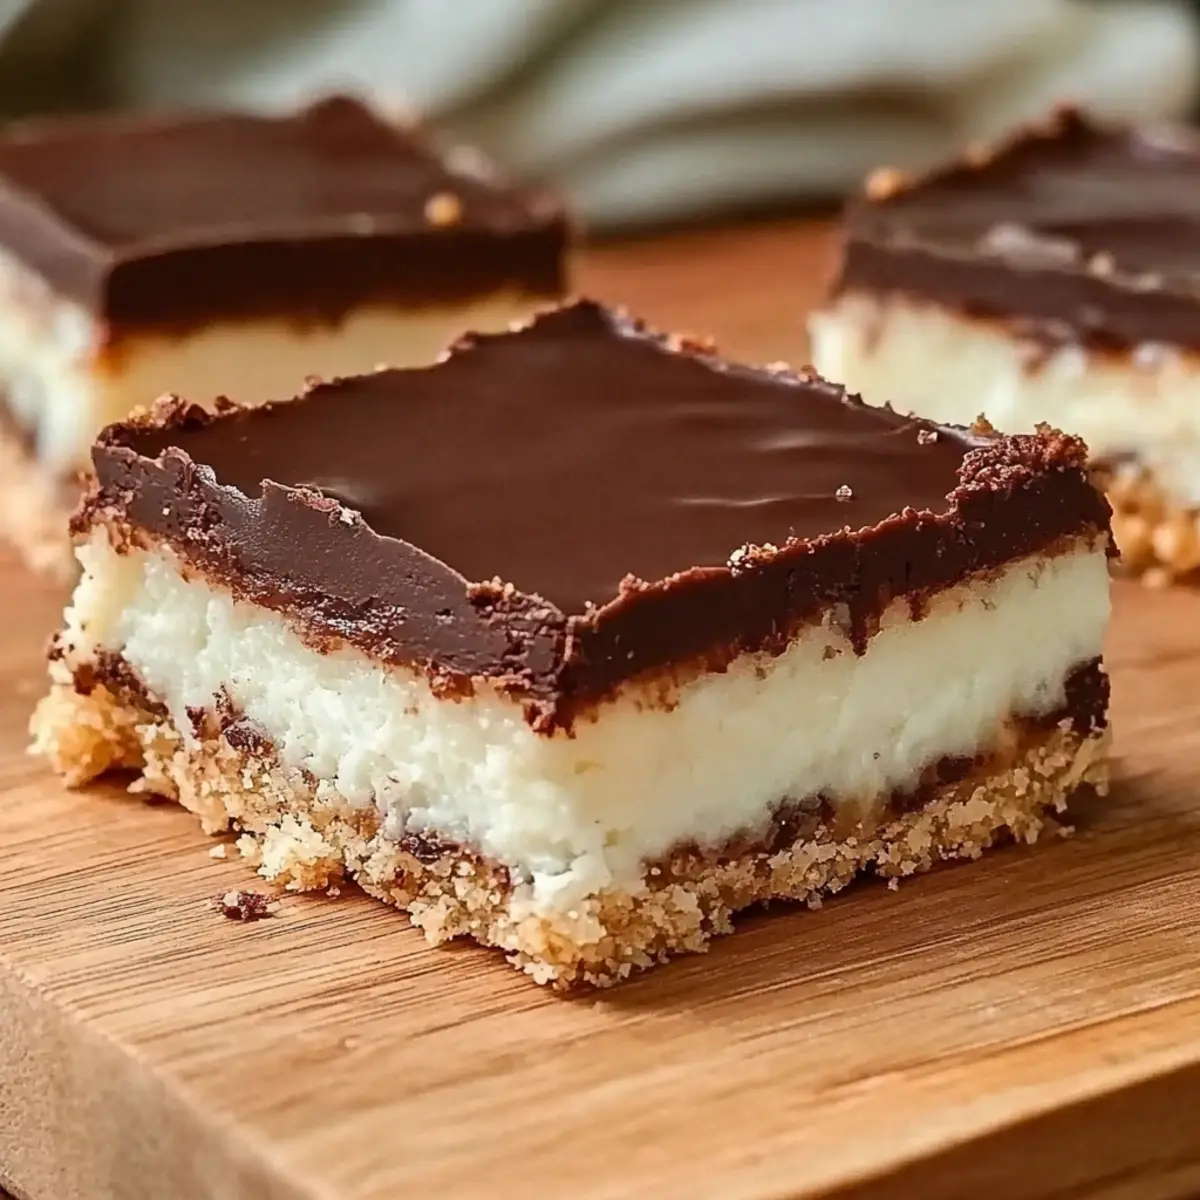
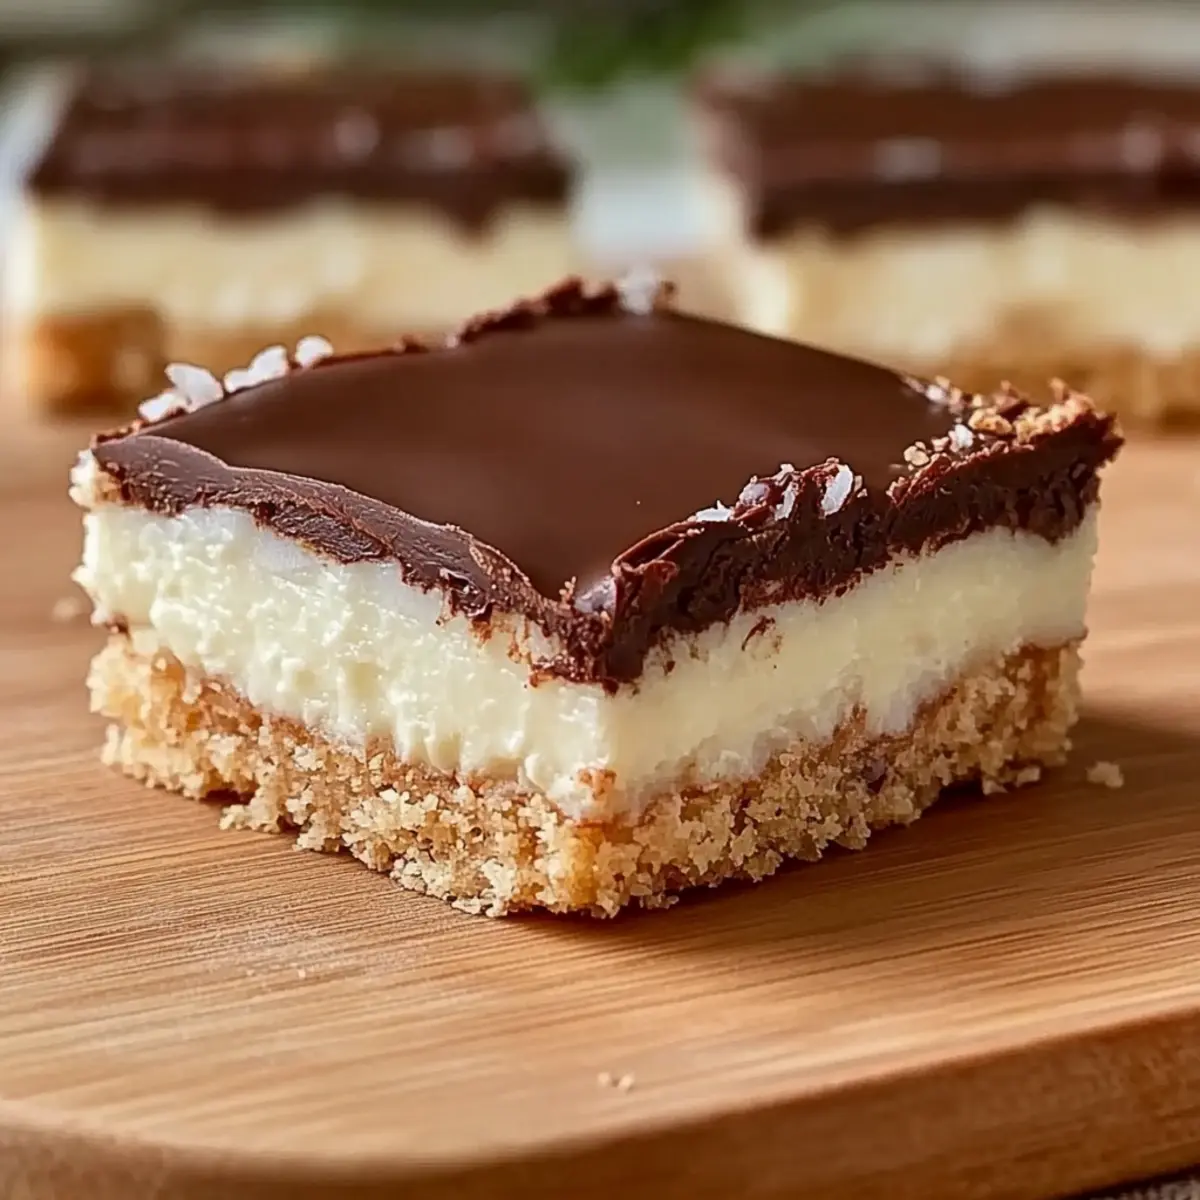
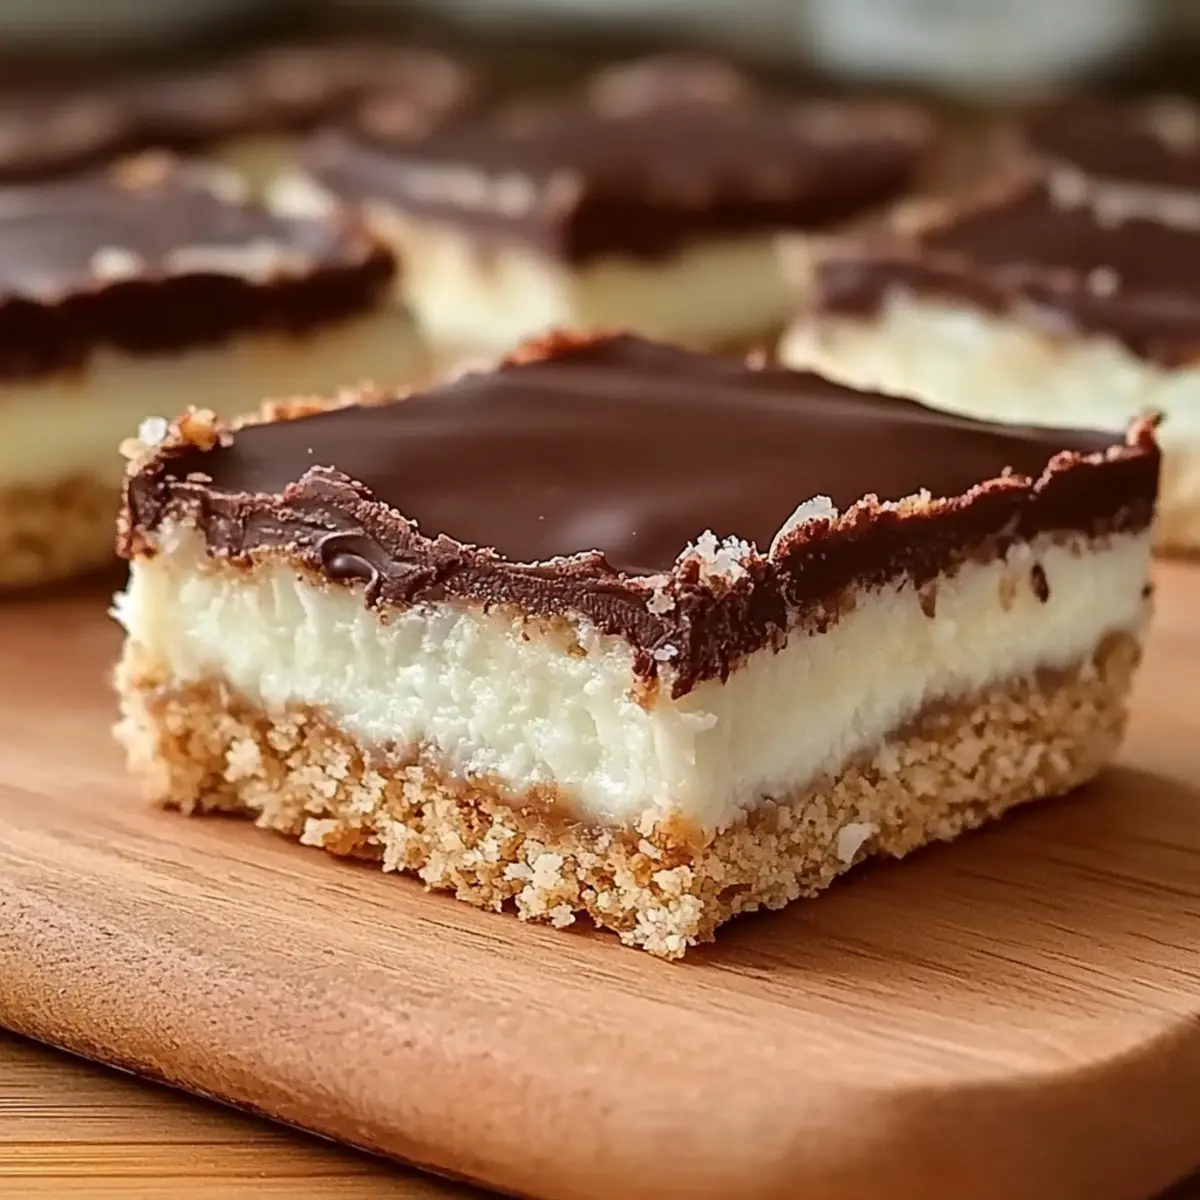
I never realized how a simple blend of coconut and chocolate could transport me to a tropical paradise until I tried making Coconut Dream Bars. These delightful treats offer a chewy, creamy texture that complements the buttery graham cracker crust, making them an instant crowd-pleaser. Not only are they incredibly easy to whip up with ingredients you probably already have at home, but they can also cater to gluten-free diets, allowing everyone to indulge. Perfect for bake sales, gatherings, or just a much-deserved personal treat, these bars promise to satisfy your sweet tooth without the fuss of elaborate desserts. Curious about how to create this creamy coconut paradise? Let’s dive into the recipe!
Why are Coconut Dream Bars a must-try?
Irresistibly Chewy: This recipe delivers a delightful chew that keeps everyone coming back for more.
Easy to Make: With simple ingredients and straightforward steps, you’ll whip these up in no time, perfect for busy days!
Crowd-Pleasing Flavor: Who can resist the combination of creamy coconut and rich chocolate? They’re sure to become a favorite at your next gathering!
Gluten-Free Options: Easily adapt the recipe for gluten-free diets by swapping out graham crackers, ensuring everyone can join in on the sweet fun!
Versatile Variations: Feel free to add nuts or play with different chocolate types for a unique twist. You’ll love the freedom to customize!
Pair these Coconut Dream Bars with a refreshing side of fresh berries or even a scoop of vanilla ice cream for an unforgettable treat. Whether it’s a family gathering or just a well-deserved snack, these bars will satisfy your cravings beautifully!
Coconut Dream Bars Ingredients
For the Crust
• Butter – Provides richness and moisture for the crust; substitute with coconut oil for a dairy-free version.
• Graham Wafer Crumbs – Forms the crust structure; use gluten-free alternatives if required.
• Sugar – Sweetens the crust; brown sugar can be used for added depth of flavor.
For the Coconut Layer
• Sweetened Condensed Milk – Binds the coconut layer; it’s key for creaminess and can be substituted with homemade condensed milk for a less sweet option.
• Unsweetened Dried Coconut – Main flavor contributor that adds texture; sweetened coconut can be used for a sweeter bar.
• Vanilla Extract – Enhances overall flavor; a drop of almond extract can be a nice twist.
For the Topping
• Chocolate Chips – Topping component that provides a rich finish; use dark or semi-sweet chocolate to balance sweetness.
This delightful combination in your Coconut Dream Bars is sure to be a hit!
Step‑by‑Step Instructions for Coconut Dream Bars
Step 1: Preheat and Prepare the Pan
Begin by preheating your oven to 350°F (175°C). While the oven warms, take a 9×9 inch baking pan and grease it lightly, lining it with parchment paper for easy removal later. This step ensures your Coconut Dream Bars won’t stick, making clean-up a breeze!
Step 2: Make the Crust
In a mixing bowl, melt about ½ cup of butter. Once melted, mix in graham wafer crumbs and sugar until the mixture resembles wet sand. Transfer this blend to your prepared pan, pressing it firmly into an even layer. Bake this crust in the preheated oven for about 10 minutes or until it’s set and lightly golden around the edges.
Step 3: Prepare the Coconut Layer
While the crust is baking, combine a can of sweetened condensed milk, unsweetened dried coconut, and a splash of vanilla extract in a separate bowl. Stir this mixture until evenly combined. The creamy texture of the condensed milk should fully coat the coconut, creating a luscious filling for your Coconut Dream Bars.
Step 4: Assemble and Bake
Once the crust is ready, remove it from the oven and immediately pour the coconut layer over the hot crust. Use a spatula to spread the mixture evenly, smoothing out the edges. Return the pan to the oven and bake for an additional 10-15 minutes, monitoring closely until the top is lightly golden and the edges are set.
Step 5: Let It Cool
Remove your freshly baked Coconut Dream Bars from the oven and allow them to cool in the pan on a wire rack. This cooling phase is crucial, so be patient and let them cool completely to room temperature before you move to the next step, ensuring clean cuts later.
Step 6: Melt the Chocolate Topping
In a microwave-safe bowl, combine chocolate chips with a bit of butter or cream to enhance richness. Heat in intervals of 20 seconds, stirring in between, until the mixture is smooth and glossy. This chocolate topping will add a perfect finishing touch to your Coconut Dream Bars.
Step 7: Add the Chocolate Layer
Once the coconut layer has cooled, carefully pour the melted chocolate over it. Use a spatula to spread it evenly across the surface, ensuring every inch is covered. Allow this chocolate layer to set at room temperature, ideally for at least one hour, creating a delectable topping for your Coconut Dream Bars.
Step 8: Slice and Serve
Finally, once the chocolate is properly set, it’s time to slice your Coconut Dream Bars into squares. For clean cuts, use a sharp knife dipped in hot water. Serve these delightful treats as a special dessert or snack that your friends and family will adore!
What to Serve with Coconut Dream Bars
Indulging in heavenly dessert bliss is easy when you pair Coconut Dream Bars with delightful accompaniments that enhance their tropical charm.
-
Fresh Berries: Bursting with colors and tartness, they provide a refreshing contrast to the creamy sweetness of the bars. Strawberries or raspberries on the side are simply irresistible!
-
Vanilla Ice Cream: A scoop of creamy vanilla ice cream complements the chewy texture of the bars, creating a dreamy dessert experience. The cold creaminess perfectly offsets the rich chocolate topping.
-
Coffee or Espresso: Pairing with a bold cup of coffee adds depth to the sweetness of the Coconut Dream Bars. The warm, rich flavors harmonize beautifully, ideal for an afternoon pick-me-up.
-
Mint or Coconut Tea: A soothing cup of mint or coconut tea can offer a refreshing palate cleanser. The herbal notes will enhance the coconut flavor while providing a lovely, warming touch.
-
Lemon Sorbet: Light and zesty, lemon sorbet adds a bright, tart flavor that cuts through the richness of the bars. Serving this on the side creates a delightful play of flavors.
-
Chocolate Dipped Strawberries: Elevate your dessert experience by serving chocolate dipped strawberries alongside. Complementing the chocolate topping, they offer a dual chocolate experience that’s hard to resist.
How to Store and Freeze Coconut Dream Bars
Room Temperature: Keep Coconut Dream Bars in an airtight container at room temperature for up to 4 days. They’ll remain deliciously chewy and creamy!
Fridge: For longer freshness, refrigerate your bars in a sealed container for up to 1 week. This will enhance the chocolate layer’s firmness without compromising flavor.
Freezer: You can freeze Coconut Dream Bars for up to 3 months. Wrap individual bars tightly in plastic wrap, then place them in a freezer-safe bag.
Thawing: To enjoy, simply let them thaw at room temperature for about 30 minutes before serving. This method retains their delightful texture!
Coconut Dream Bars Variations & Substitutions
Feel free to let your creativity shine and tailor these Coconut Dream Bars to your liking!
-
Gluten-Free: Swap regular graham crackers for gluten-free options, ensuring everyone can indulge in this delicious treat.
-
Nutty Delight: Mix in chopped nuts, like pecans or walnuts, into the coconut layer for a delightful crunch that enhances texture and flavor.
-
Sweetener Swap: Instead of regular sugar, try using maple syrup or coconut sugar for a more natural sweetness that adds a unique touch.
-
Flavor Fusion: Add a splash of rum or coconut extract to the coconut layer for an extra tropical kick!
-
Chocolate Options: Experiment with different types of chocolate—white chocolate adds a creamy sweetness while dark chocolate deepens the flavor.
-
Berry Boost: Top the finished bars with fresh raspberries or strawberries, which provide a bright, tart contrast to the creamy sweetness.
-
Caramel Layer: For a decadent twist, drizzle caramel sauce over the coconut layer before adding chocolate, creating an indulgent layered effect.
If you’re itching to explore more flavors, why not whip up Chocolate Chip Cookies next? Or perhaps follow it up with a lovely slice of Old Fashioned Pie? Each variation ensures your Coconut Dream Bars become a canvas for your imagination!
Expert Tips for Coconut Dream Bars
-
Cool Completely: Ensure to cool your Coconut Dream Bars fully before cutting. This step prevents messy edges and helps maintain the layers’ integrity.
-
Watch the Baking Time: Overbaking the coconut layer can lead to dryness. Keep an eye on it for that perfect golden hue, usually around 10-15 minutes.
-
Use Hot Water: For neat slices, dip your knife in hot water before cutting. This trick helps to achieve clean cuts and a better presentation for your Coconut Dream Bars.
-
Substitution Smart: If you’re out of graham crackers, use gluten-free alternatives. This simple swap ensures everyone can enjoy these scrumptious bars!
-
Experiment with Toppings: Don’t hesitate to get creative. Adding nuts or trying different chocolate types can elevate your Coconut Dream Bars to new delicious heights!
Make Ahead Options
These Coconut Dream Bars are ideal for meal prep, making it easy for busy home cooks to enjoy a delicious treat without the last-minute rush! You can prepare the graham cracker crust up to 24 hours in advance; simply press it into the pan and store it covered at room temperature. The coconut layer can also be made ahead of time and refrigerated for up to 3 days. When you’re ready to finish, just bake the assembled bars and let them cool, then add the chocolate topping. This approach keeps the bars just as delicious and prevents them from drying out. Enjoy the sweet benefits of having these bars ready to serve whenever a craving strikes!
Coconut Dream Bars Recipe FAQs
How do I select the best ingredients for Coconut Dream Bars?
Absolutely! When choosing your ingredients, aim for freshness. For butter, select unsalted for better control of sweetness. When picking dried coconut, look for flakes that are lightly colored and without dark spots. If you prefer a gluten-free version, use certified gluten-free graham crackers and ensure that your chocolate chips are also gluten-free.
What’s the best way to store leftover Coconut Dream Bars?
Absolutely! To keep your Coconut Dream Bars fresh, store them in an airtight container at room temperature for up to 4 days. If you want them to last longer, place them in the fridge, where they’ll stay delicious for up to a week. Remember, the chocolate layer might firm up in the cold, making the bars even more enjoyable!
Can I freeze Coconut Dream Bars? If so, how?
Very! You can freeze Coconut Dream Bars for up to 3 months. First, wrap each bar tightly in plastic wrap to prevent freezer burn. Then, place them in a freezer-safe bag or container. When you’re ready to indulge, simply thaw them at room temperature for about 30 minutes, and they’ll be ready to enjoy without losing that delightful texture!
What should I do if my coconut layer becomes too dry?
I understand how frustrating that can be! If your coconut layer ends up dry, it might be due to overbaking. To prevent this, keep an eye on the bars during the final baking phase. Aim for a light golden color, which means they’re done. If you notice dryness, try adding a drizzle of coconut milk or a dollop of whipped cream when serving to bring back that creamy texture!
Are Coconut Dream Bars suitable for those with allergies?
Absolutely! While these bars are a treat, they do contain dairy and may contain gluten from the graham crackers. For a gluten-free option, use gluten-free graham crackers. If you have dairy allergies, consider substituting butter with coconut oil and using dairy-free chocolate chips. Always check ingredient labels to ensure safety for your specific dietary needs.
Coconut Dream Bars: Irresistibly Chewy, Creamy Treats
Ingredients
Equipment
Method
- Preheat your oven to 350°F (175°C) and prepare a 9x9 inch baking pan by greasing it and lining it with parchment paper.
- Melt about ½ cup of butter in a bowl, then mix in graham wafer crumbs and sugar until it resembles wet sand. Press this mixture into the prepared pan and bake for about 10 minutes.
- Combine sweetened condensed milk, unsweetened dried coconut, and vanilla extract in a separate bowl until evenly mixed.
- Pour the coconut mixture over the hot crust and spread it evenly. Bake for an additional 10-15 minutes until lightly golden.
- Let the baked bars cool in the pan on a wire rack to room temperature.
- In a microwave-safe bowl, melt chocolate chips with a bit of butter or cream in 20-second intervals until smooth.
- Pour the melted chocolate over the cooled coconut layer and spread evenly. Allow it to set for at least one hour.
- Slice the bars into squares using a sharp knife dipped in hot water.
Leave a Reply