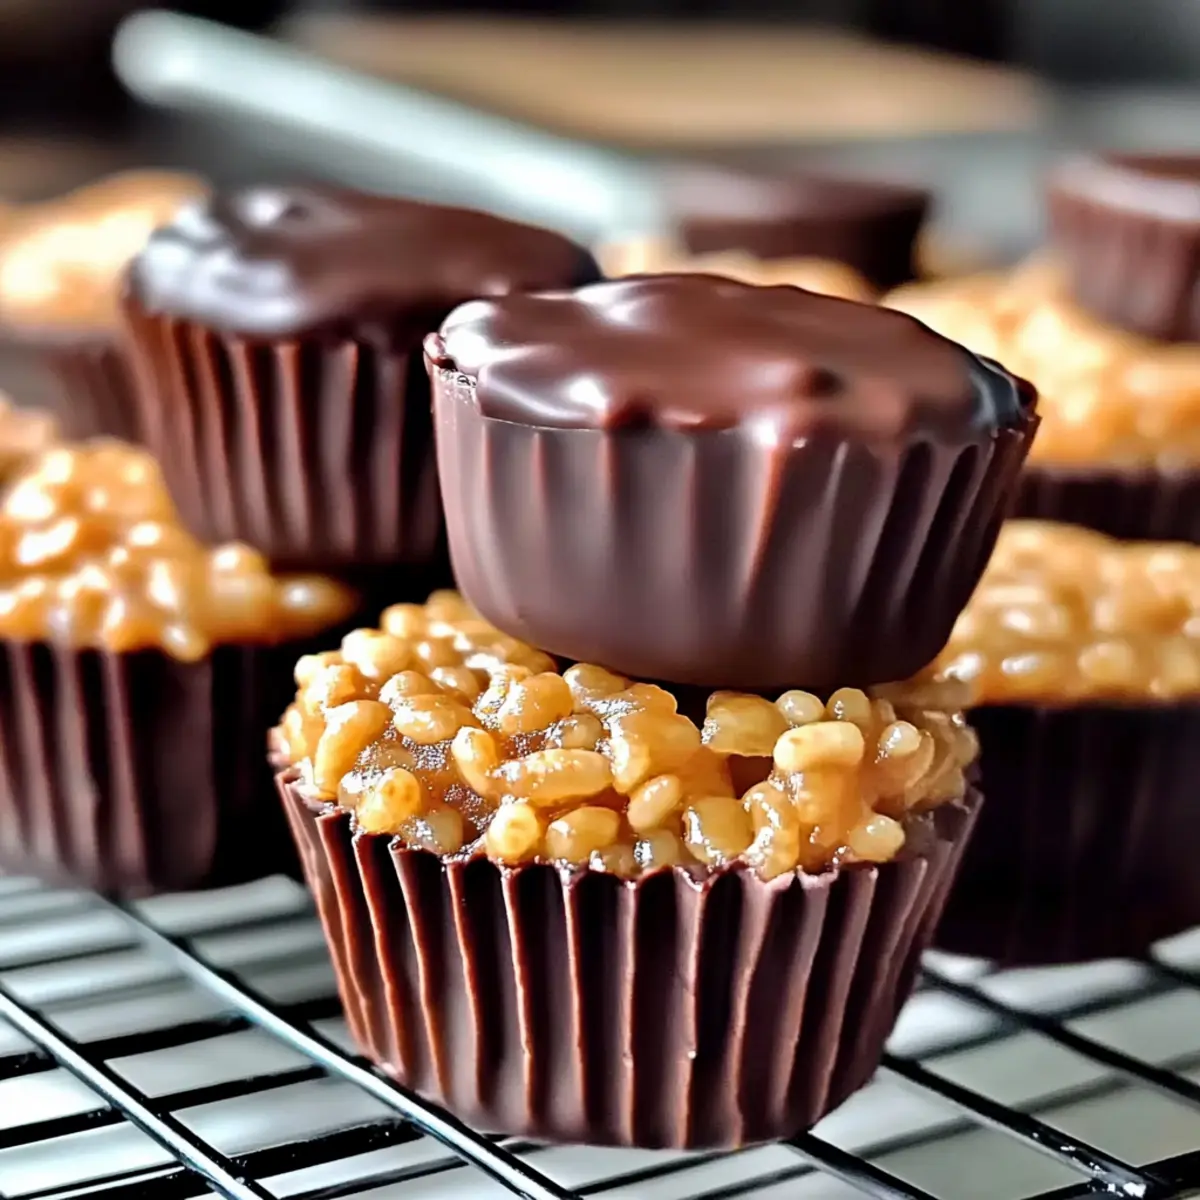
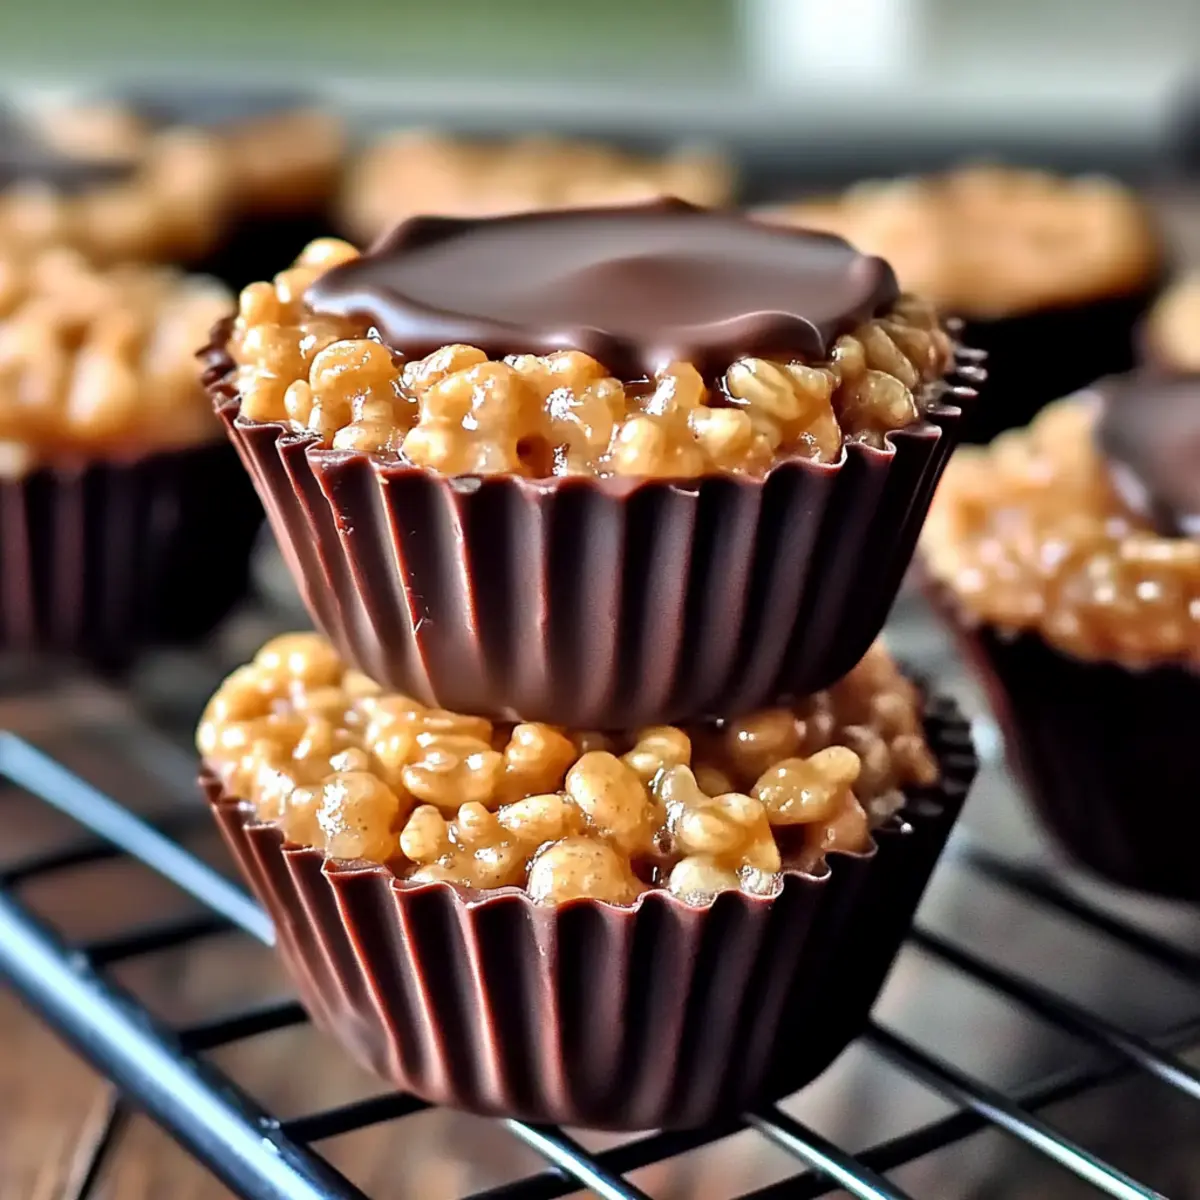
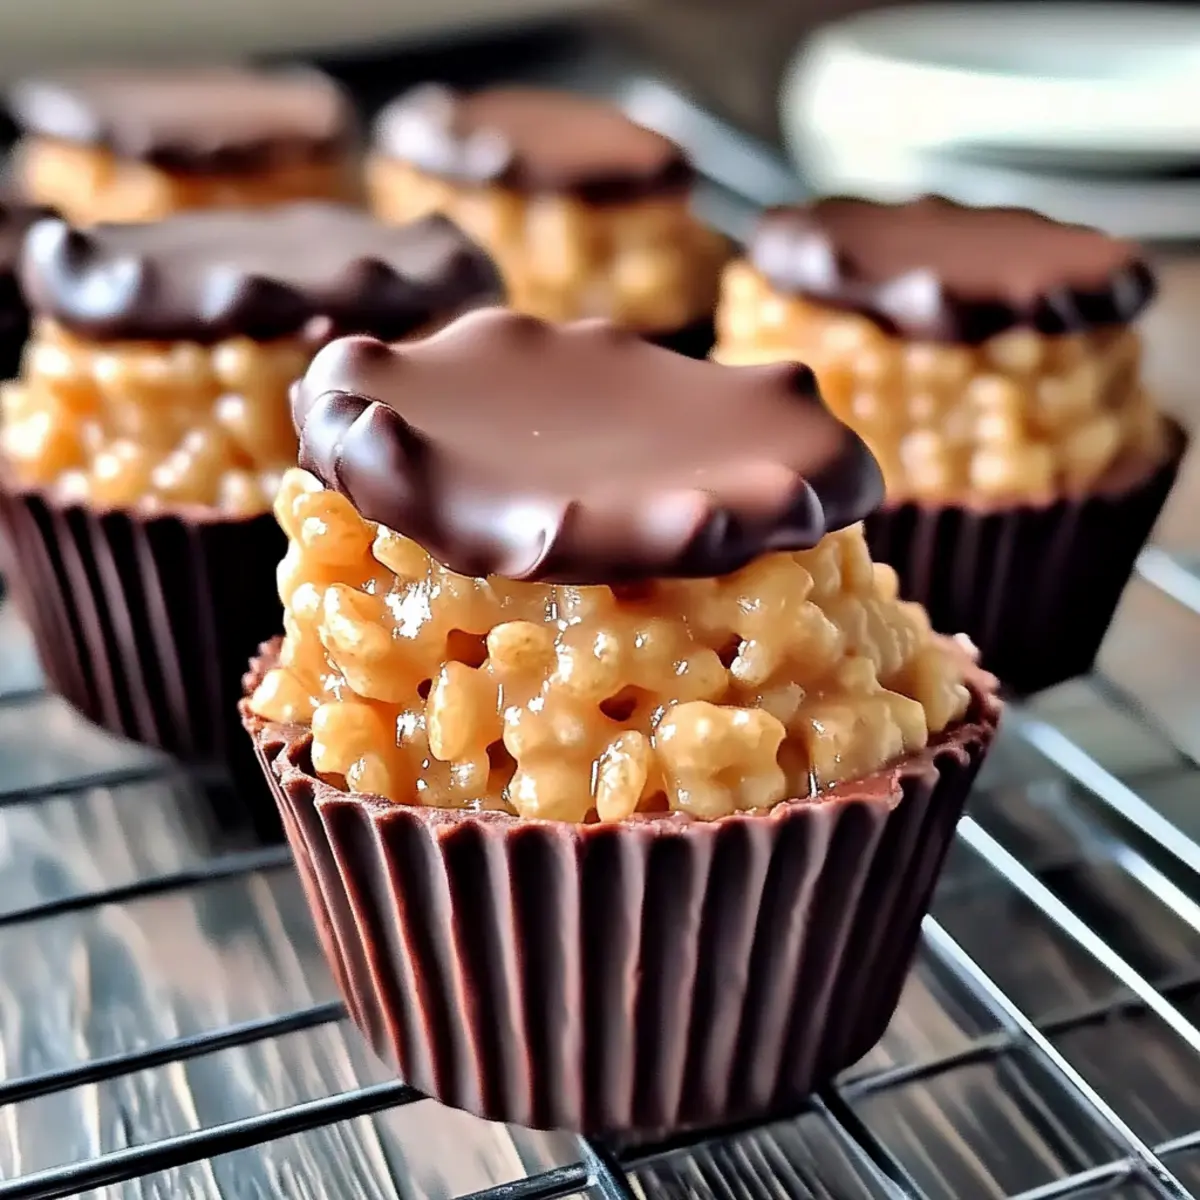
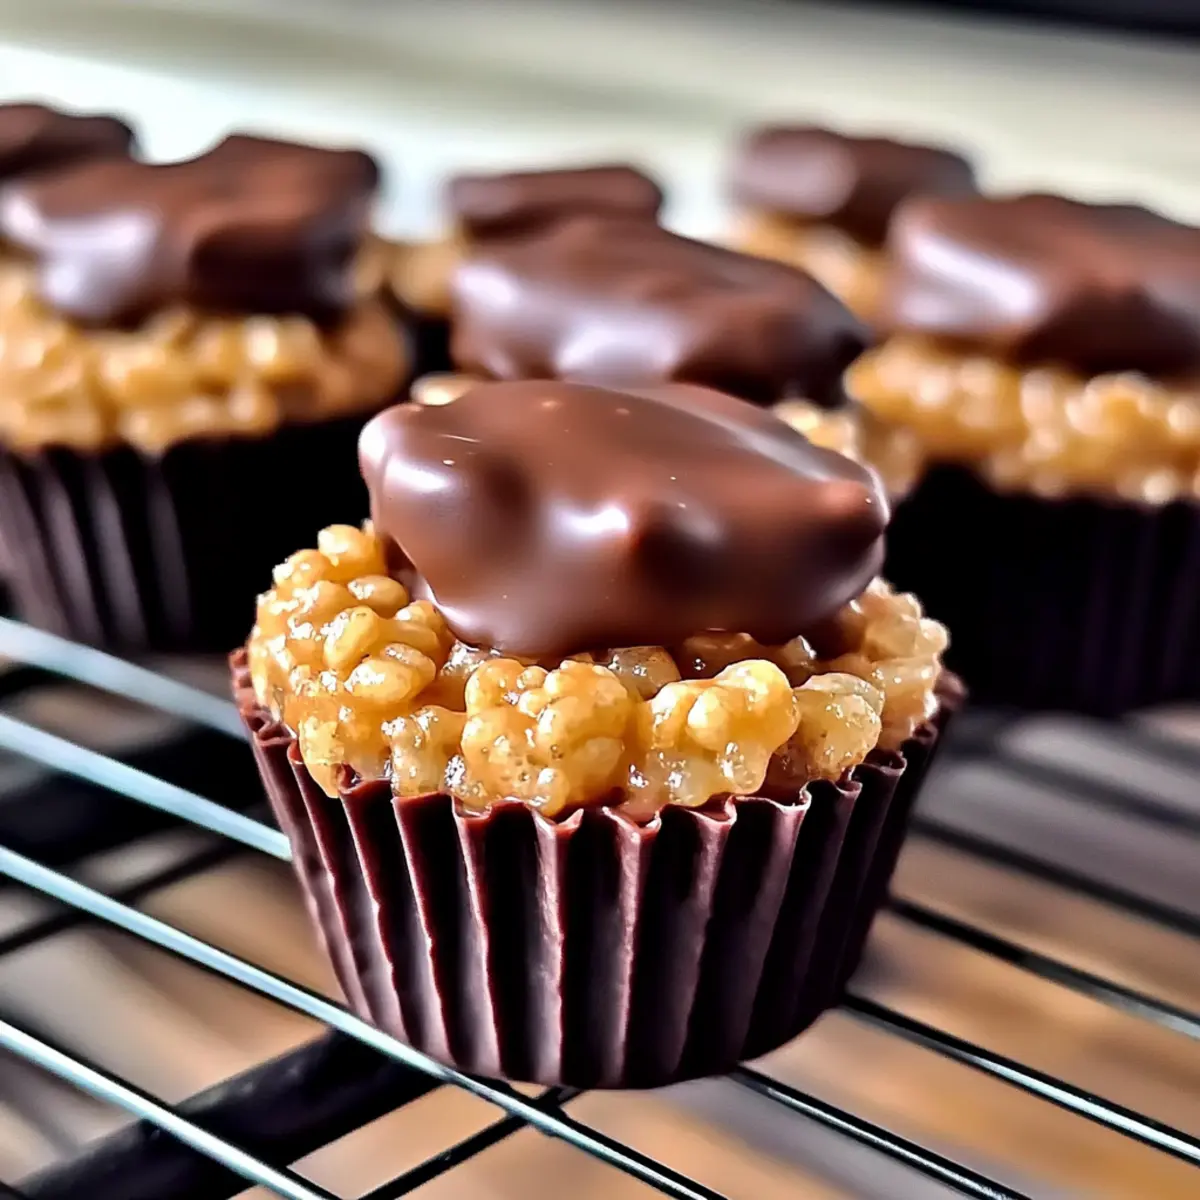
The moment I took my first bite of these Chocolate Peanut Butter Rice Krispie Cups, I was transported back to my childhood—those sweet, crunchy afternoons filled with laughter and homemade treats. These no-bake delights meld the nostalgic crunch of Rice Krispies with creamy peanut butter and rich chocolate, creating an effortlessly satisfying dessert that requires minimal effort. Not only are they quick and easy to whip up, but they’re also gluten-free, making them perfect for gatherings or a cozy night in. With endless possibilities for variations—from switching up the chocolate to adding your favorite toppings—these treats can be tailored to your heart’s desire. Are you ready to dive into a recipe that’s as fun to make as it is to eat?
Why Will You Love These Cups?
Nostalgic Crunch: These Chocolate Peanut Butter Rice Krispie Cups deliver that delightful crunch, reminiscent of childhood treats you loved.
Quick and Easy: With just a few simple steps, you can whip these up in no time—perfect for those busy days!
Gluten-Free Goodness: Using certified gluten-free Rice Krispies ensures everyone can enjoy these delectable cups without worry.
Endless Variations: Why stick to one flavor? Swap in dark chocolate or almond butter, or add toppings like sea salt or shredded coconut for a gourmet twist. Don’t forget to check out my White Chocolate Raspberry Cheesecake for more irresistibly sweet options!
Crowd-Pleasing Appeal: These treats are perfect for any event, whether it’s a casual movie night or a festive gathering. Pair them with vanilla ice cream for an extra special touch!
Chocolate Peanut Butter Rice Krispie Cups Ingredients
• The perfect ingredients for these delightful treats!
For the Base
- 1 cup smooth peanut butter – Adds creaminess and richness; natural peanut butter is great for a less sweet option.
- 1/2 cup honey or light corn syrup – Acts as a sweetener and binder; honey brings a lovely natural flavor.
- 1 teaspoon vanilla extract – Enhances the overall flavor profile beautifully.
- 4 cups Rice Krispies cereal – Provides that delightful crunch; ensure they’re certified gluten-free for a safe option.
For the Topping
- 1 cup semi-sweet chocolate chips – Adds sweetness and rich chocolate flavor; swap for dark or vegan chocolate for a twist.
- 1/4 cup unsalted butter – Helps melt the chocolate adding a rich texture; coconut oil works for a dairy-free choice.
Indulge in these Chocolate Peanut Butter Rice Krispie Cups, perfect for satisfying your sweet cravings!
Step‑by‑Step Instructions for Chocolate Peanut Butter Rice Krispie Cups
Step 1: Melt Peanut Butter and Honey
In a medium saucepan, combine 1 cup of smooth peanut butter and 1/2 cup of honey over low heat. Stir continuously for about 3–5 minutes until the mixture is smooth and well combined, with a glossy appearance. This creates the rich base for your Chocolate Peanut Butter Rice Krispie Cups.
Step 2: Add Vanilla Extract
Remove the saucepan from heat and stir in 1 teaspoon of vanilla extract. Mix thoroughly, allowing the vanilla to enhance the flavors of the peanut butter and honey blend. Set the mixture aside to cool slightly while you prepare the Rice Krispies cereal.
Step 3: Combine Mixture with Rice Krispies
In a large mixing bowl, pour the peanut butter mixture over 4 cups of Rice Krispies cereal. Gently fold the cereal into the mixture using a spatula until all the Rice Krispies are evenly coated, which should take about 2–3 minutes. The mixture should look sticky and well integrated, ensuring every bite of the Chocolate Peanut Butter Rice Krispie Cups is flavorful.
Step 4: Prepare the Muffin Tin
Line a muffin tin with paper liners, ensuring they fit snugly in each cavity for easy removal later. Using your hands or a spoon, scoop the Rice Krispies mixture into each liner, pressing down firmly to create compact cups. This process should take about 5 minutes; aim for an even surface to ensure they hold their shape.
Step 5: Melt Chocolate and Butter
In a microwave-safe bowl, combine 1 cup of semi-sweet chocolate chips and 1/4 cup of unsalted butter. Microwave in 30-second intervals, stirring in between, until melted and smooth, taking about 1–2 minutes total. Be careful not to overheat to avoid burning. This luscious mixture will top off your Chocolate Peanut Butter Rice Krispie Cups.
Step 6: Add Chocolate Topping
Once the chocolate mixture is smooth, spoon it generously over each Rice Krispie cup, ensuring they are completely covered. Use a small spatula to spread it evenly if desired. Allow the chocolate to drizzle down the sides a bit for a decorative touch. This step should take about 3 minutes, adding a decadent finish to your treats.
Step 7: Chill to Set
Refrigerate the muffin tin for at least 30 minutes, allowing the chocolate topping to harden and the cups to set. After this time, the Chocolate Peanut Butter Rice Krispie Cups will be firm to the touch, making them easy to remove from the liners. Enjoy this waiting period by anticipating your delicious homemade treat!
Chocolate Peanut Butter Rice Krispie Cups Variations
Feel free to get creative with these delightful treats! You’ll love exploring all the different flavor profiles and textures.
-
Nut-Free: Substitute sunflower seed butter for peanut butter to create a delicious, nut-free option that’s equally satisfying.
Sunflower seed butter adds its own unique flavor and is perfect for lunches or snacks for kids with allergies. -
Dairy-Free: Use coconut oil instead of butter and swap in dairy-free chocolate chips for a tasty dairy-free twist.
This keeps the creamy texture while ensuring everyone can enjoy this treat without worry. -
Sweet Twist: Swap honey for maple syrup for a different sweetness.
This adds a wonderful, rich flavor that beautifully complements the chocolate and peanut butter. -
Flavor Explosion: Mix in a tablespoon of instant coffee or espresso powder for a delicious mocha flavor.
It creates a delightful balance between the sweetness and strong coffee notes, adding depth to your cups. -
Topping Variation: Add crushed nuts or sprinkles on top before the chocolate sets for added crunch and visual appeal.
This is a fun way to personalize your treats and make them even more festive for gatherings. -
Spicy Kick: Sprinkle a dash of cayenne pepper or chili powder in the chocolate mixture for a surprising heat.
This bold twist elevates each bite to a whole new level of excitement! -
Chocolate Varieties: Try white chocolate or dark chocolate instead of semi-sweet for different flavor profiles and sweetness levels.
Each version brings its own personality to the cup, making it a fun experiment to find your favorite.
These Chocolate Peanut Butter Rice Krispie Cups are wonderfully adaptable! They can be perfect for gatherings or a cozy night in, and don’t miss out on the opportunity to check out my Cinnamon Honey Butter Sweet Potato Cornbread recipe for another delightful sweet fix!
Make Ahead Options
These Chocolate Peanut Butter Rice Krispie Cups are a fantastic option for meal prep, allowing you to whip up a batch in advance for those busy days ahead! You can prepare the Rice Krispie mixture and press it into the muffin tin up to 24 hours before you’re ready to serve. Just cover the prepared cups with plastic wrap and refrigerate; this will keep them fresh and prevent any sticking. When you’re ready to finish, simply melt the chocolate and butter mixture, spoon it over the chilled cups, and let them set in the fridge for another 30 minutes. This way, you’ll have delicious, no-bake treats at your fingertips, perfect for satisfying your sweet cravings or impressing guests!
What to Serve with Chocolate Peanut Butter Rice Krispie Cups
Elevate your dessert experience by pairing these delightful treats with tempting side options that enhance their sweet, crunchy goodness.
-
Creamy Vanilla Ice Cream:
The cool creaminess of vanilla ice cream beautifully contrasts the rich chocolate and peanut butter, creating a heavenly bite. -
Fresh Berries:
Juicy strawberries or raspberries add a refreshing tartness, balancing the sweetness of the cups while providing a pop of color. -
Coffee:
A warm cup of coffee offers a delightful counterpoint, enhancing the chocolate flavor and providing a cozy ambiance during dessert time. -
Nutty Granola:
Sprinkling some crunchy granola on top creates an extra layer of texture, making each mouthful even more satisfying and delicious. -
Chocolate Milkshake:
Pairing these cups with a thick chocolate milkshake offers an indulgent treat, perfect for both kids and adults alike! -
Caramel Drizzle:
A sweet caramel sauce drizzled on top gives an extra touch of richness, complementing the peanut butter and chocolate flavors wonderfully. -
Chilled Almond Milk:
The nutty flavor of chilled almond milk brings a refreshing twist, keeping the dessert light and enjoyable. -
Mini Pretzels:
The salty crunch of pretzels contrasts beautifully with the sweet cups, adding a fun element of surprise with each bite.
These pairings not only enhance the flavors of the Chocolate Peanut Butter Rice Krispie Cups, but each one contributes to a delightful, memorable dessert experience!
How to Store and Freeze Chocolate Peanut Butter Rice Krispie Cups
Room Temperature: Enjoy these treats within 1-2 days at room temperature if kept in an airtight container, though refrigerating them will extend their freshness.
Fridge: Store in an airtight container in the refrigerator for up to 1 week. This keeps your Chocolate Peanut Butter Rice Krispie Cups fresh and delicious!
Freezer: For longer storage, freeze the cups for up to 3 months. Wrap each cup individually in plastic wrap and then place them in a freezer-safe bag.
Reheating: There’s no need to reheat; simply enjoy them chilled or at room temperature for the best flavor and texture!
Expert Tips for Chocolate Peanut Butter Rice Krispie Cups
-
Natural Peanut Butter Choice: For a less sweet and more authentic flavor, use natural peanut butter instead of regular varieties.
-
Watch the Chocolate: When melting chocolate, do it in short intervals and stir frequently to avoid burning.
-
Get Creative with Toppings: Feel free to add chopped nuts, seeds, or a drizzle of caramel on top for extra crunch and flavor in your Chocolate Peanut Butter Rice Krispie Cups.
-
Chill for Best Results: Chill your mixture before pressing it into cups; this will make it easier to handle.
-
Storage Savvy: Store your cups in an airtight container in the refrigerator for up to one week to keep them fresh and crunchy.
Chocolate Peanut Butter Rice Krispie Cups Recipe FAQs
How do I choose the right peanut butter for this recipe?
Absolutely! For the best flavor, I recommend using natural peanut butter. It’s less sweet and provides a more pronounced taste, which perfectly complements the chocolate. Just be sure to stir it well before using, as natural varieties often separate.
What are the best storage methods for these cups?
To maintain freshness, store your Chocolate Peanut Butter Rice Krispie Cups in an airtight container in the refrigerator for up to one week. If they are kept at room temperature for a day or two, ensure they are in a cool, dry place to prevent them from becoming too soft.
Can I freeze these Rice Krispie cups for later enjoyment?
Yes! To freeze your treats, wrap each Chocolate Peanut Butter Rice Krispie Cup individually in plastic wrap. Place them in a freezer-safe bag, and they’ll be good for up to 3 months. When you’re ready to enjoy them, simply thaw them in the refrigerator overnight or let them sit at room temperature for a bit.
What should I do if my chocolate topping isn’t melting smoothly?
If your chocolate isn’t melting well, ensure that you’re using a microwave-safe bowl and melting it in short 30-second intervals, stirring in between each round. If it still seems clumpy or thick, add a tiny splash of coconut oil or butter to help create a smoother consistency.
Are these Rice Krispie Cups suitable for people with allergies?
Be mindful! While the main ingredients are generally gluten-free, always check the labels on your Rice Krispies and chocolate chips to confirm. If there are nut allergies in your household, you can use sun butter or another nut-free alternative instead of peanut butter for a safe option.
Chocolate Peanut Butter Rice Krispie Cups for Sweet Moments
Ingredients
Equipment
Method
- In a medium saucepan, combine 1 cup of smooth peanut butter and 1/2 cup of honey over low heat, stirring until smooth and glossy for about 3-5 minutes.
- Remove from heat and stir in 1 teaspoon of vanilla extract, mixing thoroughly to enhance flavors.
- In a large mixing bowl, pour the peanut butter mixture over 4 cups of Rice Krispies cereal and gently fold until all cereal is coated.
- Line a muffin tin with paper liners and scoop the mixture into each, pressing down to form compact cups. This should take about 5 minutes.
- In a microwave-safe bowl, combine 1 cup of semi-sweet chocolate chips and 1/4 cup of unsalted butter. Microwave in 30-second intervals until melted and smooth.
- Spoon the melted chocolate mixture generously over each Rice Krispie cup and spread evenly if desired.
- Refrigerate the muffin tin for at least 30 minutes to allow chocolate to harden and cups to set.
Leave a Reply