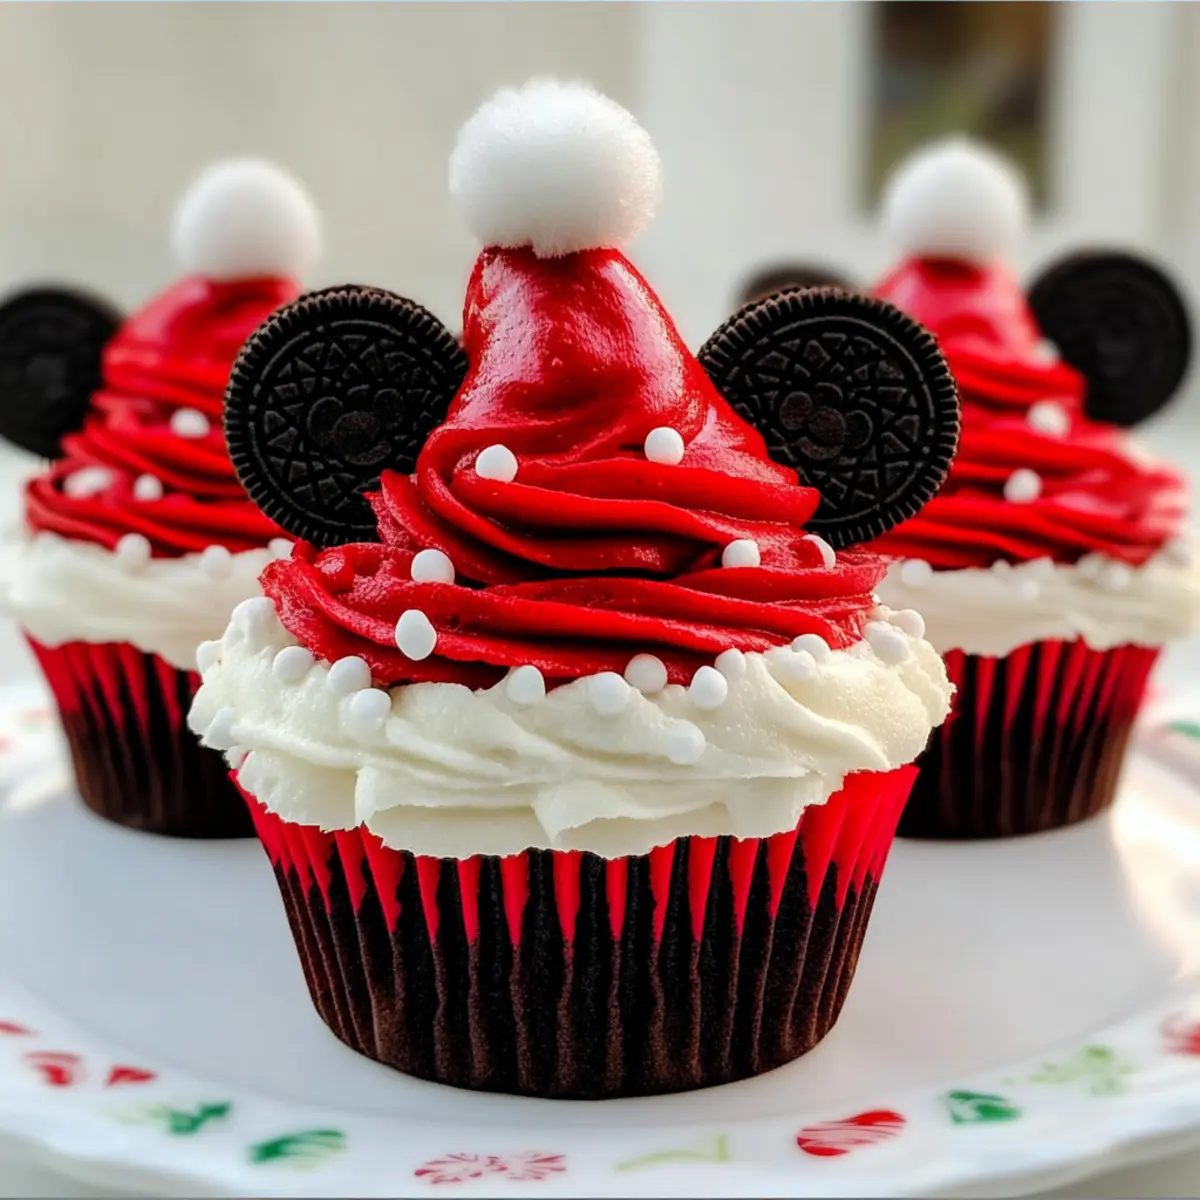
The aroma of chocolate cupcakes wafting through the air is enough to brighten anyone’s day, especially when they’re adorned with festive flair! These Mickey Mouse Santa Hat Cupcakes combine two beloved themes: the magic of Disney and the joy of Christmas. Not only are they a treat to the eyes with their adorable design, but they also bring a wave of nostalgia to any holiday gathering. With quick prep time and the ability to delight both kids and adults, these cupcakes are the ultimate crowd-pleaser that will have everyone smiling. Ready to add a sprinkle of magic to your festivities? Let’s dive into the magic of holiday baking together!
Why You’ll Love These Cupcakes
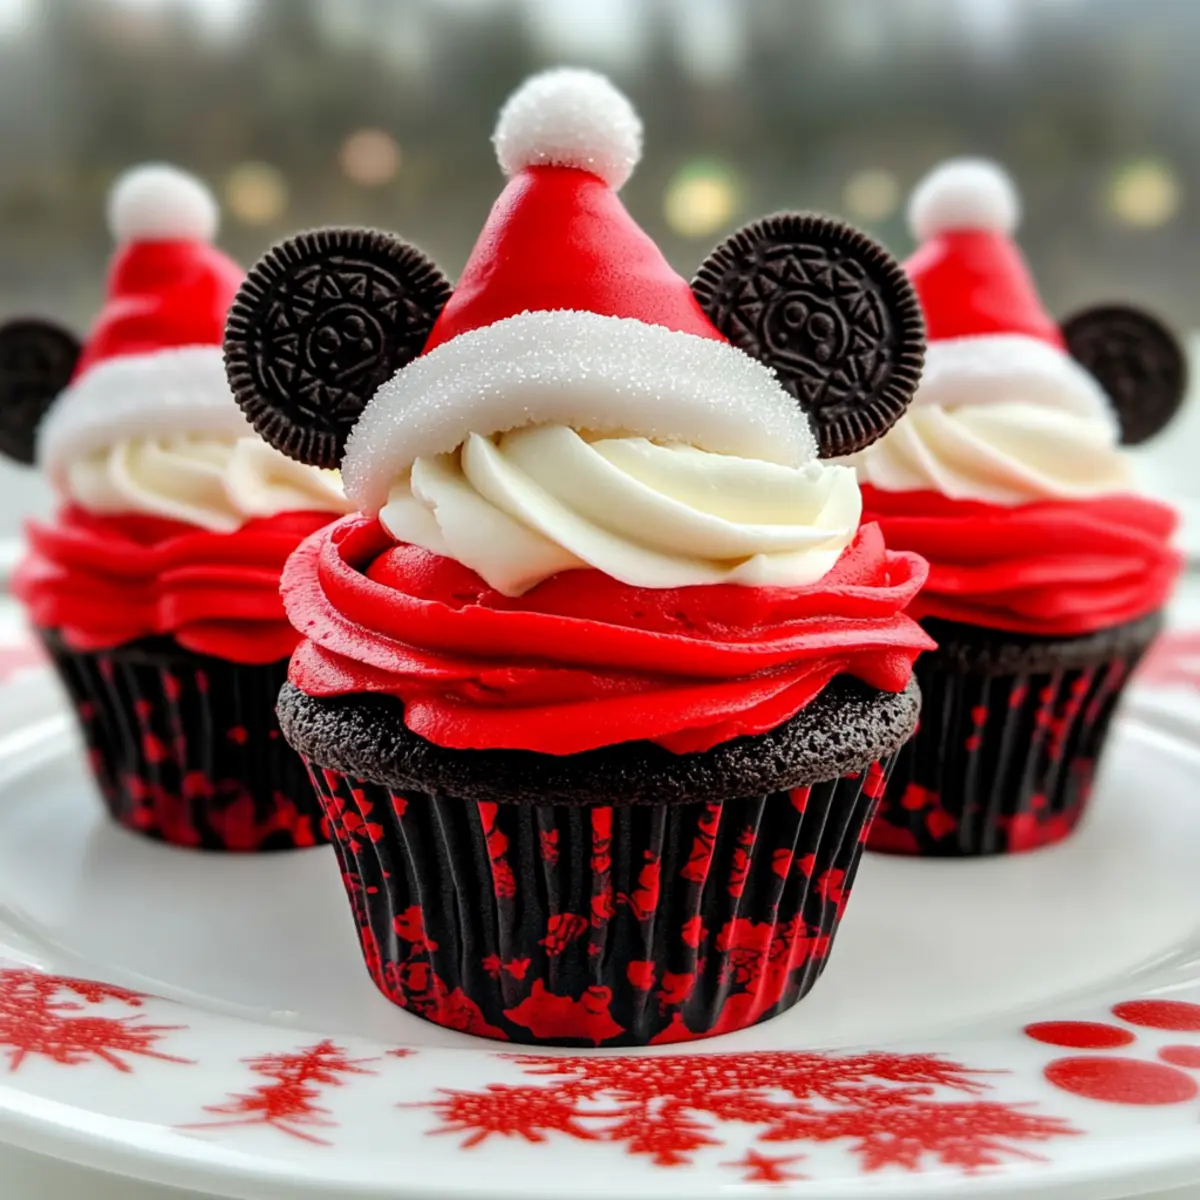
Whimsical Design: These Mickey Mouse Santa Hat Cupcakes are not just desserts; they’re eye-catching centerpieces that bring holiday cheer to any gathering.
Easy to Make: With simple ingredients like a chocolate cake mix and buttercream frosting, you’ll have these delectable treats ready in no time!
Family Fun: Involve kids in the decorating process for a memorable family activity that makes the holiday season even more special.
Perfectly Festive: Bright red frosting and cute Oreo ears capture the holiday spirit, making them ideal for both Christmas and Disney enthusiasts.
Versatile Options: Switch it up with vanilla cupcakes or try different themed decorations for year-round celebrations. Check out my White Chocolate Cupcakes for another delightful treat!
Mickey Mouse Santa Hat Cupcake Ingredients
Get ready to bake a magical treat this holiday season!
For the Cupcakes
- 1 box Chocolate Cake Mix – This forms the rich, chocolaty base; feel free to use a homemade chocolate cupcake recipe for a personal touch.
For the Buttercream Frosting
- 1-2 batches of Best Buttercream Frosting – Essential for creating that beautiful Santa hat look; make sure to prepare enough to frost all cupcakes.
- Wilton Color Right Food Coloring (Red, Crimson) – Use this to tint your frosting for that festive Santa hat effect; any bright red food coloring works, too.
For Decoration
- 18 Mini Oreo Cookies – Perfect for crafting Mickey’s ears; if you’re in a pinch, any chocolate wafer cookies can do, but nothing beats Oreo flavor!
- Wilton 1M Frosting Decorating Tip – Ideal for that signature hat swirl with your red frosting; you can swap it out for any star tip, but the design will differ.
- Wilton #22 Star Decorating Tip – Use this for the fluffy white “fur” at the bottom of the hat; any similar star tip will do just fine.
- Decorating Bags – Essential for piping your buttercream; if you lack these, resealable plastic bags can serve as a handy alternative.
- White Dots from a Hole Punch – These make adorable “buttons” on your cupcakes; edible pearl sprinkles can serve as a fun substitution.
Get ready to bring a sprinkle of magic to your festive baking with these delightful Mickey Mouse Santa Hat Cupcakes!
Step‑by‑Step Instructions for Mickey Mouse Santa Hat Cupcakes
Step 1: Bake Cupcakes
Preheat your oven to 350°F (175°C). Prepare your chocolate cake mix according to the package instructions, then pour the batter into lined cupcake tins, filling each cup about two-thirds full. Bake for 18-22 minutes until a toothpick inserted in the center comes out clean. Once done, let them cool in the pan for a few minutes before transferring them to a wire rack to cool completely.
Step 2: Make Buttercream Frosting
While the cupcakes cool, whip up your Best Buttercream Frosting. Follow your favorite recipe or package instructions to ensure it’s smooth and creamy. Reserve about ¼ of the frosting for later use, and tint the remaining frosting with red food coloring until you achieve a vibrant shade that resembles Santa’s hat.
Step 3: Prepare Decorations
Twist open 18 Mini Oreo cookies, discarding the creamy filling, and keep the chocolate wafer halves aside for decorating. These will be used for Mickey’s ears, providing both a fun look and a delicious crunch. Set them aside in a cool spot as you prepare for frosting.
Step 4: Frost Cupcakes
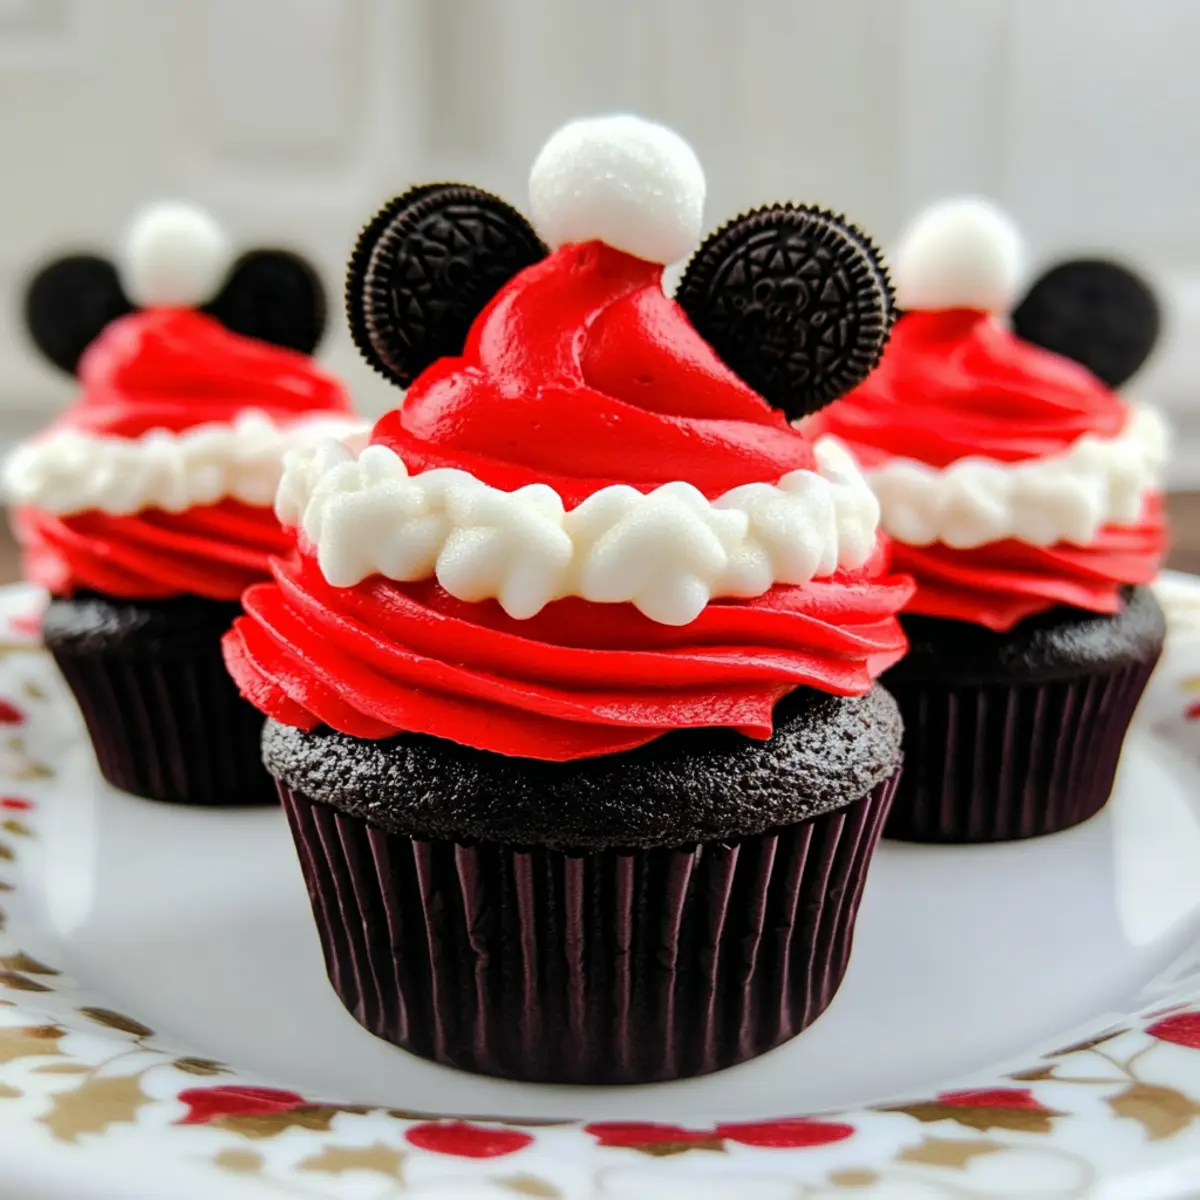
Grab a pastry bag and fit it with the Wilton 1M frosting tip. Fill the bag with the red buttercream frosting, then pipe a swirl onto the cooled cupcakes to create a whimsical Santa hat shape. Start from the middle, working outward, and create a nice peak at the top to complete the look.
Step 5: Add White Frosting
Change to your Wilton #22 star decorating tip, fill your pastry bag with the reserved white buttercream frosting, and pipe a decorative band at the base of the red frosting. This will give the illusion of fluffy white “fur” around the Santa hat. Make sure it’s thick enough to stand out and create a delightful contrast.
Step 6: Decorate the Top
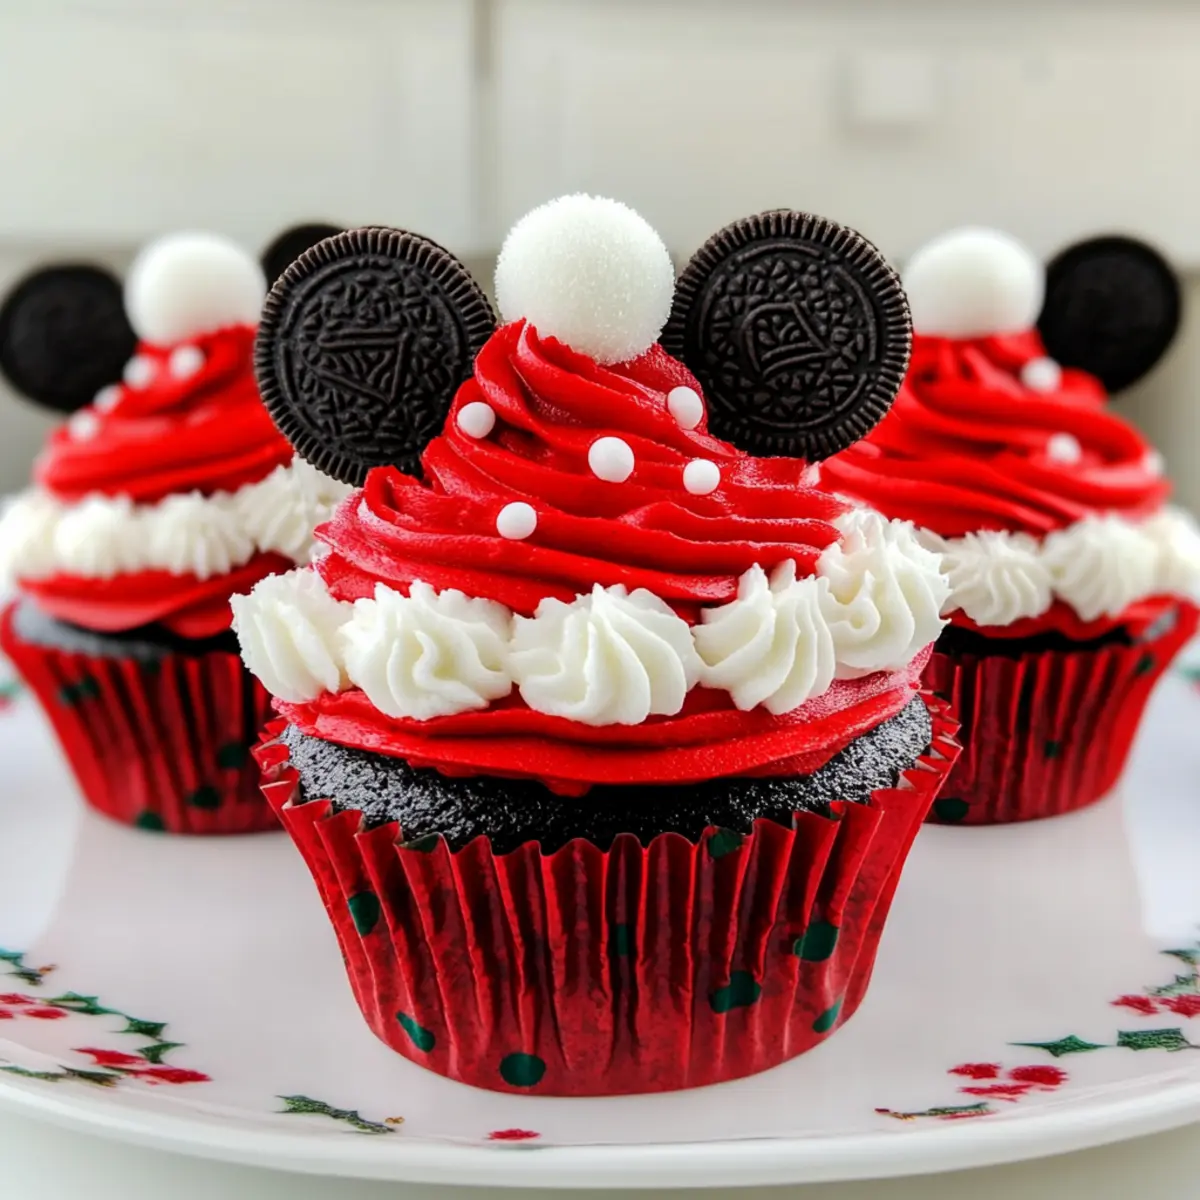
Using the white frosting, pipe a small dot at the tip of each cupcake to mimic the ball on Santa’s hat. Press two Mini Oreo cookie halves into the frosting just below the hat peak to make Mickey’s ears look perfectly charming and festive.
Step 7: Attach Details
For the final decorative touch, use white buttercream to pipe small dots onto the red cupcake liners, simulating buttons on Santa’s outfit. These cute details will not only enhance the visual appeal but also make your Mickey Mouse Santa Hat Cupcakes extra special for your holiday gatherings.
How to Store and Freeze Mickey Mouse Santa Hat Cupcakes
Room Temperature: Store frosted cupcakes in an airtight container at room temperature for up to 3 days. This keeps them fresh and ready to enjoy!
Fridge: For longer freshness, unfrosted cupcakes can be stored in the refrigerator for up to a week. Just make sure they’re covered lightly with plastic wrap to prevent drying out.
Freezer: If you want to save them for later, freeze unfrosted cupcakes in an airtight container for up to 2 months. When ready to enjoy, let them thaw at room temperature and frost before serving.
Reheating: If you’ve frozen them, allow the cupcakes to come to room temperature before serving. You can also pop them in the microwave for about 10-15 seconds for a cozy treat.
Make Ahead Options
These Mickey Mouse Santa Hat Cupcakes are perfect for busy home cooks looking to save time during the hectic holiday season! You can bake the chocolate cupcakes and keep them unfrosted for up to 3 days in an airtight container at room temperature. For the buttercream frosting, prepare and store it in the refrigerator for up to 1 week. Just be sure to bring it back to room temperature and re-whip before frosting your cupcakes. When you’re ready to serve, simply frost the cooled cupcakes and add the decorative touches. With these make-ahead tips, you’ll have stunning, festive treats ready with minimal effort!
What to Serve with Mickey Mouse Santa Hat Cupcakes
These festive treats are perfect for a joyful holiday gathering, bringing smiles and warmth to any table.
-
Hot Cocoa: The rich, chocolatey warmth of hot cocoa enhances the cupcakes’ delightful flavors, creating a cozy, festive vibe.
-
Holiday Punch: A sparkling cranberry or citrus punch adds a refreshing contrast to the sweetness of the cupcakes and brightens the celebrations.
-
Christmas Cookies: Serve alongside classic sugar cookies or gingerbread men for a delightful cookie platter that appeals to all ages.
-
Fruit Salad: Fresh fruit salad with seasonal favorites brings a refreshing sweetness that complements the rich frosting and balances the indulgence.
-
Vanilla Ice Cream: A scoop of vanilla ice cream adds a creamy texture and contrast to the cupcakes, making a delightful pairing for dessert lovers.
-
Milk: Don’t forget the classic pairing! A glass of cold milk can soften the sweetness and enhance the chocolate flavor of the cupcakes.
-
Cheese Platter: A variety of cheeses can serve as a sophisticated touch, breaking up the sweet elements with savory bites.
-
Cupcake Stand: Elevate the presentation by serving the cupcakes on a festive cupcake stand. It creates a focal point and encourages guests to indulge.
These pairings will elevate your holiday festivities, ensuring a delicious and memorable gathering around the table!
Mickey Mouse Santa Hat Cupcake Variations
Feel free to explore your creativity and customize these festive cupcakes to suit your or your family’s tastes!
- Vanilla Swap: Use a vanilla cake mix instead of chocolate for a lighter, classic flavor that still shines during the holiday season.
- Gluten-Free Version: Substitute regular cake mix with a gluten-free option to cater to dietary needs while keeping the magic alive.
- Peanut Butter Twist: Swirl in some peanut butter into the frosting for a delightful twist that pairs perfectly with chocolate and this holiday theme.
- Alternative Decor: Try using chocolate-covered marshmallows instead of Mini Oreos for Mickey’s ears; this will add a new texture and sweetness.
- Cream Cheese Frosting: Use cream cheese frosting instead of buttercream for a tangy, rich flavor that’s simply irresistible and festive.
- Holiday Colors: Change the food coloring to blue and silver for a winter wonderland theme! It’ll still feel festive while offering a unique take.
- Spicy Option: Add a dash of cinnamon or nutmeg to your cupcake batter for a warm spice that embodies the cozy spirit of the holidays.
- Decorate Like Mickey: Consider using edible googly eyes instead of frosting dots on the cupcake wrappers for an even more playful design.
Oh, and if you’re looking for sweet inspiration beyond these cupcakes, check out my delightful notes on Covered Pretzel Cupcakes or try your hand at a warm loaf of Banana Bread Cajun. Happy baking!
Expert Tips for Mickey Mouse Santa Hat Cupcakes
-
Color Gradation: Start with a small amount of food coloring to achieve the perfect shade of red for your frosting. This prevents overly vibrant colors that can overwhelm the design.
-
Cooling Time: Ensure your cupcakes are completely cooled before frosting. Frosting warm cupcakes can lead to melting and a messy result, ruining those adorable designs.
-
Crumb Coating: Consider applying a thin layer of frosting, known as crumb coating, before the final frosting layer. This helps seal in crumbs and results in a smoother finish.
-
Stability Check: If your frosting is too soft, refrigerate it for a few minutes before piping. This will make it easier to create those fluffy Santa hat swirls on your Mickey Mouse Santa Hat Cupcakes.
-
Decorative Tips: Experiment with different decorating tips for varied finishes. While the 1M and #22 tips create beautiful effects, try star-shaped tips for even more design options!
Mickey Mouse Santa Hat Cupcakes Recipe FAQs
How do I choose the right chocolate cake mix?
Absolutely! When selecting a chocolate cake mix, look for one with rich, high-quality chocolate flavor. Opt for mixes that describe their taste as “fudgy” or “moist” for the best results. You can also check the expiration date to ensure freshness!
How should I store my cupcakes after decorating?
Once your frosted Mickey Mouse Santa Hat Cupcakes are decorated, store them in an airtight container at room temperature for up to 3 days to maintain their freshness. If you have leftover unfrosted cupcakes, they can be kept in the fridge for up to a week, just be sure to cover them lightly in plastic wrap to prevent them from drying out.
Can I freeze the cupcakes for later?
Yes, you can! To freeze your cupcakes, be sure to cool them completely. Then, place the unfrosted cupcakes in an airtight container, layering them with parchment paper to avoid sticking. They can be stored in the freezer for up to 2 months. When you’re ready to enjoy them, simply let them thaw at room temperature and frost them beforehand.
What if my frosting is too soft for decorating?
If your buttercream frosting feels too soft to pipe smoothly, don’t worry! Refrigerate it for about 10-15 minutes to firm it up. This helps create those beautiful swirls and maintains the festive shape of your Mickey Mouse Santa Hat Cupcakes. If needed, beat in a bit more powdered sugar until you reach your desired consistency.
Are there any dietary considerations for these cupcakes?
Very! If you’re making these cupcakes for someone with allergies, be mindful of the ingredients. They contain gluten from the cake mix and dairy in the buttercream. You can explore gluten-free cake mixes and use dairy-free butter substitutes to make them more inclusive. Always check ingredient labels for allergens, especially if serving to guests.
How can I get vibrant red frosting without it tasting off?
To achieve that perfect red hue without altering the taste, start with just a small amount of food coloring, gradually adding until you achieve your desired shade. This prevents overpowering the frosting with extra coloring while maintaining its delicious buttery flavor!
Mickey Mouse Santa Hat Cupcakes for a Festive Holiday Treat
Ingredients
Equipment
Method
- Preheat your oven to 350°F (175°C). Prepare your chocolate cake mix according to the package instructions, then pour the batter into lined cupcake tins, filling each cup about two-thirds full. Bake for 18-22 minutes until a toothpick inserted in the center comes out clean. Let them cool in the pan for a few minutes before transferring them to a wire rack to cool completely.
- While the cupcakes cool, whip up your Best Buttercream Frosting. Follow your favorite recipe or package instructions to ensure it's smooth and creamy. Reserve about ¼ of the frosting for later use, and tint the remaining frosting with red food coloring until you achieve a vibrant shade that resembles Santa's hat.
- Twist open 18 Mini Oreo cookies, discarding the creamy filling, and keep the chocolate wafer halves aside for decorating. These will be used for Mickey’s ears.
- Fill a pastry bag with the red buttercream frosting, then pipe a swirl onto the cooled cupcakes to create a whimsical Santa hat shape. Start from the middle, working outward, and create a nice peak at the top.
- Change to your Wilton #22 star decorating tip, fill your pastry bag with the reserved white buttercream frosting, and pipe a decorative band at the base of the red frosting.
- Using the white frosting, pipe a small dot at the tip of each cupcake to mimic the ball on Santa's hat. Press two Mini Oreo cookie halves into the frosting just below the hat peak to make Mickey's ears look charming.
- Use white buttercream to pipe small dots onto the red cupcake liners, simulating buttons on Santa's outfit.
Leave a Reply