As I sat with a cup of tea, memories of holiday gatherings flooded my mind, evoking the soft, creamy sensations of Old-Fashioned Butter Mints. These delightful no-bake treats are not just a blast from the past; they’re a versatile gem in any home chef’s arsenal. This simple yet charming recipe brings together a few pantry staples to create colorful mints that are perfect for any occasion—be it festive celebrations, baby showers, or just a sweet indulgence after dinner. With their customizable colors and flavors, these mints are sure to impress, making them ideal homemade gifts for friends and family. The best part? You can whip them up in no time, and they store beautifully for week-long enjoyment. Ready to unlock the nostalgia? Let’s whip up some mints that will make your taste buds dance!
Why are Old-Fashioned Butter Mints so special?
Soft, Creamy Delight: These mints are the epitome of melt-in-your-mouth perfection, creating a blissful experience that will take you back to nostalgic moments.
No-Bake Convenience: With a simple no-bake process, anyone can whip these up without the fuss of an oven.
Customizable Flavors: Switch up the flavor with different extracts like almond or lemon to match your mood or event.
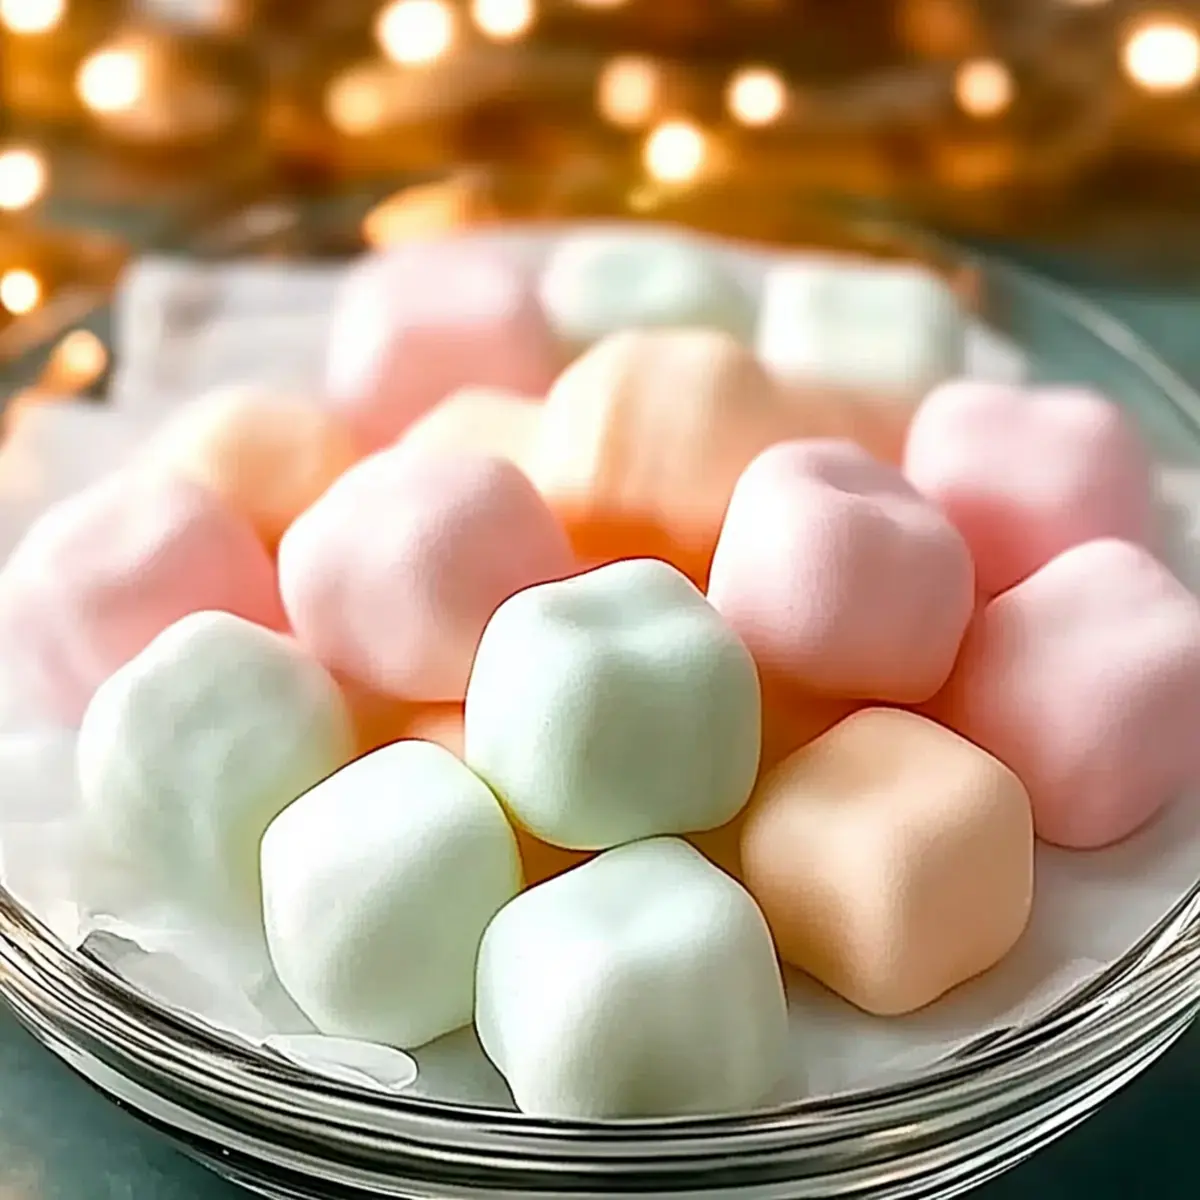
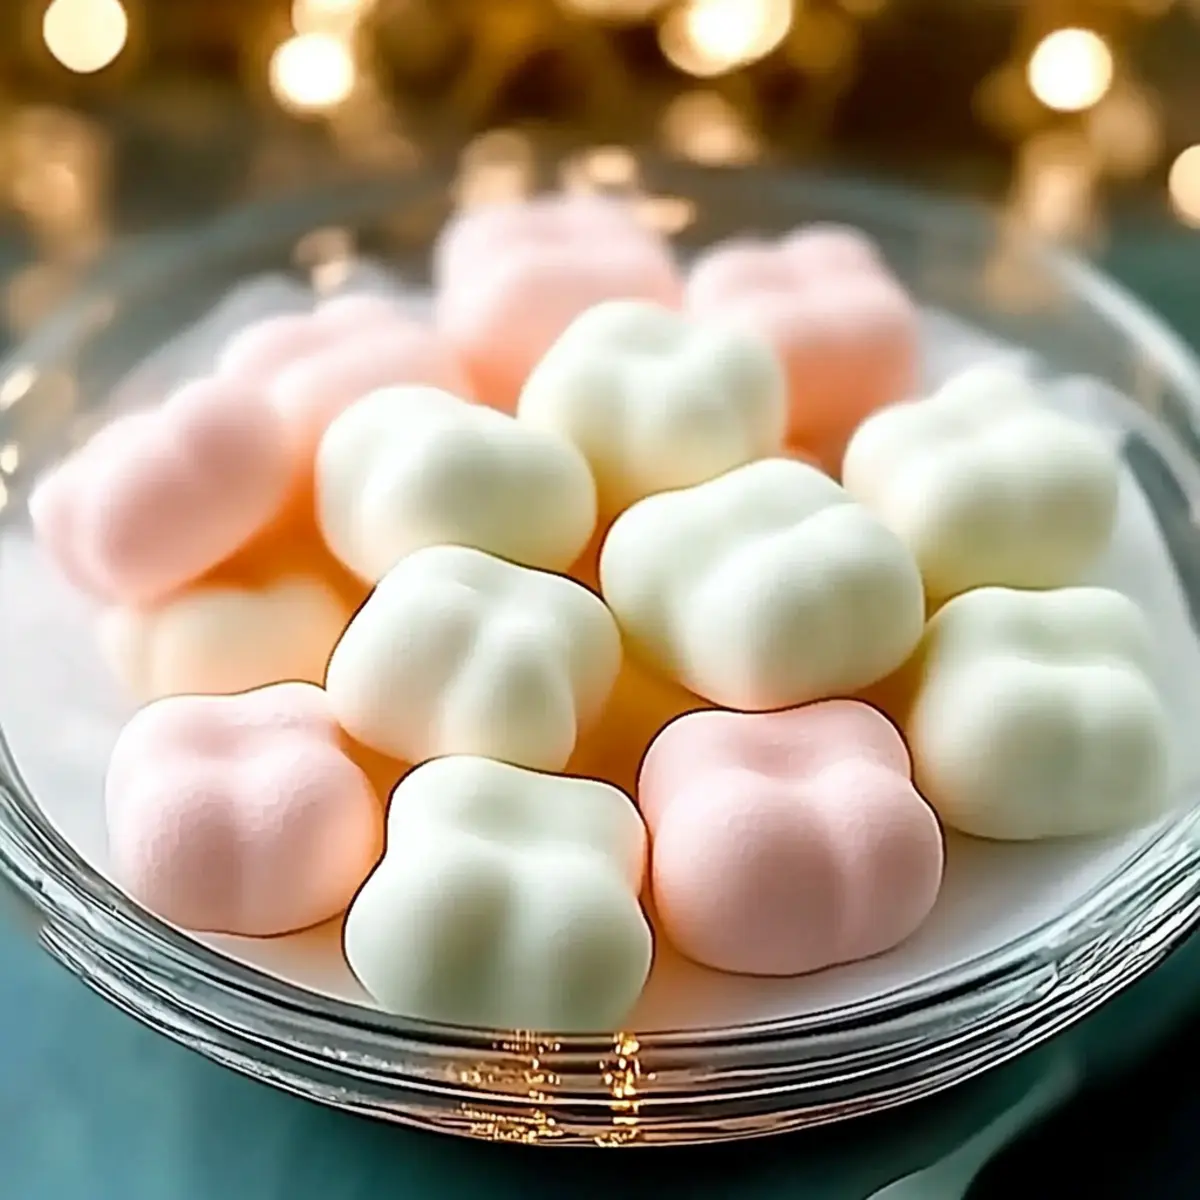
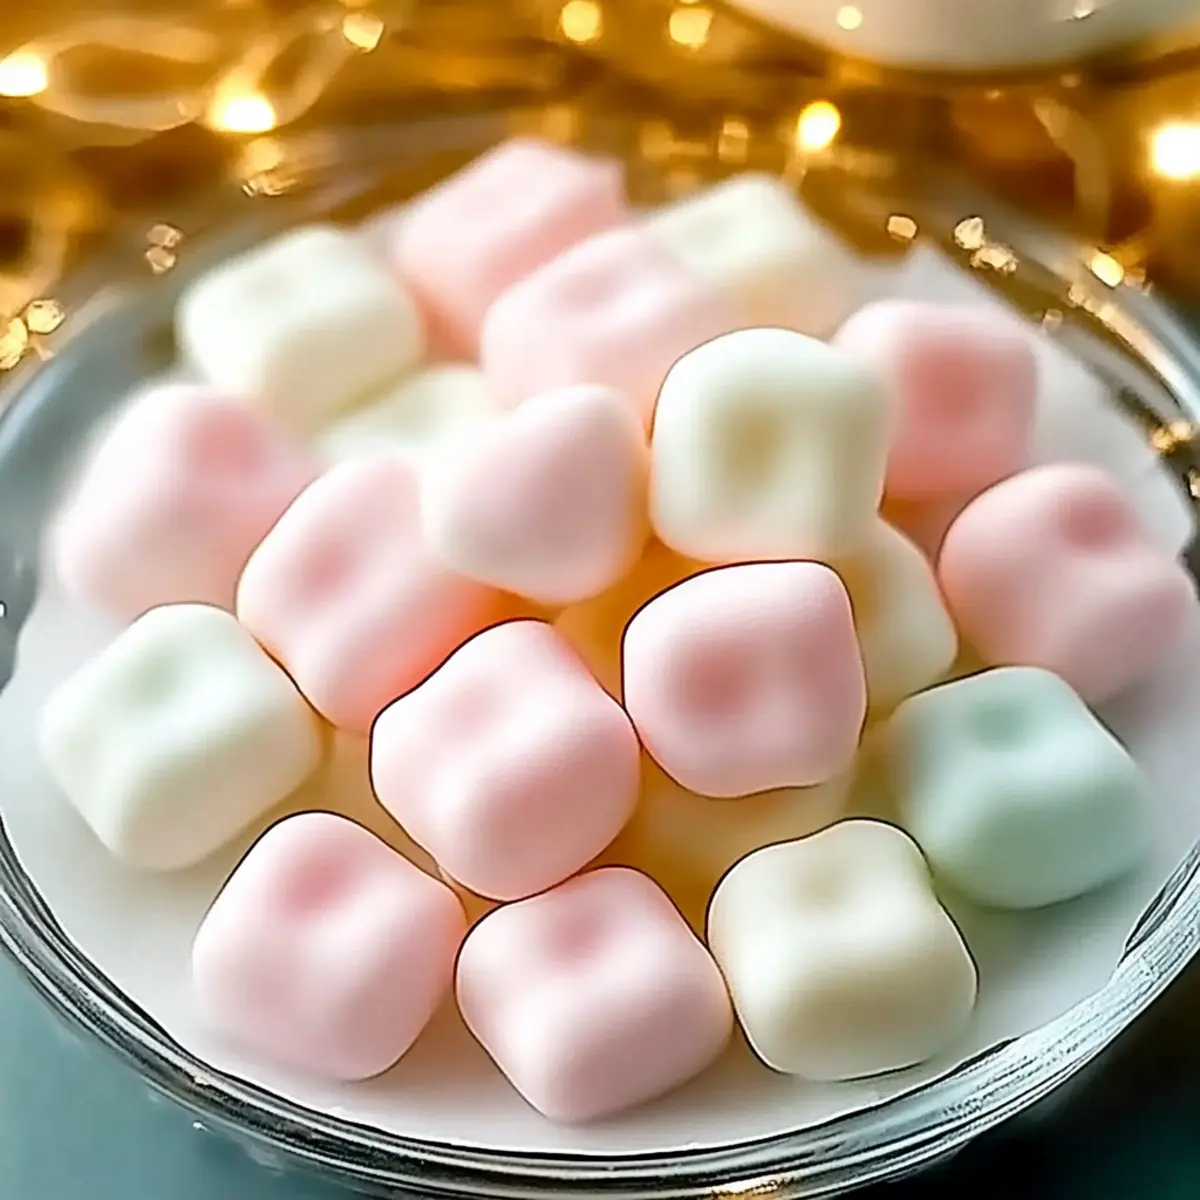
Colorful Appeal: Tint the mints in charming pastels that brighten up your table, making them perfect for any festive occasion.
Homemade Gifts: Packaged in cute boxes, these mints are delightful homemade gifts that show you care. Pair them with other treats like Old Fashioned Pie for an extra special touch!
Time-Saving Magic: Prepare them ahead of time, and they stay fresh for weeks—ideal for busy schedules or last-minute gatherings.
Old-Fashioned Butter Mints Ingredients
For the Mints
- Unsalted Butter – Provides creaminess and structure; using softened butter ensures smooth blending.
- Heavy Cream – Adds silkiness and a tender texture to the mints, elevating their feel and taste.
- Peppermint Extract – Infuses the mints with classic minty flavor; substitution options like almond or lemon extract offer delightful variations.
- Powdered Sugar – Sweetens while providing essential structure; key for achieving the perfect texture in your Old-Fashioned Butter Mints.
- Food Coloring (optional) – Use to tint your mints in vibrant pastels; makes them visually appealing for any occasion.
Step‑by‑Step Instructions for Old-Fashioned Butter Mints
Step 1: Cream the Butter
Begin by placing softened unsalted butter in a large mixing bowl. Use an electric mixer on medium speed to beat the butter until it becomes smooth and fluffy, about 2-3 minutes. This creamy base sets the foundation for your Old-Fashioned Butter Mints, so ensure there are no lumps before moving on.
Step 2: Mix in Cream and Extract
Add in the heavy cream and peppermint extract to the whipped butter. Continue mixing on low speed until everything is fully integrated, approximately 1-2 minutes. The mixture should be creamy and slightly thickened, enhancing the delicious minty flavor that characterizes these delightful mints.
Step 3: Add Powdered Sugar
Gradually sprinkle in the powdered sugar, one cup at a time, while mixing on low speed. After each addition, increase the speed slightly until all sugar is incorporated and the mixture forms a stiff dough. This process should take about 5-7 minutes in total. The dough will begin to pull away from the sides of the bowl, indicating readiness.
Step 4: Color the Mixture (Optional)
If you wish to tint your mints, divide the dough into sections based on how many colors you want to use. Add a few drops of food coloring to each section, then knead the coloring in by hand or with the mixer until evenly distributed. Aim for vibrant pastel shades that will make your Old-Fashioned Butter Mints visually appealing.
Step 5: Shape the Mints
Roll pieces of the dough into thin ropes, about ½ inch in diameter. Once you have your ropes, use a sharp knife or kitchen scissors to cut them into bite-sized pieces, approximately 1 inch long. Ensure consistent sizes for a beautiful presentation that showcases your homemade treats.
Step 6: Dry the Mints
Carefully arrange the cut mints on a parchment-lined tray, ensuring they are spaced apart to prevent sticking. Allow the mints to dry at room temperature for at least 12 hours; this crucial step helps them firm up while maintaining that delightful melt-in-your-mouth texture that makes Old-Fashioned Butter Mints so special.
How to Store and Freeze Old-Fashioned Butter Mints
Airtight Container: Store your Old-Fashioned Butter Mints in an airtight container at room temperature for up to 2 weeks to maintain their delightful texture and flavor.
Refrigeration: If you’d like them to last longer, refrigerate the mints in an airtight container for up to 1 month. This keeps them fresh and creamy.
Freezing: For extended storage, freeze the mints in a single layer on a baking sheet, then transfer to a freezer-safe container. They can be stored this way for up to 3 months.
Thawing: When ready to enjoy, thaw the mints in the fridge or at room temperature. Avoid using the microwave, as it may alter their texture.
Expert Tips for Old-Fashioned Butter Mints
-
Quality Ingredients: Use high-quality unsalted butter for rich flavor; it makes all the difference in your Old-Fashioned Butter Mints’ taste and texture.
-
Butter Temperature: Ensure your butter is at room temperature to facilitate smooth blending. Cold butter can lead to clumpy mints.
-
Drying Time: Allow at least 12 hours for the mints to dry completely; this helps achieve that perfect firm outer shell while keeping the inside soft and creamy.
-
Mixing Technique: Gradually add powdered sugar to avoid a sugar cloud in your kitchen! Start with low speed before increasing to incorporate it smoothly into the dough.
-
Color Control: When using food coloring, start with a small amount; you can always add more if you want a more vibrant hue for your mints.
Old-Fashioned Butter Mints Variations & Substitutions
Feel free to get creative with these delightful mints by customizing their flavors, colors, and even textures!
- Almond Extract: Swap peppermint for almond extract to create a nutty, sweet flavor that’s equally scrumptious.
- Lemon Zest: Add a hint of lemon zest for a refreshing citrus twist that brightens the mints and perfect for summer gatherings.
- Chocolate Drizzle: Once dried, drizzle melted chocolate over your mints for a rich indulgence that combines the sweetness of butter and chocolate in every bite.
- Spicy Peppermint: For a little kick, add a pinch of cayenne pepper or a few drops of spicy extract for a surprise heat element that tea lovers will adore.
- Color Themes: Tint your mints in vibrant colors that match seasonal holidays—think red and green for Christmas or pastel colors for baby showers.
- Coconut Flakes: Fold shredded coconut into your mint dough for added texture and a tropical twist, reminiscent of your favorite desserts. Imagine a summery celebration with these playful mints!
- Flavor Fusion: Combine extracts, like peppermint and vanilla, to create a unique flavor profile that marries familiar taste with something new.
- Cocoa Powder: For a chocolatey version, mix in cocoa powder to the dough. These rich and creamy mints pair beautifully with a cup of coffee or after dinner.
These variations can turn your Old-Fashioned Butter Mints into something truly special. Try pairing them with a warm cup of chamomile tea or alongside your favorite Cinnamon Honey Butter Sweet Potato Cornbread for a delightful contrast in flavors!
Make Ahead Options
These Old-Fashioned Butter Mints are perfect for meal prep enthusiasts! You can prepare the dough up to 24 hours in advance, mixing it as described, then rolling it into ropes before cutting them into bite-sized pieces. Store the unformed mints in an airtight container at room temperature to maintain their quality. On the day you’re ready to serve, simply arrange the mints on a parchment-lined tray and allow them to dry at room temperature for at least 12 hours (or overnight) before enjoying. By prepping them ahead of time, you can save precious moments during busy holiday gatherings while still delivering that delightful, homemade touch!
What to Serve with Old-Fashioned Butter Mints?
Indulging in the delightful sweetness of these mints deserves a well-rounded meal to enhance the experience.
-
Chamomile Tea: A soothing, floral cup to balance the minty sweetness, creating a comforting treat after dinner.
-
Mint Tea: Elevate the mint experience by serving these with a refreshing cup, accentuating the bold mint flavor beautifully.
-
Coffee: The rich, bold notes of coffee create a delightful contrast to the sweet mints, perfect for an after-dinner indulgence.
-
Chocolate Dessert: Pair with a slice of rich chocolate cake for a contrast of flavors—sweetness meets decadence in each bite!
-
Fruit Salad: Fresh berries or citrus provide a light and zesty element to cleanse the palate after the buttery mints.
-
Lemonade: A chilled glass of lemonade offers a refreshing tang that balances the creamy richness of the mints beautifully.
-
Almond Biscotti: The crunchy texture and nutty flavor create a perfect complementary treat that pairs wonderfully with coffee or tea.
-
Vanilla Ice Cream: Top a scoop with drizzled mints for a whimsical dessert, combining temperature and flavor for pure joy.
-
Caramel Sauce: Drizzling mints with warm caramel creates a decadent twist, enhancing their sweetness and providing a chewy depth.
-
Sparkling Water: For a lighter choice, serve these mints with sparkling water infused with fresh mint or lemon for a refreshing finish.
Old-Fashioned Butter Mints Recipe FAQs
What type of butter should I use for Old-Fashioned Butter Mints?
Absolutely, using high-quality unsalted butter is key for achieving the best flavor and texture in your mints. Opt for butter that is at room temperature to ensure easy blending; cold butter may result in clumpy mints, which we want to avoid!
How should I store my Old-Fashioned Butter Mints?
To keep your delicious mints fresh, store them in an airtight container at room temperature for up to 2 weeks. If you want to enjoy them longer, you can refrigerate them, where they’ll maintain their delightful texture for up to a month.
Can I freeze Old-Fashioned Butter Mints, and how?
Very! To freeze your mints, first arrange them in a single layer on a baking sheet to prevent sticking, then place them in the freezer until they’re firm. Once set, transfer them to a freezer-safe container or zip-top bag. They’ll stay fresh for up to 3 months! When you’re ready to enjoy, simply thaw at room temperature or in the fridge—no microwave, please, to maintain their ideal texture.
What if my mints are too soft after drying?
If your mints are not firm after the drying period, it may be due to the humidity in the air or not enough drying time. Make sure they’re left in a cool, dry place to set. You can also leave them to dry for a bit longer—up to 24 hours can sometimes do the trick. If necessary, reduce the amount of heavy cream slightly in your next batch for a firmer texture.
Can I use different flavors besides peppermint?
Absolutely! The beauty of Old-Fashioned Butter Mints lies in their customizable nature. You can easily swap peppermint extract for almond, lemon, or vanilla extract, depending on your flavor preferences or to match a themed event. Just remember to adjust the amount to achieve the desired taste, and have fun with it!
Are these mints safe for kids and pets?
While the ingredients in Old-Fashioned Butter Mints are safe for children, it’s important to note that mint extracts can be strong for pets, particularly dogs. It’s best to enjoy your homemade mints yourself or ensure they are out of reach from your furry friends to keep everyone safe during your sweet moments!

Old-Fashioned Butter Mints: Sweet Nostalgia in Every Bite
Ingredients
Equipment
Method
- Cream the Butter: Beat the softened unsalted butter until smooth and fluffy, about 2-3 minutes.
- Mix in Cream and Extract: Add heavy cream and peppermint extract, mixing until creamy and thickened, 1-2 minutes.
- Add Powdered Sugar: Gradually mix in powdered sugar one cup at a time until a stiff dough forms, about 5-7 minutes.
- Color the Mixture (Optional): Divide dough and knead in food coloring for pastel shades.
- Shape the Mints: Roll dough into ropes and cut into 1-inch pieces for uniformity.
- Dry the Mints: Arrange on parchment-lined tray and let dry for at least 12 hours at room temperature.
Leave a Reply