The tantalizing aroma wafting through my kitchen reminded me of my childhood—warm cinnamon rolls fresh from the oven but with a delightful twist. Say hello to Oreo Cinnamon Rolls, where your favorite cookie meets a beloved breakfast staple. This recipe is not only a fun and indulgent way to start your weekend but also a crowd-pleaser that promises to bring smiles to the table. With just a handful of ingredients and minimal prep time, you can whip up these scrumptious rolls topped with a glossy vanilla glaze that perfectly complements the rich dark chocolate Oreo filling. Whether you’re looking for a special treat to serve guests or simply want to elevate your brunch game, these Oreo cinnamon rolls are sure to satisfy your sweet tooth. Who’s ready to dive into this delicious baking adventure?
Why are Oreo Cinnamon Rolls so delightful?
Indulgent Flavor: Each bite offers a heavenly blend of rich chocolate and warm cinnamon, making these rolls utterly irresistible.
Easy to Make: With simple ingredients and minimal prep, creating these treats is a breeze, perfect for even novice bakers.
Crowd-Pleasing Treat: Great for gatherings, they are sure to impress friends and family, much like my Homemade Cinnamon Twists.
Versatile Ingredients: Swap out regular Oreos for flavors like mint for a fun twist, or use gluten-free flour to suit your dietary needs!
Perfect for Any Meal: Whether paired with coffee for breakfast or as an afternoon snack, these rolls are an all-day delight!
Oreo Cinnamon Rolls Ingredients
For the Dough
• All-Purpose Flour – Essential to form the dough structure; you may need up to 1/2 cup more depending on consistency.
• Granulated Sugar – Sweetens the dough and enhances flavor; can be substituted with cane sugar.
• Instant Dry Yeast – Crucial for dough rising; you can swap it with active dry yeast, but expect longer rising times.
• Fine Salt – Balances sweetness perfectly; stick with regular salt for the best results.
• Whole Milk – Adds moisture and activates the yeast; almond milk is a great dairy-free alternative.
• Large Egg – Provides moisture and structure; a flax egg serves as a vegan substitute.
• Unsalted Butter – Ensures richness in the dough; always use room temperature butter for easy mixing.
For the Filling
• Light Brown Sugar – Infuses sweetness and moisture into the filling; you can use packed brown sugar as a substitute.
• Black Cocoa Powder – Gives a deep chocolate flavor reminiscent of Oreos; dark cocoa powder works if black is unavailable.
• Ground Cinnamon – Enhances warmth and spice; no substitutes, but feel free to reduce it slightly if necessary.
• Crushed Oreos – The star ingredient that adds texture and Oreo goodness to the filling; adjust the quantity to your liking.
For the Glaze
• Powdered Sugar – Sweetens and thickens the glaze; monk fruit powdered sugar can be used for a lower-sugar version.
• Unsalted Butter (for glaze) – Adds creaminess to the glaze; opt for room temperature butter for easier mixing.
• Milk – Helps achieve the right consistency for the glaze; you can replace it with almond milk for a dairy-free option.
• Artificial Vanilla Extract – Infuses a lovely flavor into the glaze; swap for pure vanilla extract for a more natural twist.
Indulge in the deliciousness of these Oreo Cinnamon Rolls and bring a touch of sweetness to your breakfast table!
Step‑by‑Step Instructions for Oreo Cinnamon Rolls
Step 1: Prepare the Filling
In a mixing bowl, combine light brown sugar, black cocoa powder, and ground cinnamon. Stir these delicious ingredients together with a fork until thoroughly mixed. This filling will add a rich chocolatey flavor, reminiscent of Oreos, to your cinnamon rolls. Set it aside while you work on making the dough.
Step 2: Make the Dough
In a large bowl, mix all-purpose flour, instant dry yeast, and fine salt. In another bowl, warm milk and melt unsalted butter together until just lukewarm. Gradually add this liquid mixture to the flour blend, stirring until a sticky dough forms. The contrasting aromas of the Oreo cinnamon roll dough will fill your kitchen!
Step 3: Knead the Dough
Sprinkle a clean surface with a little flour and turn out your sticky dough. Knead gently, adding more flour as needed, until the dough becomes tacky yet pulls away from the bowl easily. This should take about 5-7 minutes, resulting in a soft texture that is perfect for rolling out.
Step 4: Rest the Dough
Place your kneaded dough into an oiled bowl and cover it with a clean kitchen towel or plastic wrap. Let it rest in a warm area for 10-15 minutes until slightly puffy. This quick rise will enhance the fluffiness of your Oreo cinnamon rolls, making them all the more delightful.
Step 5: Roll the Dough
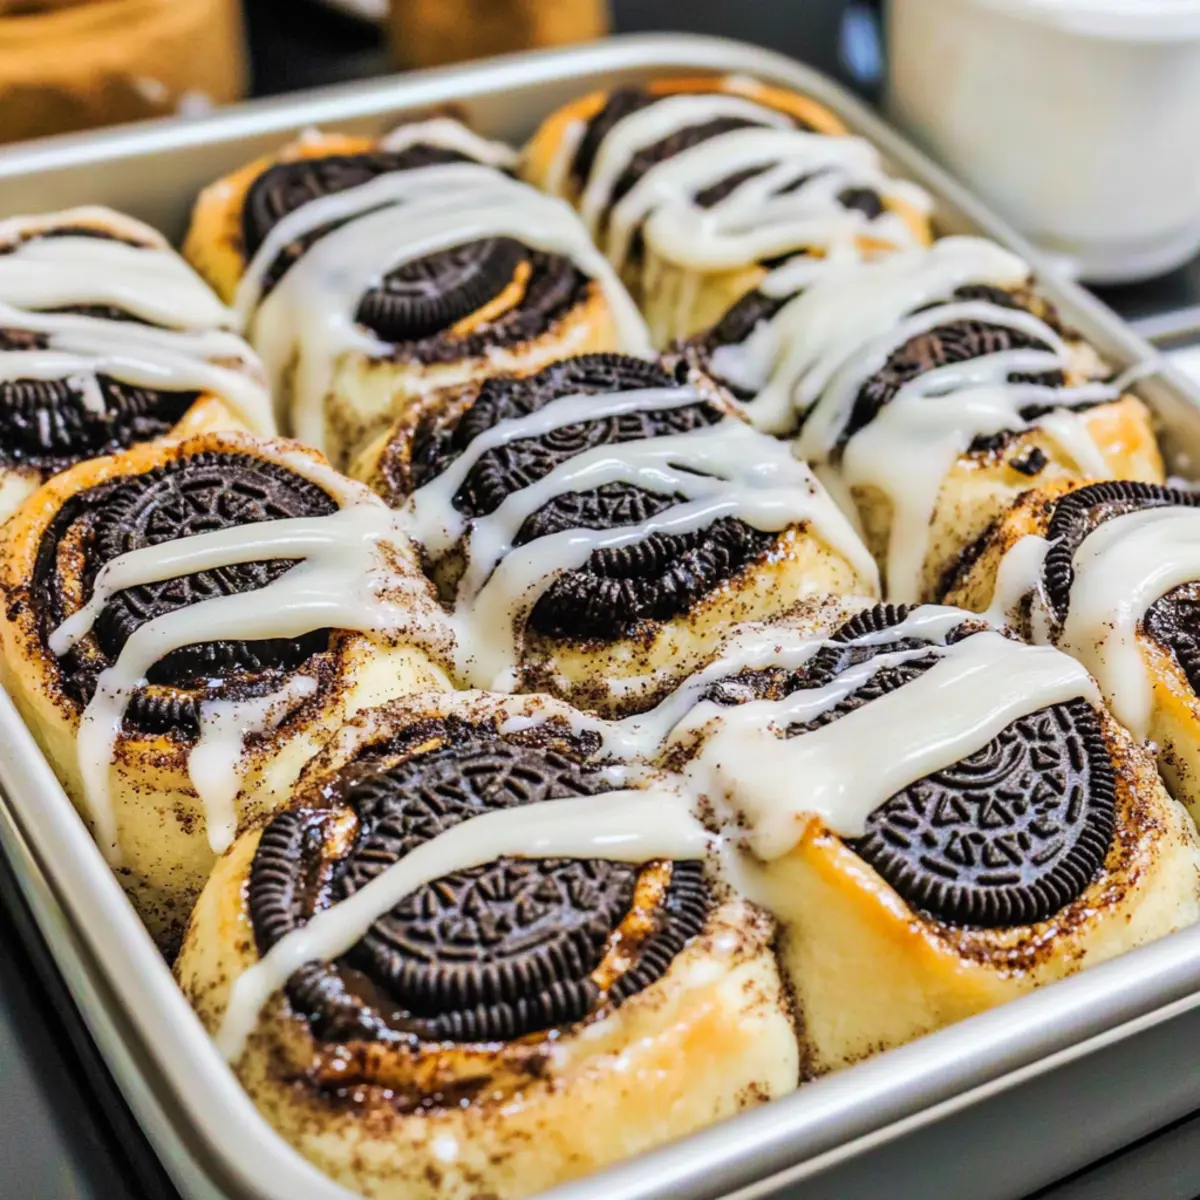
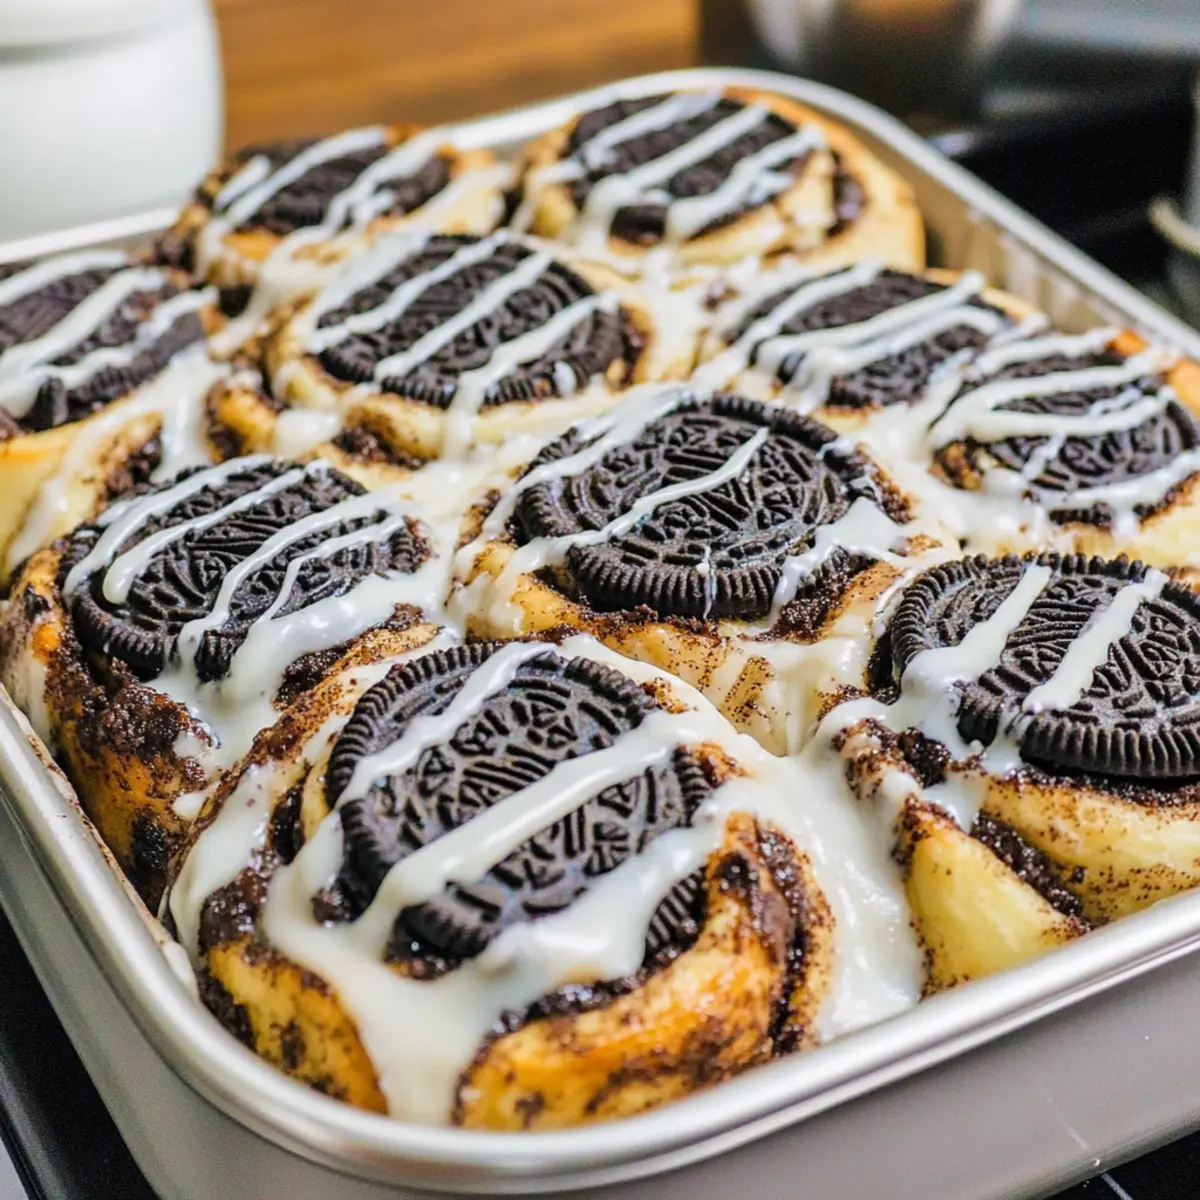
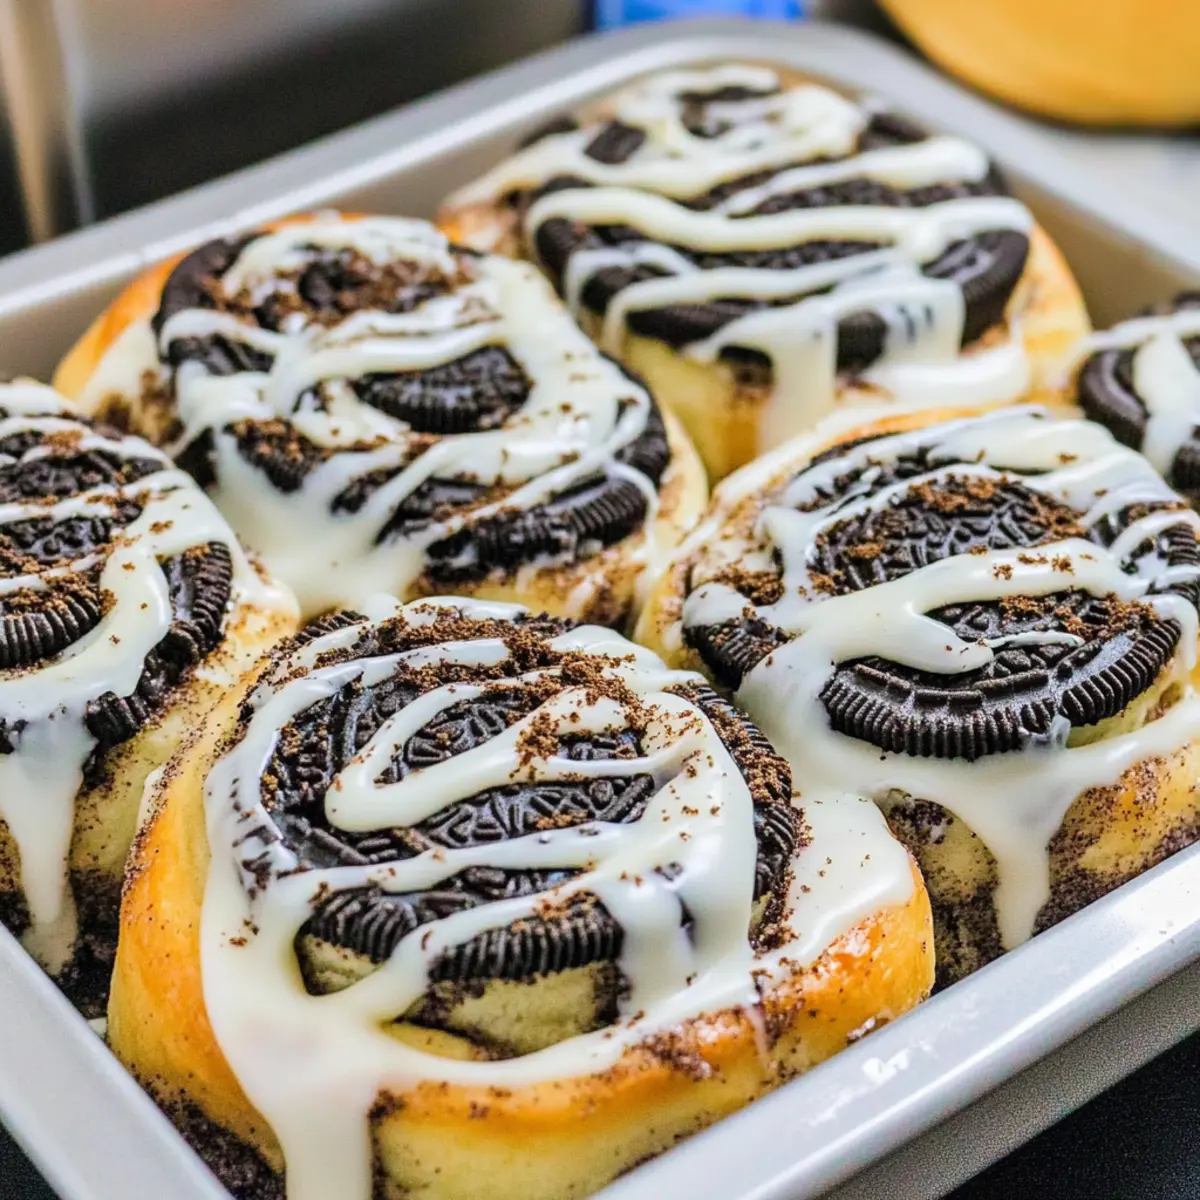
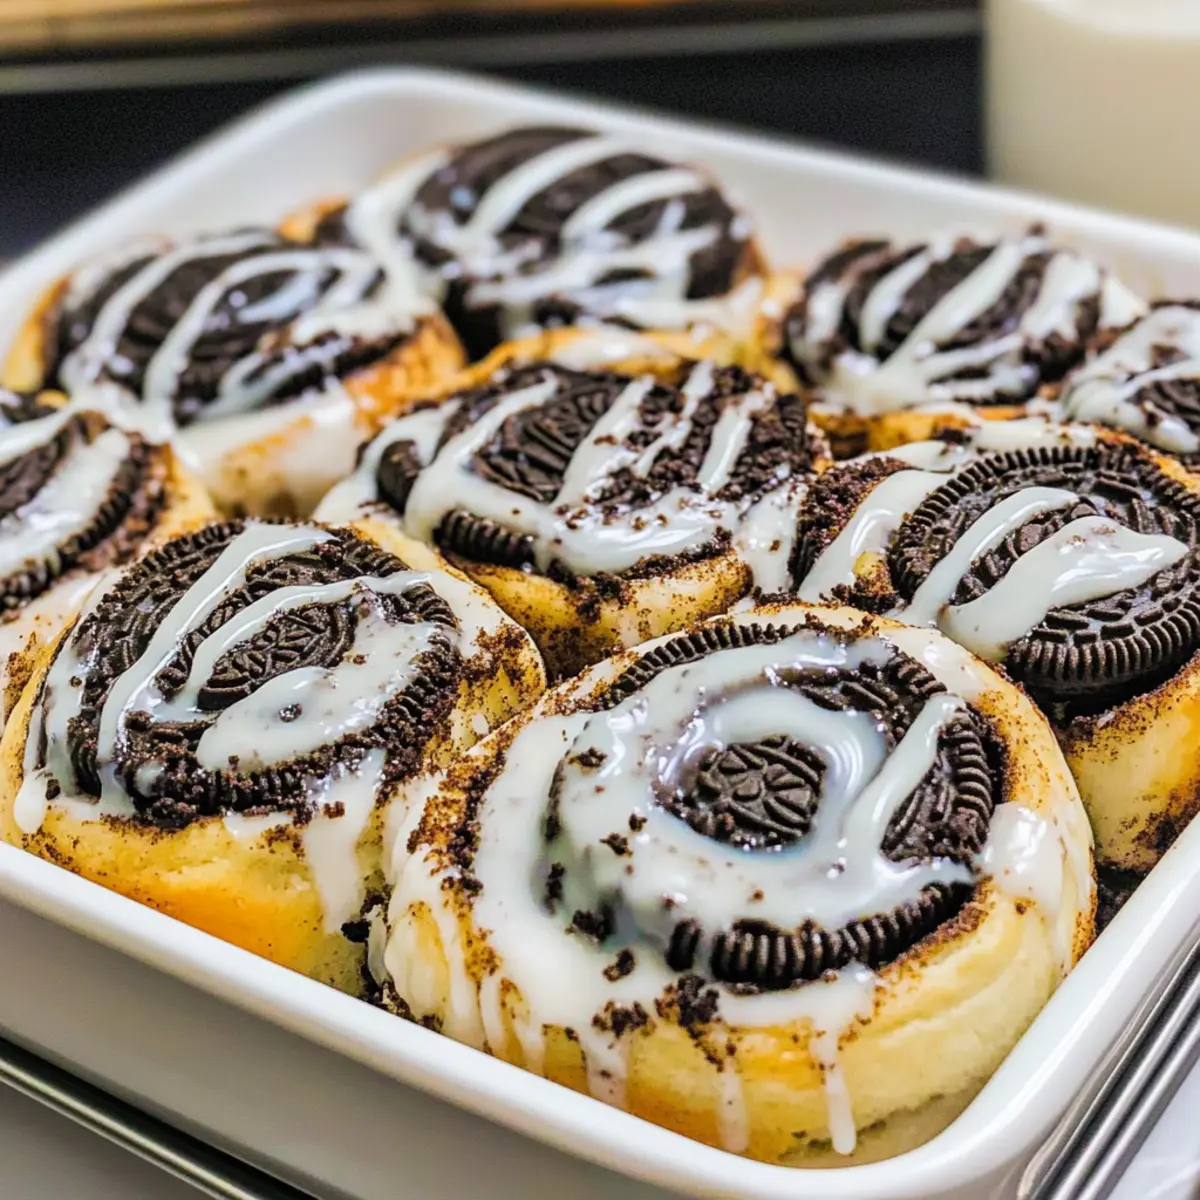
After resting, lightly flour your work surface and roll the dough into a giant rectangle about 12×18 inches. Spread softened unsalted butter evenly over the surface, then generously sprinkle the prepared filling and crushed Oreos on top. The sight of this luscious mixture will entice you even more to dive into the next steps!
Step 6: Shape Rolls
Starting from one long edge, tightly roll the dough into a log shape. Using a sharp knife or dental floss, cut the log into 9 equal pieces. Place the slices in a greased baking pan, ensuring that they are snug yet not overcrowded. This is where your Oreo cinnamon rolls begin to take shape!
Step 7: Initial Rise
Cover the pan with foil and place it in a turned-off oven to rise for 30 minutes. During this time, the dough will expand and become fluffy, setting the stage for those perfect rolls. You’ll notice a lovely aroma starting to build—this is a wonderful sign that things are going well!
Step 8: Bake
Preheat your oven to 350°F (175°C). Once hot, remove the foil from the rolls and bake them for 26-30 minutes until they emerge golden brown and your kitchen is filled with heavenly scents. Keep a watchful eye on these beauties, as you want them to be just the right shade of golden for the perfect texture.
Step 9: Prepare the Glaze
While the rolls are baking, prepare the vanilla glaze. In a bowl, whisk together powdered sugar, softened butter, warm milk, and artificial vanilla extract until smooth and glossy. This will add a sweet finishing touch to your Oreo cinnamon rolls, making them even more indulgent!
Step 10: Cool & Serve
Allow the freshly baked Oreo cinnamon rolls to cool in the pan for about 10-20 minutes. Once slightly cooled, drizzle the luscious glaze generously over the tops of the rolls. Serve warm and watch as everyone devours them, reveling in the perfect blend of flavors that make these rolls a true breakfast delight!
Expert Tips for Oreo Cinnamon Rolls
- Measure with Precision: Use a ruler to ensure your rolled dough is exactly 12×18 inches; this ensures even baking and prevents undercooked centers.
- Use Dental Floss: For clean cuts, use unflavored dental floss instead of a knife to slice the rolls; this prevents squishing and maintains their shape.
- Cool Before Glazing: Allow the rolls to cool for 10-20 minutes before drizzling the glaze; this helps the icing adhere better, resulting in a beautiful finish.
- Dough Consistency: Adjust flour as needed while kneading; if the dough is too sticky, gradually add flour until it feels tacky yet pulls away from the bowl.
- Variations Are Key: Feel free to experiment with different Oreo flavors or add-ins like nuts for a personalized touch in your Oreo cinnamon rolls!
What to Serve with Oreo Cinnamon Rolls
Transform your breakfast into a delightful feast with these warm, sweet, and indulgent rolls fresh out of the oven.
- Creamy Coffee: The rich flavors of coffee perfectly complement the chocolatey goodness of the rolls, enhancing your morning experience.
- Fresh Fruits Salad: A vibrant mix of strawberries, blueberries, and oranges adds a refreshing touch, balancing the sweetness of the rolls.
- Savory Bacon: Crispy, salty bacon contrasts wonderfully with the sweet cinnamon rolls, creating a mouthwatering flavor combination that pleases everyone.
- Whipped Cream: A dollop of fluffy whipped cream elevates the rolls, providing a luscious, creamy texture that mingles with each bite.
- Vanilla Ice Cream: Pair a warm roll with a scoop of vanilla ice cream for an indulgent dessert twist, blending temperatures and flavors.
- Maple Syrup Drizzle: A light drizzle of maple syrup over the rolls adds an extra layer of sweetness, reminiscent of classic breakfast favorites.
- Chai Latte: The warm spices of chai tea enhance the cinnamon in the rolls, making for a cozy and delicious pairing any day of the week.
- Milkshake: A thick, chocolate milkshake offers a double dose of indulgence, satisfying your sweet tooth and perfectly paired with these scrumptious rolls.
- Almond Milk Latte: For a lighter option, an almond milk latte can provide a nutty flavor that complements the rich chocolate without overwhelming the taste buds.
Oreo Cinnamon Rolls Variations & Substitutions
Feel free to explore these fun twists and swaps for your Oreo cinnamon rolls—each choice adds a new layer of flavor and personalization!
- Gluten-Free: Use gluten-free baking flour to make these delicious rolls suitable for a gluten-sensitive diet.
- Minty Fresh: Swap regular Oreos for mint-flavored Oreos to create a refreshing, nostalgic taste reminiscent of your favorite mint desserts.
- Nutty Delight: Add chopped walnuts or pecans to the filling for a delightful crunch that contrasts beautifully with the soft rolls. Imagine the satisfying texture of nutty bites within your warm rolls!
- Extra Chocolatey: Mix in some chocolate chips to the filling for an even richer chocolate experience. It’s a chocolate lover’s dream come true!
- Dairy-Free: Replace whole milk with almond milk and use a dairy-free butter alternative for a fully dairy-free version. Your tastebuds won’t miss the dairy at all.
- Churro Style: Toss the finished rolls in a mixture of cinnamon and sugar right after baking for a churro-inspired treat that adds a delightful sweetness.
- Fruity Twist: Incorporate a layer of mashed bananas or apple sauce in the filling for a fruity flavor that complements the rich chocolatey goodness.
- Spicy Touch: Add a pinch of cayenne or chili powder to the filling for a unique sweet-and-spicy kick. It’s an unexpected twist that intrigues the palate!
For a luscious addition, drizzle your rolls with Cinnamon Honey Butter or serve alongside some Homemade Cinnamon Twists for a delightful breakfast ensemble! Enjoy playing around with these variations!
Make Ahead Options
These delightful Oreo Cinnamon Rolls are perfect for meal prep! You can prepare the dough and shape the rolls up to 24 hours in advance. Simply follow the first six steps, then cover the pan tightly with plastic wrap and refrigerate overnight. This allows the flavors to meld beautifully while making your morning less hectic. When you’re ready to bake, let the rolls sit at room temperature for 30 minutes before the initial rise. Bake as instructed, and enjoy rolls that are just as delicious as if made fresh that day! With this prep method, you can savor the joy of homemade treats without the morning rush.
Storage Tips for Oreo Cinnamon Rolls
Room Temperature: Keep cooled Oreo cinnamon rolls in an airtight container at room temperature for up to 3 days. This keeps them soft and ready to enjoy!
Fridge: For longer freshness, refrigerate the cinnamon rolls in an airtight container for up to 5 days. Just remember to warm them slightly before serving!
Freezer: If you want to prepare in advance, freeze unfrosted, cooled cinnamon rolls individually in plastic wrap for up to 3 months. Thaw and glaze before serving for the best results.
Reheating: To reheat, warm in the oven at 350°F for about 10–15 minutes, or microwave for 20–30 seconds, ensuring the perfect texture returns to your delicious Oreo cinnamon rolls.
Oreo Cinnamon Rolls Recipe FAQs
What’s the best way to select ripe ingredients for these Oreo cinnamon rolls?
Absolutely! For the best results, ensure your milk is slightly warm, about 110°F, as this helps activate the yeast. When choosing Oreos, look for fresh packages without any visible damage or expired dates. Freshness guarantees that their flavor shines in your rolls!
How should I store leftover Oreo cinnamon rolls?
Very well! Once cooled, store them in an airtight container at room temperature for up to 3 days to maintain their softness. If you want to keep them longer, refrigerate them where they’ll stay fresh for up to 5 days. Just be sure to warm them up slightly before indulging again!
Can I freeze the Oreo cinnamon rolls?
Absolutely! For freezing, wrap unfrosted, cooled cinnamon rolls individually in plastic wrap and then place them in a freezer bag. They can last for up to 3 months in the freezer. To serve, simply thaw them in the fridge overnight, then allow them to come to room temperature before glazing and warming them in the oven for about 10-15 minutes.
What are some common troubleshooting tips for baking these rolls?
If your dough isn’t rising, it might be due to using old yeast. Make sure your yeast is fresh and active; it should froth when combined with warm liquid. If the rolls turn out too dense, the dough may have been over-kneaded. Aim for a soft, slightly tacky consistency. Lastly, ensure you’re accurately measuring your ingredients for the best results!
Are Oreo cinnamon rolls safe for anyone with allergies?
Great question! These Oreo cinnamon rolls contain common allergens like dairy, eggs, and gluten. For dairy-free options, substitute milk with almond milk and use a flax egg in place of the regular egg. Always check the packaging of Oreos for any specific allergy warnings and adjust as necessary to accommodate dietary restrictions.
How can I personalize my Oreo cinnamon rolls for different tastes?
The more the merrier! Feel free to swap out regular Oreos for flavored varieties like mint or birthday cake for a unique twist. You can also add chopped nuts or chocolate chips to the filling for added texture and flavor. Just be mindful of adjustments in sugar or moisture levels based on your additions!
Oreo Cinnamon Rolls: Irresistible Chocolatey Breakfast Bliss
Ingredients
Equipment
Method
- Prepare the filling by combining light brown sugar, black cocoa powder, and ground cinnamon in a mixing bowl. Stir until thoroughly mixed and set aside.
- Make the dough by mixing all-purpose flour, instant dry yeast, and fine salt in a large bowl. In another bowl, warm milk and melt unsalted butter until lukewarm. Gradually add the liquid mixture to the flour blend, stirring until a sticky dough forms.
- Knead the dough on a floured surface, adding more flour as needed until it becomes tacky yet pulls away from the bowl easily, about 5-7 minutes.
- Rest the dough in an oiled bowl, cover it with a towel, and let it rise in a warm area for 10-15 minutes until slightly puffy.
- Roll the dough into a rectangle about 12x18 inches. Spread softened unsalted butter over the surface, then sprinkle the prepared filling and crushed Oreos on top.
- Shape the rolls by tightly rolling the dough from one edge into a log and cutting it into 9 equal pieces. Place slices in a greased baking pan.
- Cover the pan with foil and let it rise in a turned-off oven for 30 minutes.
- Preheat the oven to 350°F (175°C). Remove foil and bake for 26-30 minutes until golden brown.
- Prepare the glaze by whisking together powdered sugar, softened butter, warm milk, and artificial vanilla extract until smooth and glossy.
- Allow the rolls to cool for 10-20 minutes, then drizzle the glaze over the tops. Serve warm.
Leave a Reply