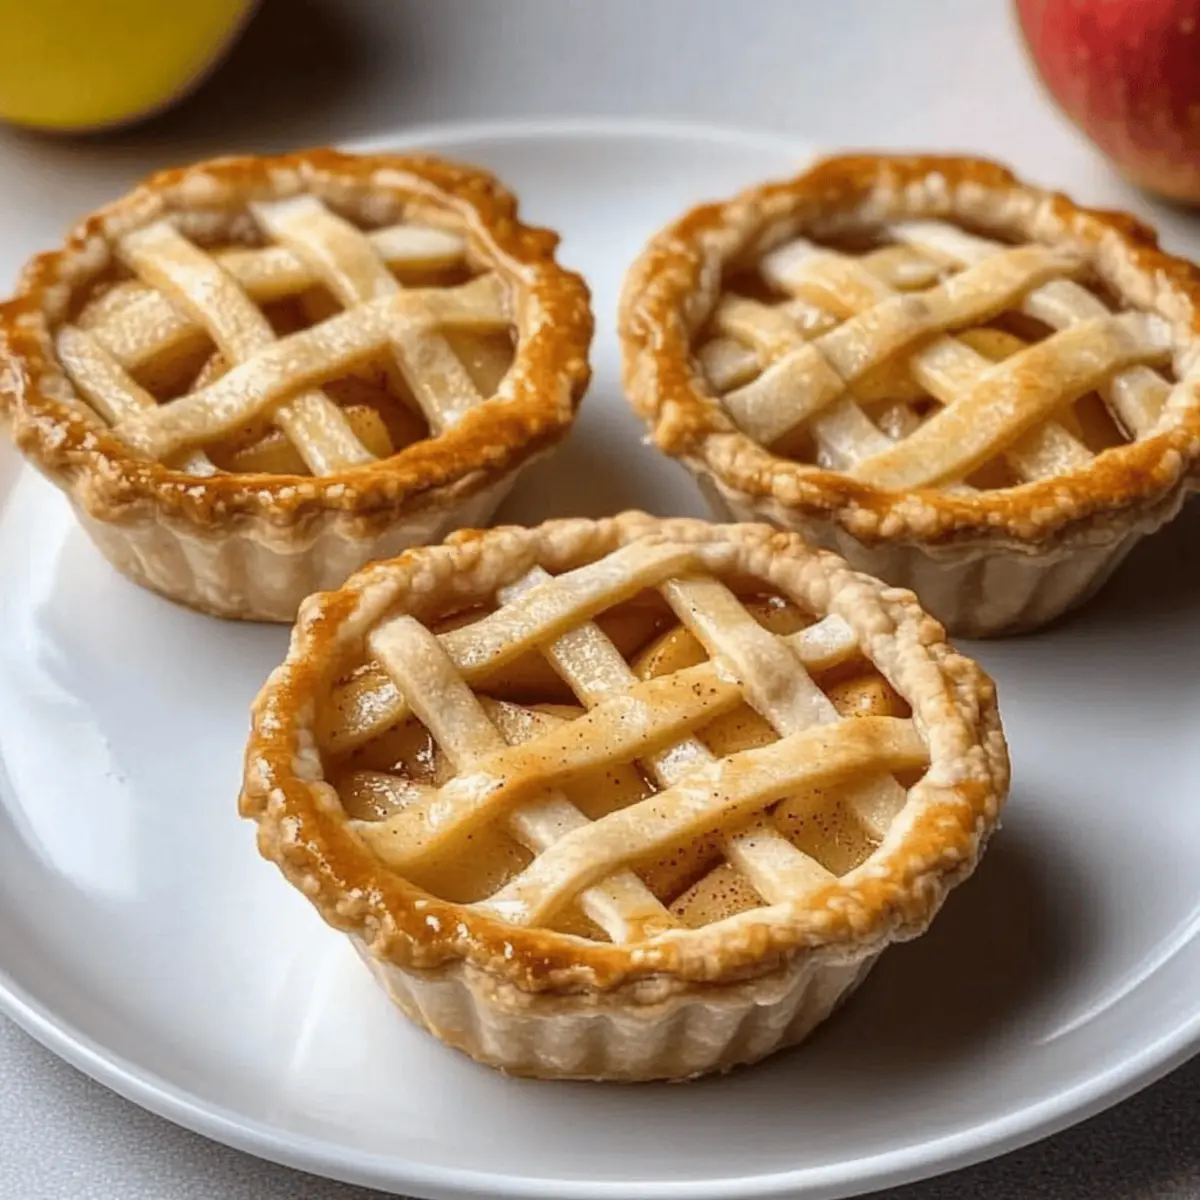
There’s something undeniably enchanting about sinking your teeth into a warm, flaky Mini Apple Pie nestled in your hand. These delightful, bite-sized wonders are not just desserts; they capture the heart of any gathering with their sweet and tangy filling of apples spiced to perfection. What I adore about making Mini Apple Pies is that they are incredibly quick to prepare, making them the ultimate go-to treat for everything from holidays to casual get-togethers. Plus, they’re perfect for lunchboxes, adding a charming homemade touch to your day!
Ready to whip up your own delicious batch and fill your kitchen with the warm scent of cinnamon and apples? Let’s get started!

Why Are Mini Apple Pies Irresistible?
Delightful Bites: These mini apple pies are the perfect size for satisfying your sweet cravings without the guilt of a big dessert.
Easy and Quick: You can whip these up in no time, making them ideal when surprise guests drop by or when you need a last-minute treat.
Customizable: Use store-bought or homemade dough, and feel free to mix up the apple varieties to suit your taste. I love adding a sprinkle of nutmeg for a warm twist!
Crowd-Pleaser: Their charming size and festive aroma make them a hit at any gathering, from cozy family dinners to holiday celebrations.
Perfect Texture: Experience the magic of a crispy, flaky crust cradling a gooey, apple-filled center that is reminiscent of your grandma’s kitchen.
Looking for more apple-inspired desserts? Try out my Apple Crumble Warm or get cozy with a slice of Apple Cobbler Buttery. Both will surely sweeten your day!
Mini Apple Pies Ingredients
For the Filling
• Medium Granny Smith Apples – Provides tartness and structure; can substitute with other tart apples like Braeburn if needed.
• Light Brown Sugar – Adds rich sweetness and depth; coconut sugar works as a less refined alternative.
• Granulated Sugar – Balances the tartness of the apples; feel free to use white sugar instead.
• All-Purpose Flour – Helps create the filling consistency; use a gluten-free all-purpose blend for gluten-free options.
• Ground Cinnamon – Enhances flavor with warm spice notes; nutmeg can be an interesting swap for a different flavor twist.
• Lemon Juice – Brightens the flavor of the filling; lime juice is a great alternative for a refreshing touch.
For the Dough
• Pie Dough Rounds (pre-made or homemade) – Encases the filling and provides structure; ensure it’s chilled for easier handling before use.
Ready to bring that warmth of home into your kitchen? Gather these ingredients and let’s make some delightful mini apple pies!
Step‑by‑Step Instructions for Mini Apple Pies
Step 1: Prepare the Filling
In a large mixing bowl, combine diced Medium Granny Smith apples, light brown sugar, granulated sugar, all-purpose flour, ground cinnamon, and lemon juice. Toss the ingredients together until the apples are well coated, and their juices begin to mingle with the sugars, creating a delicious blend. Set the bowl aside for about 10 minutes to allow the flavors to meld.
Step 2: Roll Out the Dough
If you’re using homemade dough, roll it out on a floured surface until it’s about 1/8-inch thick. Use a round cutter to cut out circles or squares that will fit neatly into muffin tins, pressing the dough into each cavity to form the bases for your mini pies. Ensure the dough is chilled before use to maintain its flakiness and set aside any scraps for topping later.
Step 3: Assemble the Pies
Preheat your oven to 375°F (190°C). Carefully spoon the prepared apple filling into each dough-lined muffin tin, filling them generously but avoiding overfilling to prevent spills. If desired, use additional rounds of dough to cover the tops, sealing the edges by pressing them together with a fork. Create small slits on the top dough to allow steam to escape while baking.
Step 4: Bake the Mini Apple Pies
Place the muffin tin in the preheated oven and bake the mini apple pies for 20–25 minutes, or until the crust is golden brown and the apple filling is bubbling through the slits. Keep an eye on the pies as they bake, looking for that alluring golden hue that signifies they are done and ready to be enjoyed.
Step 5: Cool & Serve
Once baked, remove the muffin tin from the oven and let the mini apple pies cool in the pan for about 10 minutes. This allows the filling to set slightly and makes them easier to remove. Gently loosen the edges with a knife, then carefully lift them out. Best served warm, these mini delights pair beautifully with a scoop of vanilla ice cream.

Mini Apple Pies Variations & Substitutions
Feel free to get creative with your mini apple pies and make them truly yours!
- Dough Type: Use store-bought or homemade dough depending on your time and preference—both will yield delicious results!
- Apple Varieties: Swap Granny Smith apples for Honeycrisp or Jonagold to bring a different flavor profile to your filling.
- Sweetness Adjustments: Try using maple syrup or honey instead of granulated sugar for a natural sweetener twist, enhancing that charming taste.
- Add-Ins: Incorporate dried cranberries or raisins into the apple filling for a delightful texture and burst of sweetness.
- Top It Off: Instead of a crust, sprinkle a crumbly streusel topping for added crunch and a rustic presentation. It’s like a cozy blanket for your pies!
- Spice It Up: Don’t just stick to cinnamon—experiment with a hint of ginger or cardamom to create a warm, exotic flair in the filling.
- Citrus Alternatives: Swap lemon juice for orange juice to add a bright, zestful surprise that pairs wonderfully with apples.
- Nutty Twists: Toss in some chopped pecans or walnuts to the filling for an added layer of flavor and delightful crunch.
Looking for more apple-filled inspiration? You can’t go wrong with my sweet and crispy Apple Crumble Warm or indulge in the buttery goodness of an Apple Cobbler Buttery. Both options will surely satisfy your apple cravings!
Make Ahead Options
These Mini Apple Pies are fantastic for busy cooks looking to save time without sacrificing flavor! You can prepare the apple filling up to 24 hours in advance. Simply mix the diced apples with sugars, flour, cinnamon, and lemon juice, then store it in an airtight container in the refrigerator to maintain freshness. Additionally, you can prep the dough rounds a day before, keeping them chilled in the fridge. When you’re ready to enjoy your delicious pies, assemble and bake them directly from the fridge, ensuring a cozy treat with just the right flakiness and flavor, all with minimal effort on your special day!
What to Serve with Mini Apple Pies
Indulging in these sweet, golden mini apple pies sparks cravings for complementary flavors and textures to create the perfect meal experience.
-
Vanilla Ice Cream: A scoop of rich vanilla ice cream adds a creamy contrast to the warm, spiced filling, making each bite even more delightful. It melts just slightly with the heat of the pie, giving you that blissful hot-and-cold sensation.
-
Whipped Cream: Light and airy whipped cream provides a beautiful finish to the pies. Its sweetness amplifies the apple’s natural flavor, making it a charming companion on top or on the side.
-
Caramel Sauce: Drizzling warm caramel sauce over the mini pies enhances their sweetness while adding a luscious, gooey texture. The rich flavor brings out the spiced notes beautifully.
-
Fresh Berries: A generous side of fresh, tart berries like raspberries or blueberries offers a refreshing contrast, balancing the sweetness of the pies with their vibrant acidity. Their juiciness brightens the entire dessert experience.
-
Coffee or Tea: Pairing a steaming cup of coffee or fragrant tea with your mini apple pies creates a warm and comforting atmosphere, ideal for savoring these treats with loved ones. The slight bitterness of coffee nicely offsets the sweetness.
-
Cheddar Cheese: Surprising yet delightful, a slice of sharp cheddar cheese can complement the sweet and spicy notes of the mini pies. The creaminess of the cheese pairs wonderfully with the flaky crust, creating an unexpected balance of flavors.
-
Chocolate Sauce: For a twist, try drizzling some chocolate sauce over your mini apple pies for a touch of decadence. This indulgent addition offers a delightful contrast to the cinnamon and apple filling, making for a truly delightful treat.
Storage Tips for Mini Apple Pies
Room Temperature: Store leftover mini apple pies in an airtight container at room temperature for up to 2 days for optimal freshness.
Fridge: If you want to keep them longer, refrigerate mini apple pies in a tightly sealed container for up to 5 days. This helps retain their delicious flavor and texture.
Freezer: For longer storage, freeze the mini apple pies in a single layer on a baking sheet, then transfer them to a freezer bag or airtight container for up to 3 months.
Reheating: To enjoy frozen mini apple pies, thaw them overnight in the fridge, then reheat in a 350°F (175°C) oven for about 10-15 minutes until warmed through.
Expert Tips for Mini Apple Pies
• Perfectly Diced Apples: Ensure your apples are evenly diced for consistent cooking and flavor throughout. This avoids any overly crunchy or mushy bites.
• Chill Your Dough: Use chilled ingredients for making the dough to maintain its flakiness; warm dough may lead to tough pies.
• Mind Your Bake Time: Keep a close eye on the baking time; overbaking can result in a tough crust. Aim for that lovely golden brown finish!
• Flavor Boost: Experiment with adding a splash of vanilla extract or a pinch of nutmeg to the filling for an extra burst of flavor in your mini apple pies.
• Prevent Spills: Don’t overfill the pies to prevent the delicious filling from bubbling over. Just fill them generously for the perfect balance!
Mini Apple Pies Recipe FAQs
What type of apples should I use for the filling?
Absolutely! Medium Granny Smith apples are your best bet for adding tartness and structure. However, you can also opt for other tart apples such as Braeburn or Honeycrisp for a sweeter twist. Always ensure they are firm and free from dark spots for the best results!
How should I store leftover mini apple pies?
To keep your delicious mini apple pies fresh, store them in an airtight container at room temperature for up to 2 days. If you want them to last a bit longer, refrigerate them for up to 5 days. Make sure they’re fully cooled before sealing to avoid moisture buildup!
Can I freeze mini apple pies?
Certainly! To freeze mini apple pies, first, place them in a single layer on a baking sheet and freeze until solid. Then transfer them to a freezer bag or an airtight container, where they will keep well for up to 3 months. For reheating, thaw overnight in the fridge and warm them in the oven at 350°F (175°C) for about 10–15 minutes.
What if my pie crust becomes tough?
Very! To ensure a tender crust, remember to chill your ingredients before mixing; this helps maintain flakiness. Also, be cautious not to overwork the dough when rolling and shaping it. If you notice your mini apple pies are browning too quickly in the oven, cover them gently with foil to prevent burning while the filling continues to cook.
Are mini apple pies suitable for gluten-free diets?
Yes, they can be! Simply use a gluten-free all-purpose flour blend in place of regular flour for the crust, and ensure that the pie dough you use is gluten-free if you’re going with store-bought. Your family and friends with dietary restrictions can enjoy these delightful mini apple pies too!
How can I ensure my filling doesn’t overflow during baking?
It’s a great question! To prevent spills, make sure not to overfill the pie shells—leave just enough room so the filling can bubble without escaping. Additionally, cutting small slits in the dough covering can help steam escape, keeping the pies intact and delightful.
Mini Apple Pies That Warm Your Heart and Tickle Your Tastebuds
Ingredients
Equipment
Method
- In a large mixing bowl, combine diced Medium Granny Smith apples, light brown sugar, granulated sugar, all-purpose flour, ground cinnamon, and lemon juice. Toss until the apples are well coated and set aside for about 10 minutes.
- Roll out homemade dough on a floured surface until 1/8-inch thick. Cut out circles or squares for muffin tins, pressing into each cavity to form bases.
- Preheat oven to 375°F (190°C). Spoon apple filling into each dough-lined muffin tin, avoiding overfilling. Optionally cover with additional dough rounds, sealing edges and creating slits for steam.
- Bake for 20–25 minutes or until crust is golden brown and filling is bubbling. Watch for the golden hue.
- Cool in the pan for about 10 minutes, then loosen the edges with a knife and carefully lift them out. Best served warm with vanilla ice cream.
Leave a Reply