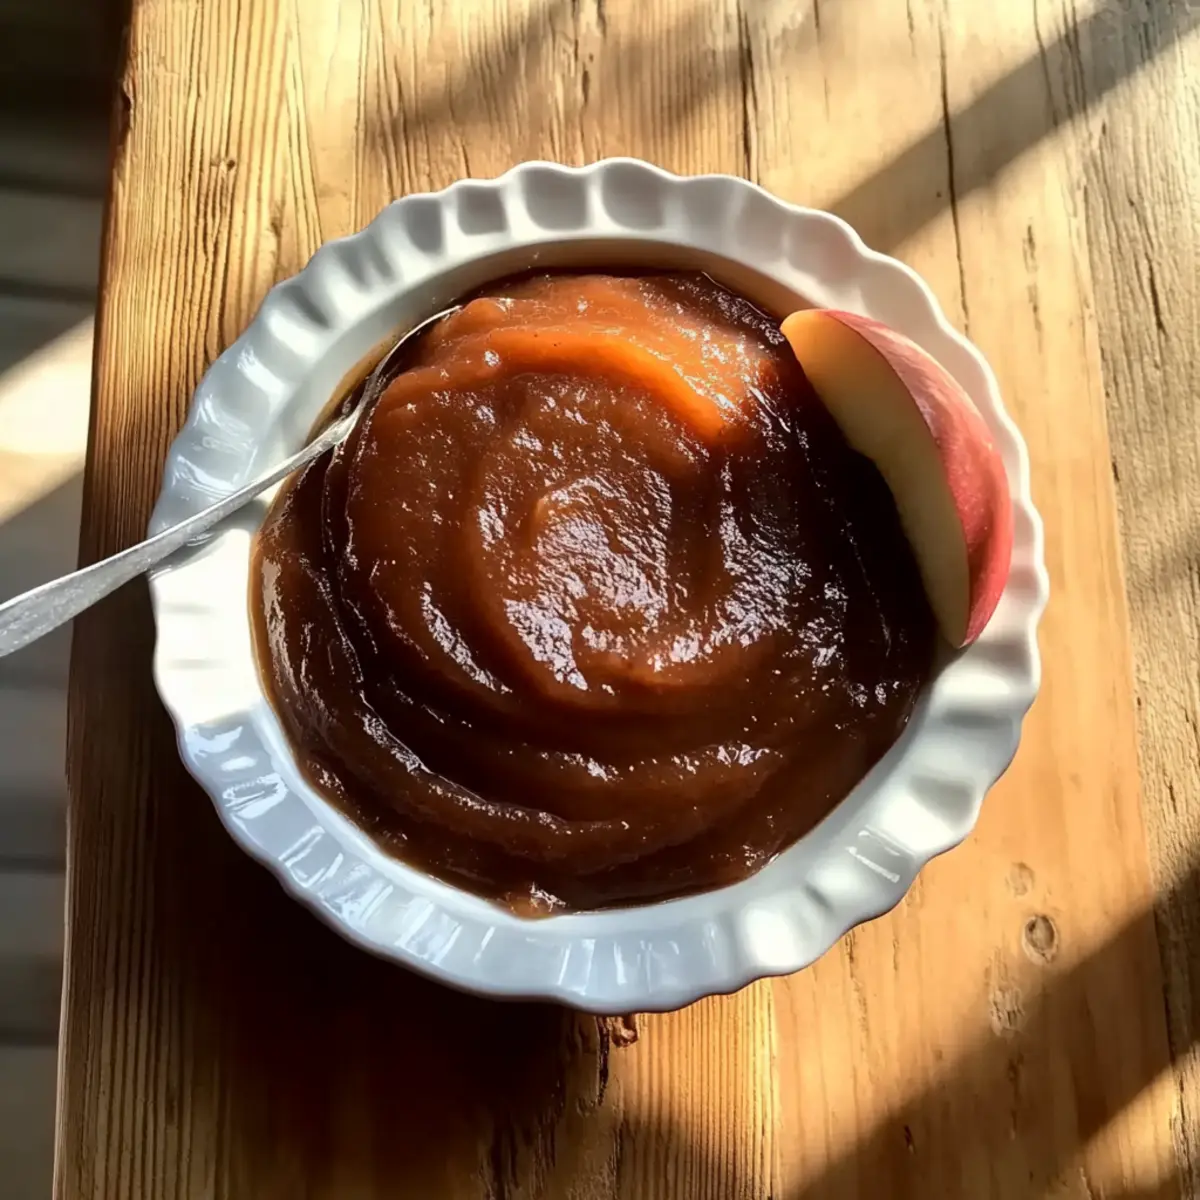
As I peeled back the skin of a freshly picked apple, the crisp sound echoed the promise of autumn’s bounty. With every slice, I could already envision the rich, smooth homemade apple butter from scratch that would soon fill my kitchen with a welcoming aroma. This delightful spread is not just simple to prepare but also perfect for canning, allowing you to savor that fall essence long after the leaves have fallen. Plus, you’ll enjoy a wholesome flavor that’s far superior to any store-bought option, thanks to the balance of sweet and tart apples paired with delicate spices. Ready to turn your apples into something magical? Let’s dive into the heart of this recipe!
Why Make Homemade Apple Butter?
Wholesome goodness: There’s nothing quite like the taste of homemade apple butter, bursting with fresh apple flavor and the warm spices of autumn. Two easy methods mean you can choose the convenience of a slow cooker or the hands-on approach of stovetop cooking! Versatile and delicious, it pairs perfectly with breakfast muffins, baked goods, or cheese boards. Plus, this gluten-free treat makes for an impressive homemade gift! For more delightful fall flavors, check out our Apple Crumble Warm or Mini Apple Pies recipes!
Homemade Apple Butter Ingredients
• For the Apple Base
- Apples – Choose a mix of sweet and tart varieties for a balanced flavor in your homemade apple butter.
- Lemon Juice – Adds acidity and helps preserve the beautiful color of the apples; can be swapped with apple cider vinegar if desired.
• For Sweetness and Spice
- Sugar – Use to taste; this enhances sweetness to balance any tartness from the apples, making your spread delightful!
- Cinnamon – A warm spice that brings a cozy aroma and flavor to your apple butter.
- Nutmeg – A touch of nutmeg adds depth and warmth, making your homemade apple butter even more delightful.
- Cloves – Provides a rich, aromatic flavor; use sparingly for a touch of spice.
With these simple ingredients, you’re ready to explore the delicious world of homemade apple butter from scratch!
Step‑by‑Step Instructions for Homemade Apple Butter from Scratch
Step 1: Prepare the Apples
Start by rinsing your apples thoroughly and then core and chop them into small pieces, leaving the skin on for added flavor and nutrients. Aim for about one-inch chunks to ensure they cook evenly. You’ll need a large mixing bowl to hold the chopped apples as you prep your ingredients for homemade apple butter.
Step 2: Combine Ingredients
In a large pot or slow cooker, combine the chopped apples with the sugar, lemon juice, cinnamon, nutmeg, and cloves. Stir well to ensure the apples are evenly coated in the spices and sugar. If using a slow cooker, set it to low to begin cooking the mixture. You should see the sugar start to dissolve and the apples begin to release their juices almost immediately.
Step 3: Cook the Mixture
For the slow cooker method, cover and cook the mixture on low for 6-8 hours, stirring occasionally until the apples are incredibly soft and the mixture has thickened. If you prefer the stovetop method, set the heat to medium and cook, stirring regularly for about 1.5 to 2 hours. The apples will break down, and you’ll notice a rich aroma filling your kitchen as they caramelize beautifully.
Step 4: Blend the Apple Butter
Once the apples are tender and the mixture has thickened for your homemade apple butter, it’s time to blend. Using an immersion blender, puree the mixture until you reach your desired smoothness. If you prefer a slightly chunky texture, pulse it a few times instead. If you don’t have an immersion blender, carefully transfer the mixture in batches to a regular blender.
Step 5: Store or Can the Apple Butter
Finally, transfer the blended apple butter into sterilized jars while it’s still hot. For refrigerator storage, allow the jars to cool completely before sealing them; they will keep for up to four weeks. If you want to store them for a longer period, follow proper water bath canning techniques to seal the jars for shelf stability, and label them with the date.
Expert Tips for Homemade Apple Butter
• Apple Variety Blend: Use a mix of sweet and tart apples like Honeycrisp and Granny Smith for well-rounded flavor in your homemade apple butter.
• Cooking Patience: Slow cooking deepens flavors, so resist the urge to rush the process; it will be worth the wait!
• Proper Canning Techniques: Always follow water bath canning guidelines to ensure your apple butter stays fresh and safe for long-term storage.
• Spice Customization: Feel free to adjust spices to your taste; adding ginger or allspice can create delicious twists.
• Thickening Tips: If your apple butter isn’t thickening, continue cooking uncovered, allowing moisture to evaporate for that perfect spreadable consistency.
Make Ahead Options
These homemade apple butter preparations are perfect for busy home cooks looking to streamline their meal planning! You can prepare the apples and combine them with the sugar and spices up to 24 hours in advance; just refrigerate the mixture in an airtight container to maintain freshness. When you’re ready to cook, pour the mixture into your slow cooker or pot, then proceed with the cooking instructions as mentioned. By prepping ahead, you’ll save valuable time without sacrificing flavor, resulting in a rich and smooth homemade apple butter that’s just as delicious as if you made it fresh that day!
How to Store and Freeze Homemade Apple Butter
Fridge: Store your homemade apple butter in a sealed jar in the refrigerator for up to 4 weeks, enjoying its fresh flavor throughout the month.
Freezer: For longer storage, freeze apple butter in airtight containers or freezer bags for up to 6 months. Label with the date for easy tracking.
Canning: If you opt for canning, follow proper water bath canning techniques to ensure your apple butter is shelf-stable. Properly sealed jars can last up to a year in a cool, dark place.
Reheating: If you like your apple butter warm, simply reheat in the microwave or on the stovetop over low heat, stirring gently until warmed through.
Homemade Apple Butter Variations
Feel free to get creative and customize your homemade apple butter for every taste and occasion!
- Sugar-Free: Substitute sugar with your favorite sweetener, like maple syrup or honey, to keep it guilt-free. Sweet reminders of autumn aren’t limited to just sugar!
- Spiced Up: Add a pinch of cayenne pepper or red pepper flakes for a subtle heat that pairs perfectly with the sweetness of the apples. It’s a surprising twist that’ll excite your palate!
- Fruit Fusion: Mix in other fruits like pears or cranberries for a unique flavor profile. These fruits add delightful complexity and a seasonal flair to your apple butter!
- Nutty Goodness: Stir in some crushed nuts like pecans or walnuts before blending for a satisfying crunch and nutty flavor. Think of it as a delicious, textural surprise!
- Herb Infusion: Add a sprig of rosemary or thyme while cooking for an aromatic kick that elevates your apple butter to a gourmet level. You’ll be amazed at how herbs can transform the flavor!
- Vanilla & More: Incorporate vanilla extract or a splash of bourbon for deeper flavor notes. This comforting addition will warm your heart with each spoonful!
- Citrus Zest: Grate in some orange or lemon zest for a bright, zesty lift that complements the apple’s sweetness beautifully. These citrus notes will really brighten your spread!
- Vegan Option: Replace regular sugar with coconut sugar or agave nectar to craft a delicious vegan apple butter. Everyone can enjoy this autumn treat!
Embrace your creative side with these variations and don’t forget to try pairing your delicious spread on toast or pancakes, or even enhancing your favorite cheese boards with your flavorful homemade apple butter! To explore more delectable ideas, check out our Classic Apple Crumble New or Cinnamon Honey Butter recipes!
What to Serve with Homemade Apple Butter?
There’s something truly magical about crafting a cozy, comforting meal that warms the heart and delights the senses.
-
Warm Biscuits: Flaky and buttery, these biscuits provide the perfect vehicle for the sweet, spiced flavors of homemade apple butter. Spread generously for a hearty breakfast treat!
-
Creamy Mashed Potatoes: The smooth, creamy texture of mashed potatoes balances the sweet and tangy notes of apple butter, making for an unexpected yet delightful pairing.
-
Grilled Cheese Sandwiches: The melty, savory goodness of a grilled cheese sandwich combined with the sweetness of apple butter creates a comforting flavor harmony perfect for a cozy lunch.
-
Pancakes or Waffles: Drizzle homemade apple butter atop pancakes or waffles for an autumn-inspired breakfast that celebrates the season’s finest flavors. It’s a sweet twist on your classic morning favorites.
-
Charcuterie Board: Include a small dish of homemade apple butter on your cheese board; it pairs beautifully with sharp cheeses and cured meats, elevating your snack game for gatherings.
-
Roasted Pork Loin: The rich flavors of roasted pork loin are enhanced by a dollop of apple butter, bringing a lovely sweetness to a savory dish. It’s a delightful centerpiece for any dinner.
-
Vanilla Yogurt Parfait: Swirl homemade apple butter into vanilla yogurt, layered with granola and fresh fruit for a refreshing breakfast or dessert that captures autumn in every bite.
Each of these pairings invites a flavorful experience, transforming homemade apple butter into the star of your table.
Homemade Apple Butter from Scratch Recipe FAQs
What type of apples should I use for homemade apple butter?
Absolutely, the best approach is to use a combination of sweet and tart apples. I recommend mixing Honeycrisp for sweetness and Granny Smith for a bit of tartness. This blend creates a well-rounded flavor that enhances your homemade apple butter.
How do I store homemade apple butter, and how long does it last?
For refrigerator storage, keep your homemade apple butter in a sealed jar; it will stay fresh for up to 4 weeks. If you plan on canning, follow proper water bath canning methods, and your sealed jars can last nearly a year in a cool, dark location. Always label your jars with dates for reference!
Can I freeze homemade apple butter, and how do I do it?
Very much so! To freeze your homemade apple butter, simply transfer it into airtight containers or freezer bags, leaving some space for expansion. It’s best to consume this frozen treat within 6 months. Don’t forget to label the containers with the date for easy tracking!
What should I do if my apple butter isn’t thickening properly?
If you find your homemade apple butter remains too runny, don’t worry! Just continue cooking it uncovered on low heat. This allows excess moisture to evaporate. Stir frequently to avoid sticking, and check for thickness every 15 minutes until you reach that rich, spreadable consistency.
Is homemade apple butter gluten-free?
Yes, indeed! Homemade apple butter from scratch is naturally gluten-free, making it a delightful option for anyone with gluten sensitivities. Just be sure to check any labels on ingredients should you choose specific spices or sugar blends.
Can I use apple cider vinegar instead of lemon juice?
Absolutely, you can swap lemon juice for apple cider vinegar if you prefer! Both add acidity and flavor, enhancing the overall depth of your homemade apple butter. Just use the same amount as the recipe calls for lemon juice.
Homemade Apple Butter from Scratch: Cozy Fall Delight
Ingredients
Equipment
Method
- Prepare the Apples: Rinse, core, and chop the apples into small pieces, leaving the skin on.
- Combine Ingredients: In a pot or slow cooker, mix chopped apples with sugar, lemon juice, and spices.
- Cook the Mixture: Cook on low for 6-8 hours in a slow cooker or on medium for 1.5-2 hours on the stovetop.
- Blend the Apple Butter: Use an immersion blender to puree the mixture to desired smoothness.
- Store or Can the Apple Butter: Transfer to sterilized jars while hot and seal for storage.
Leave a Reply