As the chill of winter creeps in, there’s nothing quite like the anticipation of a warm slice of cake to snuggle up with. My rich Hot Chocolate Cake is not just a dessert; it’s a cozy experience that captures the essence of that beloved classic winter drink. With its moist texture and tender crumb, this cake is surprisingly versatile—you can dress it up with toppings like luscious whipped ganache or classic cocoa buttercream, making it the star of any celebration or a delightful treat for a quiet night in. Easy to whip up yet profoundly satisfying, it’s the perfect way to escape the fast food rut—why compromise when homemade goodness is just a mix away? Ready to indulge your sweet tooth with a slice of decadence? Let’s dive in!
Why Is This Cake a Must-Try?
Irresistible Flavor: The rich chocolate flavor mirrors the warmth of a classic hot chocolate, making this cake incredibly comforting and indulgent.
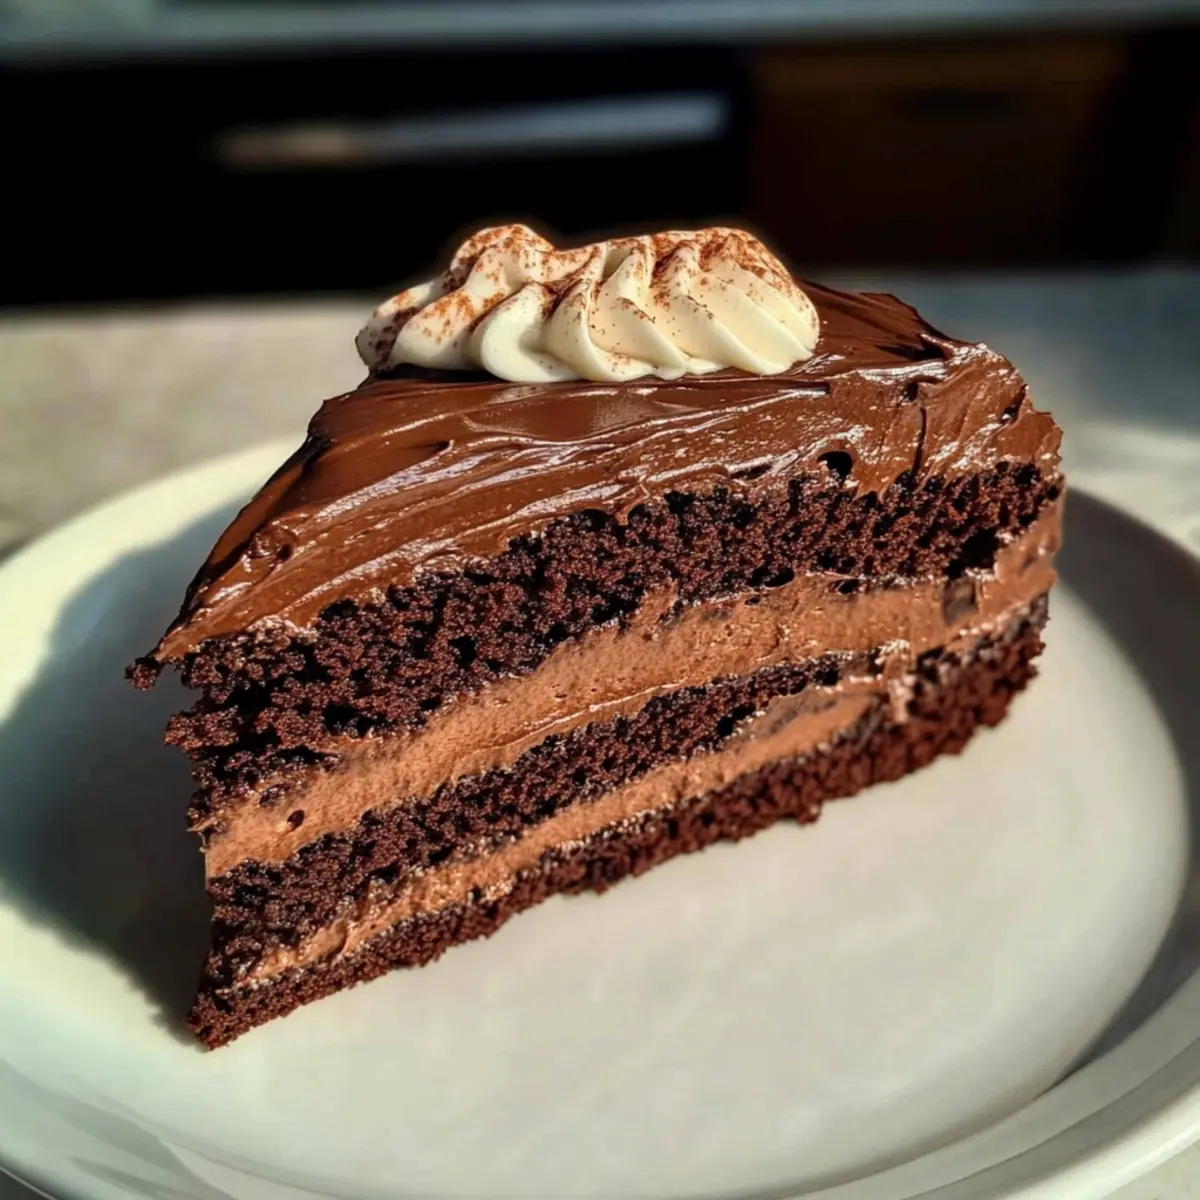
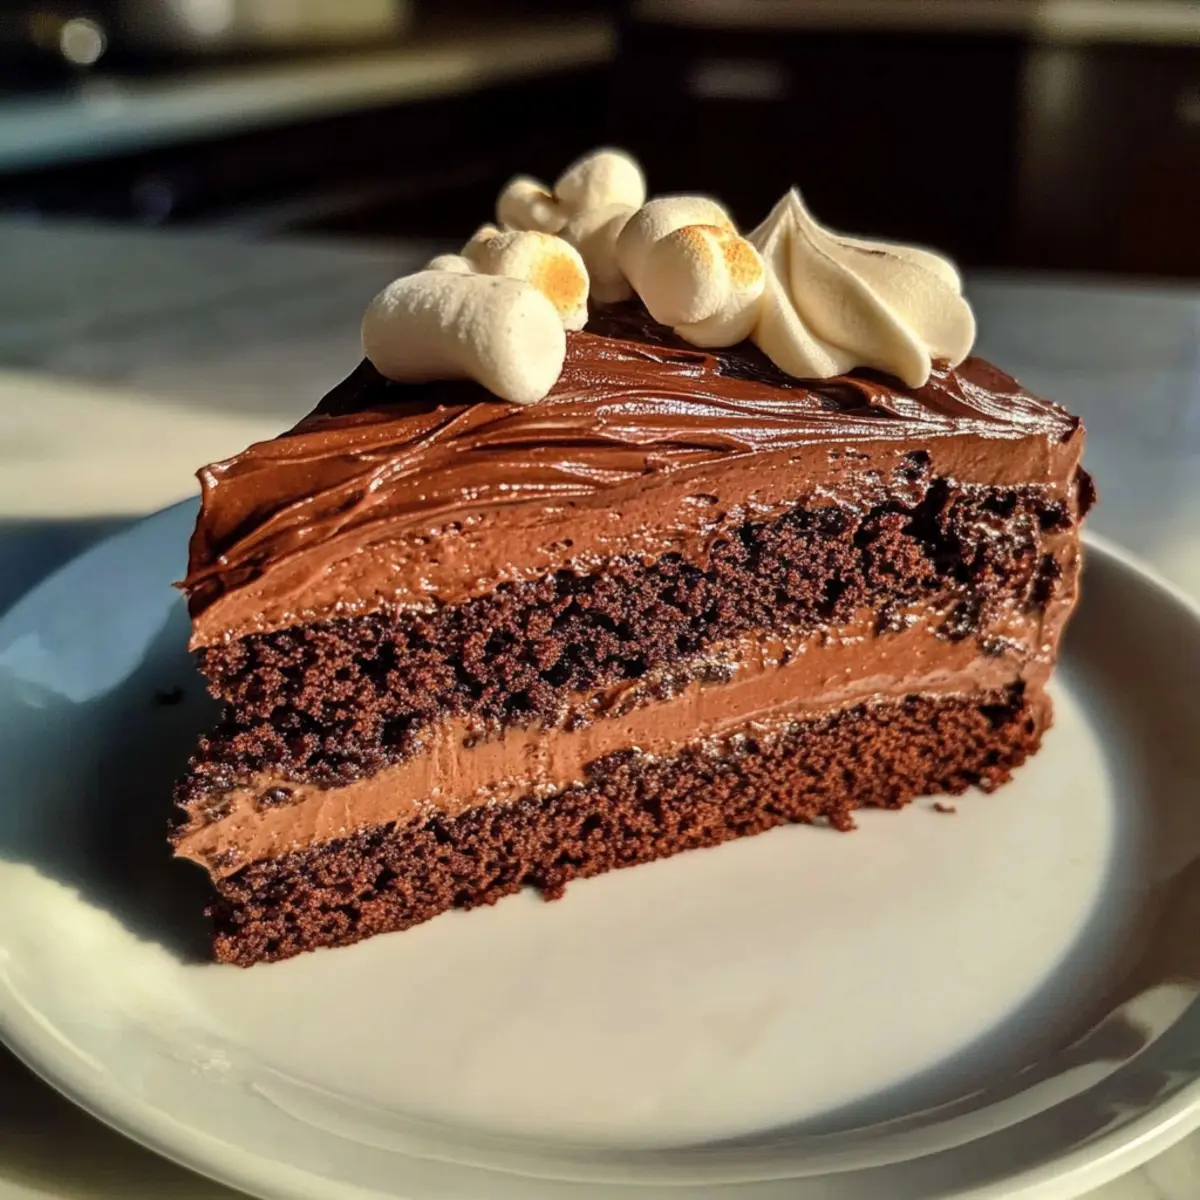
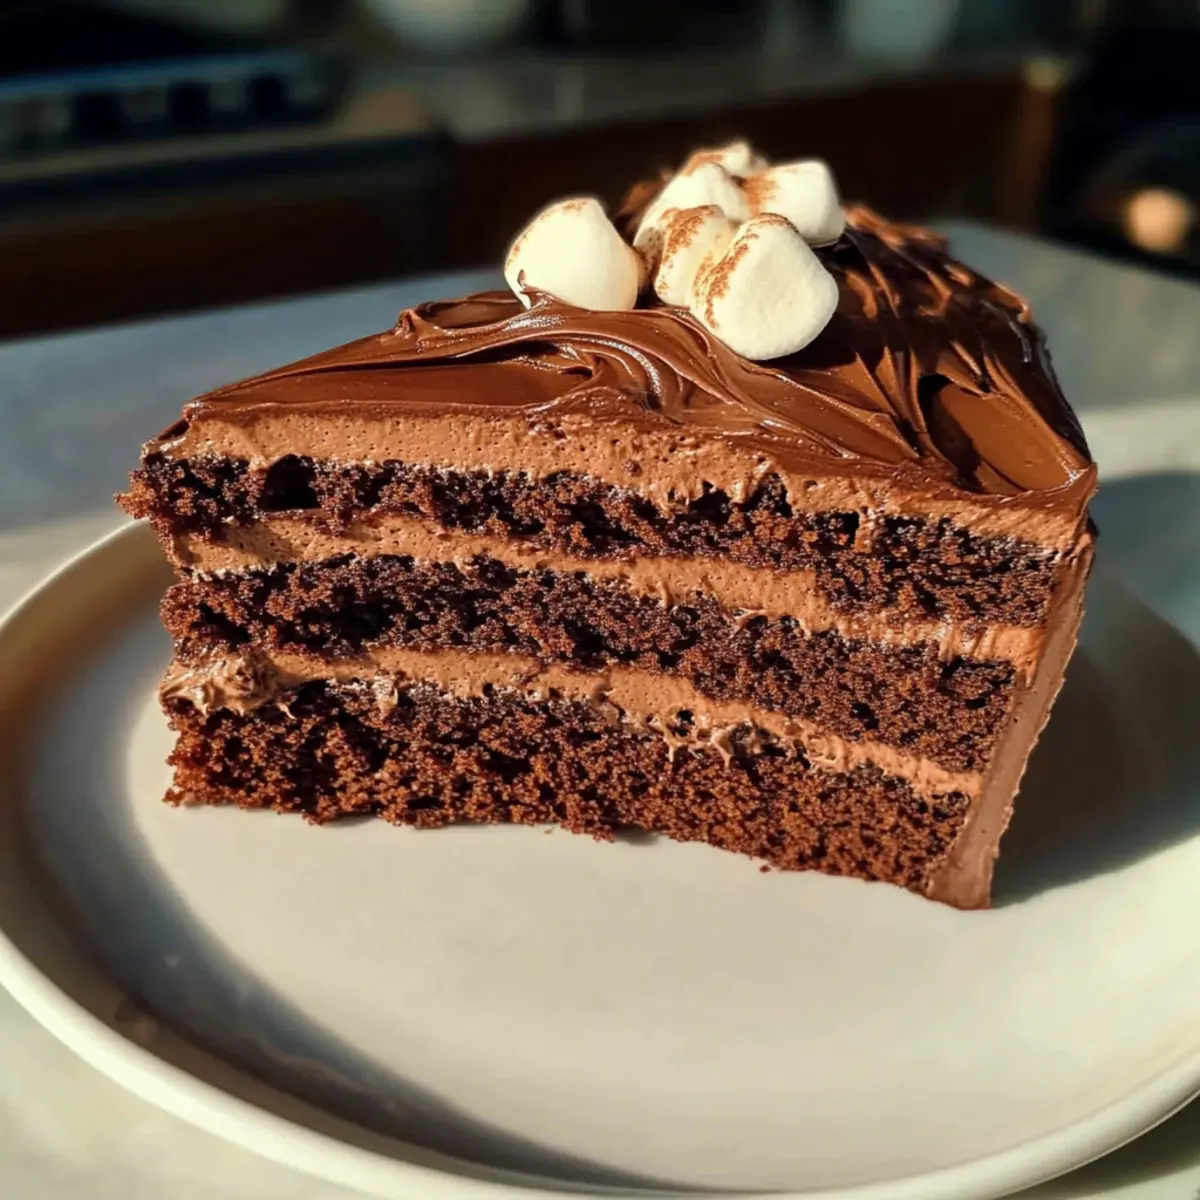
Versatile Toppings: Dress it up or down! Top it with whipped ganache, luscious cocoa buttercream, or even toasted marshmallows for a unique twist.
Easy to Make: With straightforward steps, this cake is perfect for both novice bakers and seasoned chefs looking for a cozy dessert option.
Ideal for Every Occasion: Whether it’s a birthday celebration or a cozy gathering, this cake is the star of the dessert table.
Make-Ahead Friendly: Bake the layers in advance and frost them right before serving to save time on busy days.
For an extra treat, try pairing it with a scoop of vanilla ice cream or explore Vegan Chocolate Chip cookies for a lovely contrast!
Warm Up with Hot Chocolate Cake Ingredients
• Get ready to gather these delightful ingredients!
For the Cake
- All-Purpose Flour – Provides structure; swap with a gluten-free blend for a gluten-free version.
- Granulated Sugar – Adds sweetness and moisture to your cake.
- Unsweetened Cocoa Powder – Essential for rich chocolate flavor; choose natural or Dutch-processed for a deep taste.
- Baking Powder/Baking Soda – Crucial leavening agents for a fluffy texture.
- Salt – Enhances overall flavor and balances the sweetness.
- Large Eggs – Bind the ingredients and bring richness; ensure they are at room temperature for better mixing.
- Vegetable Oil – Keeps the cake moist; can substitute with melted coconut oil or butter.
- Unsalted Butter – Introduces a rich flavor; remember to soften it before mixing.
- Whole Milk – Adds moisture; almond or oat milk work well for a dairy-free option.
- Vanilla Extract – Infuses warmth and enhances the overall flavor profile.
- Hot Chocolate or Boiling Water – Blooms the cocoa, intensifying the chocolate flavor—substitute coffee for added richness.
For Topping Options
- Whipped Ganache – Indulgently creamy and perfect for a decadent finish.
- Cocoa Buttercream – A nostalgic touch, bringing classic flavors to life.
- Toasted Marshmallows – Add a festive and delicious twist; delightful when layered on top!
This rich Hot Chocolate Cake is not just delightful on its own but offers a canvas to express your creativity with toppings. It’s time to warm up with a slice of homemade goodness!
Step‑by‑Step Instructions for Warm Up with a Slice of Our Rich Hot Chocolate Cake
Step 1: Preheat the Oven
Begin by preheating your oven to 350°F (175°C). While it warms up, grease and line two 8–9 inch round cake pans with parchment paper to ensure easy release after baking. This step will help your rich Hot Chocolate Cake come out perfectly shaped and ready for topping.
Step 2: Combine Dry Ingredients
In a large mixing bowl, whisk together 2 cups of all-purpose flour, 2 cups of granulated sugar, 3/4 cup of unsweetened cocoa powder, 1.5 teaspoons of baking powder, 1.5 teaspoons of baking soda, and 1 teaspoon of salt. This mixture is the foundation of your cake, combining to create a rich chocolate flavor once baked—a lovely start to your cozy dessert.
Step 3: Add Wet Ingredients
Next, stir in 1 cup of vegetable oil, 1/2 cup of softened unsalted butter, and 1 cup of whole milk until just combined. The mixture will be thick but smooth. This is where your rich Hot Chocolate Cake gains its moisture, ensuring a tender crumb that melts in your mouth once baked.
Step 4: Incorporate Eggs
Add 4 large eggs to the mixture, one at a time, mixing well after each addition. This step ensures that every element is well incorporated, creating a uniform batter. The eggs contribute to the cake’s richness and stability, so take your time to blend thoroughly before moving on.
Step 5: Add Hot Chocolate
Carefully stream in 1 cup of hot chocolate or boiling water, mixing until the batter is fully blended. The heat will help bloom the cocoa, enhancing the depth of chocolate flavor. Your batter will now be silky and slightly thinner, ready for the final bake.
Step 6: Bake the Cake
Divide the batter evenly between your prepared cake pans and place them in the preheated oven. Bake for 30–40 minutes or until a toothpick inserted into the center comes out clean. Keep an eye on the cakes; they should be slightly domed and spring back when gently pressed, indicating they’re perfectly baked.
Step 7: Cool the Cakes
Once baked, let the cakes cool in the pans for about 15 minutes. After that, carefully transfer them to wire racks to cool completely. This step is crucial for a successful frosting application; a warm cake can melt your rich toppings and create a mess!
Step 8: Frost as Desired
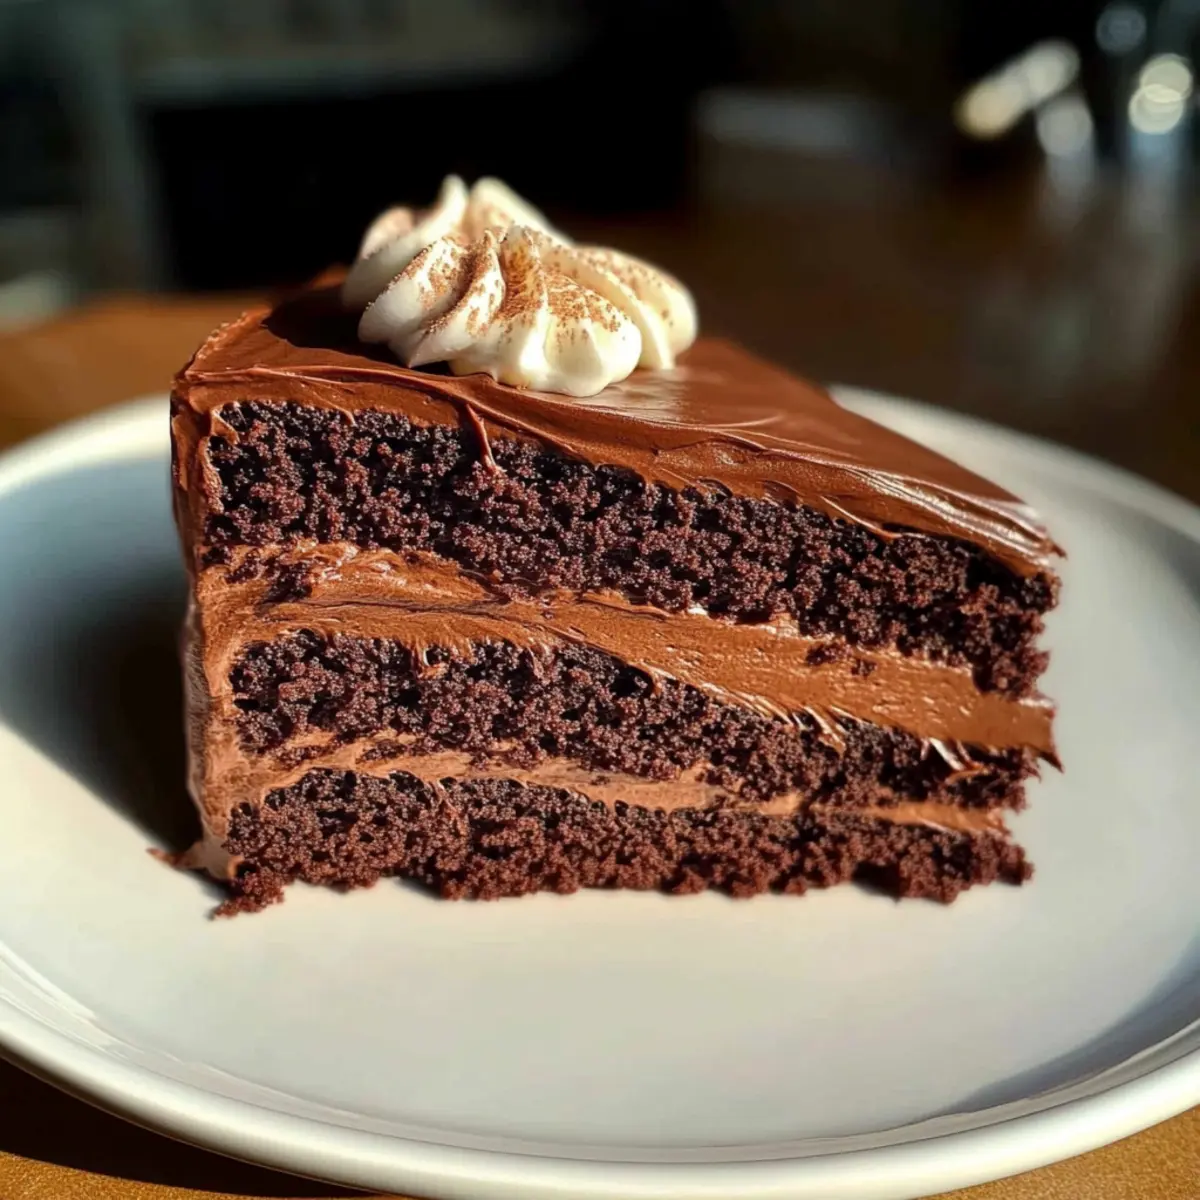
Once your rich Hot Chocolate Cake layers are completely cool, it’s time to frost! Choose your favorite toppings, whether it’s whipped ganache for a decadent finish or classic cocoa buttercream for a nostalgic touch. Apply your layers evenly for a beautifully presented cake ready for any occasion.
Expert Tips for Hot Chocolate Cake
-
Perfect Cocoa Bloom: Ensure your hot chocolate or boiling water is truly hot. This step activates the cocoa, deepening the chocolate flavor in your cake and avoiding blandness.
-
Room Temperature Ingredients: Always use room temperature eggs and milk. It helps create a smoother batter and ensures even mixing, resulting in a tender cake.
-
Avoid Overmixing: When combining wet and dry ingredients, mix until just combined. Overmixing can lead to a dense cake rather than the light, fluffy texture you desire.
-
Cool Completely: Allow the cake layers to cool completely before frosting. This prevents the frosting from melting and ensures that your cake maintains its beautiful presentation.
-
Topping Flexibility: Feel free to get creative with your toppings! Whether you opt for whipped ganache or toasted marshmallows, mixing and layering different toppings elevates your rich Hot Chocolate Cake to new heights.
How to Store and Freeze Hot Chocolate Cake
-
Room Temperature: Keep your Hot Chocolate Cake covered at room temperature for up to 3 days. This retains its moistness while allowing flavors to deepen.
-
Fridge: If you need to store it longer, place the cake in the fridge for up to a week. Make sure it’s in an airtight container to prevent it from drying out.
-
Freezer: For longer storage, wrap the cake tightly in plastic wrap followed by aluminum foil and freeze for up to 3 months. This keeps your cake fresh for future indulgences.
-
Reheating: To enjoy frozen layers, thaw overnight in the fridge and bring to room temperature before serving. You can gently warm slices in the microwave for a cozy treat!
Make Ahead Options
These delicious Hot Chocolate Cake layers are perfect for meal prep enthusiasts! You can bake the cake layers up to 3 days in advance and store them in the refrigerator, tightly wrapped in plastic wrap to maintain their moisture and prevent them from drying out. Alternatively, you can freeze the layers for up to 1 month; just remember to let them cool completely before wrapping and freezing. When you’re ready to serve, thaw the layers in the refrigerator overnight if frozen. Finish by frosting with your favorite toppings like whipped ganache or cocoa buttercream just before serving, ensuring that your cake is just as delightful and fresh as the day it was baked!
Warm Up with Hot Chocolate Cake Variations
Don’t hesitate to get creative! This cake is a blank canvas just waiting for your personal touch.
- Dairy-Free: Swap whole milk for almond or oat milk, and use dairy-free butter for a luscious vegan treat.
- Gluten-Free: Use a gluten-free flour blend instead of all-purpose flour for an equally delicious cake that everyone can enjoy.
- Coffee Kick: Replace hot chocolate with brewed coffee for a deeper, richer chocolate flavor that coffee lovers will adore.
- Festive Flair: During the holidays, sprinkle crushed peppermint or top with cinnamon sugar for a festive spin that adds a lovely seasonal touch.
- Texture Twists: Combine whipped ganache with toasted marshmallows on top for a delightful contrast of fluffy and creamy textures. This combination will elevate each bite.
- Fruity Surprise: Incorporate chopped fresh berries or banana slices into the batter for a fruity twist that cuts through the indulgence.
- Nutty Goodness: Stir in chopped nuts, like walnuts or pecans, for added crunch and a flavor boost. This enhances both texture and taste.
- Spiced Variation: Add a dash of cinnamon or anise to the batter for a warm, aromatic flavor that’s perfect for cozy gatherings.
Once you’ve perfected your Hot Chocolate Cake, consider pairing it with delightful treats like an indulgent slice of Chocolate Raspberry Cheesecake or some Chocolate Covered Pretzel cupcakes for an unforgettable dessert spread!
What to Serve with Decadent Hot Chocolate Cake
As your decadent Hot Chocolate Cake emerges from the oven, it’s time to craft a full meal experience that pairs beautifully with this cozy treat.
-
Vanilla Ice Cream: The creamy coldness offers a delightful contrast to the warm, rich cake, enhancing the chocolate experience with every bite.
-
Whipped Cream: Light and airy, this topping complements the cake’s density while adding a charming presentation. A dusting of cocoa on top creates an elegant finish.
-
Fresh Berries: Their natural tartness brightens the dish, cutting through the cake’s sweetness for a refreshing palate cleanser.
-
Toasted Almonds: A sprinkle of these adds a nutty crunch, enhancing the cake’s texture while providing an appetizing aromatic depth.
-
Chocolate Sauce Drizzle: For those who can’t get enough chocolate, a warm pour of sauce elevates each slice into an indulgent experience, intensifying the flavor.
-
Coffee or Espresso: The bold bitterness of coffee creates a wonderful balance with the sweetness of the cake, making this pairing perfect for coffee lovers.
-
Spiced Apple Slices: Sautéed with cinnamon and a touch of sugar, these warm slices add a seasonal touch that echoes the cozy feelings of winter.
-
Chai Tea: The warm spices in chai create a comforting drink that complements the cake’s rich flavors beautifully, making it a delightful after-dinner treat.
-
Molten Chocolate Lava Cake: For dessert lovers, serving this alongside your hot chocolate cake takes indulgence to the next level, creating a decadent chocolate fantasy.
Warm Up with a Slice of Our Rich Hot Chocolate Cake Recipe FAQs
How can I ensure my ingredients are ripe or at their best?
Absolutely! For this Hot Chocolate Cake, it’s crucial to use room temperature eggs and milk, as this helps achieve a smooth batter. Softened unsalted butter is also key for proper blending. If possible, use fresh cocoa powder for the best flavor, checking the expiration date to ensure maximum taste!
What is the best way to store my Hot Chocolate Cake?
You can keep your Hot Chocolate Cake covered at room temperature for up to 3 days. If you need to store it longer, place it in the refrigerator for up to a week in an airtight container to prevent drying out. Be sure to let it come to room temperature before serving for optimal flavor and texture.
Can I freeze Hot Chocolate Cake, and if so, how?
Yes! To freeze your Hot Chocolate Cake, wrap it tightly in plastic wrap followed by aluminum foil. It can be frozen for up to 3 months. When you’re ready to enjoy it, thaw it in the fridge overnight and let it reach room temperature before serving. You can even gently warm up individual slices in the microwave for that fresh-baked experience!
What should I do if my cake layers are domed after baking?
No worries! If the layers of your Hot Chocolate Cake rise and dome, just level them with a serrated knife once they are cooled. This will create an even surface for frosting, ensuring a beautiful presentation. It’s an easy fix that can save your cake from looking lopsided!
Is this recipe suitable for people with gluten allergies?
The traditional Hot Chocolate Cake contains all-purpose flour, which is not gluten-free. However, you can easily substitute it with a gluten-free flour blend to make it suitable for those with gluten allergies. Just be sure to check the other ingredients as well, especially if you’re using pre-packaged toppings!
Can I use different toppings for my Hot Chocolate Cake?
Very! This cake is highly adaptable. Besides whipped ganache and cocoa buttercream, consider toppings like toasted marshmallows or a sprinkle of crushed peppermint for a festive twist. Mix and match toppings to elevate your cake according to your mood or the occasion!
Warm Up with a Slice of Our Rich Hot Chocolate Cake Bliss
Ingredients
Equipment
Method
- Preheat your oven to 350°F (175°C) and prepare your cake pans.
- In a large bowl, whisk together the dry ingredients: flour, sugar, cocoa powder, baking powder, baking soda, and salt.
- Stir in the wet ingredients: oil, softened butter, and milk until combined.
- Add the eggs one at a time, mixing well after each addition.
- Slowly mix in the hot chocolate or boiling water until the batter is smooth.
- Divide the batter between the prepared pans and bake for 30-40 minutes.
- Cool the cakes in the pans for 15 minutes, then transfer to wire racks to cool completely.
- Frost your cooled cakes with your desired toppings.
Leave a Reply