As I stood in my kitchen the other day, a symphony of sweet and nutty scents filled the air, igniting a wave of nostalgia. This was the moment when I decided to create a Cherry Pistachio Cheesecake—a dessert that’s become my go-to for special occasions. With its creamy texture and the delightful crunch of pistachios, this cheesecake is a true crowd-pleaser, making it perfect for gatherings and celebrations. Plus, its versatility means you can swap out the maraschino cherries for fresh or frozen ones, and choose any nut that tickles your fancy. Not only is this dessert a feast for the eyes, but it’s also a quick way to transform any event into a festive occasion. Curious about how to whip up your own slice of happiness? Let’s dive into this delectable recipe!
Why is Cherry Pistachio Cheesecake a Must-Try?
Irresistible Flavor: The sweet and tangy maraschino cherries paired with buttery pistachios create a symphony of flavors that dance on your palate.
Versatile Options: Feel free to customize it! You can swap maraschino cherries for fresh ones or use different nuts for personal preferences—all while maintaining that delightful cheesecake experience.
Festive Appeal: This dreamy dessert is not just about taste; its vibrant colors make it a stunning centerpiece for any holiday table or special occasion.
Quick to Prepare: With straightforward steps, you’ll have this showstopper ready without spending hours in the kitchen. For a fun spin, why not try individual portions and make mini cheesecakes?
Make-Ahead Friendly: Baking this cheesecake the day before allows the flavors to develop beautifully, making serving a breeze when it’s time to celebrate.
This Cherry Pistachio Cheesecake is sure to impress your guests and become a cherished part of your dessert repertoire! If you’re in the mood for more easy desserts, check out my delightful Crisp Mini Cheesecakes or indulge in classic Chocolate Chip Cookies.
Cherry Pistachio Cheesecake Ingredients
For the Crust
• Graham Cracker Crumbs – Provides the base structure of the crust; you can substitute with digestive biscuits for a unique flavor.
• Ground Pistachios – Enhances the crust with nutty richness; chopped almonds or walnuts work well if you’re looking for alternatives.
• Sugar – Adds sweetness and helps the crust bind together.
• Melted Butter – Binds the crust ingredients, providing moisture and richness; for a dairy-free version, try coconut oil or unsalted margarine.
For the Filling
• Cream Cheese – The primary ingredient contributing to the rich and creamy texture; Neufchâtel cheese can be used as a lower-fat substitute.
• Granulated Sugar – Sweetens the cheesecake filling.
• Sour Cream – Adds creaminess and a slight tang to balance the richness.
• Pistachio Pudding Mix (dry powder) – Contributes flavor and silkiness; you can use more ground pistachios instead.
• Vanilla Extract – Intensifies the overall flavor profile of the cheesecake.
• Eggs – Provide structure and stability to the cheesecake filling.
For the Topping
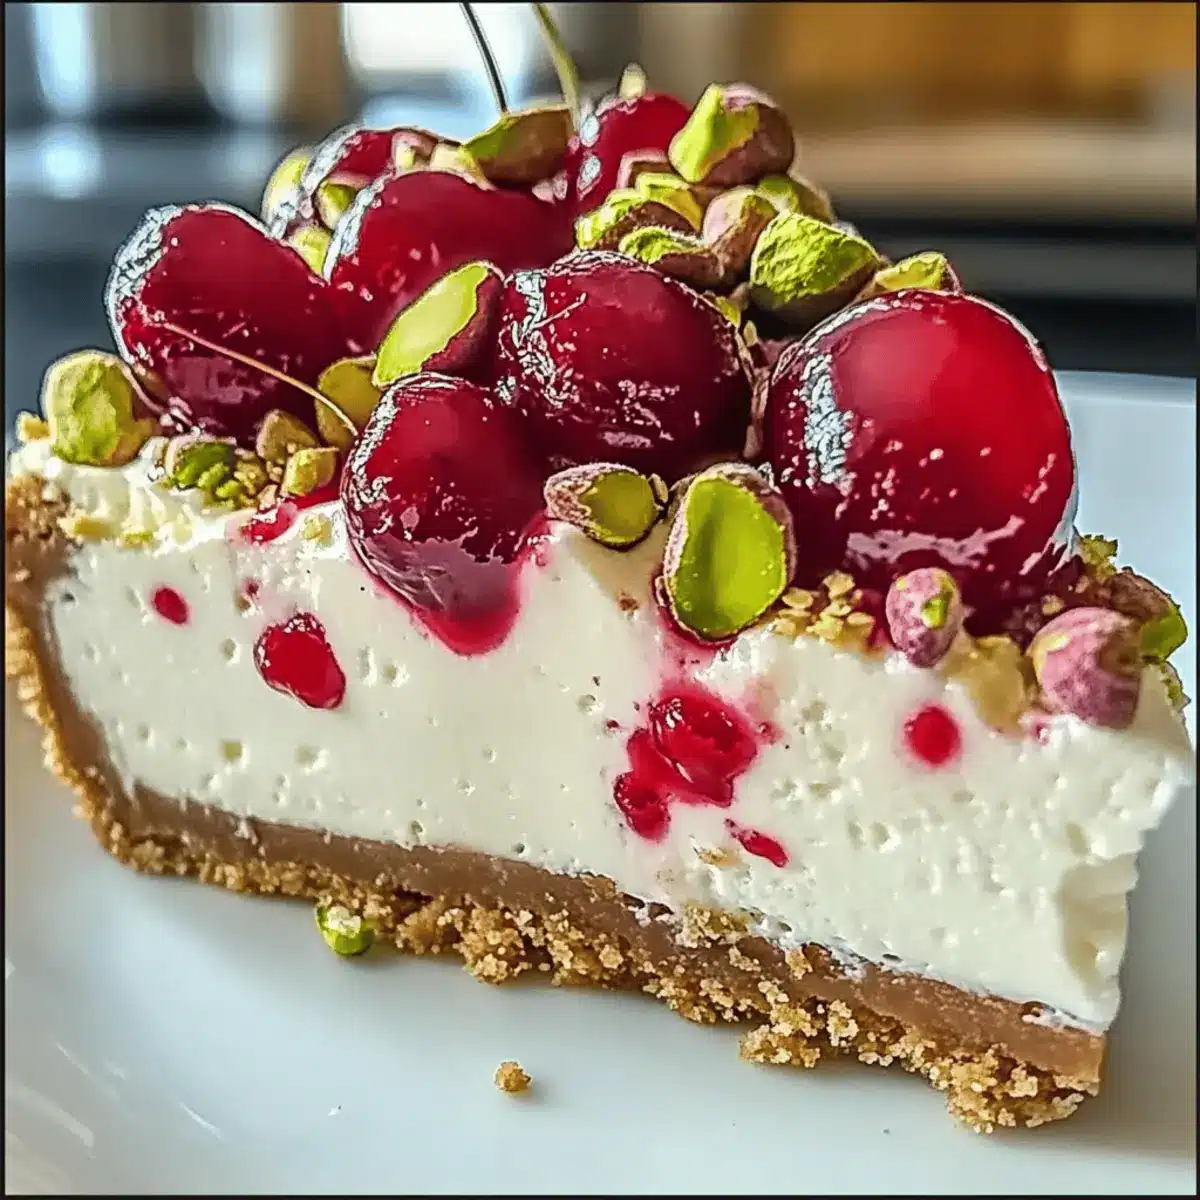
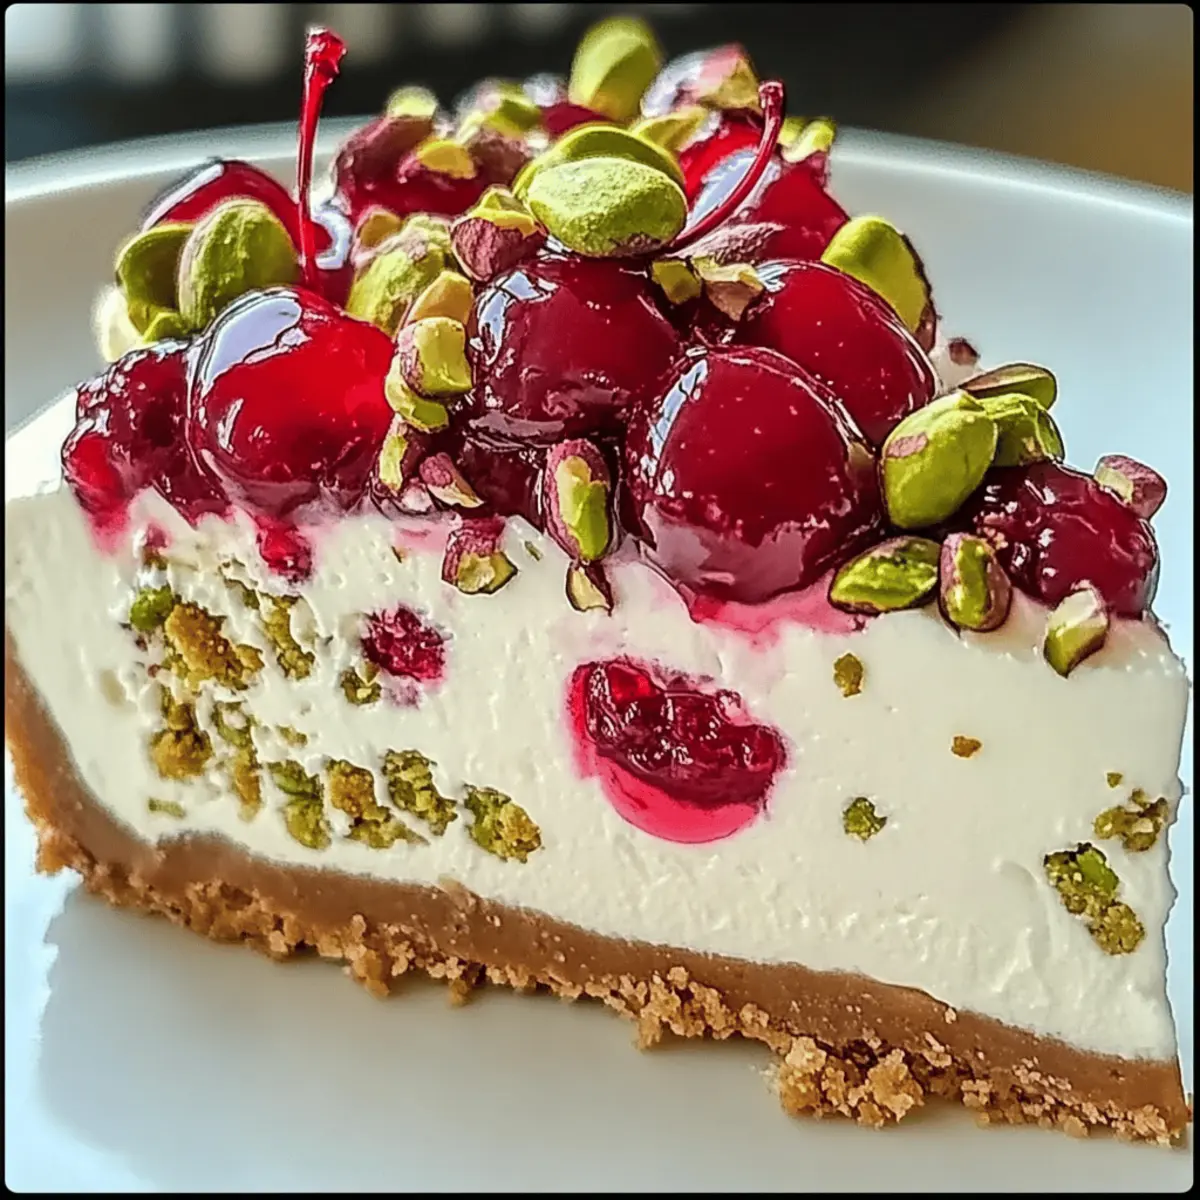
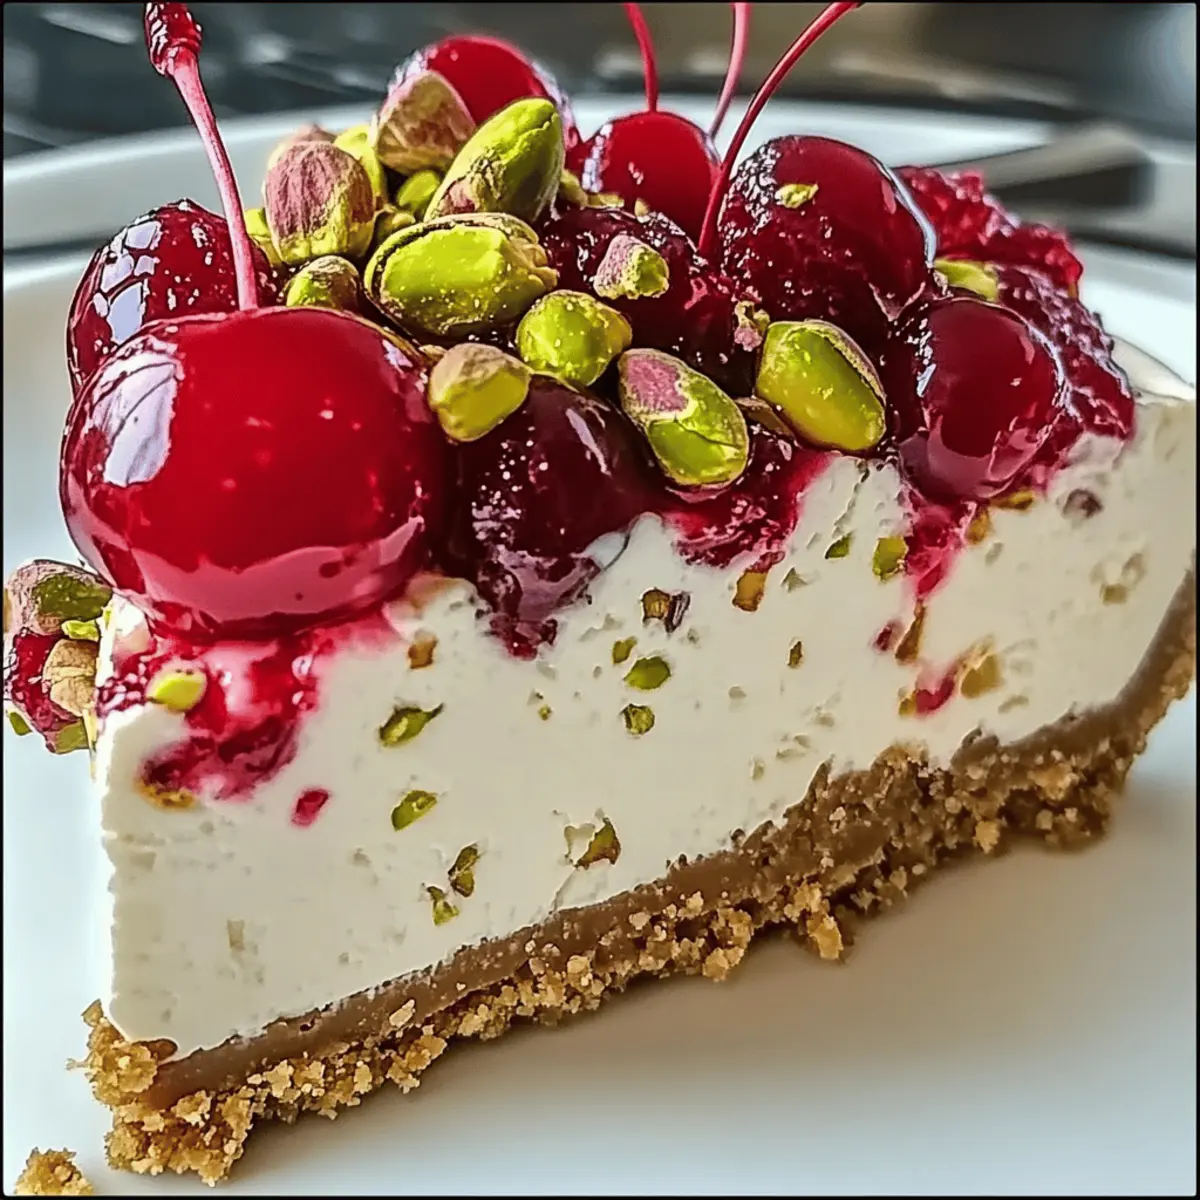
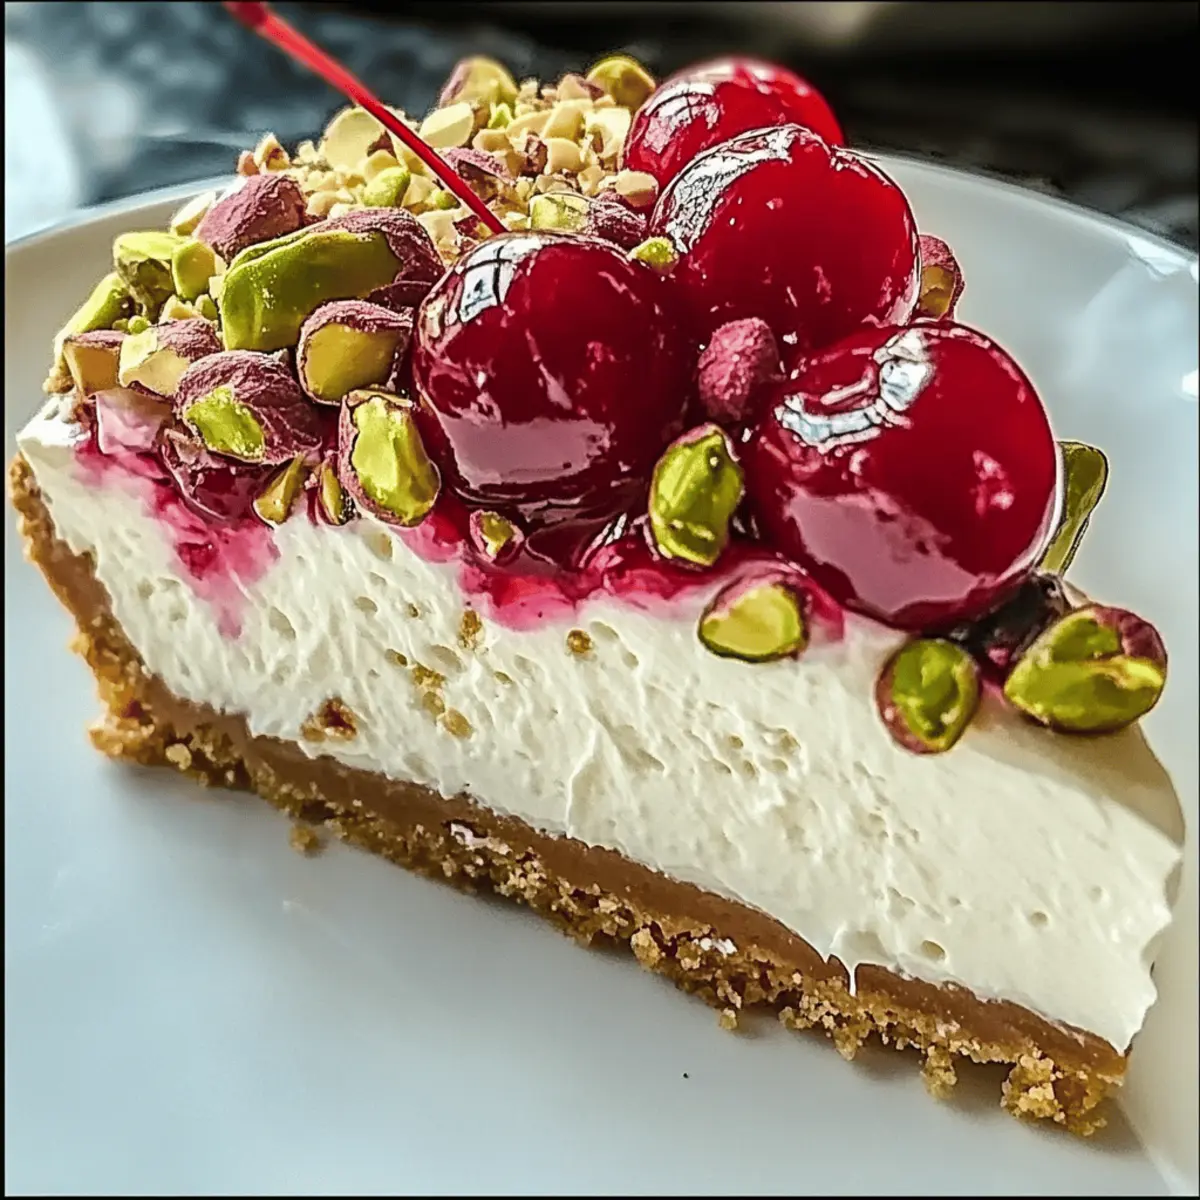
• Cherry Pie Filling – A sweet topping that adds color; alternatively, fresh or homemade cherry compote is a great option.
This Cherry Pistachio Cheesecake is not only a feast for the eyes but also a delightful treat that will make any celebration feel extra special!
Step‑by‑Step Instructions for Cherry Pistachio Cheesecake
Step 1: Preheat the Oven
Begin by preheating your oven to 325°F (160°C). While the oven warms up, prepare a 9-inch springform pan by greasing it with butter or lining it with parchment paper. This ensures your Cherry Pistachio Cheesecake will release smoothly after baking.
Step 2: Make the Crust
In a mixing bowl, combine graham cracker crumbs, ground pistachios, sugar, and melted butter, stirring until fully incorporated. Once ready, press this mixture firmly into the bottom of the prepared springform pan. Bake the crust for about 8 minutes or until lightly golden, then remove from the oven and let it cool completely.
Step 3: Prepare the Filling
In a large mixing bowl, beat the softened cream cheese until smooth and creamy using a mixer on medium speed. Gradually add granulated sugar while continuing to blend, then incorporate eggs one at a time, ensuring each one is fully mixed in before adding the next. Blend in the sour cream, pistachio pudding mix, and vanilla extract until just combined, taking care not to overmix.
Step 4: Bake the Cheesecake
Pour the cheesecake filling over the cooled crust in the springform pan, smoothing the top with a spatula. Place it in the preheated oven and bake for 45–50 minutes. The cheesecake should be slightly jiggly in the center when done; this ensures a creamy texture once cooled.
Step 5: Cool Gradually
After baking, turn off the oven and crack the door open, allowing the cheesecake to cool inside for one hour. This step helps prevent cracks that can form from sudden temperature changes while keeping your beautiful Cherry Pistachio Cheesecake intact.
Step 6: Chill
Once the hour is up, remove the cheesecake from the oven and refrigerate it. Allow it to chill in the fridge for at least 4 hours, but overnight is even better for maximum flavor development. This cooling time will create a richer taste and firmer texture.
Step 7: Top and Serve
After chilling, spread the cherry pie filling evenly over the top of the cheesecake, letting the vibrant red cherries shine. If desired, sprinkle additional chopped pistachios for garnish. Slice and serve your impressive Cherry Pistachio Cheesecake to delight your family and friends!
How to Store and Freeze Cherry Pistachio Cheesecake
Fridge: Store your Cherry Pistachio Cheesecake covered in the refrigerator for up to 5 days. This allows the flavors to continue developing while keeping it fresh.
Freezer: For longer storage, wrap the cheesecake tightly in plastic wrap, then aluminum foil, and freeze for up to 2 months. Remember to add the cherry topping after thawing for the best presentation.
Thawing: When ready to enjoy, thaw the cheesecake in the refrigerator overnight before serving. This ensures a smooth texture without compromising its delightful taste.
Reheating: There’s no need to reheat cheesecake; simply serve it chilled for the best experience.
Make Ahead Options
This Cherry Pistachio Cheesecake is an ideal candidate for meal prep, saving you time on busy days! You can make the cheesecake base up to 24 hours in advance and store it covered in the refrigerator. To do this, bake the cheesecake and allow it to cool completely before refrigerating. Keep the cherry topping separate until you’re ready to serve, as this prevents the crust from becoming soggy. When it’s time to impress your guests, simply add the cherry pie filling on top and garnish with extra pistachios before slicing. Your delicious cheesecake will be just as delightful and fresh, allowing you to enjoy the celebration with ease.
Expert Tips for Cherry Pistachio Cheesecake
-
Room Temperature Cream Cheese: Ensure your cream cheese is at room temperature to achieve a smooth filling without lumps. Cold cream cheese can result in a grainy texture.
-
Mix Carefully: Avoid overmixing the filling once you add the eggs, as this can lead to cracks during baking. Mix just until combined for a perfect cheesecake.
-
Crust Cool Down: Let the crust cool completely before adding the filling. A warm crust can lead to a soggy cheesecake.
-
Prevent Cracks: Cooling the cheesecake gradually in the oven prevents sudden temperature changes that cause cracks. Follow the cooling method outlined to keep your cheesecake smooth.
-
Flavor Development: For the best flavor, refrigerate the cheesecake overnight before serving. The resting time allows the flavors to meld beautifully.
-
Fresh Cherry Tip: If using fresh cherries, make sure to dry them thoroughly after washing. Excess moisture can affect the cheesecake’s texture.
Cherry Pistachio Cheesecake Variations & Substitutions
Feel free to explore creative twists on your Cherry Pistachio Cheesecake that will make it truly your own!
-
Fresh Cherries: Replace maraschino cherries with fresh or frozen cherries for a naturally sweet and vibrant flavor.
-
Nut Alternatives: Swap pistachios for chopped almonds, walnuts, or pecans to suit your taste or dietary needs—each nut brings its unique crunch.
-
Mini Cheesecakes: Use a muffin tin for individual cheesecakes; they’re perfect for parties and easy to serve!
-
Dairy-Free Option: Substitute cream cheese with a plant-based cream cheese for a delicious dairy-free version that doesn’t compromise on flavor.
-
Lower Sugar: Try using a sugar alternative or reducing the sugar in the crust and filling for a lighter treat that still satisfies your sweet tooth.
-
Additional Flavor: Add a splash of almond extract alongside the vanilla for a delightful nutty flavor that complements the pistachios beautifully.
-
Chocolate Lovers: Incorporate a layer of chocolate ganache on top before adding the cherry filling for an indulgent chocolatey twist.
For more tempting ideas, try my delightful Crisp Mini Cheesecakes or indulge in classic Chocolate Chip Cookies as quick dessert options. Happy baking!
What to Serve with Cherry Pistachio Cheesecake
Indulge in the perfect ensemble to complement your creamy, vibrant dessert, ensuring a memorable dining experience.
-
Refreshing Berries: A mix of fresh strawberries, blueberries, and raspberries adds a burst of tartness that balances the cheesecake’s sweetness.
-
Light Whipped Cream: A dollop of fluffy whipped cream enhances the cheesecake’s richness while adding a velvety texture that everyone will adore.
-
Chocolate Drizzle: A playful drizzle of dark chocolate ganache offers a delightful contrast to the sweet and nutty flavors, enhancing the overall dessert experience.
-
Crispy Almond Cookies: These light, crispy treats provide a satisfying crunch that pairs beautifully with the creamy consistency of the cheesecake.
-
Sparkling Lemonade: A refreshing glass of sparkling lemonade brings a zesty finish, cleansing the palate and perfectly complementing dessert’s richness.
-
Coffee or Espresso: A warm cup of coffee or a shot of espresso cuts through the cheesecake’s richness, rounding off a delightful meal.
-
Fruit Sorbet: Tangy fruit sorbet, like raspberry or lemon, serves as a refreshing contrast, offering a cool counterbalance to the cheesecake’s creamy texture.
-
Mini Fruit Tarts: Their crisp texture and fruity freshness make these tarts an elegant addition, enhancing the overall fruity theme while providing delightful variety.
-
Cheese Platter: Pairing with a selection of creamy cheeses can surprise your guests and elevate the flavor experience, enticing everyone with contrasts and complementary bites.
Cherry Pistachio Cheesecake Recipe FAQs
What type of cherries should I use for the cheesecake?
Absolutely! You can use maraschino cherries for a sweet flavor or fresh cherries for a more natural taste. If opting for fresh cherries, make sure to dry them thoroughly after washing to avoid excess moisture affecting the cheesecake’s texture.
How should I store my Cherry Pistachio Cheesecake?
Store your cheesecake covered in the refrigerator for up to 5 days. This helps the flavors continue to meld beautifully while keeping it fresh and delicious for those cravings!
Can I freeze the Cherry Pistachio Cheesecake?
Yes, you can freeze it! Wrap the cheesecake tightly in plastic wrap, followed by aluminum foil, to prevent freezer burn. It can stay frozen for up to 2 months. Just remember to add the cherry topping after thawing for the best presentation and taste!
What if my cheesecake cracks during baking?
No worries! Cracking can happen, but it’s usually due to overmixing or sudden temperature changes. To avoid this, mix the filling gently after adding the eggs, and remember to cool the cheesecake gradually in the oven. If cracks do appear, a fun trick to mask them is to add extra cherries or whipped cream on top!
Are there any dietary considerations for this cheesecake?
Certainly! This Cherry Pistachio Cheesecake can be made gluten-free by using gluten-free graham cracker crumbs. For nut allergies, simply omit the pistachios or substitute them with a safe option like seeds. Experimenting with Neufchâtel cheese instead of cream cheese also offers a lighter option without sacrificing flavor.
How far in advance can I make the cheesecake?
I often make this cheesecake a day in advance! Not only does the flavor deepen, but it also makes serving a breeze on the day of your gathering. Simply prepare it the night before and let it chill overnight in the refrigerator for the best results.
Cherry Pistachio Cheesecake: A Dreamy Festive Delight
Ingredients
Equipment
Method
- Preheat your oven to 325°F (160°C) and prepare a 9-inch springform pan by greasing it or lining it with parchment paper.
- In a mixing bowl, combine graham cracker crumbs, ground pistachios, sugar, and melted butter. Press mixed ingredients firmly into the bottom of the pan and bake for about 8 minutes.
- Beat softened cream cheese in a large mixing bowl until smooth. Gradually add granulated sugar, mixing well. Add eggs one at a time, then blend in sour cream, pistachio pudding mix, and vanilla extract.
- Pour cheesecake filling over cooled crust in the pan and smooth with a spatula. Bake for 45-50 minutes, until slightly jiggly in the center.
- After baking, turn off the oven and crack the door open to cool for one hour.
- Remove from oven and refrigerate for at least 4 hours, preferably overnight.
- Spread cherry pie filling over the chilled cheesecake. Serve to family and friends.
Leave a Reply