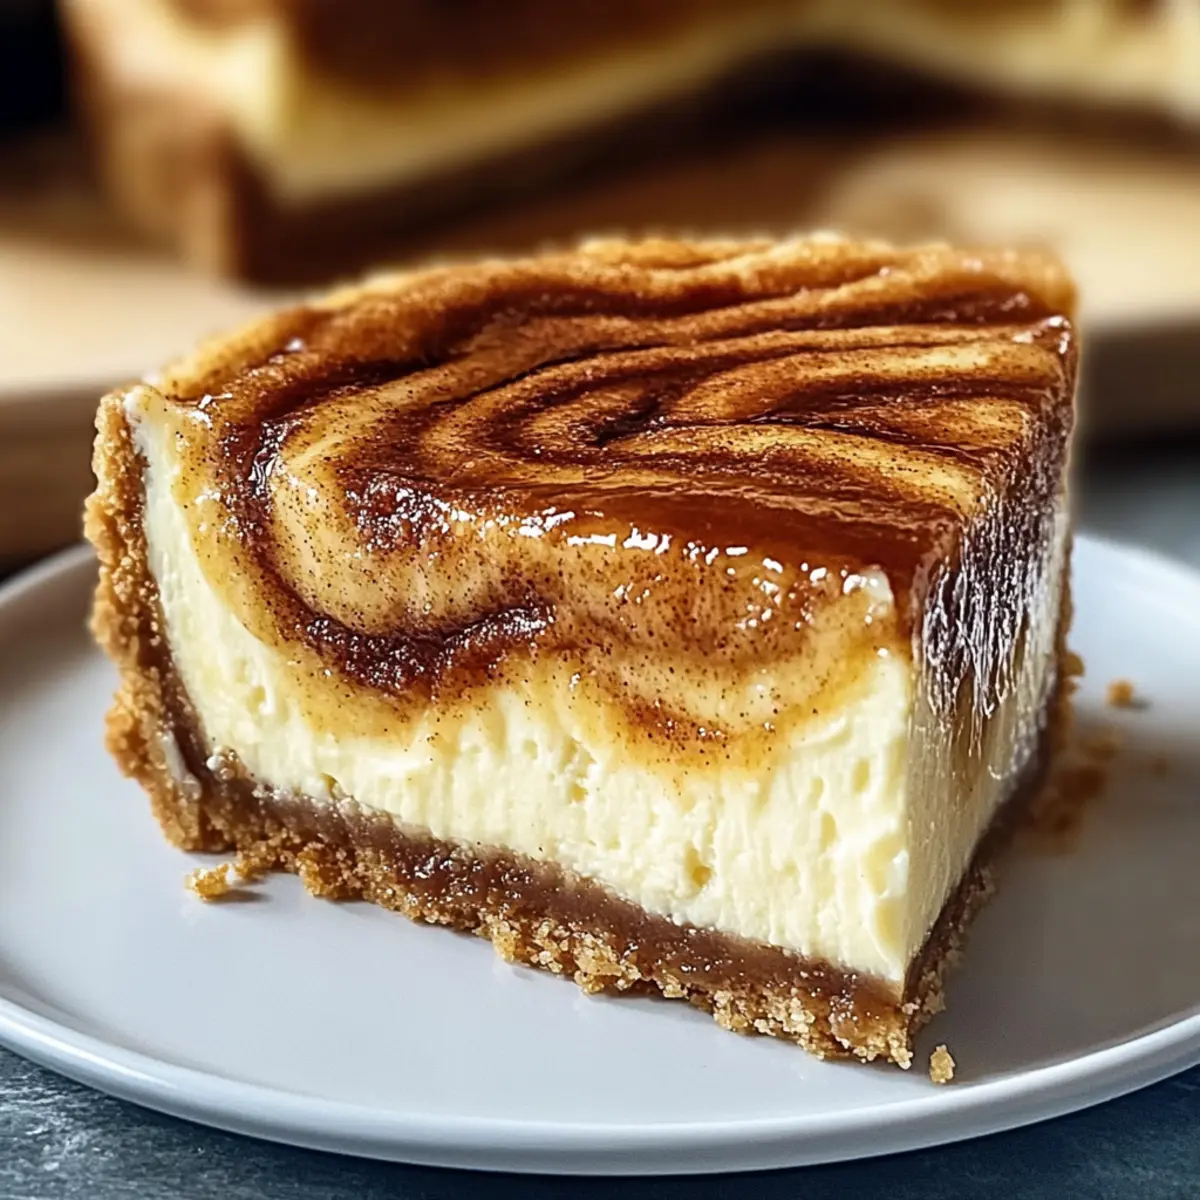
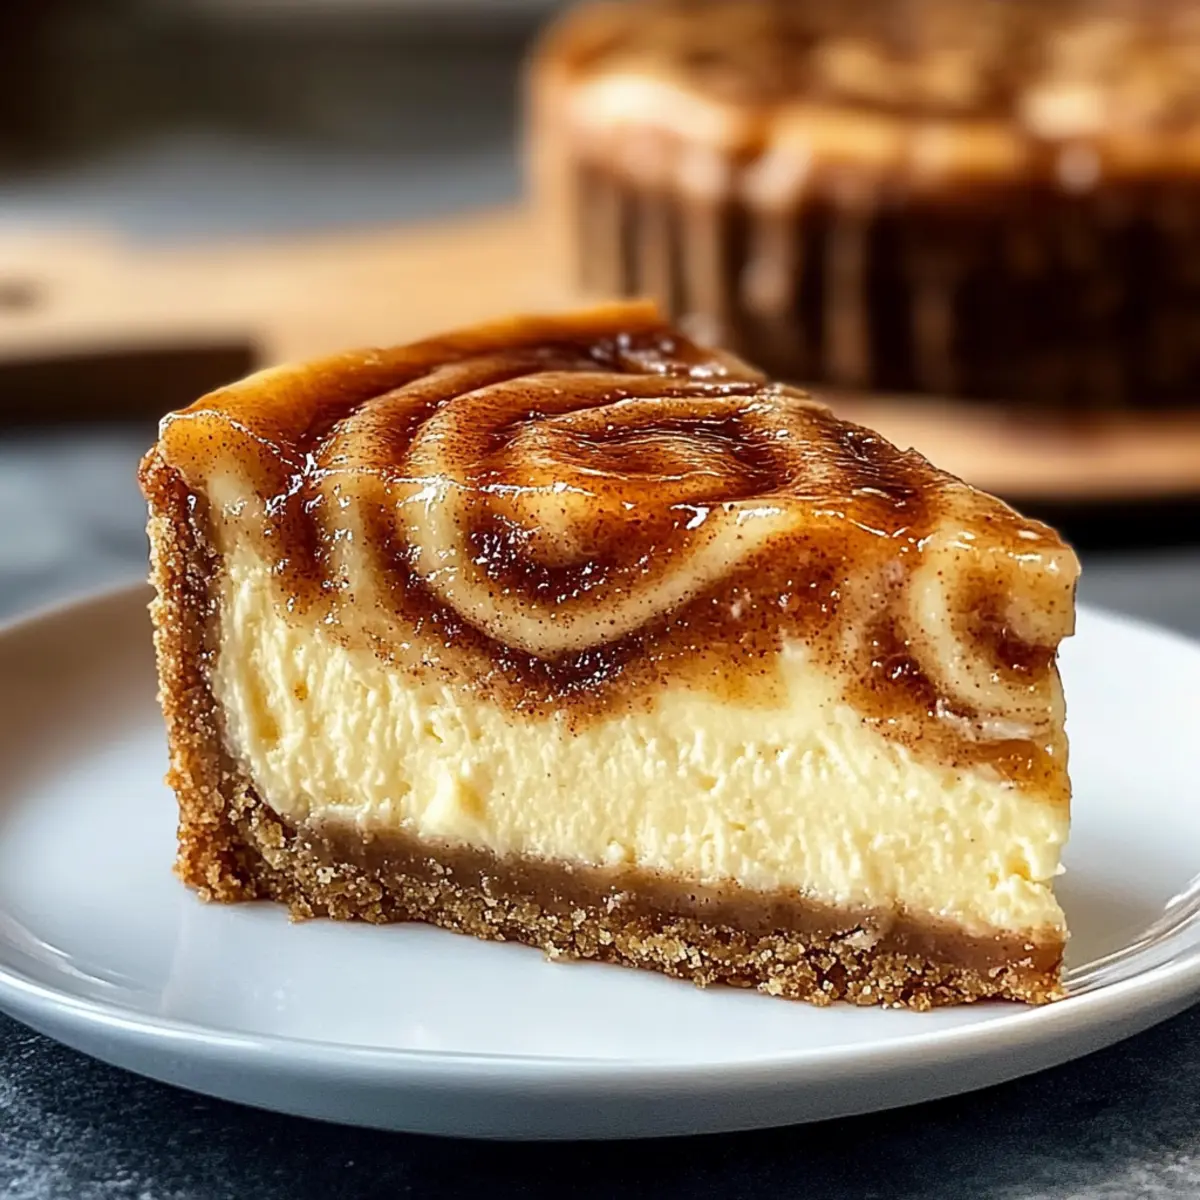
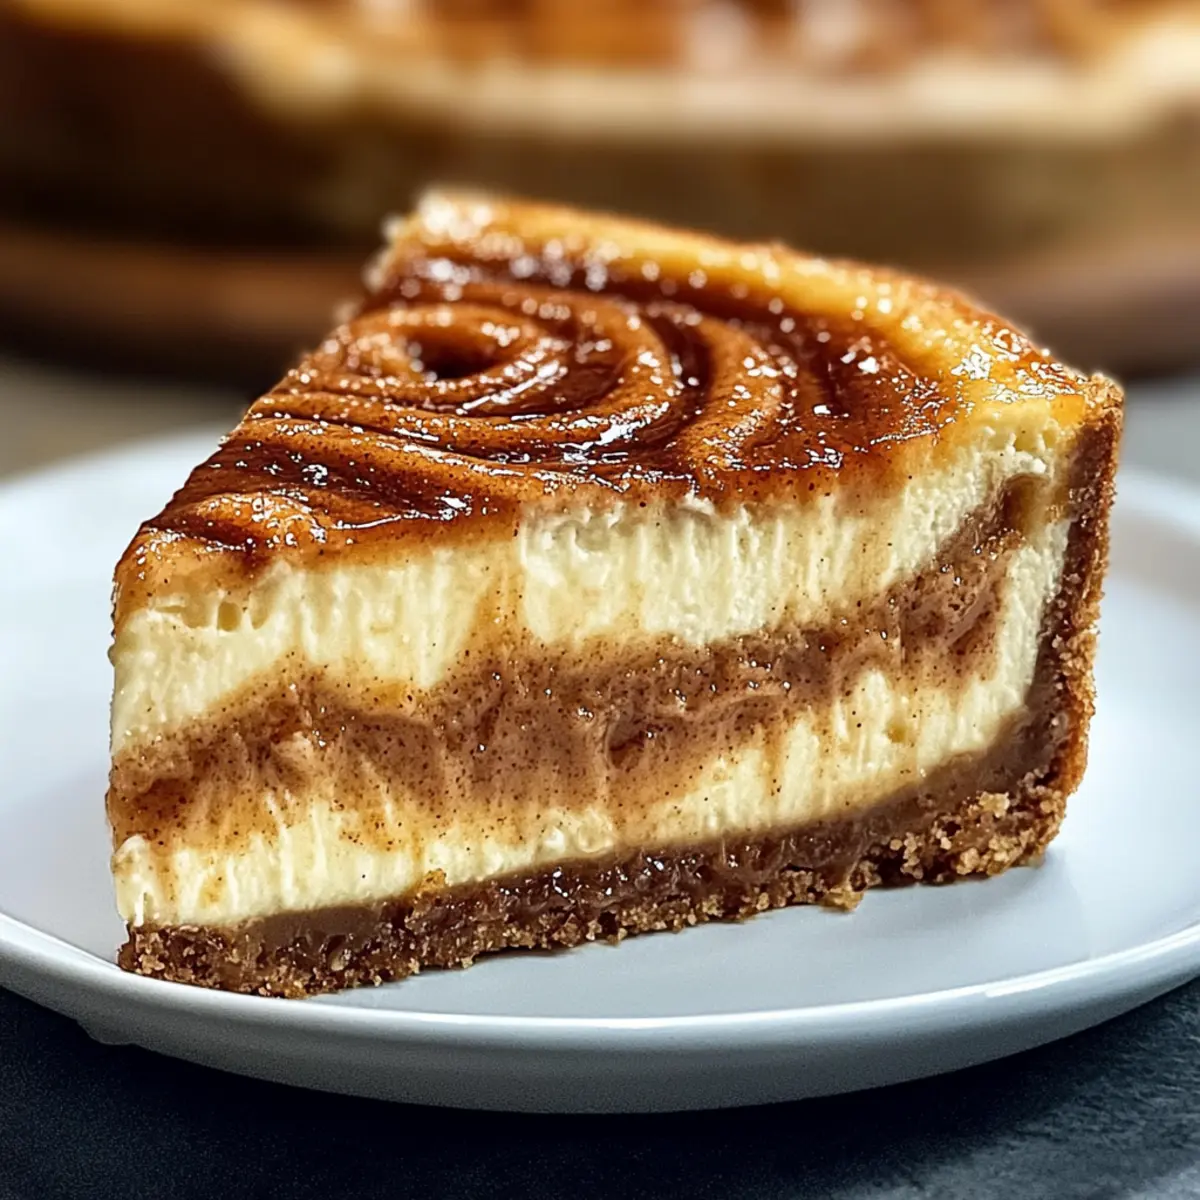
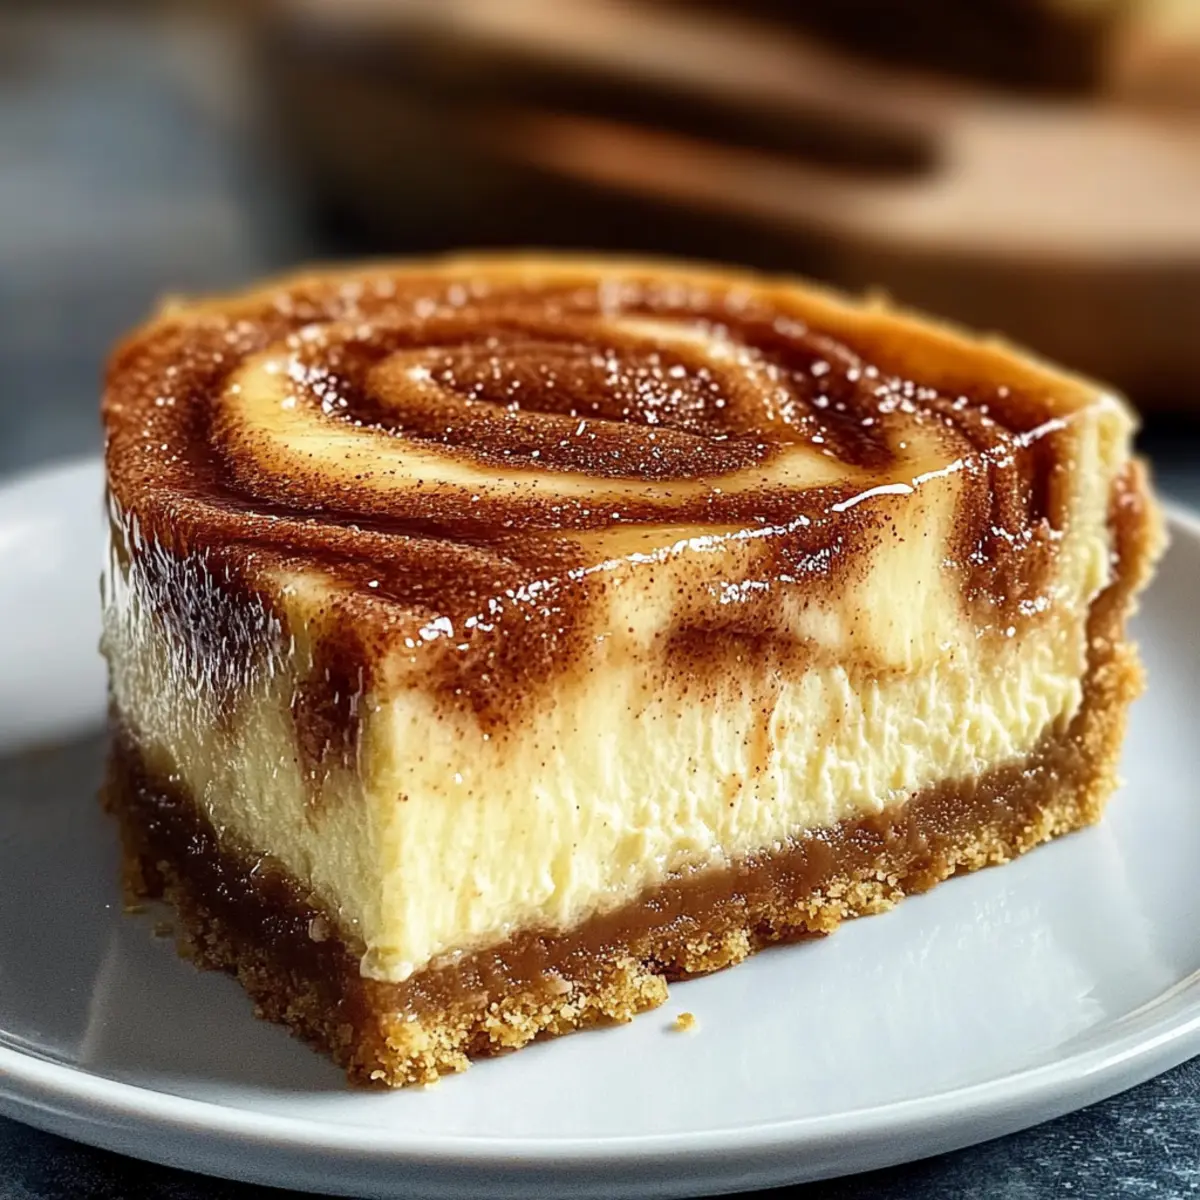
As I stood in my kitchen, the aroma of cinnamon wafting through the air whisked me back to those heartfelt mornings spent devouring warm honey buns. Now, I’m thrilled to share a twist on that nostalgia: indulge in Honey Bun Cheesecake, a unique fusion that tantalizes both the palate and the heart. This decadent dessert beautifully marries the light, creamy texture of cheesecake with the cozy, spiraled flavors of honey buns, making it a perfect centerpiece for any gathering or an everyday treat to lift your spirits. Not only does it enchant with its flavors, but it also offers the convenience of being easily customizable—try it gluten-free or personalize with your favorite add-ins! Ready to create a dessert that’s as captivating to look at as it is to eat? Let’s embark on this sweet adventure together.
Why Indulge in Honey Bun Cheesecake?
Nostalgic Bliss: Indulge in the flavors of your childhood with the comforting taste of warm honey buns infused in a creamy cheesecake.
Versatile Options: Customize it to suit your preferences! From gluten-free options to various flavor twists, this recipe is adaptable for everyone.
Effortlessly Impressive: Stun your guests with a dessert that looks as fabulous as it tastes, making it perfect for gatherings or special occasions.
Quick to Prepare: Save time in the kitchen with straightforward steps that allow for easy prep while still delivering gourmet results.
Perfect Pairings: Complement this delightful cheesecake with a cup of coffee or fresh berries for a well-rounded dessert experience.
Treat yourself and your loved ones to this unforgettable dessert that combines nostalgia and modern flair!
Honey Bun Cheesecake Ingredients
• Discover the essentials to make your perfect cheesecake!
For the Crust
- Nilla Wafers or Graham Crackers – Great base for the crust; use finely crushed for a sturdy structure. Gluten-free cookies can be substituted for a delicious gluten-free option.
- Unsalted Butter – Helps bind the crust mixture; ensure it’s melted for seamless combining.
- Granulated Sugar – Sweetens the crust; contributes to a lovely golden color.
- Ground Cinnamon – Infuses warm, cozy spice into the crust blend.
For the Filling
- Full-Fat Cream Cheese – The heart of your cheesecake; gives a rich, creamy texture—remember to soften it for easy mixing!
- Sour Cream – Adds a delightful tanginess, enhancing the creaminess of the filling; ensure it’s at room temperature.
- Vanilla Extract – A flavor booster for the filling; opt for pure extract for the best taste.
- Fine Sea Salt – Balances the sweetness perfectly.
- Large Eggs (and Yolks) – Provides essential structure; use room temperature for even mixing.
For the Cinnamon Swirl
- Light Brown Sugar – Adds sweetness and depth to the swirl; it’s what gives that classic honey bun flavor!
- All-Purpose Flour – Thickens the swirl mixture for excellent structure.
For the Glaze
- Powdered Sugar – Creates a smooth, sweet glaze; key for the finishing touch!
- Whole Milk or Heavy Cream – Adjusts the glaze’s consistency; heavy cream will add richness.
- Honey – Brings a unique gloss and sweetness to the glaze.
Optional Garnish
- Ground Cinnamon or Chopped Pecans – Use to decorate and enhance the aesthetic appeal of your gorgeous cheesecake.
Prepare these ingredients, and you’re ready to indulge in Honey Bun Cheesecake like never before!
Step‑by‑Step Instructions for Indulge in Honey Bun Cheesecake
Step 1: Prepare Crust
Preheat your oven to 350°F (175°C) and prepare a 9-inch springform pan by greasing it lightly. In a mixing bowl, combine the finely crushed Nilla wafers or graham crackers with the granulated sugar and ground cinnamon. Pour in melted butter, mixing until the crumbs are evenly moistened. Press this mixture firmly into the bottom of the prepared pan and bake for 10-12 minutes, or until golden brown. Allow it to cool completely before adding the filling.
Step 2: Make Cheesecake Filling
In a large bowl, beat the softened cream cheese until it’s perfectly smooth and creamy. Gradually add granulated sugar, continuing to mix until combined. Then, blend in the sour cream, vanilla extract, and fine sea salt until smoothly incorporated. Add the eggs one at a time, carefully mixing after each addition to avoid overbeating. Your cheesecake filling should be velvety and luscious, ready to layer on the crust.
Step 3: Create Cinnamon Swirl
In a separate bowl, mix the light brown sugar, ground cinnamon, and all-purpose flour. Pour 2/3 of your cheesecake batter onto the cooled crust, spreading it evenly. Sprinkle 3/4 of the cinnamon-sugar mixture over the top. Carefully spoon the remaining cheesecake batter over this layer, then use a knife to gently swirl the top, creating a marbled effect reminiscent of honey bun goodness.
Step 4: Bake Cheesecake
Wrap the springform pan tightly in aluminum foil to prevent water from seeping in. Reduce the oven temperature to 325°F (160°C). Place the wrapped pan into a larger roasting pan filled with boiling water, ensuring the water reaches halfway up the sides of the cheesecake pan for the bain-marie method. Bake for 70-90 minutes, or until the edges are set but the center jiggles slightly when shaken—this ensures a creamy filling.
Step 5: Cool and Chill
Once baked, turn off the oven and leave the cheesecake inside for an additional hour to cool gently. After this hour, carefully remove the pan from the water bath and let it come to room temperature. Once cooled, refrigerate your cheesecake for at least 6-8 hours or overnight for flavors to meld perfectly and to achieve that decadent, sliceable texture.
Step 6: Prepare Glaze and Serve
To create the glaze, whisk together the powdered sugar, milk or heavy cream, honey, and a dash of vanilla extract until smooth and drizzle-worthy. Once the cheesecake is fully chilled, run a knife around the edge to gently release it from the springform pan and remove the sides. Drizzle the glaze generously over the top, and if desired, garnish with ground cinnamon or chopped pecans for a delightful finishing touch before slicing and serving this indulgent Honey Bun Cheesecake.
Make Ahead Options
These Honey Bun Cheesecakes are perfect for busy weeknights or meal prep enthusiasts! You can prepare the crust and cinnamon swirl up to 24 hours in advance, making the assembly a breeze. Once cooled, store the crust wrapped in plastic wrap and the swirl mixture in an airtight container in the refrigerator to maintain freshness. When ready to bake, simply mix the filling ingredients, layer it with the crust, and create your beautiful swirl before baking. This approach ensures that your cheesecake is just as delicious and indulgent when you finally serve it, saving you precious time while delighting your guests with this delightful dessert.
Variations & Substitutions for Honey Bun Cheesecake
Customize your Honey Bun Cheesecake with these delightful ideas to spark creativity and enhance your dessert experience!
- Gluten-Free: Swap Nilla Wafers for gluten-free cookies to create a delectable crust without sacrificing flavor.
- Dairy-Free: Use non-dairy cream cheese and sour cream to craft an indulgent cheesecake that everyone can enjoy!
- Seasonal Twist: Substitute pumpkin puree for sour cream and add pumpkin spice to embrace fall flavors in every bite.
- Nutty Crust: Replace graham crackers with crushed almonds or pecans for a nutty, crunchy base that enhances the overall texture.
- Flavor Infusion: Mix in a teaspoon of almond extract or orange zest into the filling for a refreshing twist that brightens the classic taste.
- Caramel Drizzle: Drizzle with caramel sauce before serving for an irresistibly sweet layer that complements the honey glaze perfectly.
- Individual Portions: Bake in muffin tins lined with paper cups for charming mini cheesecakes, ideal for parties or potlucks.
- Swirled Sorbet: For a light dessert option, serve slices with a scoop of sorbet on the side, adding a fruity contrast to the creamy cheesecake.
No matter which variation you choose, your Honey Bun Cheesecake will shine, bringing warmth and nostalgia to your table. If you want to incorporate new flavors, consider pairing it with a side of Honey Bbq Chicken or ending the meal with a slice of Salted Honey Pie. Let your creativity burst forth and enjoy every delicious moment!
What to Serve with Honey Bun Cheesecake?
As you savor each heavenly bite of this sweet dessert, consider elevating your meal with delightful pairings that tantalize the taste buds.
-
Fresh Berries: A medley of strawberries and blueberries offers a refreshing burst of acidity to balance the creamy sweetness.
-
Whipped Cream: Light, airy whipped cream adds a luscious touch, perfect for contrasting textures while enhancing flavor.
-
Coffee or Espresso: A warm cup of coffee or rich espresso complements the cinnamon notes, making each bite feel indulgently cozy.
-
Spiced Chai Latte: The aromatic spices in chai enhance the cinnamon flavor, creating a delightful escape with every sip.
-
Caramel Sauce: Drizzle caramel atop your cheesecake for an extra layer of sweetness; it’s a divine pairing that brings out the flavors beautifully.
-
Chopped Pecans: Sprinkle toasted pecans on top for a delightful crunch, adding a nutty richness that perfectly contrasts the cheesecake’s creaminess.
-
Chocolate Sauce: For chocolate lovers, a rich chocolate drizzle adds a luscious decadence that pairs wonderfully with the honey flavors.
-
Vanilla Ice Cream: Scoop creamy vanilla ice cream alongside for a delightful contrast in temperature and texture, ensuring a truly indulgent experience.
Embrace these pairings to make your Honey Bun Cheesecake even more unforgettable!
How to Store and Freeze Honey Bun Cheesecake
Fridge: Keep your Honey Bun Cheesecake tightly covered in plastic wrap or an airtight container for up to 5-7 days, ensuring it stays fresh and delicious.
Freezer: For longer storage, freeze slices wrapped individually in plastic wrap and then aluminum foil for up to 3 months—this helps retain its creamy texture.
Thawing: When ready to enjoy, thaw in the fridge overnight for the best results and then allow it to come to room temperature before serving.
Reheating: If you prefer it warm, you can gently reheat slices in the microwave for about 10-15 seconds—just enough to take the chill off and enhance the flavors.
Expert Tips for Honey Bun Cheesecake
-
Room Temperature Dairy: Ensure all dairy ingredients are at room temperature to prevent lumps and achieve a smooth filling for your Honey Bun Cheesecake.
-
Avoid Overmixing: Be cautious when mixing in the eggs; overmixing can lead to cracks in your cheesecake. Mix gently until just combined.
-
Proper Cooling: Let the cheesecake cool in the oven after baking for an hour to reduce the chance of cracks and ensure a creamy texture.
-
Water Bath Necessity: Always use the bain-marie method by placing the pan in boiling water; this helps to evenly bake the cheesecake and keeps it moist.
-
Clean Cuts: For beautifully neat slices, use a hot, clean knife to slice the cheesecake—this maintains the presentation and is perfect for sharing!
Indulge in Honey Bun Cheesecake by following these helpful tips to ensure perfection and delight your guests!
Honey Bun Cheesecake Recipe FAQs
What type of cookies are best for the crust?
I recommend using Nilla Wafers or graham crackers for a deliciously buttery crust. If you’re looking for a gluten-free version, opt for gluten-free cookies that can be finely crushed to achieve a similar texture.
How should I store leftover Honey Bun Cheesecake?
Your delectable Honey Bun Cheesecake can be stored in the fridge, tightly covered with plastic wrap or in an airtight container, for about 5-7 days. This will keep it fresh and enjoyable for you to savor at your leisure!
Can I freeze Honey Bun Cheesecake?
Absolutely! For freezing, slice the cheesecake into individual portions, wrap each piece in plastic wrap, and then in aluminum foil. This way, it can be frozen for up to 3 months without losing its creamy texture. When you’re ready to enjoy, simply thaw in the fridge overnight!
How can I prevent cracks in my cheesecake?
To achieve a flawless finish without cracks, be sure to mix your ingredients gently after adding eggs. Overmixing incorporates too much air, which can expand and create cracks during baking. Additionally, allowing it to cool slowly in the oven after baking helps maintain its lovely texture.
Is this cheesecake safe for people with nut allergies?
Yes! The base recipe for Honey Bun Cheesecake does not contain nuts, making it safe for most individuals with nut allergies. However, if you choose to add garnishes like chopped pecans for decoration, ensure to inform your guests about this addition to avoid any allergic reactions.
How can I customize this cheesecake for dietary preferences?
The Honey Bun Cheesecake is easily adaptable! You can opt for gluten-free cookies for the crust to cater to gluten sensitivities. Additionally, experimenting with different flavor extracts or spices, such as pumpkin puree or almond extract, can help create a personalized dessert that’s perfect for anyone’s taste buds.
Feel free to indulge in your homemade Honey Bun Cheesecake knowing that you can make it suit everyone’s dietary needs and preferences!
Indulge in Honey Bun Cheesecake for a Sweet Nostalgic Treat
Ingredients
Equipment
Method
- Preheat your oven to 350°F (175°C) and prepare a 9-inch springform pan by greasing it lightly.
- In a mixing bowl, combine the finely crushed Nilla wafers or graham crackers with the granulated sugar and ground cinnamon. Pour in melted butter, mixing until the crumbs are evenly moistened.
- Press this mixture firmly into the bottom of the prepared pan and bake for 10-12 minutes, or until golden brown. Allow it to cool completely before adding the filling.
- In a large bowl, beat the softened cream cheese until it’s perfectly smooth and creamy. Gradually add granulated sugar, continuing to mix until combined.
- Blend in the sour cream, vanilla extract, and fine sea salt until smoothly incorporated. Add the eggs one at a time, carefully mixing after each addition to avoid overbeating.
- In a separate bowl, mix the light brown sugar, ground cinnamon, and all-purpose flour. Pour 2/3 of your cheesecake batter onto the cooled crust, spreading it evenly.
- Sprinkle 3/4 of the cinnamon-sugar mixture over the top. Carefully spoon the remaining cheesecake batter over this layer, then use a knife to gently swirl the top.
- Wrap the springform pan tightly in aluminum foil to prevent water from seeping in. Reduce the oven temperature to 325°F (160°C).
- Place the wrapped pan into a larger roasting pan filled with boiling water, ensuring the water reaches halfway up the sides of the cheesecake pan for the bain-marie method.
- Bake for 70-90 minutes, or until the edges are set but the center jiggles slightly when shaken.
- Once baked, turn off the oven and leave the cheesecake inside for an additional hour to cool gently.
- After this hour, carefully remove the pan from the water bath and let it come to room temperature. Once cooled, refrigerate your cheesecake for at least 6-8 hours or overnight.
- To create the glaze, whisk together the powdered sugar, milk or heavy cream, honey, and a dash of vanilla extract until smooth.
- Run a knife around the edge to gently release it from the springform pan and remove the sides. Drizzle the glaze generously over the top and garnish as desired.
Leave a Reply