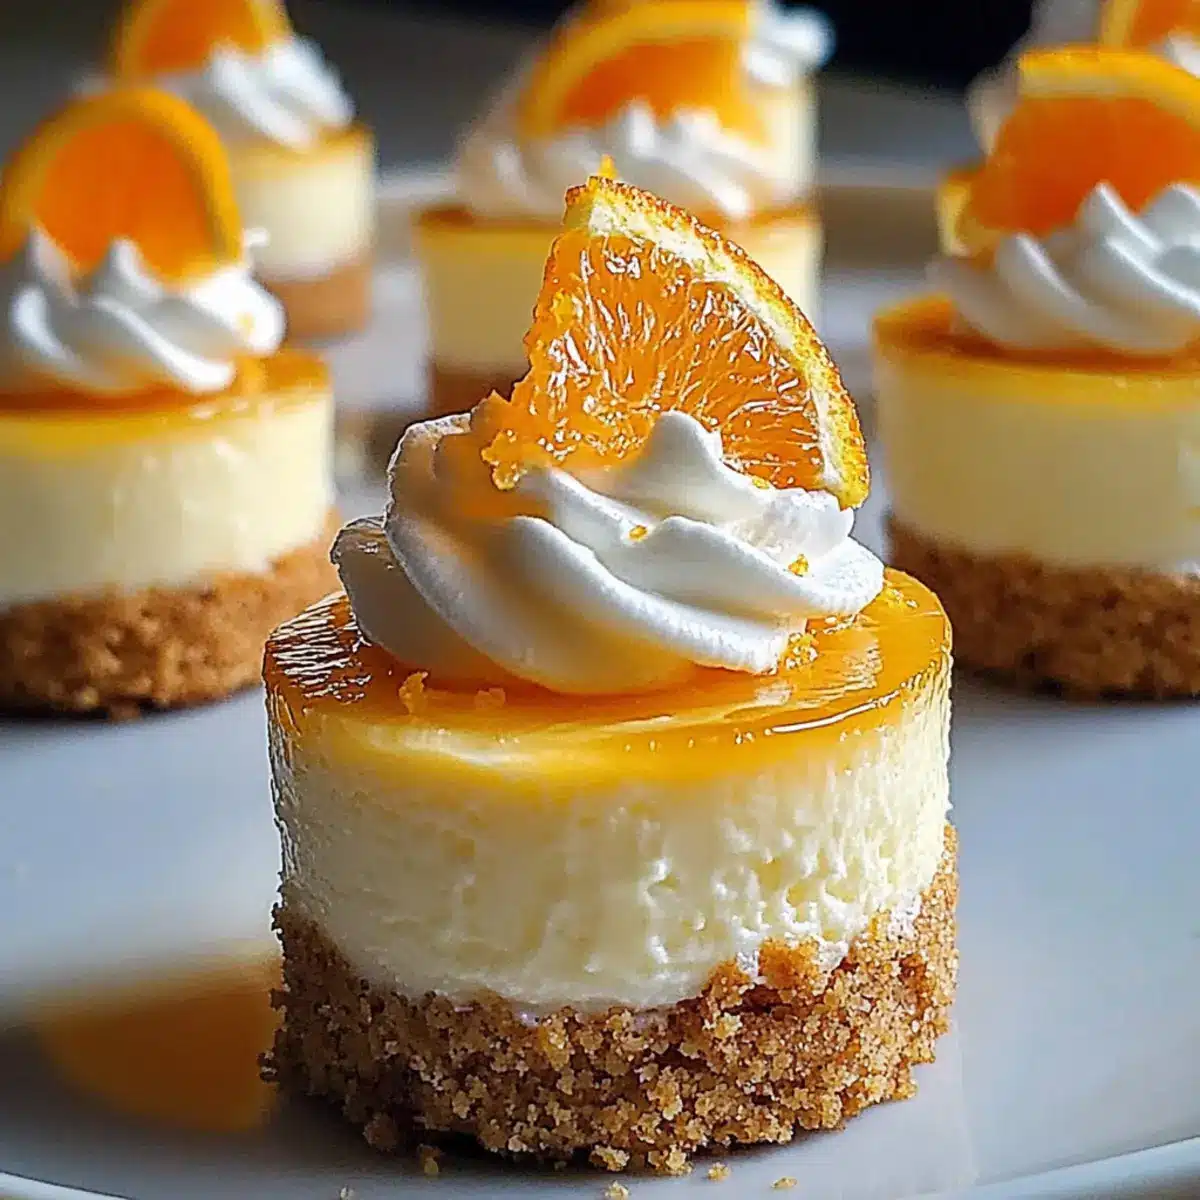
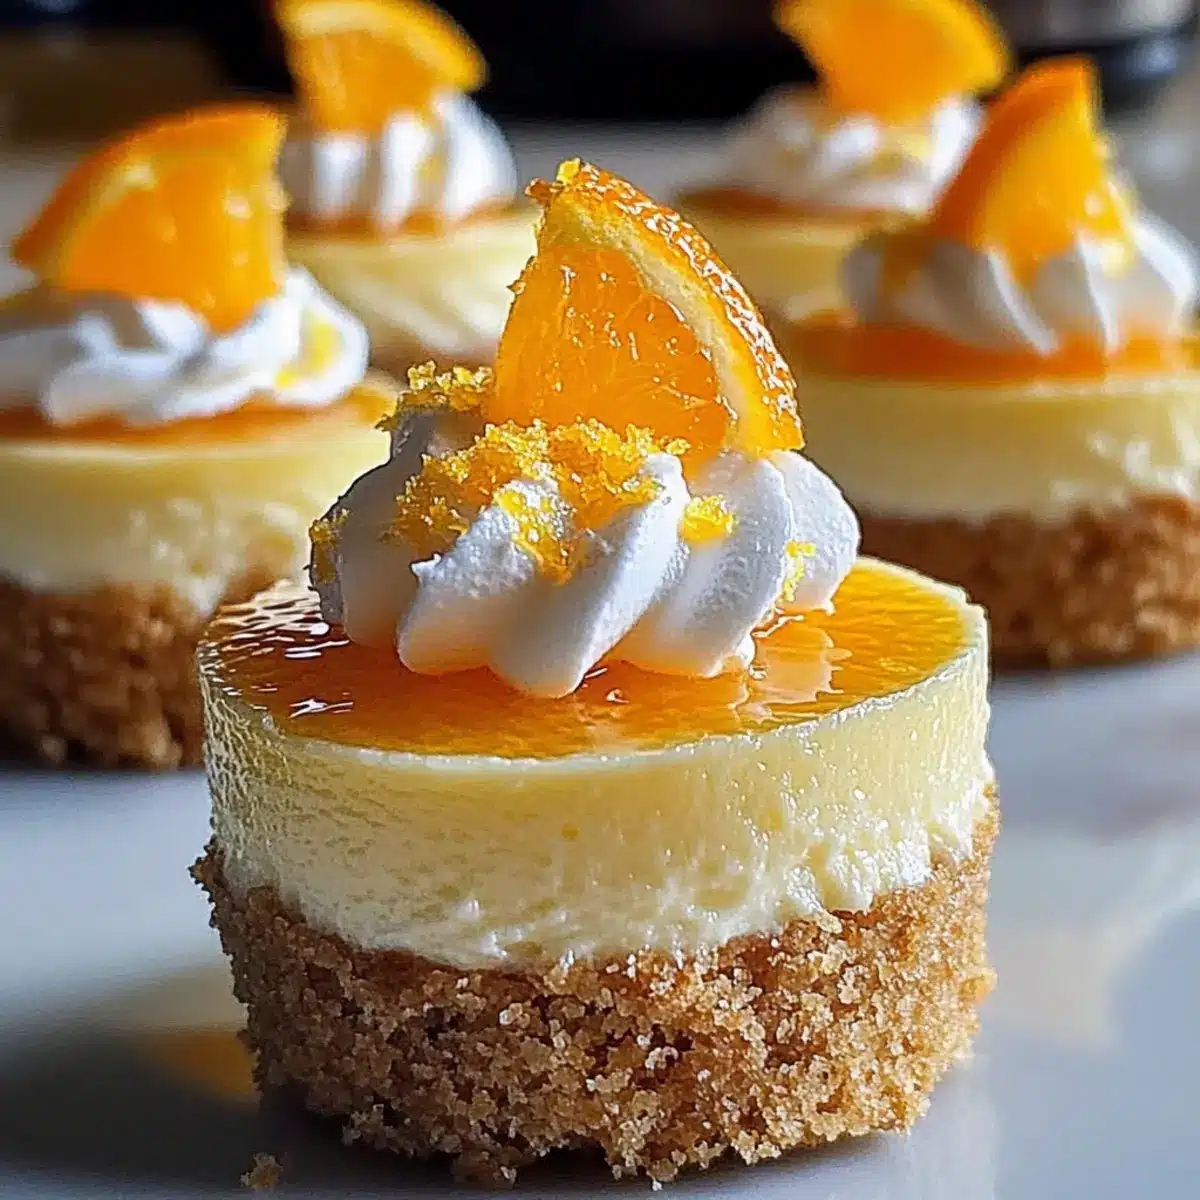
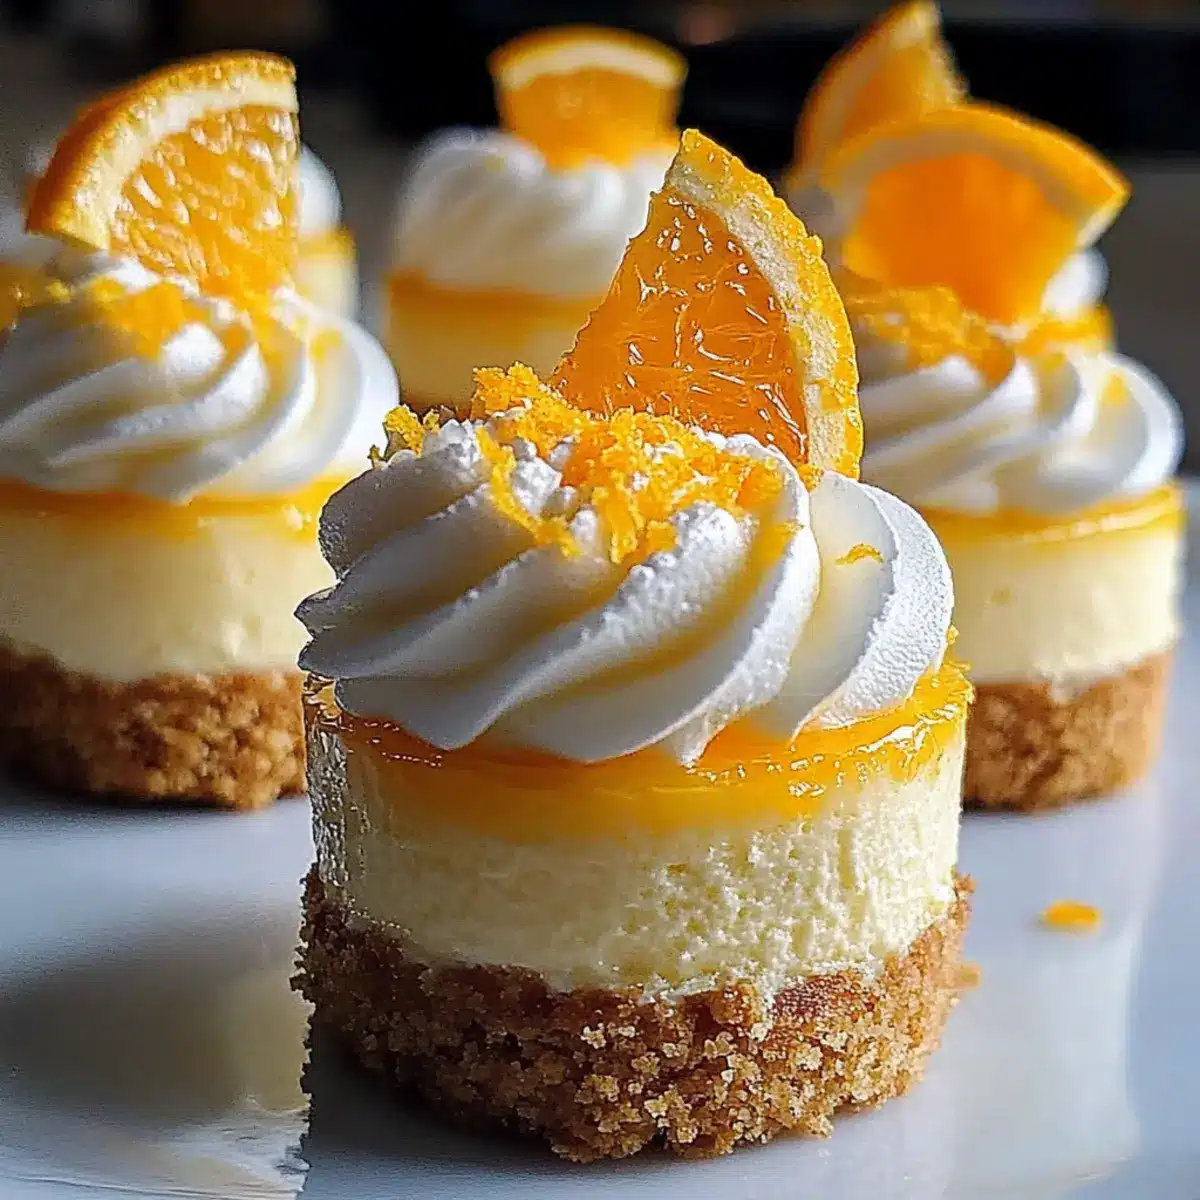
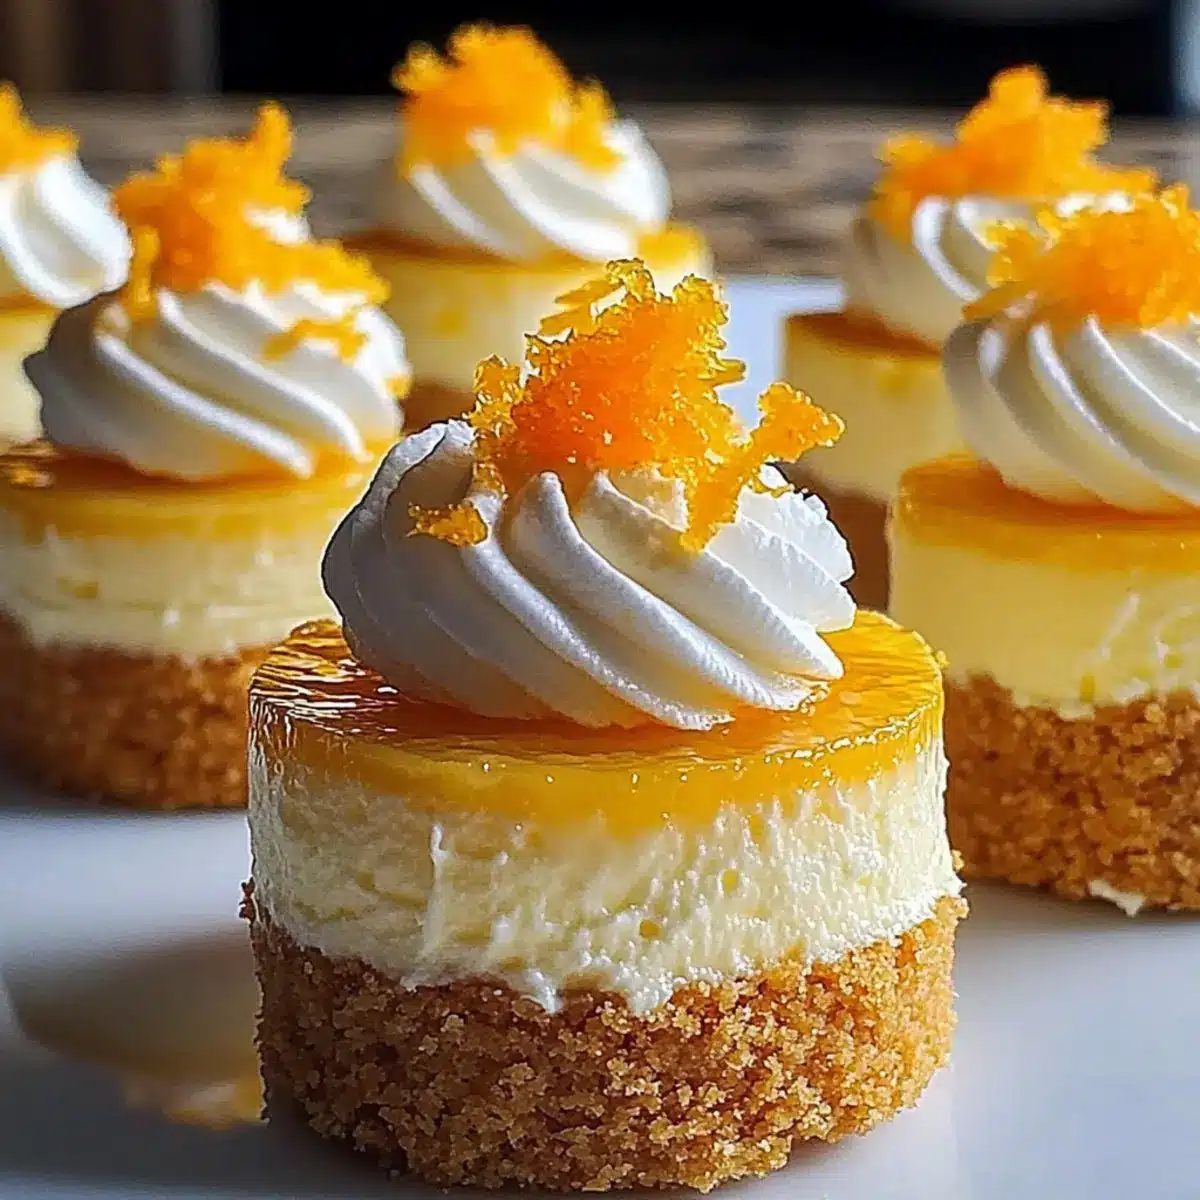
The aroma of freshly zested oranges whisked me back to summer afternoons spent playing outside, my hands sticky from melting popsicles. These Orange Creamsicle Mini Cheesecakes capture that carefree essence, blending the nostalgia of an ice cream truck treat with the sophistication of a homemade dessert. Each bite reveals a creamy, citrus-infused cheesecake snugly tucked in a buttery graham cracker crust, making them not just an easy dessert but a delightful centerpiece for any gathering. Whether you’re hosting a party or simply looking to elevate your weeknight sweets, these mini cheesecakes promise to deliver joy without the fuss. Feeling curious how to bring sunshine to your dessert table? Let’s dive into the recipe!
Why Make Orange Creamsicle Mini Cheesecakes?
Irresistibly Creamy: Each cheesecake boasts a silky filling that melts in your mouth, perfectly capturing that nostalgic orange popsicle taste.
Quick to Prepare: With simple steps and minimal ingredients, these mini delights come together swiftly, leaving you more time to enjoy with loved ones.
Customizable Base: Use gluten-free graham crackers or swap in your favorite cookies for a unique crust that suits everyone’s taste!
Crowd-Pleasing Appeal: Ideal for summer gatherings, birthday parties, or just because; they ensure everyone is satisfied with their own individual serving.
Make-Ahead Convenience: Chill them overnight for enhanced flavor, making them a stress-free option to whip up ahead of time.
Eager to explore more desserts with a nostalgic twist? Check out my Crisp Mini Cheesecakes or for a bite-sized treat, try these Mini Apple Pies that will also impress your guests!
Orange Creamsicle Mini Cheesecakes Ingredients
• To craft these delightful treats, gather the following ingredients for a perfect balance of creamy and zesty bliss!
For the Crust
- Graham Cracker Crumbs – The base structure for the crust; use gluten-free graham crackers for a gluten-free option.
- Granulated Sugar – Adds sweetness to the crust; substitute with brown sugar for a richer flavor.
- Unsalted Butter – Binds the graham crumbs; make sure to melt it for even mixing.
For the Filling
- Cream Cheese – Provides that rich, creamy texture; always use room temperature to prevent lumps.
- Sour Cream – Adds tanginess; can be swapped with Greek yogurt for a similar effect.
- Freshly Squeezed Orange Juice – The star flavoring; steer clear of bottled juice for the best taste.
- Orange Zest – Intensifies the citrus flavor; a microplane works wonders to avoid bitter pith.
- Vanilla Extract – Complements the other flavors beautifully; opt for pure vanilla for the best results.
- Eggs – Essential for structure; remember to use them at room temperature to avoid cracks.
For the Topping
- Heavy Whipping Cream – Whips into a fluffy and luscious topping; ensure it’s chilled for optimal results.
- Powdered Sugar – Sweetens the whipped cream; adjust the amount based on your preference for sweetness.
Garnish
- Extra Orange Zest/Candied Orange Peel – Adds a decorative touch and extra burst of flavor; perfect for a lovely finish!
Step‑by‑Step Instructions for Orange Creamsicle Mini Cheesecakes
Step 1: Preheat the Oven
Begin by preheating your oven to 325°F (160°C). While it’s warming up, line a standard 12-cup muffin tin with cupcake liners to hold the cheesecakes. This will make removing them easier once they are baked and cooled, ensuring a smooth, hassle-free serving experience later.
Step 2: Prepare the Crust
In a mixing bowl, combine graham cracker crumbs, granulated sugar, and melted butter until they form a crumbly, wet mixture. Evenly press this mixture into the bottom of the muffin tin, creating a solid crust. Bake in the preheated oven for 5 to 6 minutes, or until the crust is lightly golden, then remove and let cool while you prepare the filling.
Step 3: Mix the Cream Cheese Filling
In a large bowl, beat the softened cream cheese with an electric mixer on medium speed until it’s completely smooth. Gradually add in granulated sugar and mix until well combined. The goal is to get a creamy texture without lumps, which is essential for your Orange Creamsicle Mini Cheesecakes to be velvety and delicious.
Step 4: Add Flavorful Ingredients
Next, incorporate the sour cream, freshly squeezed orange juice, orange zest, and vanilla extract into the cream cheese mixture. Mix on low speed until everything is well combined and silky. This blend of citrus and creaminess is what gives our mini cheesecakes their irresistible flavor.
Step 5: Incorporate the Eggs
With the mixer on low, add the eggs one at a time, ensuring each is fully mixed in before adding the next. Gently combine until just incorporated to avoid introducing too much air which can lead to cracks during baking. This careful mixing will help maintain the integrity of your Orange Creamsicle Mini Cheesecakes.
Step 6: Fill the Crusts
Carefully divide the cheesecake filling evenly among the baked crusts in the muffin tin. Tap the tin gently on the counter to release any air bubbles that may be trapped in the filling. This step is crucial as it helps ensure a smooth surface for your mini cheesecakes post-baking.
Step 7: Bake the Cheesecakes
Place the filled muffin tin back in the oven and bake for 18 to 22 minutes, or until the edges are set but the centers remain slightly jiggly. Once done, turn off the oven and leave the door ajar for 10 minutes, allowing the cheesecakes to cool gradually, which helps prevent cracking.
Step 8: Cool Completely
After the initial cooling in the oven, carefully transfer the mini cheesecakes to a wire rack and let them come to room temperature. This cooling step is critical for achieving the perfect texture in your Orange Creamsicle Mini Cheesecakes before chilling them in the refrigerator.
Step 9: Chill for Flavor Development
Refrigerate the cooled mini cheesecakes for at least 4 hours, or ideally overnight. This chilling period allows all the flavors to meld beautifully, ensuring that your Orange Creamsicle Mini Cheesecakes taste heavenly when it’s time to serve.
Step 10: Make the Whipped Topping
When you’re ready to serve, whip the heavy cream in a bowl until soft peaks form, then gradually add powdered sugar and a splash of vanilla extract. Continue beating until stiff peaks are achieved, resulting in a light and fluffy topping that perfectly balances the creamy cheesecakes.
Step 11: Decorate and Serve
With the whipped cream ready, pipe it generously onto the tops of each mini cheesecake. For an elegant touch, garnish with extra orange zest or candied orange peel just before serving. This final flourish not only enhances the visual appeal but also adds a delightful burst of citrus flavor to your Orange Creamsicle Mini Cheesecakes.
Expert Tips for Orange Creamsicle Mini Cheesecakes
-
Room Temperature Ingredients: Ensure your cream cheese and eggs are at room temperature for a smooth filling. Cold ingredients can lead to lumps in your Orange Creamsicle Mini Cheesecakes.
-
Gentle Mixing: Mix the egg mixture gently and only until combined. Overmixing can introduce air, causing cracks during baking.
-
Proper Cooling: Allow the cheesecakes to cool gradually in the oven to prevent sudden temperature changes that can lead to cracks.
-
Chilling Time: For the best flavor and texture, let your cheesecakes chill in the fridge for at least 4 hours or overnight before serving.
-
Variations Galore: Don’t hesitate to experiment! Swap graham cracker crusts for different cookies or try adding a swirl of fruit puree for a unique twist on your Orange Creamsicle Mini Cheesecakes.
How to Store and Freeze Orange Creamsicle Mini Cheesecakes
Fridge: Keep your mini cheesecakes in an airtight container in the refrigerator for up to 5 days. This preserves their creamy texture and refreshing orange flavor.
Freezer: For longer storage, freeze the cheesecakes (without toppings) for up to 2 months. Ensure they are wrapped well in plastic wrap and then placed in a freezer-safe container.
Thawing: When you’re ready to enjoy, thaw the Orange Creamsicle Mini Cheesecakes in the fridge overnight. Avoid microwaving, as that can affect the texture.
Reheating: Serve chilled straight from the fridge for the best taste. If desired, reload with fresh whipped cream or a touch of extra orange zest before serving.
Make Ahead Options
These Orange Creamsicle Mini Cheesecakes are a dream for meal prep enthusiasts! You can prepare the crusts and the cheesecake filling up to 24 hours in advance. Just make the graham cracker crust, press it into the muffin tins, and refrigerate tightly wrapped. For the filling, mix all ingredients except the eggs, then cover and store in the fridge. When you’re ready to bake, simply add the eggs to the chilled mixture and fill the crusts. After baking, cool them at room temperature before chilling overnight to enhance the flavor. This method ensures your mini cheesecakes remain just as delicious while saving you precious time on party day!
Orange Creamsicle Mini Cheesecakes Variations
Feel free to mix and match these ideas to suit your taste and dietary needs, bringing even more sunshine to your dessert experience!
- Gluten-Free: Use gluten-free graham crackers to make the crust suitable for those with gluten sensitivities.
- Brown Sugar Twist: Substitute granulated sugar with brown sugar for a richer, more caramel-like flavor in the crust and filling.
- Creamy Greek Yogurt: Swap sour cream for Greek yogurt, adding protein and a slight tang for creaminess that complements the citrus.
- Chocolate Delight: Mix in a tablespoon of cocoa powder or top with chocolate ganache for a decadent chocolate-orange mashup that will please any chocolate lover.
- Citrus Medley: Experiment by adding lemon or lime juice and zest along with the orange for a vibrant citrus combination that sings with freshness.
- Fruity Swirl: Before baking, fold in a swirl of fruit puree, like raspberry or strawberry, for a colorful and fruity surprise in every bite.
- No-Bake Option: For a chilled dessert, skip the baking process and set the filling in the fridge for a creamy, soft-textured result.
- Dairy-Free: Use dairy-free cream cheese and coconut whipped cream for a delicious alternative that everyone can enjoy.
These delightful variations can transform your Orange Creamsicle Mini Cheesecakes into something uniquely yours. Baking should be a joyful, creative process, so don’t hesitate to try other dessert inspirations like my Crisp Mini Cheesecakes or delightful Mini Apple Pies for even more sweet creations!
What to Serve with Orange Creamsicle Mini Cheesecakes?
Bring joy and flavor to your dessert table by crafting a meal that complements the refreshing sweetness of these delightful mini cheesecakes.
-
Fresh Fruit Salad: A vibrant mix of seasonal fruits like berries and melon adds a refreshing contrast that pairs beautifully with the creamy cheesecakes.
-
Homemade Lemonade: The zesty, citrus notes of lemonade perfectly balance the creamy richness of the cheesecakes, making for a delightful summer beverage.
-
Crunchy Almond Biscotti: The nutty crunch provides an enjoyable texture contrast while enhancing the orange flavors, creating an elegant snack alongside your dessert.
-
Coconut Macaroons: Their chewy texture and subtle sweetness beautifully complement the creamy, citrus notes of the cheesecakes, offering a tropical twist.
A surprise bite of these tropical-inspired treats will leave guests smiling and satisfied.
-
Vanilla Ice Cream: A scoop of smooth vanilla ice cream alongside the cheesecakes adds a luscious creaminess, making each bite heavenly.
-
Mint Tea: Refreshing and aromatic, mint tea is a perfect palate cleanser that complements the zesty citrus flavors of your Orange Creamsicle Mini Cheesecakes.
-
Chocolate Drizzle: A rich chocolate drizzle over the mini cheesecakes introduces a delightful depth of flavor, enhancing their sweetness while providing a gorgeous presentation.
Elevate your dessert experience by pairing these mini cheesecakes with these delicious companions!
Orange Creamsicle Mini Cheesecakes Recipe FAQs
Can I use bottled orange juice instead of fresh?
Absolutely! However, for the best flavor, I highly recommend using freshly squeezed orange juice. Bottled juice can often taste flat compared to the vibrant, zesty tones of fresh oranges, which truly enhance the overall taste of your Orange Creamsicle Mini Cheesecakes.
How should I store the mini cheesecakes?
Keep your mini cheesecakes in an airtight container in the refrigerator for up to 5 days. This helps maintain their creamy texture and refreshing orange flavor, ensuring each dessert is just as delightful as the first day they were made.
Can I freeze these mini cheesecakes? If so, how?
Yes, you can freeze the cheesecakes for up to 2 months! Here’s how to do it:
- Make sure the cheesecakes are cooled completely.
- Remove them from the muffin tin and wrap each mini cheesecake tightly in plastic wrap.
- Place the wrapped cheesecakes in a freezer-safe container to prevent freezer burn.
When you’re ready to enjoy them, simply thaw them in the refrigerator overnight before serving. Avoid using the microwave, as it can alter their smooth texture.
What should I do if my cheesecakes crack while baking?
If the tops of your cheesecakes crack during the baking process, don’t worry! This can happen if the batter is overmixed or due to rapid temperature changes. To help avoid this, make sure to mix the eggs gently and ensure a gradual cooling process in the oven. Remember, a little whipped cream topping can cover up any imperfections beautifully!
Are these mini cheesecakes suitable for gluten-free diets?
Very! You can easily make your Orange Creamsicle Mini Cheesecakes gluten-free by using gluten-free graham cracker crumbs in the crust. Just check that all other ingredients—like the cream cheese and heavy whipping cream—are certified gluten-free as well.
Can I make substitutions for the toppings?
Certainly! If you’re looking for a lighter option, you can skip the whipped cream topping altogether and instead drizzle with a homemade orange glaze or serve them with a side of fruit compote. Alternatively, consider topping with coconut whipped cream for a different twist that blends beautifully with the citrus flavor!
Delicious Orange Creamsicle Mini Cheesecakes for Sweet Bliss
Ingredients
Equipment
Method
- Preheat your oven to 325°F (160°C). Line a standard 12-cup muffin tin with cupcake liners.
- Combine graham cracker crumbs, granulated sugar, and melted butter in a mixing bowl. Press into the muffin tin to form the crust. Bake for 5 to 6 minutes and let cool.
- Beat softened cream cheese until smooth. Gradually add in granulated sugar and mix until well combined.
- Incorporate sour cream, freshly squeezed orange juice, orange zest, and vanilla extract into the cream cheese mixture. Mix on low speed until well combined.
- Add eggs one at a time, mixing gently just until incorporated.
- Divide the cheesecake filling evenly among the baked crusts. Tap the tin to release air bubbles.
- Bake for 18 to 22 minutes, until edges are set but centers are jiggly. Cool in the oven for 10 minutes with the door ajar.
- Transfer mini cheesecakes to a wire rack and let cool to room temperature before refrigerating.
- Refrigerate for at least 4 hours, preferably overnight, to let flavors meld.
- Whip heavy cream until soft peaks form, then add powdered sugar and vanilla extract until stiff peaks are achieved.
- Pipe whipped cream onto each cheesecake and garnish with extra orange zest or candied orange peel before serving.
Leave a Reply