As the leaves transform into a vibrant palette of oranges and golds, I find myself dreaming of the perfect autumn gatherings filled with laughter, warmth, and delicious bites. That’s where these delightful Pumpkin Patch Deviled Eggs come into play—a whimsical appetizer that brings both charm and flavor to any festive table. Not only do they feature an easy peeling technique to save you time, but their playful pumpkin appearance is bound to spark smiles across the room. Simple yet stunning, these creamy-filled eggs are a guaranteed crowd-pleaser for your holiday events. Ready to impress your guests this season? Let’s dive into this pumpkin-inspired fun!
Why Are These Deviled Eggs Special?
Uniquely Festive: These Pumpkin Patch Deviled Eggs are not just any appetizer; they offer a delightful twist on the classic dish, making them a standout at your autumn gatherings.
Easy Peeling: Say goodbye to the struggle of peeling eggs! This recipe reveals a simple technique that ensures your eggs peel perfectly every time, allowing you to spend more time enjoying the festivities.
Crowd-Pleasing Flavor: With a creamy filling enhanced by just the right amount of seasoning, these eggs are packed with flavor that delights both kids and adults alike.
Visual Appeal: Their charming pumpkin-like appearance will capture everyone’s attention, making them an Instagram-worthy dish that adds a touch of whimsy to your spread.
Versatile Option: Feel free to mix in spices or herbs, such as smoked paprika or fresh dill, to customize the flavor profile to your liking. For other great ideas, check out my Christmas Deviled Eggs for a festive twist!
Pumpkin Patch Deviled Eggs Ingredients
• Get ready for a festive treat!
For the Filling
- Large Eggs – Fresh eggs yield better peeling results, ensuring a smooth and easy prep.
- Mayonnaise – This key ingredient adds creaminess and richness, making every bite delightful.
- Yellow Mustard – Offers a tangy balance; substitute with Dijon mustard for a touch of gourmet flair.
- Salt – Enhances flavor; sea salt or kosher salt works best for this creamy filling.
- Black Pepper – Freshly cracked pepper adds warmth and depth; it’s a must for a tasty touch.
- Paprika – Provides color and flavor; feel free to use smoked paprika for an extra kick.
- Orange Food Coloring (optional) – Brightens the filling for a vibrant pumpkin shade; omit if you prefer a classic look.
- Fresh Chives – Perfect for creating cute stems; substitute with dill or parsley if you need alternatives.
For Serving
- Ice Water – Prepare a large bowl filled with ice water for an effective cooling bath after boiling.
These Pumpkin Patch Deviled Eggs are sure to enchant your guests with their charming appearance and delectable taste!
Step‑by‑Step Instructions for Pumpkin Patch Deviled Eggs
Step 1: Boil Eggs
Begin by placing the large eggs in a saucepan and covering them with cold water, ensuring each egg is submerged. Place the pot on the stove over high heat and bring the water to a rolling boil. Once boiling, remove the pan from heat, cover it with a lid, and let the eggs sit for 10 minutes. This cooking method will yield perfectly hard-boiled eggs for your Pumpkin Patch Deviled Eggs.
Step 2: Ice Bath
While the eggs are resting, prepare a large bowl filled with ice water. After 10 minutes, carefully transfer the eggs from the saucepan into the ice bath using a slotted spoon. Let the eggs chill in the ice water for about 5 minutes. This quick cooling process will not only stop the cooking but also make peeling the eggs much easier.
Step 3: Peel Eggs
Once the eggs are cool, gently tap each egg on a hard surface to crack the shell, and then roll it lightly in your hands to further loosen the shell. Start peeling the eggs under cool running water; this will help remove the shell smoothly without damaging the whites. After peeling, set the eggs aside on a clean kitchen towel to dry, preparing them for your delightful Pumpkin Patch Deviled Eggs.
Step 4: Mix Filling
Carefully slice each peeled egg in half lengthwise and scoop out the yolks into a mixing bowl, being careful to keep the whites intact. Add mayonnaise, yellow mustard, salt, black pepper, paprika, and orange food coloring (if using) to the yolks. Using a fork, mash the yolks and mix thoroughly until the filling is smooth and creamy. This delicious filling will be the star of your Pumpkin Patch Deviled Eggs.
Step 5: Pipe Filling
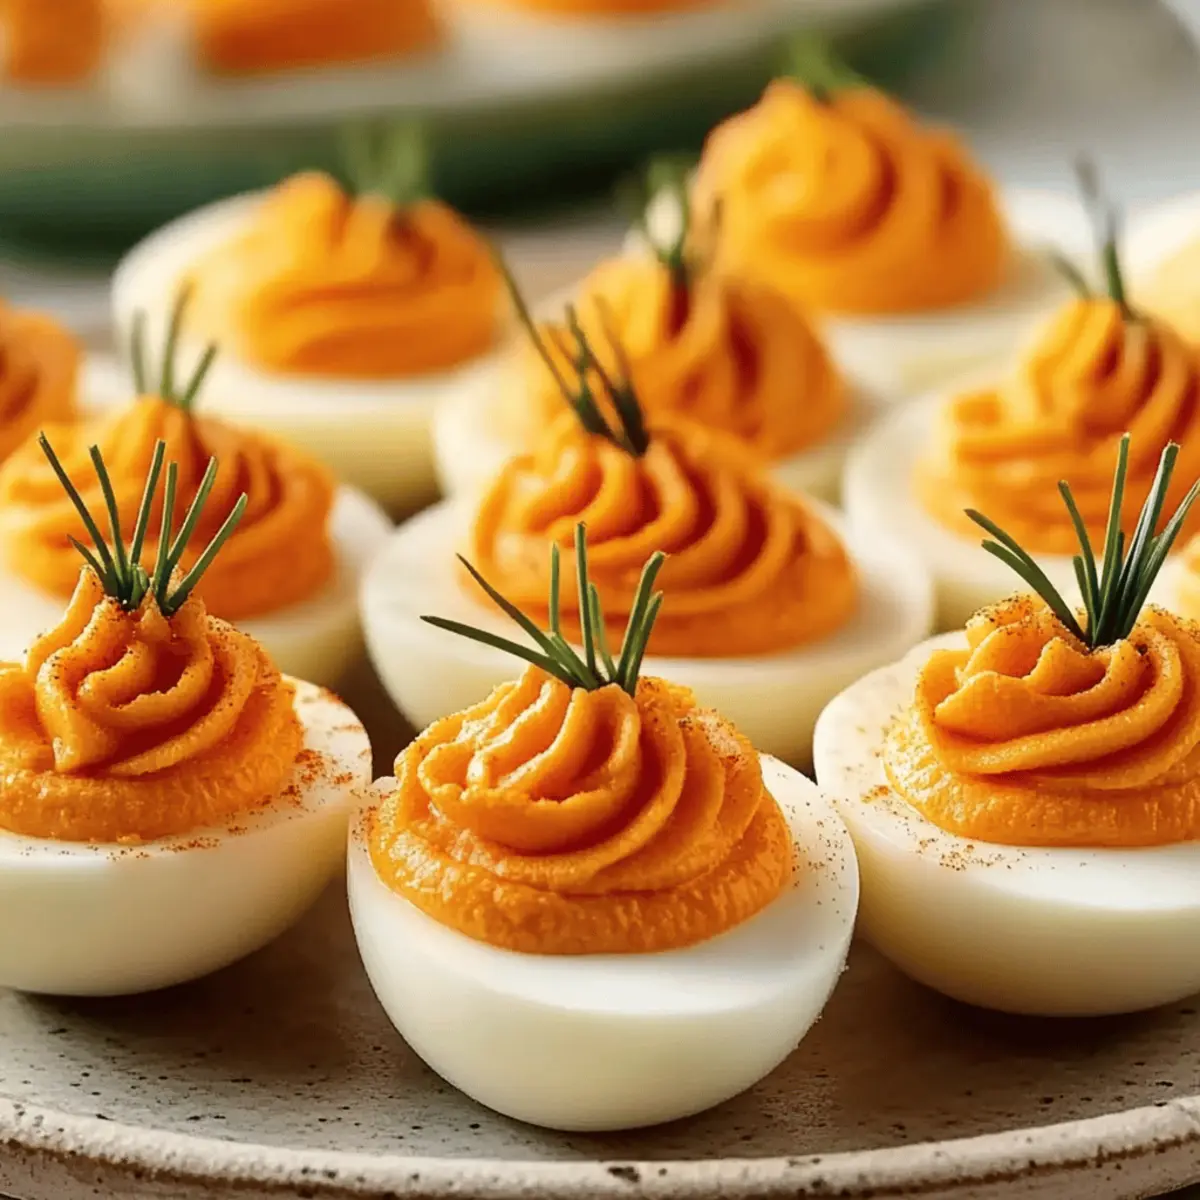
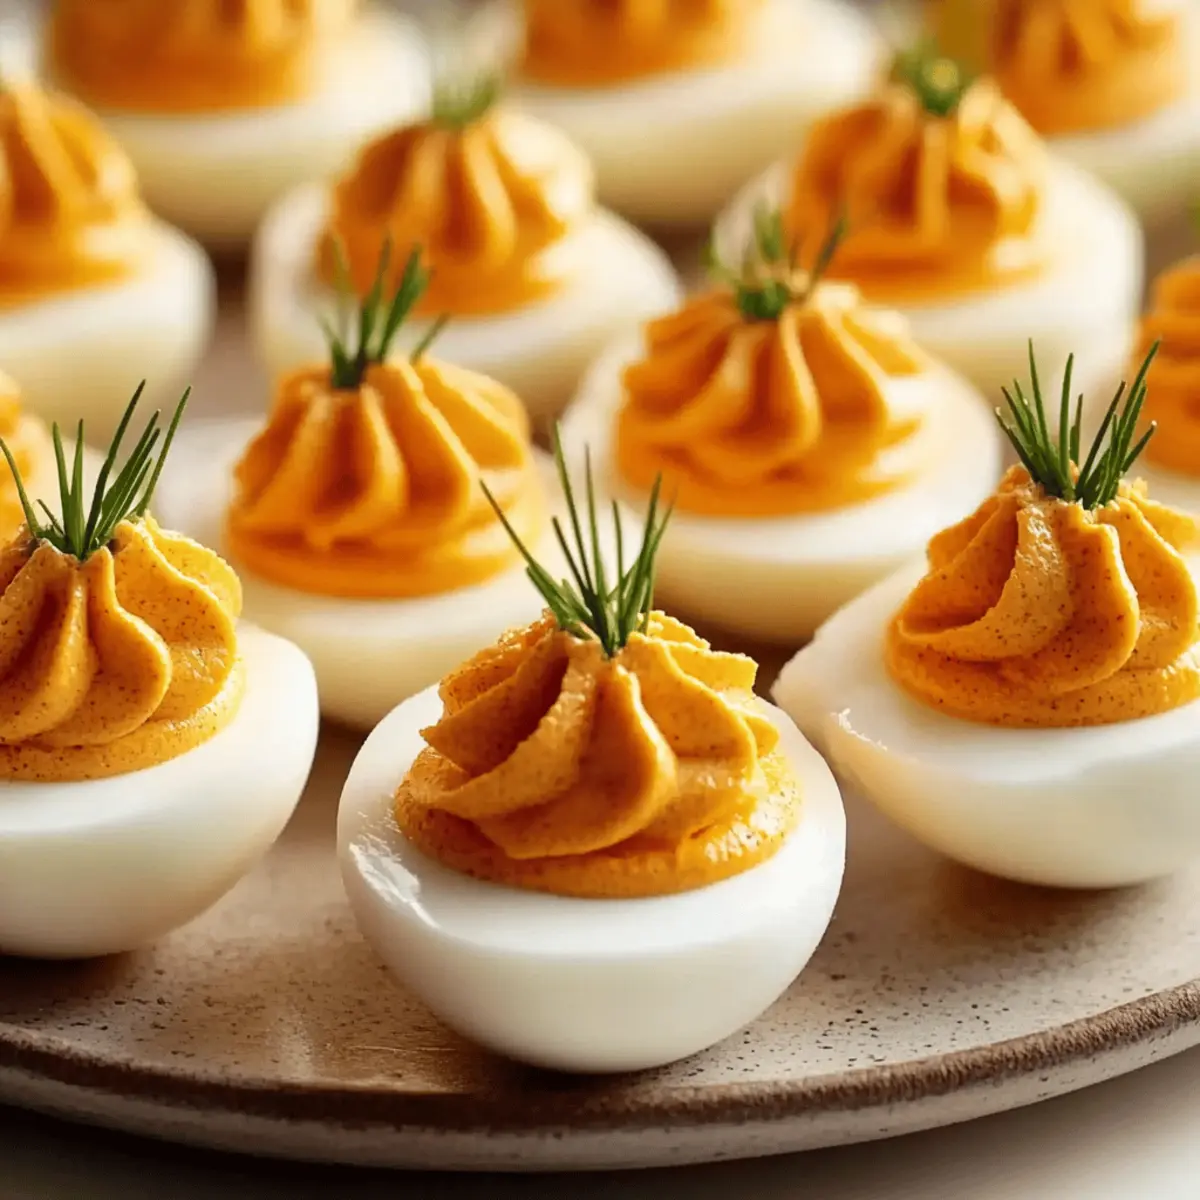
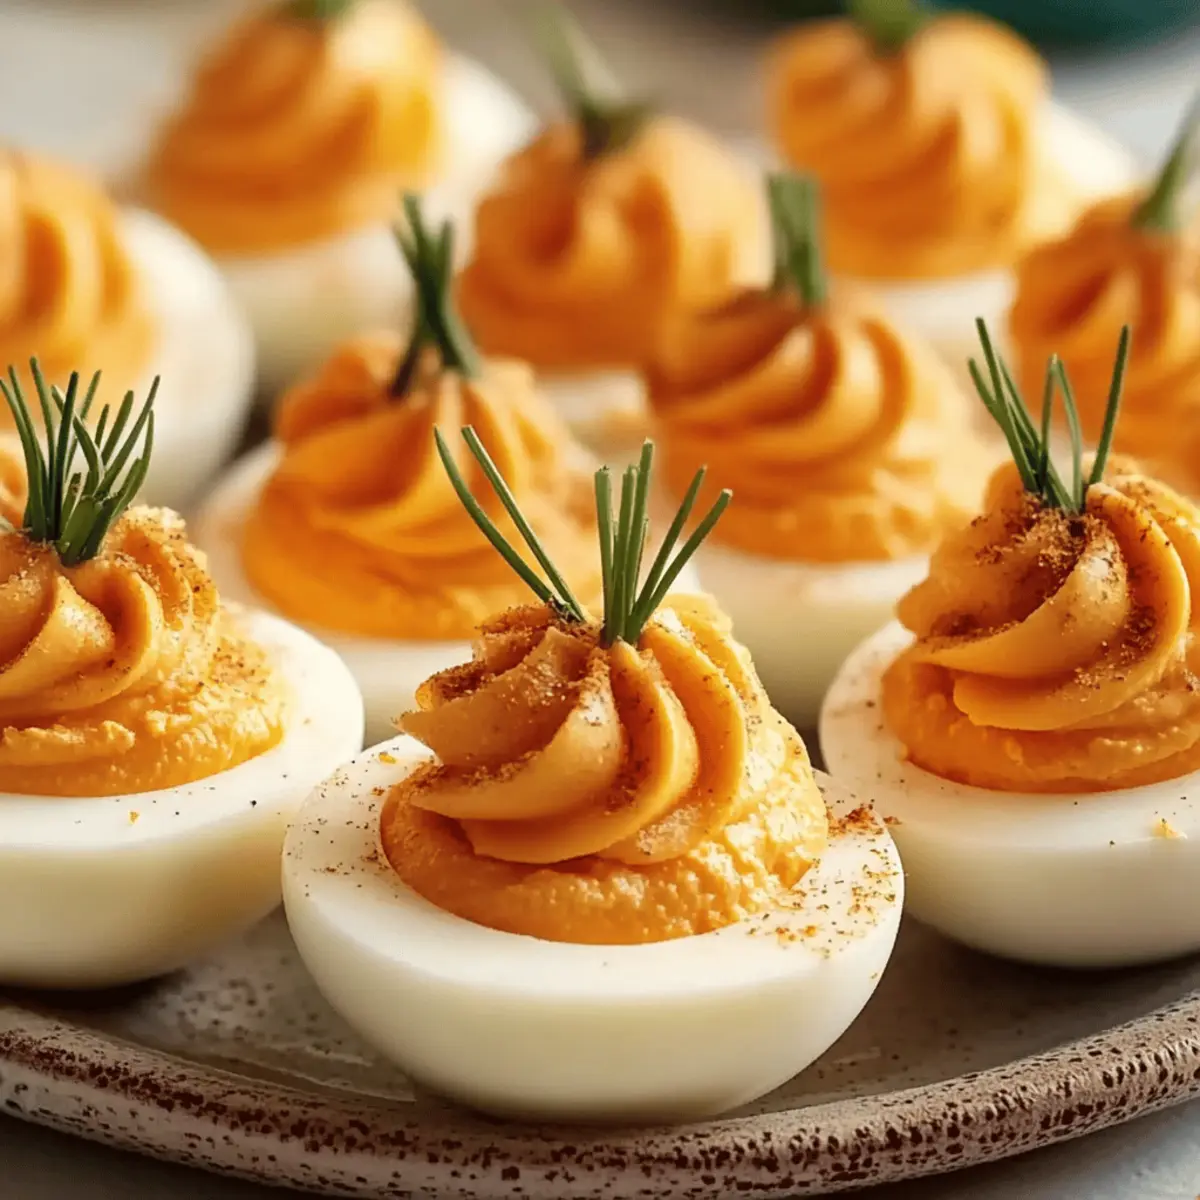
To achieve that fun pumpkin appearance, fill a piping bag fitted with a star tip with your yolk mixture. Gently squeeze the bag to pipe the creamy filling into the egg whites, creating a nice swirl that resembles the look of a pumpkin. Be generous with the filling to ensure a delightful bite.
Step 6: Create Ridges
To enhance the pumpkin-like shape of your deviled eggs, take a knife or a toothpick and carefully create ridges along the sides of the piped filling. This step is key for achieving the festive look that makes these Pumpkin Patch Deviled Eggs truly special. It’s fun and adds an artistic touch to your appetizer.
Step 7: Add Stems
Now for the finishing touch! Take small bundles of fresh chives and gently insert them into the tops of each piped filling to resemble pumpkin stems. Make sure to position them at varying angles for a more playful and natural look. This will elevate the festive feel of your Pumpkin Patch Deviled Eggs, perfect for any autumn gathering.
Step 8: Chill
Once all the eggs are assembled, place them on a serving platter and refrigerate for at least 30 minutes before serving. Chilling allows the flavors to meld beautifully and ensures the deviled eggs are served at the ideal temperature. Your adorable and delicious Pumpkin Patch Deviled Eggs are now ready to impress your guests!

What to Serve with Pumpkin Patch Deviled Eggs
As you gather around the table, think about complementing these charming bites with dishes that will enhance the warm, festive atmosphere.
-
Crispy Bacon-Wrapped Asparagus: This crunchy, savory delight offers a wonderful contrast to the creamy deviled eggs, making for a perfectly balanced appetizer spread. Guests will love the combination of textures!
-
Roasted Butternut Squash Soup: A warm, creamy bowl of soup provides a comforting and seasonal pairing that aligns beautifully with the flavors of fall, enhancing the cozy vibe of your gathering.
-
Garlic Parmesan Roasted Potatoes: These golden bites introduce a satisfying crunch and flavor depth that pairs wonderfully with the richness of the deviled eggs, making each bite exciting.
-
Apple Cider Mimosas: Bright and refreshing, these drinks add a splash of festive fun while harmonizing with the fall theme and flavors of your savory appetizers.
-
Cranberry Orange Spinach Salad: A refreshing and colorful salad brings a burst of freshness and tangy sweetness that balances the richness of the deviled eggs while adding vibrant colors to your table.
-
Pumpkin Spice Cheesecake Bars: For dessert, these sweet treats keep the pumpkin theme alive and offer a deliciously festive close to your meal, sure to wow your guests.
Each of these pairings adds a unique layer to your dining experience, creating a beautiful harmony alongside your Pumpkin Patch Deviled Eggs!
Make Ahead Options
These Pumpkin Patch Deviled Eggs are a perfect candidate for meal prep, allowing you to enjoy the fun of hosting without the last-minute rush! You can boil and peel the eggs up to 3 days in advance, storing them in the refrigerator. For the yolk filling, prepare it the day before your event and keep it refrigerated in an airtight container. When you’re ready to serve, simply pipe the filling into the egg whites, create the festive ridges, and add the chive stems. This method ensures your deviled eggs remain just as delightful and flavorful, saving you time and making your autumn gatherings stress-free!
Expert Tips for Pumpkin Patch Deviled Eggs
-
Use Fresh Eggs: Fresh eggs peel much easier! If possible, choose eggs that are between 7-14 days old to ensure optimal peeling results.
-
Avoid Overcooking: Remove the eggs from heat immediately after boiling to prevent overcooking, which can create an unsightly green ring around the yolk.
-
Sieve for Smoothness: For a lump-free filling, use a fine-mesh sieve to press the yolks after mashing. This creates a creamy and delightful interior for your Pumpkin Patch Deviled Eggs.
-
Piping Technique: Use steady pressure when piping the filling into the egg whites. Gradually raise the piping bag to create a rounded shape for that perfect pumpkin look.
-
Chill for Flavor: Refrigerate the assembled deviled eggs for at least 30 minutes before serving to enhance the flavors and ensure a refreshing taste at your gathering.
Storage Tips for Pumpkin Patch Deviled Eggs
-
Fridge: Store leftovers in an airtight container for up to 2 days. For the best flavor and texture, enjoy them within 24 hours.
-
Freezer: These Pumpkin Patch Deviled Eggs are not suitable for freezing as the texture of the egg whites and filling can be affected.
-
Reheating: These deviled eggs are best served cold, so there’s no need to reheat. Simply chill them in the fridge before serving to maintain freshness.
-
Wrapping: If you’ve made ahead components, such as the yolk filling, refrigerate in a separate airtight container and pipe just before serving for optimal presentation.
Pumpkin Patch Deviled Eggs Variations
Feel free to make these delightful deviled eggs your own by experimenting with different flavors and presentations!
-
Spicy Kick: Add a pinch of cayenne pepper to the yolk mixture for a zesty surprise; this brings a delightful warmth that will awaken your taste buds.
-
Flavorful Stems: Swap out chives for roasted red pepper pieces or baby carrots for a colorful touch. This twist adds not just visual appeal but a touch of sweetness, enhancing the overall experience.
-
Herb Infusion: Mix in fresh dill or basil into the yolk filling for an aromatic twist; you’ll discover a refreshing flavor profile that pairs beautifully with the creamy filling.
-
Smoky Flavor: Use smoked paprika instead of regular for a deeper, more complex taste; this subtle change could be the perfect conversation starter at your gathering.
-
Vegetarian Delight: For an earthier flavor, consider adding finely chopped sun-dried tomatoes into the yolk mixture, giving the deviled eggs a sophisticated twist that complements the traditional recipe beautifully.
-
Creamy Avocado: Replace half of the mayonnaise with mashed avocado for a healthful, creamy variant; it adds a unique flavor and a beautiful green hue that enhances the pumpkin theme.
-
Dijon Mustard Twist: Swap yellow mustard for Dijon mustard to elevate the taste with a hint of sophistication. It’s an easy change that could take your appetizers to the next level.
-
Decorative Touch: Drizzle a little balsamic glaze on top before serving; not only does it look stunning, but it also adds a hint of tartness that balances the richness of the filling.
For even more recipe inspiration and variations, you might want to check out my festive Christmas Deviled Eggs or dive into the lovely world of my Pumpkin Spice Crumble for seasonal goodness!
Pumpkin Patch Deviled Eggs Recipe FAQs
What type of eggs should I use for the best results?
Absolutely, I recommend using fresh large eggs that are about 7-14 days old. These eggs will peel more easily and give you that beautiful, intact egg white, which is crucial for your Pumpkin Patch Deviled Eggs.
How should I store leftovers of these deviled eggs?
Store any leftovers in an airtight container in the refrigerator for up to 2 days. However, for the best flavor and texture, I suggest enjoying them within 24 hours. Keep them in a single layer to avoid squishing the adorable pumpkin shapes!
Can I freeze Pumpkin Patch Deviled Eggs?
No, these delightful Pumpkin Patch Deviled Eggs are not suitable for freezing. The texture of both the egg whites and the creamy filling can be compromised when thawed, making them less enjoyable. It’s best to prepare and serve them fresh!
What should I do if the eggs are hard to peel?
If you find your eggs are a bit tricky to peel, try peeling them under running water. This can help loosen the shell and membrane, making the process smoother. Also, using eggs that are older (around 7-14 days) will improve your peeling experience significantly.
Can I customize the filling for dietary preferences?
Very! Feel free to tailor the filling by substituting with ingredients that suit different dietary needs. For a healthier option, you can use Greek yogurt in place of mayonnaise, or for a spicy kick, add a pinch of cayenne pepper. Get creative and enjoy experimenting!
How long before serving should I prepare these deviled eggs?
To keep them fresh and flavorful, prepare the Pumpkin Patch Deviled Eggs at least 30 minutes before serving to allow the flavors to meld. You can also boil and peel the eggs up to 2-3 days in advance and store the filling separately until ready to pipe. Enjoy!
Delicious Pumpkin Patch Deviled Eggs for Fall Gatherings
Ingredients
Equipment
Method
- Begin by placing the large eggs in a saucepan and covering them with cold water. Bring the water to a rolling boil, then remove the pan from heat and let the eggs sit for 10 minutes.
- Prepare a large bowl filled with ice water. After 10 minutes, transfer the eggs to the ice bath and chill for 5 minutes.
- Gently tap each egg and roll it lightly in your hands to crack the shell. Peel the eggs under cool running water.
- Slice each peeled egg in half lengthwise and scoop out the yolks into a mixing bowl. Add mayonnaise, yellow mustard, salt, black pepper, paprika, and orange food coloring to the yolks and mix until smooth.
- Fill a piping bag with the yolk mixture and pipe it into the egg whites to create a swirl.
- Using a knife or toothpick, create ridges along the sides of the piped filling to enhance the pumpkin-like shape.
- Insert small bundles of fresh chives into the tops of each piped filling to resemble pumpkin stems.
- Place the eggs on a serving platter and refrigerate for at least 30 minutes before serving.
Leave a Reply