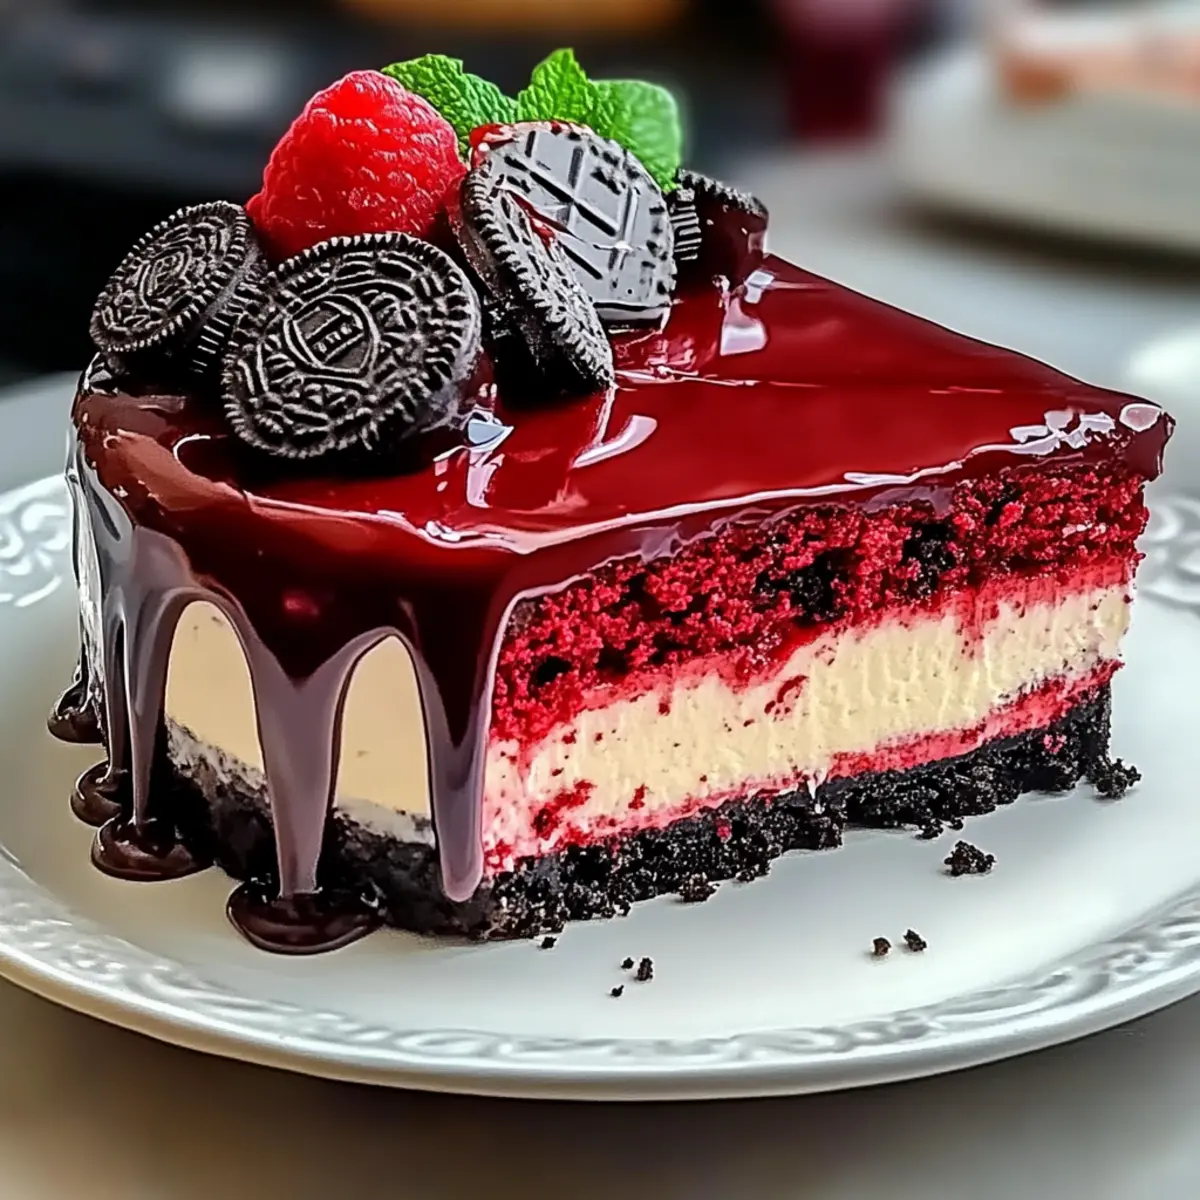
The first slice of this stunning Red Velvet Cheesecake feels like a decadent hug from inside the oven, enveloping your senses with its rich aroma. Combining the classic allure of red velvet cake with a velvety Oreo cheesecake filling, this dessert is a true showstopper that wows at any gathering. What I adore about this recipe is its quick prep time, allowing you to whip up an impressive masterpiece without stress. Plus, with a few simple adjustments, it can easily become gluten-free! Perfect for birthdays, holidays, or just a weekday indulgence, this cheesecake not only pleases the eyes but also offers an unforgettable taste experience. Curious about how to create this irresistible treat that boasts layers of flavor? Let’s dive into the delicious details!
Why is this Red Velvet Cheesecake special?
Irresistible flavor: Each bite combines the tang of cheese with the sweet notes of red velvet, delivering a luxurious taste experience that will leave everyone craving more.
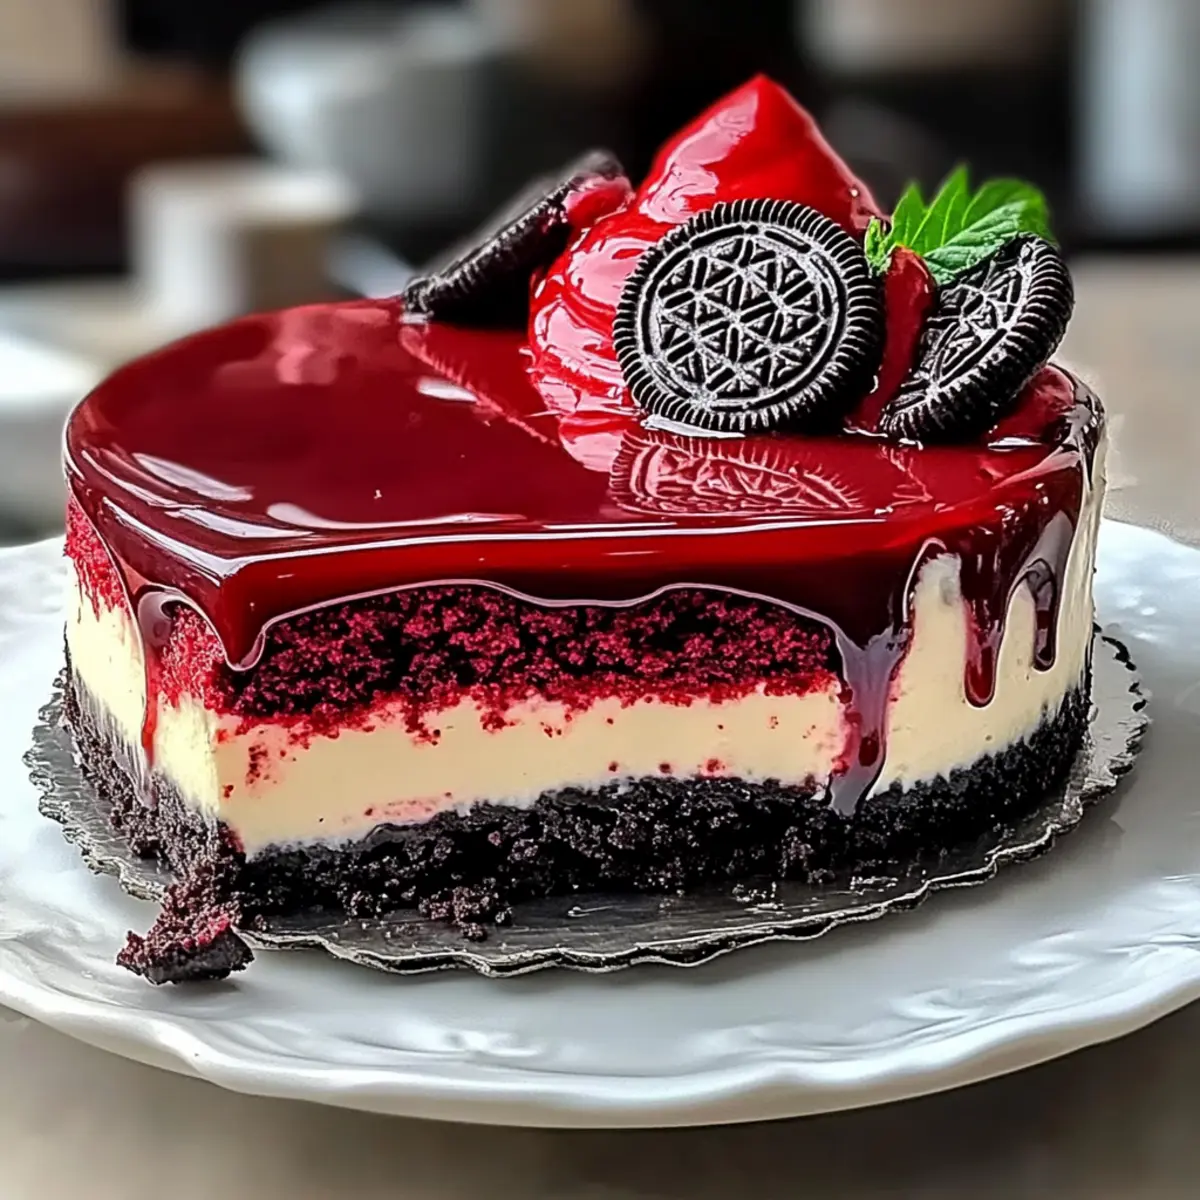
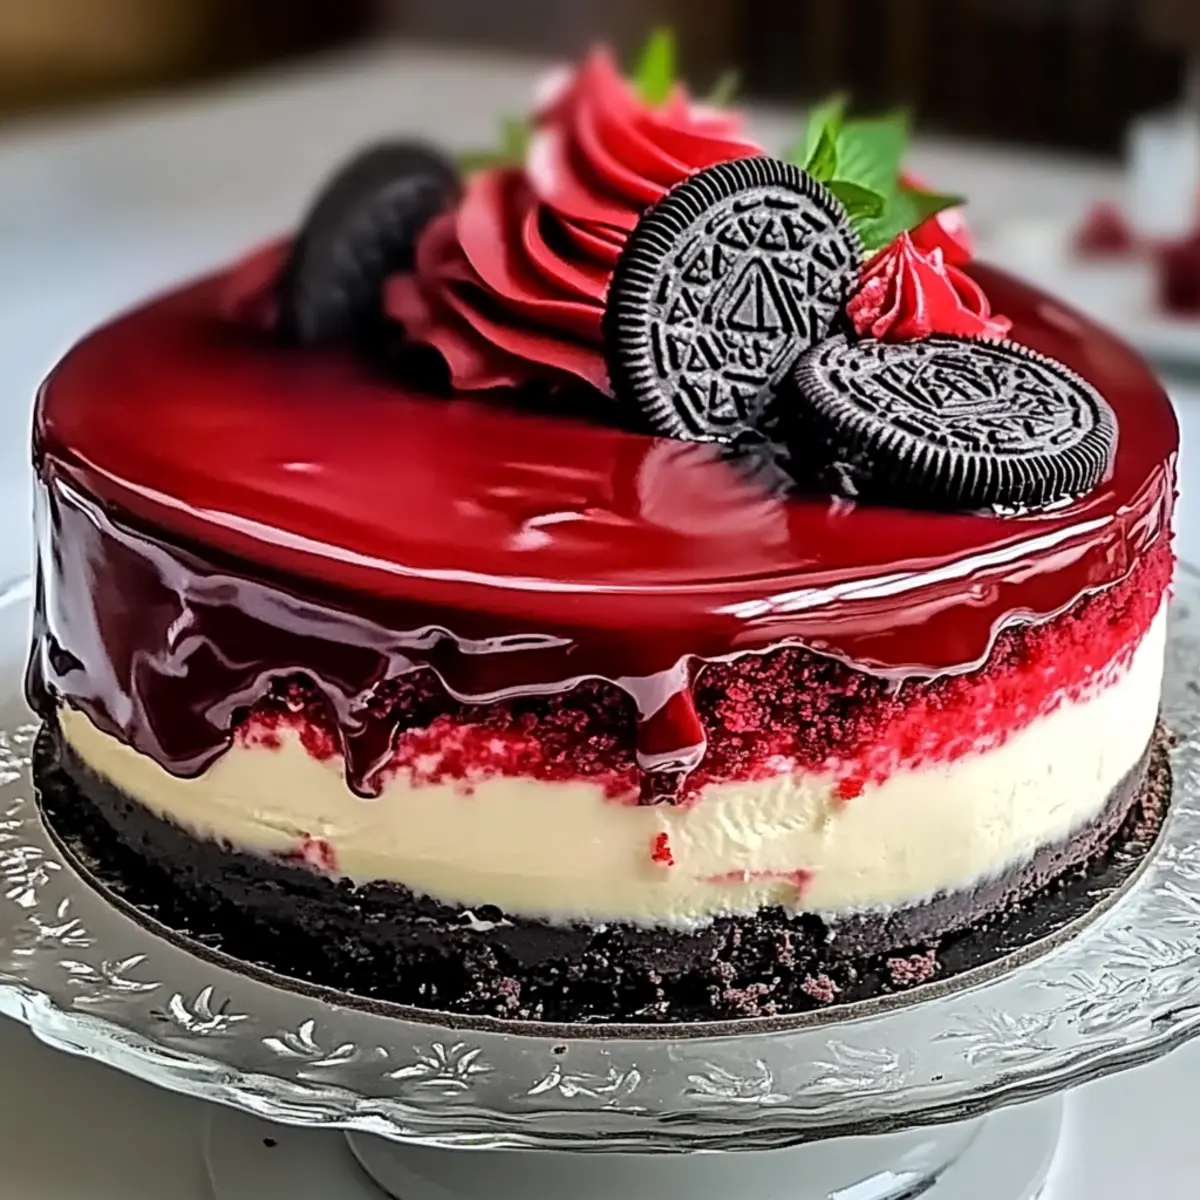
Visually stunning: The bold red layers topped with rich chocolate ganache create a show-stopping dessert that’s perfect for special occasions.
Time-efficient: With a straightforward prep process, you can easily impress your guests without spending all day in the kitchen.
Gluten-free options: Easily swap in gluten-free flour to cater to dietary needs, making this cheesecake inclusive for all guests.
Crowd-pleaser: Whether it’s a birthday or holiday, this recipe is sure to be a hit, bringing smiles and ‘oohs and aahs’ with every slice. Try serving it alongside Crisp Mini Cheesecakes for a delightful dessert spread!
Red Velvet Cheesecake Ingredients
• Get ready to bake!
For the Cake Layers
- All-Purpose Flour – Provides structure to the cake; substitute with gluten-free flour for gluten-free Red Velvet Cheesecake.
- Cocoa Powder – Adds that rich chocolate flavor and enhances the cake’s color.
- Salt – Balances and enhances the overall flavor profile.
- Butter – Creates a rich, moist texture in each layer.
- Granulated Sugar – Sweetens the batter and helps in browning for visual appeal.
- Sour Cream – Contributes moisture and a delightful tanginess.
- Vegetable Oil – Ensures the cake stays moist and tender.
- Vanilla Extract – Adds depth and an inviting aroma.
- Eggs – Essential for structure and moisture retention.
- Red Food Coloring – Gives the cake its iconic, vibrant hue.
- Buttermilk – Enhances tenderness and adds a slightly tangy flavor.
- Baking Soda – Provides the necessary lift for a fluffy texture.
- Vinegar – Reacts with baking soda for leavening and adds extra moisture.
For the Cheesecake Filling
- Oreos – Crushed to create a delicious flavor and unique texture in the filling.
- Full-Fat Cream Cheese – The star ingredient that brings creaminess to the cheesecake.
- Granulated Sugar – Sweetens the filling to perfection.
- Cornstarch – Stabilizes the cheesecake, ensuring a perfect slice every time.
- Sour Cream – Adds richness and a delicious tang, balancing the sweetness.
- Vanilla Extract – Infuses the filling with lovely flavor notes.
- Eggs – Bind everything together while keeping the filling smooth and creamy.
- Crushed Oreos – Folded in for an extra layer of flavor and texture.
For the Ganache Topping
- Dark Chocolate Chips – Create a luscious, indulgent chocolate layer.
- Heavy Cream – Blends with chocolate for a velvety-smooth ganache sauce.
Feel inspired to bake this delightful Red Velvet Cheesecake? Let’s get started!
Step‑by‑Step Instructions for Irresistible Red Velvet Oreo Cheesecake with Ganache
Step 1: Preheat and Prepare
Begin by preheating your oven to 350°F (175°C). As it warms, prepare a 9-inch springform pan and an 8-inch round cake pan. Line them with parchment paper and spray with non-stick cooking spray to ensure easy release after baking. This will set the stage for your layers of luscious Red Velvet Cheesecake!
Step 2: Mix Dry Ingredients
In a medium bowl, whisk together the all-purpose flour, cocoa powder, and salt until well combined. This step encourages even distribution of flavors and ensures your dry ingredients are aerated. Set this mixture aside while you focus on creating the rich, moist batter for your cake layers.
Step 3: Cream the Butter and Sugar
In a large mixing bowl, cream together the softened butter and granulated sugar using an electric mixer on medium speed until fluffy, about 3-5 minutes. This creates a light texture for your cake. Next, add the sour cream, vegetable oil, vanilla extract, eggs, and red food coloring, mixing until thoroughly combined and the batter is smooth and inviting.
Step 4: Combine Wet and Dry Ingredients
Gradually add the flour mixture to the wet ingredients, alternating with the buttermilk. Mix just until combined to avoid overmixing, which can toughen the texture. Finally, gently fold in the baking soda and vinegar, which will react to give your Red Velvet Cheesecake layers a perfect rise as they bake.
Step 5: Bake the Red Velvet Layers
Divide the batter evenly between the prepared pans, smoothing the tops for even baking. Place them in your preheated oven and bake for 18-20 minutes or until a toothpick inserted into the center comes out clean. Allow the cakes to cool completely on wire racks before removing them from their pans.
Step 6: Prepare the Cheesecake Filling
While your layers cool, make the Oreo cheesecake filling. Start by blending the Oreo cookies into fine crumbs using a food processor. In a separate bowl, beat the cream cheese until smooth, then mix in the Oreo filling, granulated sugar, and cornstarch until combined. This creamy filling will be the heart of your Red Velvet Cheesecake.
Step 7: Add Remaining Filling Ingredients
Incorporate the sour cream, vanilla extract, and eggs into the cream cheese mixture, mixing gently. Finally, fold in the crushed Oreos for added texture and flavor. This rich filling will sit beautifully on top of your cooled red velvet layers, creating a stunning contrast.
Step 8: Assemble and Bake in a Water Bath
Pour the cheesecake filling over the cooled red velvet cake layer in the springform pan. To prevent cracking, place the springform pan in a larger baking dish filled with hot water, creating a water bath. Bake at 300°F (150°C) for about 90 minutes, until the edges are set but the center still jiggles slightly. Allow the cheesecake to cool gradually in the oven with the door slightly ajar.
Step 9: Chill Overnight
Once cooled, refrigerate the cheesecake overnight, allowing the flavors to meld and the texture to set perfectly. This also helps develop the luxurious creaminess that defines this irresistible Red Velvet Cheesecake.
Step 10: Make the Ganache Topping
To prepare the ganache, microwave the dark chocolate chips and heavy cream in short bursts, stirring until smooth and shiny. Once combined, let it cool slightly before pouring it gently over the chilled cheesecake, allowing the rich chocolate to cascade over the edges.
Step 11: Decorate before Serving
For a stunning final touch, decorate the cheesecake with crumbles of the leftover red velvet cake, a swirl of cream cheese frosting, and additional chopped Oreos. This step enhances both the appearance and flavor of your show-stopping Red Velvet Cheesecake.
Step 12: Serve and Enjoy
Slice your beautifully layered Red Velvet Cheesecake and serve with fresh berries or a dollop of whipped cream for a delightful experience. The combination of flavors and textures is sure to impress your guests and create lasting memories around your table.
What to Serve with Irresistible Red Velvet Oreo Cheesecake?
Indulging in this delightful cheesecake creates the perfect opportunity to build a balanced and memorable meal, suited for any special occasion or cozy gathering.
-
Fresh Berries: Bright berries like strawberries and raspberries offer a refreshing contrast, enhancing both flavor and presentation. Their tartness beautifully cuts through the richness of the cheesecake.
-
Whipped Cream: Lightly sweetened whipped cream adds a cloud-like texture that complements the dense cheesecake. It’s the perfect airy contrast to the layers of deliciousness.
-
Chocolate Ganache Drizzle: Extra ganache on the plate not only decorates your dessert but enhances that rich chocolate experience. It’s a decadent touch for true chocolate lovers.
-
Mint Leaves: A sprig of fresh mint provides a pop of color and a refreshing hint that brightens the rich flavors of the cheesecake. It’s a simple yet effective garnish.
-
Coffee or Espresso: A warm cup of coffee or espresso pairs perfectly, balancing the sweetness of the cheesecake with its bold flavor, making every bite even more enjoyable.
-
Sparkling Wine: Offering a bubbly option, sparkling wine elevates any occasion and adds an elegant touch, with its effervescence delightfully cleansing the palate between bites.
-
Crisp Apple Slices: Fresh apple slices add a crunchy texture and refreshing juiciness that contrasts wonderfully with the smooth cheesecake, making for a delightful balance of flavors.
-
Chocolate-Covered Strawberries: These indulgent treats add a romantic flair and delicious chocolatey flavor, making each bite heavenly when enjoyed alongside the red velvet cheesecake.
-
Mini Cheesecakes: Serve alongside individual mini cheesecakes for a delightful dessert spread, catering to every sweetness preference while creating a beautiful display.
Make Ahead Options
These Red Velvet Cheesecake layers are perfect for meal prep enthusiasts! You can prepare the red velvet cake layers up to 3 days in advance; simply bake, cool completely, and store them wrapped in plastic in the refrigerator. The cheesecake filling can also be made ahead and stored in the fridge for up to 24 hours; just keep it covered to maintain its creamy texture. When ready to assemble, pour the filling over the cooled cake layers and bake as directed. This prep strategy not only saves you time during busy weeknights but ensures your Red Velvet Cheesecake is just as delicious when you’re ready to serve, attracting compliments from all your guests!
Expert Tips for Red Velvet Cheesecake
- Room Temperature Ingredients: Ensure all ingredients are at room temperature for a smoother batter, which helps achieve the perfect texture in your Red Velvet Cheesecake.
- Avoid Overmixing: After adding eggs, mix gently to prevent cracks on your cheesecake surface. Overmixing can air incorporate too much air, leading to these unwanted imperfections.
- Use a Water Bath: Always bake your cheesecake in a water bath to maintain moisture and promote an even bake, resulting in a creamier texture.
- Gradual Cooling: Allow the cheesecake to cool slowly in the oven with the door ajar to help avoid cracks as it sets.
- Overnight Chill: Refrigerate the cheesecake overnight for the best flavor and texture development; this patience will pay off in every delicious slice!
- Simple Decorations: Keep the garnishing simple to let the beauty of the Red Velvet Cheesecake shine through, enhancing its visual appeal without overwhelming it.
Red Velvet Cheesecake Variations & Substitutions
Feel free to explore these creative twists and make this recipe uniquely yours!
- Gluten-Free: Substitute all-purpose flour with a 1:1 gluten-free flour blend to cater to dietary needs.
- Nutty Twist: Add ½ cup of finely chopped walnuts or pecans to the red velvet batter for a delightful crunch.
- Chocolatey Boost: Mix in a splash of espresso or coffee flavor to enhance the chocolate notes of the red velvet flavor.
- Fruit Fusion: Top with fresh strawberries or raspberries for a fruity contrast to the rich flavors of the cheesecake. A berry compote can add even more magic!
- Alternative Sweeteners: Swap granulated sugar with honey or maple syrup for a natural sweetness that complements the dessert beautifully.
- Minty Fresh: Include a hint of peppermint extract in the cheesecake filling for a refreshing touch that’s perfect for the holidays.
- Mini Cheesecake Bites: Transform this recipe into mini cheesecake bites by baking in a muffin tin lined with cupcake liners; perfect for gatherings!
- Double Decker: Layer in a second cheesecake flavor, such as vanilla or chocolate, to create a visually stunning and delicious layered dessert.
For an added treat, try serving your cheesecake slices alongside some Creamsicle Mini Cheesecakes or a batch of Cherry Pistachio Cheesecake for extra delight. Enjoy the journey of creating your personalized cheesecake masterpiece!
How to Store and Freeze Red Velvet Cheesecake
Fridge: Store any leftover Red Velvet Cheesecake in an airtight container for up to 1 week, keeping that rich flavor and creamy texture intact.
Freezer: For longer storage, wrap individual slices tightly in plastic wrap and aluminum foil, freezing for up to 3 months. Thaw in the refrigerator overnight before serving.
Reheating: You can enjoy your cheesecake cold, or gently reheat slices in the microwave for a few seconds if you prefer it warmed. Just be careful not to overheat!
Serving Tips: For optimal texture and flavor, allow the cheesecake to come to room temperature for about 30 minutes before serving after storage.

Red Velvet Cheesecake Recipe FAQs
How do I choose the right ingredients for my Red Velvet Cheesecake?
Absolutely! For the best results, pick vibrant red food coloring and high-quality cocoa powder—this enhances both the flavor and the cake’s striking color. When it comes to flour, if you need a gluten-free option, opt for a finely milled gluten-free flour blend that substitutes well in cakes.
What is the best way to store leftover Red Velvet Cheesecake?
To keep your cheesecake fresh, store any leftovers in an airtight container in the refrigerator for up to 1 week. If you want to ensure it retains its delicious taste, cover it well and place it on a flat surface. A little care goes a long way!
Can I freeze Red Velvet Cheesecake?
Yes, indeed! To freeze, wrap individual slices tightly in plastic wrap and then in aluminum foil to prevent freezer burn. This will keep your cheesecake flavorful for up to 3 months. When you’re ready to enjoy, just let the slices thaw in the refrigerator overnight—perfectly straightforward!
What should I do if my cheesecake cracks while baking?
Very commonly, cracks occur if the cheesecake cools too quickly. To prevent this, always use a water bath to maintain moisture and ensure gradual cooling. If a crack does appear, don’t fret—cover it with ganache or fresh whipped cream for a beautiful, creamy distraction!
Is this Red Velvet Cheesecake suitable for dietary restrictions?
Certainly! This cheesecake can be made gluten-free by using a gluten-free flour blend. Additionally, it is essential to check that your Oreos or any similar products are gluten-free if you’re accommodating those dietary needs. Just ensure to use high-quality ingredients to maintain flavor and texture.
How can I make my cheesecake extra creamy?
For an ultra-creamy cheesecake, it’s vital to use room temperature ingredients, especially the cream cheese. This simplifies blending and eliminates lumps. I often recommend beating the cream cheese until it’s super smooth before adding any other ingredients, keeping that delicious creaminess in every slice!
Decadent Red Velvet Cheesecake that Will Wow Your Guests
Ingredients
Equipment
Method
- Preheat your oven to 350°F (175°C) and prepare a 9-inch springform pan and an 8-inch round cake pan.
- Whisk together flour, cocoa powder, and salt in a bowl and set aside.
- Cream butter and sugar until fluffy, then add sour cream, oil, vanilla, eggs, and food coloring.
- Combine wet and dry ingredients, then fold in baking soda and vinegar.
- Divide and bake the batter for 18-20 minutes; cool completely.
- Prepare the cheesecake filling by blending Oreos to crumbs and mixing with cream cheese, sugar, and cornstarch.
- Add sour cream, vanilla, and eggs to cheesecake mixture, then fold in crushed Oreos.
- Pour filling over cooled cake layer in springform pan; bake in water bath for 90 minutes.
- Chill cheesecake overnight before making and pouring on ganache.
- Decorate with cake crumbles, cream cheese frosting, and extra Oreos before serving.
- Serve with fresh berries or whipped cream.
Leave a Reply