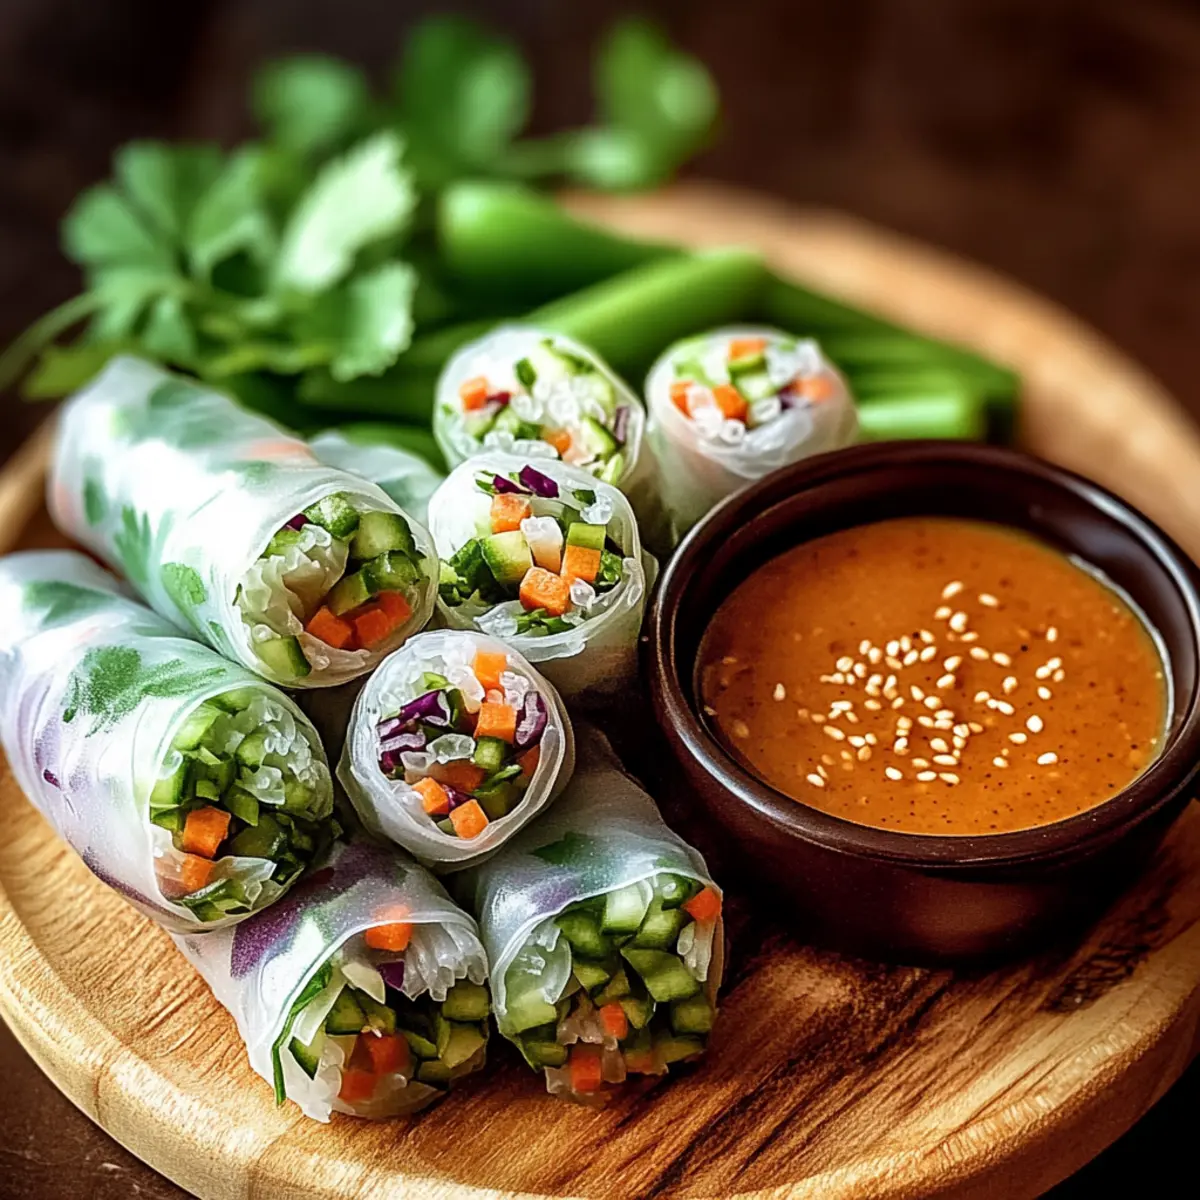
Amid the hustle and bustle of daily life, the vibrant colors and fresh crunch of Delish Thai Spring Rolls offer a delightful escape to a sun-soaked market in Thailand. Wrapped in delicate rice paper and bursting with crisp vegetables and aromatic herbs, these rolls make not just a beautiful dish but a canvas for your culinary creativity. The beauty of this recipe lies in its versatility – whether you’re entertaining guests or whipping up a quick weeknight snack, the customization options are endless. With minimal prep time and straightforward steps, you can enjoy a light yet satisfying meal that’s both healthy and utterly satisfying. Are you ready to take a bite out of this delicious adventure?
Why are these spring rolls so special?
Freshness and Flavor: Each bite of these Delish Thai Spring Rolls bursts with vibrant vegetables and aromatic herbs that transport your taste buds.
Endless Customization: Tailor the fillings to suit your cravings—think crispy tofu or refreshing avocado—for a unique spin every time!
Quick and Easy: With minimal prep time, these rolls come together in a flash. Perfect for a last-minute appetizer or a fun family dinner.
Healthy and Light: At about 120 calories per roll, they’re a guilt-free snack or meal that will leave you feeling vibrant and satisfied.
Crowd-Pleasing Delicacy: Serve these at your next gathering, and watch your guests marvel at their beauty and flavor, making them a true hit at any party!
Delish Thai Spring Rolls Ingredients
For the Wrappers
• Rice Paper Wrappers – Essential for wrapping the filling; soak briefly in warm water to avoid tearing.
For the Filling
• Shredded Carrots – Adds sweetness and crunch; substitute with other crunchy vegetables like cucumber if desired.
• Thinly Sliced Red Bell Pepper – Provides a sweet flavor and vibrant color; can be swapped with other bell pepper varieties.
• Fresh Mint Leaves – Adds a refreshing herbal note; always use fresh mint for the best flavor.
• Fresh Cilantro – Enhances flavor with brightness and freshness; omit if not a cilantro fan, or use parsley as a substitute.
• Cooked Shrimp – Adds protein and texture; omit for a vegetarian version or substitute with tofu or additional vegetables.
• Rice Vermicelli Noodles – Provide substance; cook according to package instructions and can be substituted with cooked quinoa for a gluten-free option.
For the Dipping Sauce
• Peanut Butter – Creates a rich, creamy base; use tahini or sunflower seed butter for nut-free options.
• Soy Sauce – Adds umami flavor; for a gluten-free option, use tamari instead.
• Lime Juice – Provides acidity and freshness; substitute with lemon juice if needed.
• Honey – Sweetens the sauce; use maple syrup for a vegan alternative.
• Minced Garlic – Offers aromatic depth; fresh garlic is best for a robust flavor.
• Crushed Red Pepper Flakes – Adds optional heat; adjust to taste for desired spiciness.
Now you’re ready to dive into creating these gorgeous, customizable Delish Thai Spring Rolls that will impress both family and friends!
Step‑by‑Step Instructions for Delish Thai Spring Rolls
Step 1: Prepare Rice Vermicelli
Begin by cooking the rice vermicelli noodles according to the package instructions, usually boiling them for about 3–5 minutes. Once cooked, drain the noodles and rinse them under cold water to stop the cooking process. Set the noodles aside in a bowl, ready to be added to your Delish Thai Spring Rolls.
Step 2: Soak Rice Paper
Fill a shallow dish with warm water, then take one rice paper wrapper and dip it in the water for about 10 seconds, or until it becomes pliable but not overly soft. Carefully remove it from the water and lay it flat on a clean surface, such as a cutting board. This step is crucial in ensuring your rolls hold together.
Step 3: Fill Wrap
On the bottom third of the soaked rice paper wrapper, place a small handful of the prepared rice vermicelli noodles, followed by a layer of shredded carrots, thinly sliced red bell pepper, fresh mint, cilantro, and cooked shrimp (if using). Avoid overfilling to ensure easy rolling later on; a compact filling allows for better-shaped Delish Thai Spring Rolls.
Step 4: Roll
Begin by folding the bottom edge of the rice paper over the filling, tucking it gently and pulling slightly to form a tight roll. Next, fold in the sides of the wrapper, ensuring the filling is completely enclosed. Continue rolling until you reach the top edge, sealing the roll. Repeat this process with the remaining ingredients, keeping the rolls damp to avoid sticking.
Step 5: Make Peanut Sauce
In a separate bowl, combine peanut butter, soy sauce, lime juice, honey, minced garlic, and crushed red pepper flakes. Whisk the mixture together until smooth, adding warm water gradually to achieve your desired dipping sauce consistency. Taste and adjust the seasoning if necessary; this sauce perfectly complements the fresh Delish Thai Spring Rolls.
Step 6: Serve
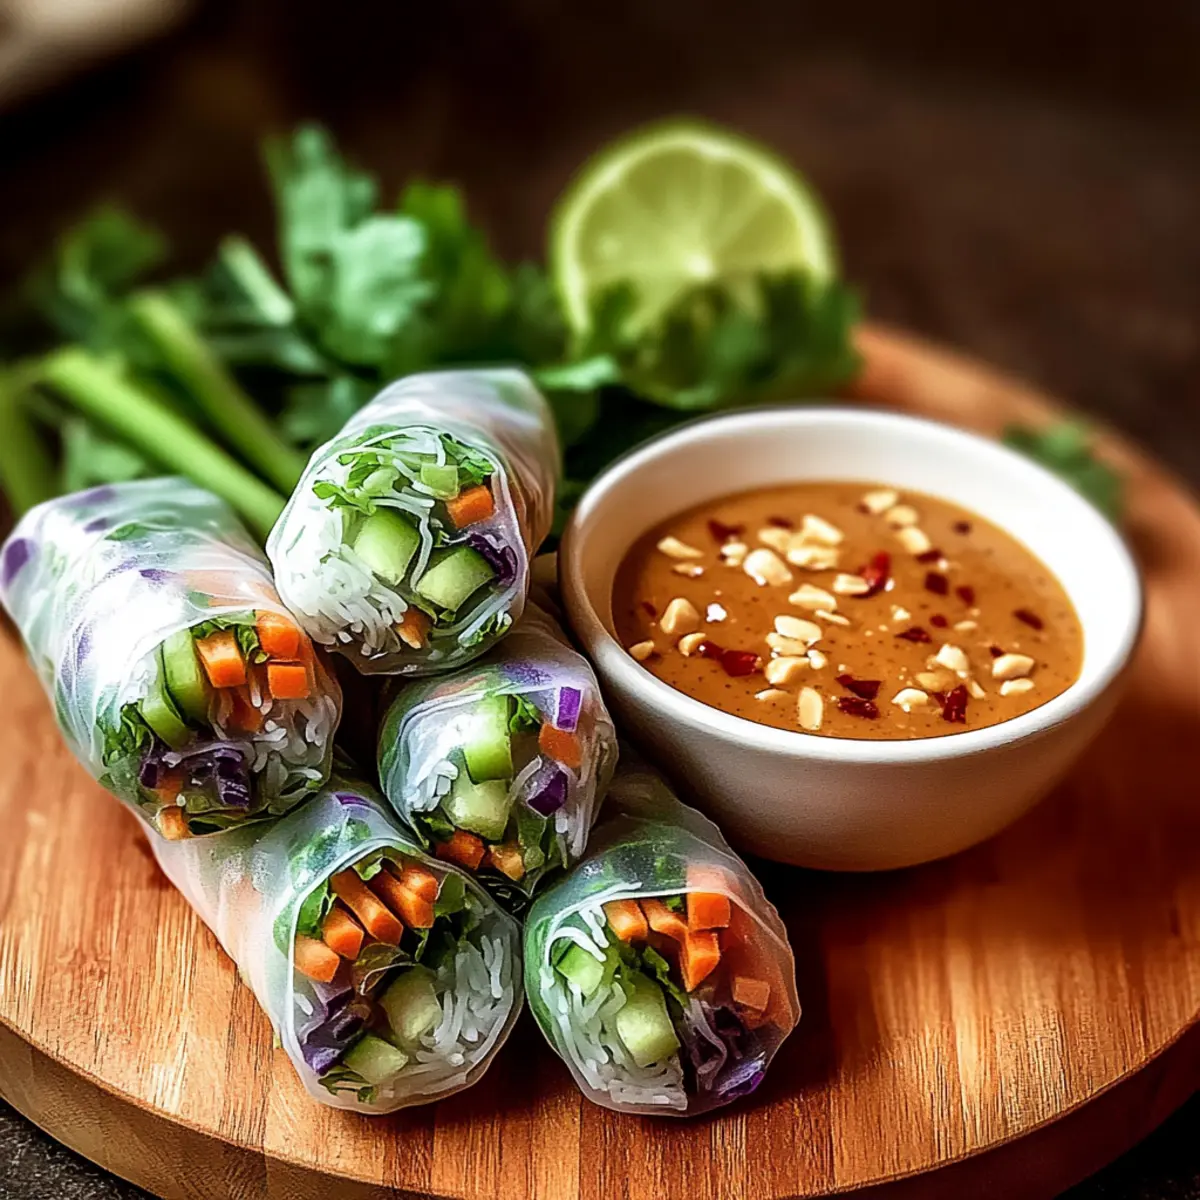
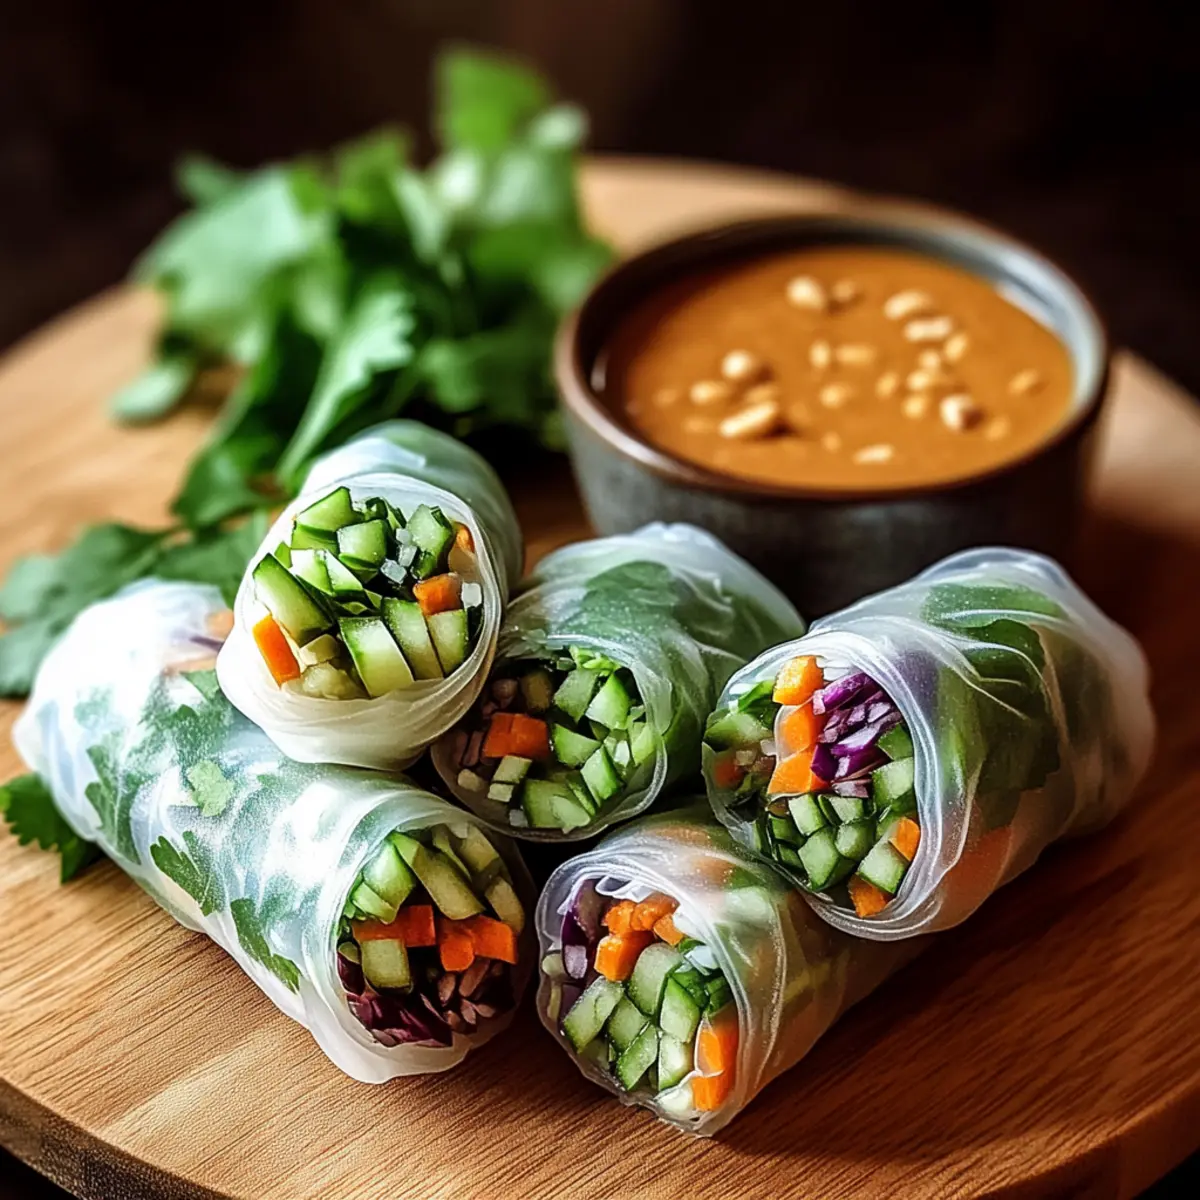
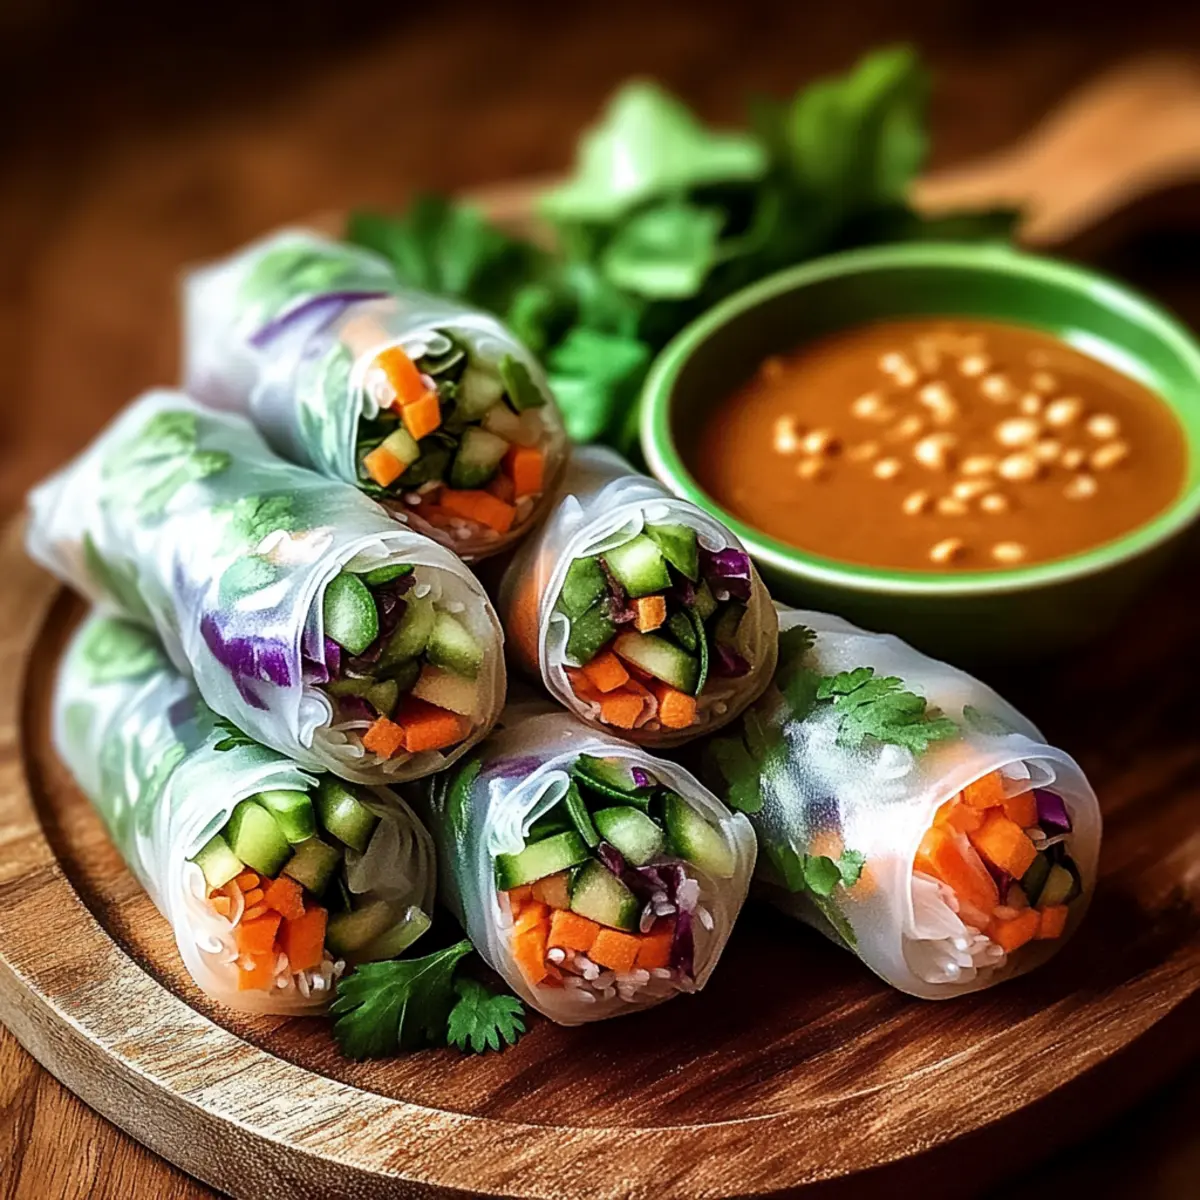
Arrange the freshly made Delish Thai Spring Rolls on a serving platter and serve them immediately with the peanut dipping sauce on the side. These rolls are best enjoyed fresh, showcasing their vibrant colors and providing a satisfying crunch with every bite. Enjoy this delightful dish as a light snack or a refreshing appetizer!
Delish Thai Spring Rolls Variations
Feel free to get creative with these Delish Thai Spring Rolls and customize them to suit your taste buds!
- Protein Swap: Replace shrimp with grilled chicken or crispy tofu for a tasty twist. Both options bring unique flavors and textures that keep things interesting.
- Avocado Boost: Add slices of creamy avocado for an extra layer of richness. This buttery addition pairs perfectly with the crunchy vegetables.
- Fresh Herbs: Experiment with different herbs, like basil or cilantro, to give your rolls a unique flavor profile. Each herb brings its own charm to the dish!
- Vegetable Crunch: Toss in additional fillings, like bean sprouts or cucumber slices, for extra texture and freshness. These crunchy elements elevate your spring rolls to new heights.
- Vegan Delight: Create a vegan version by omitting shrimp and using a homemade spicy peanut sauce. Just whisk together tahini, maple syrup, and a dash of sriracha for a delectable dip!
- Gluten-Free Option: Substitute traditional soy sauce with tamari to keep your dipping sauce gluten-free. It adds the same savory richness without the gluten.
- Change the Sauce: Try a zesty lime vinaigrette or a sweet chili sauce instead of peanut sauce for a bright and vibrant alternative. Each sauce creates a delightful new experience!
- Spice It Up: Add crushed red pepper flakes to your filling for a kick of heat. Adjust the amount according to your heat preference and enjoy the extra zing!
These variations not only enhance the flavor profile but also invite your culinary creativity to flourish. Enjoy your delicious journey with these spring rolls!
Make Ahead Options
These Delish Thai Spring Rolls are perfect for busy home cooks looking to save time! You can prepare the filling, including the shredded carrots, sliced bell peppers, and cooked shrimp (or tofu) up to 3 days in advance. Just store them in airtight containers in the refrigerator to keep them fresh. Additionally, you can soak the rice paper wrappers and assemble the rolls up to 24 hours before serving; just make sure to keep them covered with a damp cloth to prevent drying out. When ready to enjoy, simply serve with the peanut dipping sauce that can also be made ahead and refrigerated. Following these steps ensures your spring rolls are just as delicious and vibrant as when freshly prepared!
Expert Tips for Delish Thai Spring Rolls
-
Perfectly Soaked Wrappers: Avoid tearing by soaking rice papers for just 10 seconds. If they’re too soft, they’ll be difficult to handle.
-
Fill Smartly: Don’t overstuff your rolls. A smaller amount of filling makes them easier to roll and keeps everything nicely secured.
-
Fresh Ingredients Only: Use fresh herbs like mint and cilantro for an aromatic punch. Dried herbs won’t provide the same vibrant flavor in your Delish Thai Spring Rolls.
-
Rolling Technique: Tuck the filling tightly as you roll, ensuring the sides are folded in. This helps keep the filling secure and prevents messy spills.
-
Make-ahead Tips: Prepare the filling in advance and assemble the rolls right before serving for the best texture and freshness. These rolls are best enjoyed right away!
-
Temperature Matters: Keep assembled rolls damp and covered to prevent them from drying out while you prepare the rest; wet rice paper can stick to other surfaces.
What to Serve with Delicious Crunchy Thai Spring Rolls?
Experience a full and satisfying meal by pairing these vibrant rolls with complementary dishes that enhance their freshness and flavor.
-
Crispy Vegetable Tempura: Light and crunchy, tempura adds a delightful crunch that mirrors the spring rolls while introducing more textures to your meal.
-
Sweet Mango Salad: Tossed with lime dressing, this refreshing salad balances the savory flavors, adding a burst of sweetness to every bite.
-
Sesame-Cucumber Salad: The bright crunch of cucumbers paired with sesame dressing creates a crisp contrast that complements the enchanced taste of the rolls.
-
Peanut Noodle Salad: Earthy and creamy, this dish echoes the richness of the peanut sauce, tying your flavors together beautifully.
-
Thai Iced Tea: Sweet and creamy with a hint of spices, this classic drink cools your palate while enhancing the overall dining experience.
-
Fresh Fruit Platter: A mix of tropical fruits like pineapple and kiwi brings a refreshing sweetness, finishing your meal on a light note.
-
Coconut Sticky Rice: This subtly sweet dish paired with the savory rolls adds a delightful contrast that makes for a comforting meal.
-
Chili Lime Corn on the Cob: Grilled corn with chili and lime brings a smoky flavor that compliments the fresh and zesty spring rolls, creating a delightful harmony.
How to Store and Freeze Delish Thai Spring Rolls
Fridge: Keep uncut Delish Thai Spring Rolls wrapped tightly in plastic wrap or an airtight container for up to 4 hours to maintain freshness.
Freezer: If you need to store them longer, freeze assembled rolls in a single layer on a baking sheet, then transfer to a freezer bag for up to 2 months.
Reheating: For best results, thaw overnight in the fridge and enjoy cold or allow to sit at room temperature for 30 minutes. Avoid reheating in the microwave, as this can make the rice paper chewy.
Make-ahead: Prepare the filling a day in advance and enjoy the freshest rolls right before serving!
Delish Thai Spring Rolls Recipe FAQs
How do I select fresh ingredients for these spring rolls?
Absolutely! Look for vibrant, firm vegetables without dark spots or wilting. For freshness, choose mint leaves that are rich in color and free of blemishes. When picking shrimp, opt for fresh or frozen that smells clean and slightly briny; avoid any with a strong fishy odor.
What is the best way to store leftover Delish Thai Spring Rolls?
Very! If you have uncut rolls, wrap them tightly in plastic wrap or place them in an airtight container. You can keep them in the fridge for up to 4 hours to maintain their fresh taste and texture. If they’re already cut, consume them immediately for the best experience.
Can I freeze Delish Thai Spring Rolls?
Certainly! To freeze, place the assembled rolls in a single layer on a baking sheet and freeze until solid. Then, transfer to a freezer bag, removing as much air as possible. They can be stored for up to 2 months. Thaw overnight in the fridge and enjoy cold, or let them sit at room temperature for 30 minutes before serving.
What if my rice paper wrappers keep tearing?
If you encounter tearing, it might be due to soaking them too long, making them overly soft. I recommend soaking for just 10 seconds until they’re pliable but still firm—this ensures better handling. If they do tear, don’t worry! You can patch them by overlapping small pieces together.
Are there any dietary considerations I should keep in mind?
Yes! These Delish Thai Spring Rolls can easily accommodate dietary restrictions. For vegetarians, simply omit the shrimp and use tofu instead. For nut allergies, swap peanut butter with tahini or sunflower seed butter for the dipping sauce. Always double-check labels on sauces like soy sauce for gluten-free options if needed.
How can I make these spring rolls healthier without losing flavor?
Great question! You can incorporate more vegetables by adding ingredients like zucchini or bean sprouts, which provide extra nutrients without many calories. Additionally, using whole grain rice vermicelli noodles or quinoa can boost the fiber content. Finally, drizzle less honey or substitute it for a natural sweetener like stevia to reduce sugar without sacrificing taste.
Fresh Delish Thai Spring Rolls: Customize Your Crunchy Delight
Ingredients
Equipment
Method
- Prepare Rice Vermicelli: Cook rice vermicelli noodles according to package instructions, usually boiling for about 3-5 minutes. Drain and rinse under cold water. Set aside.
- Soak Rice Paper: Fill a shallow dish with warm water. Dip one rice paper wrapper for about 10 seconds until pliable, then lay flat on a clean surface.
- Fill Wrap: Place a small handful of rice vermicelli noodles on the bottom third of the soaked wrapper, followed by shredded carrots, red bell pepper, mint, cilantro, and shrimp if using. Avoid overfilling.
- Roll: Fold the bottom edge of rice paper over the filling and tuck gently. Fold in the sides, then continue rolling tightly until sealed. Repeat with remaining ingredients.
- Make Peanut Sauce: In a bowl, combine peanut butter, soy sauce, lime juice, honey, minced garlic, and crushed red pepper. Whisk until smooth, adding warm water for desired consistency.
- Serve: Arrange spring rolls on a platter and serve immediately with peanut sauce. Best enjoyed fresh.
Leave a Reply