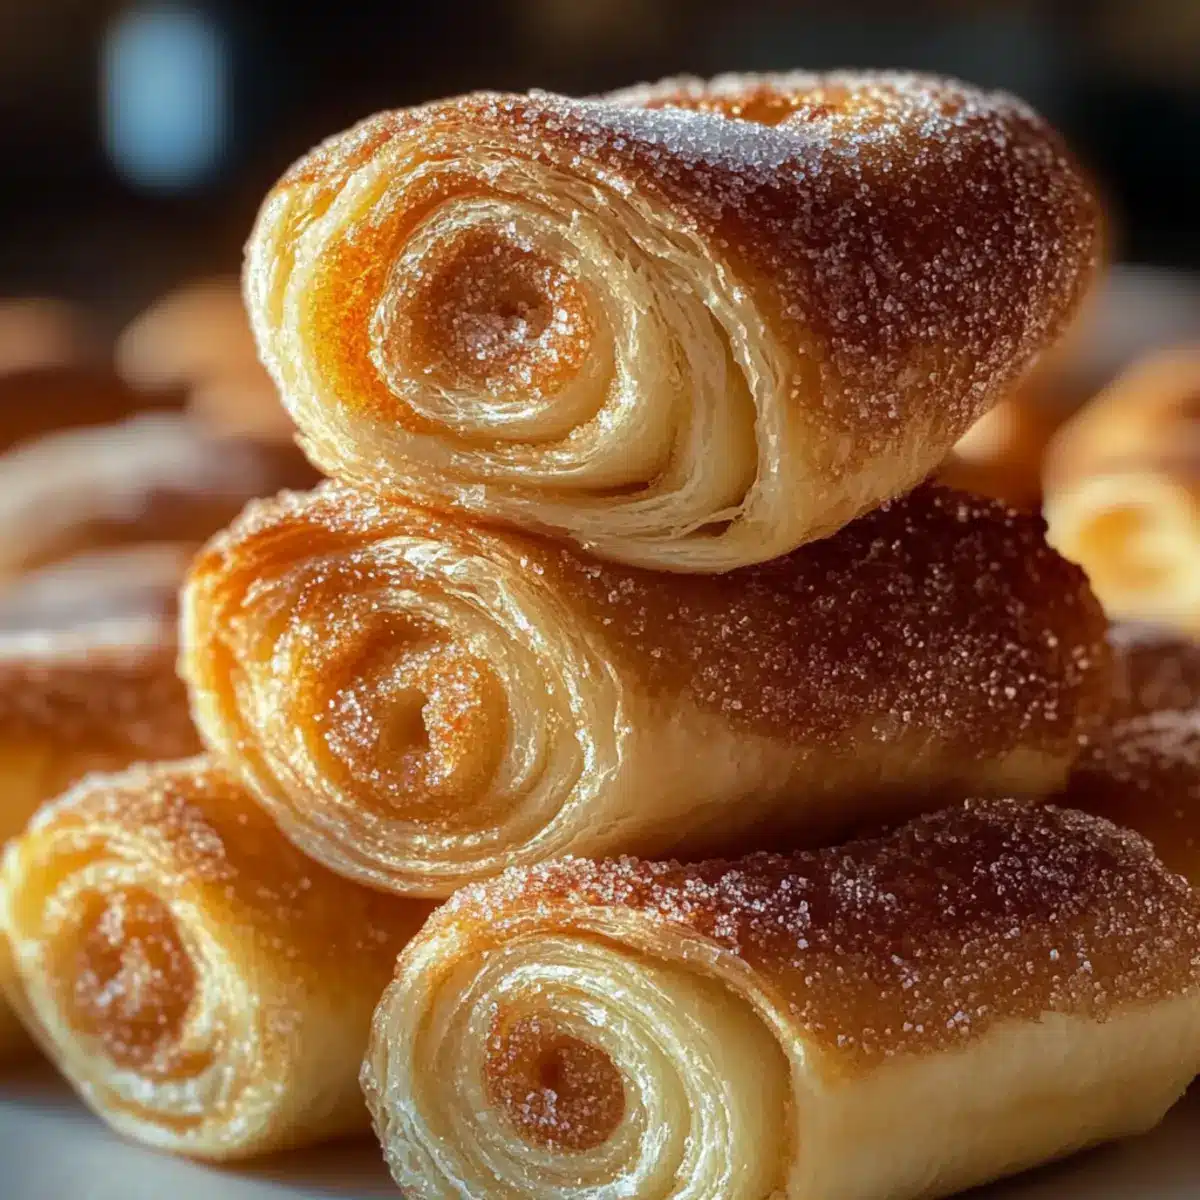
As I stood in my kitchen, the aroma of freshly baked goods filled the air, transporting me back to carefree mornings spent with my grandmother, who always had a batch of warm pastries waiting. Today, I want to share my take on a beloved classic: Sugar Snails. These soft, spiraled pastries are a delightful blend of buttery richness and subtle sweetness, making them the perfect treat for any occasion. With minimal fuss and simple ingredients, they’re incredibly easy to whip up—ideal for beginner bakers and seasoned chefs alike. Whether you’re looking to impress guests at brunch or satisfy a sweet craving, these Sugar Snails promise comfort without the heaviness of frosted desserts. Curious about how this scrumptious pastry can transform your kitchen into a cozy bakery haven? Let’s dive in!
Why are Sugar Snails irresistible?
Buttery Goodness: Each bite offers a tender, flaky texture that’s simply melt-in-your-mouth delicious.
Easy to Make: Even novice bakers will find comfort in this straightforward recipe, with no complicated steps.
Customizable Flavors: Add your favorite twists like cinnamon, lemon, or even a drizzle of glaze to make them your own.
Perfect for Sharing: Serve them warm at brunch or as a sweet treat to elevate your next gathering.
Nostalgic Charm: Relive cozy memories of home-baked goods with these delightful pastries reminiscent of European bakeries.
Make-Ahead Friendly: Prepare the dough in advance, keeping your mornings stress-free and tasty—just bake and enjoy!
These Sugar Snails are the quintessential treat for any occasion, reminiscent of a Sugar Cookie Cheesecake but with their own delightful charm!
Sugar Snails Ingredients
For the Dough
- All-purpose flour – Provides structure to the dough; remember to spoon and level for accuracy.
- Yeast – Active dry or instant yeast will help the dough rise; make sure it’s fresh for best results.
- Milk – Whole milk gives richness; warming it slightly activates the yeast effectively.
- Unsalted butter – Essential for spreading, it allows you to control the saltiness; be sure to soften before using.
- Granulated sugar – This main flavor contributor ensures that the signature caramelized sweetness shines.
- Egg – Adds richness and binds the dough together for a soft texture.
- Salt – Enhances flavor and balances the sweetness—omit if you’re using salted butter.
For the Filling
- Softened butter – Spreadable smoothness for a rich filling layer; use fresh for the best taste.
- Granulated sugar – Sweetens the filling; feel free to mix with spices for flavor variations.
Optional Additions
- Cinnamon – Mix into the sugar for a warm, aromatic flavor twist.
- Vanilla extract – Enhances sweetness; simply add to the filling for a classic touch.
- Lemon zest – Adds a refreshing twist; incorporate in the sugar for a bright flavor.
- Chopped nuts – Almonds or pecans add texture and a nutty depth; sprinkle on top or in the filling.
- Powdered sugar (for glaze) – Create a simple glaze for an extra sweet finish; just mix with a tiny bit of milk until smooth.
These delightful Sugar Snails are bound to bring a fresh charm to your kitchen, and with your imagination, the flavor possibilities are endless!
Step‑by‑Step Instructions for Sugar Snails
Step 1: Prepare the Dough
Warm the milk in a small saucepan until it becomes lukewarm, about 100°F. In a mixing bowl, combine the warm milk, yeast, and a teaspoon of granulated sugar. Allow this mixture to sit for about 5-10 minutes until it becomes foamy. This ensures the yeast is activated and ready to create soft, fluffy Sugar Snails.
Step 2: Mix Ingredients
In a separate large mixing bowl, whisk together the remaining granulated sugar, the egg, melted butter, and salt. Once well combined, gradually add the foamy yeast mixture. Slowly incorporate all-purpose flour, stirring until the mixture forms a soft dough that pulls away from the sides of the bowl, signaling it’s time for some hands-on kneading.
Step 3: Knead the Dough
Transfer the dough onto a lightly floured surface. Knead for about 8-10 minutes until the dough is smooth and elastic, yet slightly tacky to touch. You can use a bench scraper to help lift and fold the dough as needed. This vital step develops the gluten, which gives your Sugar Snails their delightful texture.
Step 4: First Rise
Place the kneaded dough in a greased bowl, turning it to coat all sides. Cover with a clean kitchen towel and let it rise in a warm spot for 1-1.5 hours, or until it has doubled in size. This magical transformation means the yeast is working its wonders and will result in light, airy pastries.
Step 5: Roll Out
After the dough has risen, punch it down to release the air and turn it onto a floured surface. Using a rolling pin, roll the dough into a rectangle approximately 1/4 inch thick. This step sets the stage for even layering and helps shape the delightful Sugar Snails.
Step 6: Add Filling
Spread a generous layer of softened butter evenly over the rolled-out dough, reaching all edges. Sprinkle granulated sugar evenly on top, and feel free to add any desired flavorings like cinnamon or vanilla extract at this stage for an extra kick. This mixture will add warmth and richness to your Sugar Snails.
Step 7: Shape Snails
Starting from the long side of the rectangle, roll the dough tightly into a log shape, ensuring a snug fit. Once rolled, use a sharp knife or unflavored dental floss to slice the log into equal pieces, about 1-1.5 inches wide. Arrange the slices neatly in a greased baking dish; this will create your beautiful Sugar Snails.
Step 8: Second Rise
Loosely cover the assembled Sugar Snails with a kitchen towel and allow them to rise again for about 30-45 minutes. Keep the dish in a warm location until the pastries have puffed up and nearly doubled in size. This second rise is crucial for achieving fluffy, airy pastries.
Step 9: Bake
Preheat your oven to 350°F (175°C). Once the Sugar Snails have risen sufficiently, bake them for 20-25 minutes or until they turn golden brown and are fragrant. Keep an eye on them; the edges should be caramelized while remaining soft in the center—a sign of perfectly baked pastries.
Step 10: Cool
Once out of the oven, let the Sugar Snails cool in the baking dish for about 10 minutes. This brief resting period allows the flavors to settle and ensures a delightful warm experience when served. Now they’re ready to be enjoyed as a cozy treat!
Storage Tips for Sugar Snails
Room Temperature: Store Sugar Snails in an airtight container at room temperature for up to 2 days to maintain their soft, tender texture.
Fridge: For longer freshness, keep them in the fridge for up to 5 days. Make sure they’re well-wrapped to prevent drying out.
Freezer: Freeze Sugar Snails for up to 2 months; wrap each pastry individually in plastic wrap, then place in a freezer-safe bag.
Reheating: To enjoy, reheat frozen Sugar Snails directly from the freezer in a preheated oven at 350°F (175°C) for about 10-15 minutes until warmed through.
Sugar Snails Variations & Substitutions
Feel free to explore creative twists on this delightful recipe that will make your Sugar Snails even more special!
-
Vanilla Sugar Snails: Add 1 teaspoon of vanilla extract to the filling for a rich, aromatic flavor. The subtle sweetness it adds can create a comforting warmth, reminiscent of homemade treats from childhood.
-
Cinnamon Sugar Snails: Mix 1 tablespoon of cinnamon into the sugar before sprinkling it on the dough. This twist brings cozy, warm undertones, perfect for autumn gatherings or holiday celebrations.
-
Lemon Sugar Snails: Incorporate 1 tablespoon of lemon zest into the sugar for a refreshing zing. The bright flavor offers a lovely contrast to the buttery richness, making these snails a delightful spring or summer treat.
-
Nutty Sugar Snails: Stir in 1/2 cup of chopped almonds or pecans either in the filling or sprinkled on top before the second rise. It adds a wonderful crunch and depth to each bite that nut lovers will adore.
-
Chocolate Sugar Snails: Replace part of the granulated sugar with cocoa powder or add mini chocolate chips to the filling. A chocolatey twist is a surefire way to satisfy any sweet tooth!
-
Glazed Sugar Snails: Whip up a simple glaze using powdered sugar and milk to drizzle over the cooled pastries. This decadent touch can transform your snails into a celebratory treat worthy of any special occasion.
-
Pumpkin Spice Sugar Snails: For a seasonal twist, whisk in pumpkin pie spice with the sugar. This will make your kitchen smell irresistible while you bake and infuse every bite with autumn flavors.
-
Savory Sugar Snails: Swap out the sugar for a mixture of cheese and herbs for a savory snack. This unique approach turns your sweet pastry into a delightful addition to cheese boards or brunch.
Exploring these variations is a great way to make your Sugar Snails truly your own. For more baking inspiration, check out my Sugar Cookie Cheesecake or think about adding a hint of spice like in our glorious Sugar Cookie Cheesecake which complements these sweet rolls perfectly!
Expert Tips for Sugar Snails
- Measure Accurately: Ensure you spoon and level your all-purpose flour to avoid overly dry dough, leading to tough Sugar Snails.
- Fresh Yeast: Always check your yeast’s expiration date and make sure it’s fresh to achieve that perfect rise.
- Room Temperature Ingredients: Soften your butter and use lukewarm milk; this helps create a more cohesive dough for tender pastries.
- Prevent Over-Handling: Knead just enough to create smooth, elastic dough; overworking can lead to dense Sugar Snails.
- Customize Wisely: Feel free to experiment with flavors, but keep the ingredient balance in mind to maintain that classic pastry charm.
- Proper Cooling: Allow Sugar Snails to cool before serving to solidify their flaky texture and maximize that melt-in-your-mouth experience.
Make Ahead Options
These Sugar Snails are perfect for busy home cooks looking to save time! You can prepare the dough and shape the pastries up to 24 hours in advance. Simply follow the instructions up to the second rise, then cover the baking dish tightly with plastic wrap and refrigerate overnight. This will maintain the pastries’ quality and allow the flavors to meld beautifully. When you’re ready to bake, simply remove them from the fridge and let them rise for about 30-45 minutes in a warm place before baking as instructed. This method gives you warm, freshly-baked Sugar Snails with minimal morning fuss, making your busy days a little sweeter!
What to Serve with Classic Sugar Snails
Enjoying a batch of warm, spiraled delights invites a world of delicious pairings that can elevate your experience even further.
-
Freshly Brewed Coffee: The rich, bold flavors complement the sweetness of the pastries, creating a harmonic balance that awakens your senses.
-
Whipped Cream: A dollop of this light, airy topping adds creaminess without overpowering the delicate sweetness of the Sugar Snails, making each bite even more indulgent.
-
Fruit Salad: Bright, fresh fruit adds a refreshing contrast to the sugary richness, introducing a burst of color and flavor to your table.
-
Scrambled Eggs: Savory eggs bring satisfaction and balance to your brunch spread, making your meal hearty while keeping it delightful.
-
Tea Selection: Herbal or black tea offers a soothing companion, enhancing the warmth and comfort of your pastry moment, perfect for cozy afternoons.
-
Maple Syrup Drizzle: A light drizzle can enhance the pastry’s sweetness naturally, while its unique flavor deepens the overall enjoyment.
-
Lemon Zest Icing: A simple glaze made with powdered sugar and lemon zest can brighten the pastries, offering a delightful citrus twist that invigorates the tastebuds.
With these irresistible additions, your Sugar Snails will not only shine but create cherished moments enjoyed with family and friends.
Sugar Snails Recipe FAQs
How do I know which yeast to use?
Absolutely! You can use either active dry or instant yeast for this recipe. The crucial part is ensuring your yeast is fresh. If you’re using active dry yeast, mix it with warm milk and a teaspoon of sugar, allowing it to sit until foamy—this usually takes about 5-10 minutes. For instant yeast, you can mix it directly with your dry ingredients, skipping the foaming step.
What’s the best way to store Sugar Snails?
Very simple! Keep your Sugar Snails in an airtight container at room temperature for up to 2 days. If you want to extend their freshness, refrigerate them for up to 5 days, making sure they are well-wrapped to avoid drying out. An added tip: if you plan to enjoy them later, freezing is also an excellent option!
Can I freeze Sugar Snails?
Absolutely! To freeze your Sugar Snails, wrap each pastry individually in plastic wrap, then place them in a freezer-safe bag. They can be frozen for up to 2 months. When you’re ready to enjoy them, simply reheat straight from the freezer by placing them in a preheated oven at 350°F (175°C) for about 10-15 minutes until warmed through.
What should I do if my Sugar Snails don’t rise?
No worries! If your pastries don’t rise, it could be due to using old yeast or insufficient warmth during the rising periods. Make sure to check the expiration date of your yeast and create a warm draft-free environment for rising—this can be achieved by placing the dough in an oven turned off but slightly warmed, or in a sunny spot in your kitchen. If they still don’t rise, let them rest a little longer, but don’t worry—sometimes a little extra time can make a big difference.
Can pets eat Sugar Snails?
While Sugar Snails are a delightful treat for humans, they shouldn’t be shared with pets. The sugar and butter can upset their stomachs, and certain ingredients like chocolate or raisins (not used here but common in other pastries) can be toxic to pets. Always be cautious and keep these treats safely out of their reach.
What are some great variations for Sugar Snails?
Oh, the more the merrier when it comes to flavoring! You can easily customize your Sugar Snails by adding ingredients like cinnamon or vanilla extract to the filling for added depth. Lemon zest can bring a delightful freshness, while chopped nuts like almonds or pecans can provide a lovely crunch. For an extra sweet twist, drizzle a simple powdered sugar glaze over the top after baking!
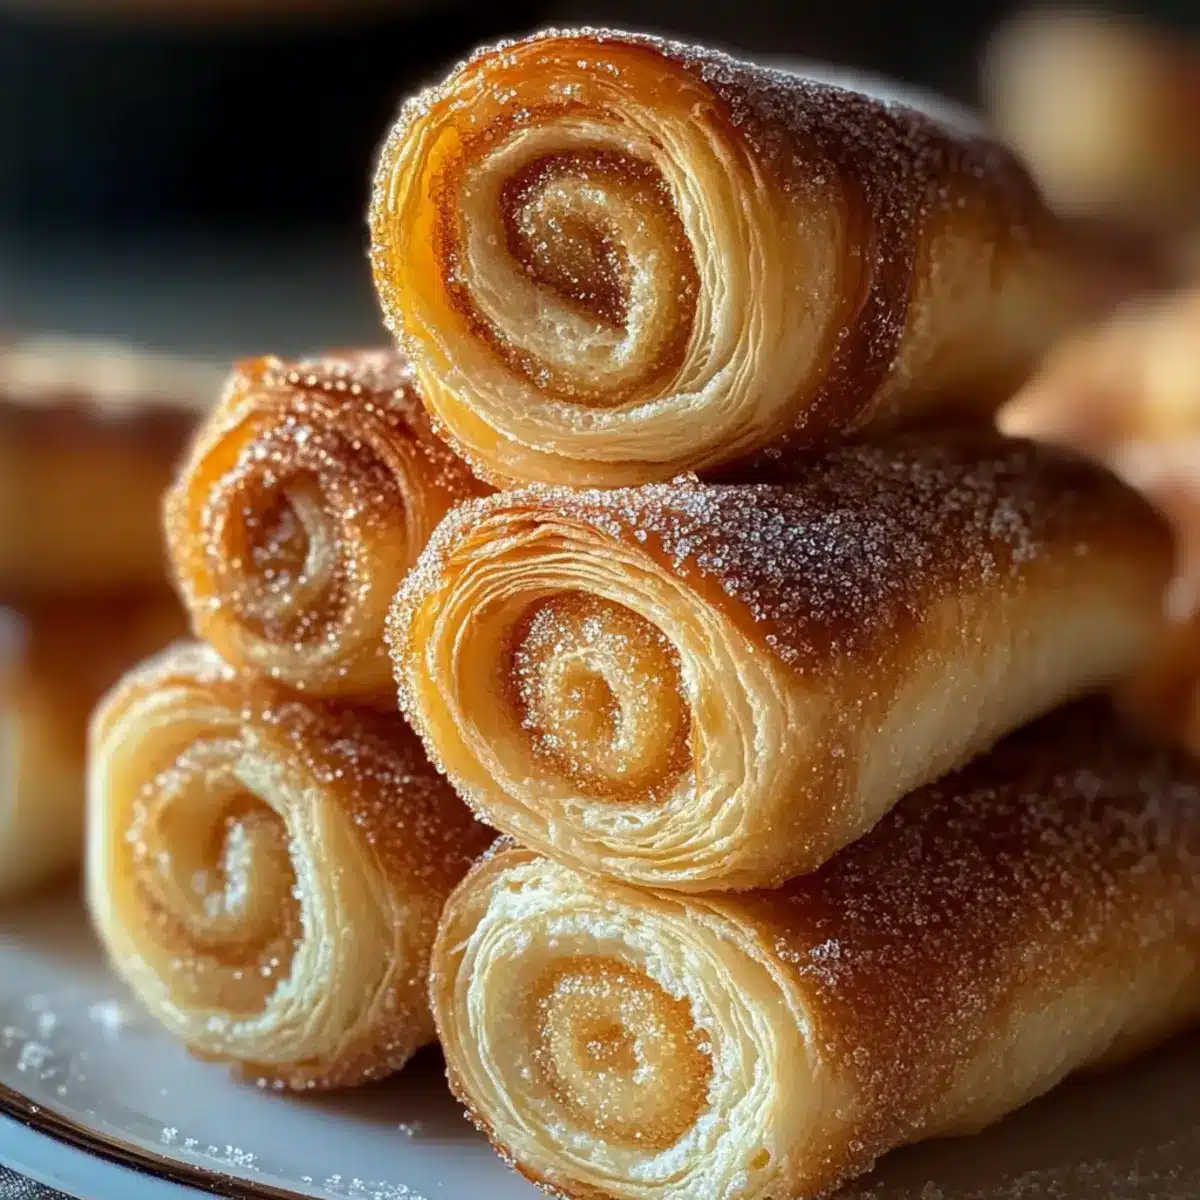
Delicious Sugar Snails: Soft Pastries for Sweet Moments
Ingredients
Equipment
Method
- Warm the milk and combine with yeast and sugar in a bowl for 5-10 minutes until foamy.
- Mix remaining sugar, egg, melted butter, and salt in a large bowl, then add the yeast mixture.
- Gradually add flour and knead until a soft dough forms.
- Let dough rise in a greased bowl for 1-1.5 hours until doubled.
- Roll dough into a rectangle about 1/4 inch thick.
- Spread softened butter, sprinkle sugar and optional flavorings over the dough.
- Roll the dough tightly from the long side and slice into pieces.
- Let the shaped Snails rise for 30-45 minutes.
- Bake in a preheated oven at 350°F for 20-25 minutes until golden.
- Cool for 10 minutes before serving.
Leave a Reply