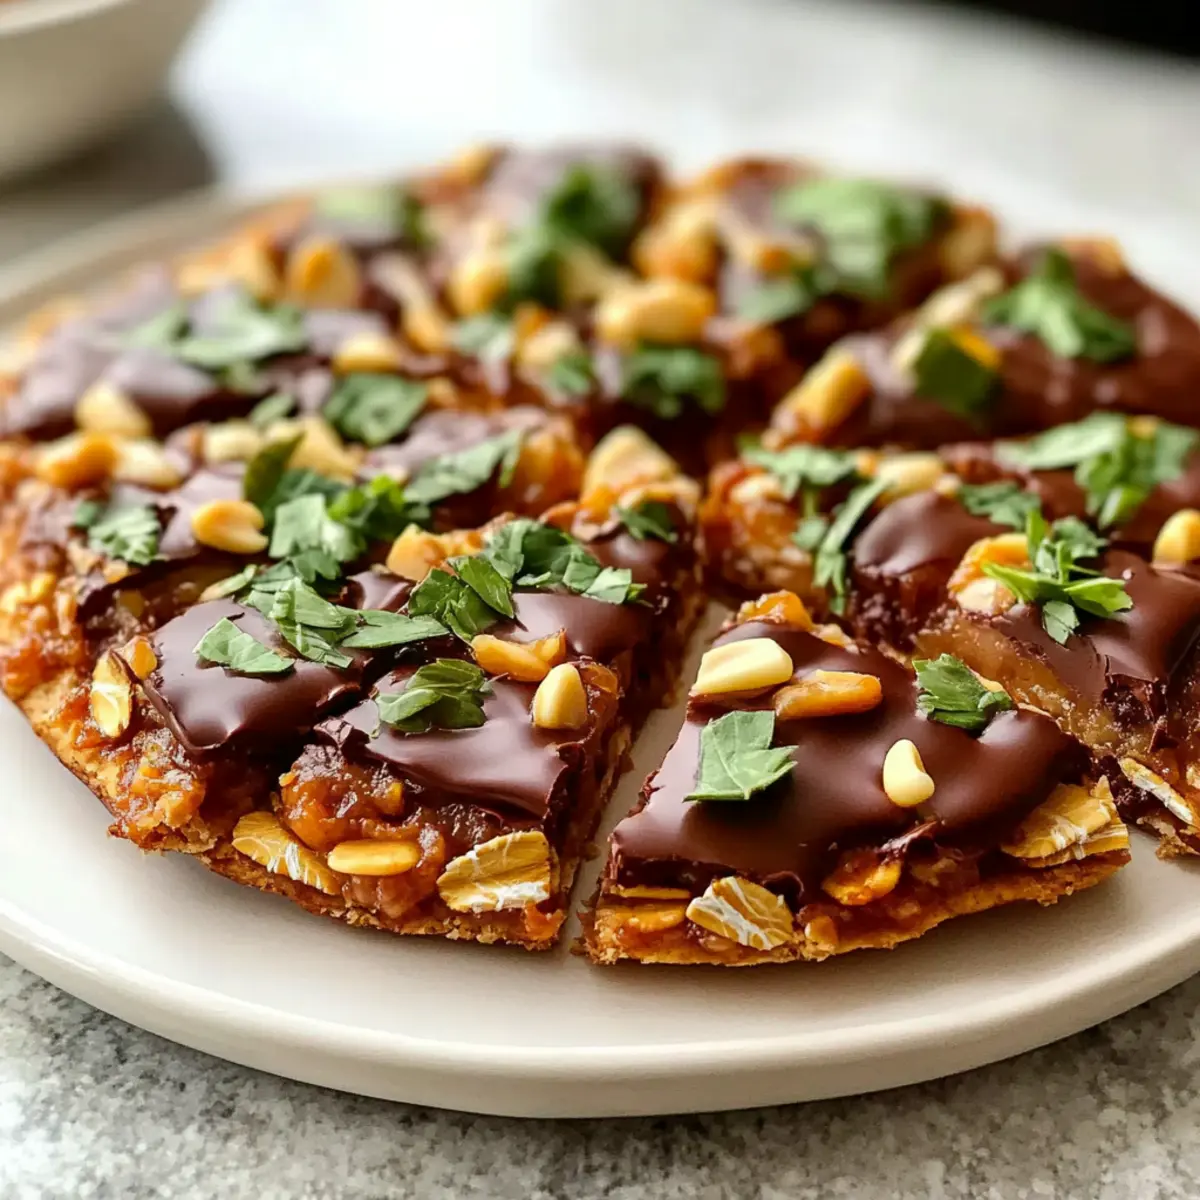
In the midst of a bustling week, as I sifted through my pantry, I stumbled upon rolled oats, creamy peanut butter, and rich cocoa powder—an unassuming trio that begged to be transformed into something magical. That’s how my No-Bake Chocolate Peanut Butter Oat Bars came to be, a perfect balance of indulgence and nutrition. These bars not only satisfy a sweet craving but are also a quick and healthy snack option—ideal for those on the go or anyone wanting to escape the fast-food rut. With minimal ingredients and no oven required, making these delicious treats feels like a quick triumph in my kitchen. Curious about how these simple ingredients come together to create a chewy, satisfying bar? Let’s dive in!
Why Are These Bars a Must-Try?
Quick and Easy: There’s no baking involved, making this a hassle-free recipe that anyone can master.
Nutritious Ingredients: Combining oats, peanut butter, and cocoa, these bars pack a punch of fiber and protein.
Customizable Delight: Feel free to swap in your favorite nut butter or toss in dried fruits to fit your taste preferences.
Perfect for Any Occasion: Enjoy them as a post-workout boost, a grab-and-go breakfast, or a delightful afternoon snack.
Satisfies Sweet Cravings: These bars deliver a rich chocolate flavor without the guilt of traditional desserts, making them a crowd favorite!
If you’re looking for more fantastic ideas, don’t forget to check out my Honey BBQ Chicken for another quick and delicious meal!
No-Bake Chocolate Peanut Butter Oat Bar Ingredients
• Discover how easy it is to whip up these delightful bars!
For the Base
- Rolled Oats – Adds chewy texture; opt for gluten-free oats if you need a gluten-free version.
- Peanut Butter – Provides a creamy richness; use natural or creamy varieties for smoothness.
- Honey or Maple Syrup – Acts as a natural sweetener; choose maple syrup for a vegan-friendly option.
For the Cocoa Mixture
- Cocoa Powder – Infuses a rich chocolate flavor; make sure it’s unsweetened for healthier sweetness control.
For the Chocolatey Goodness
- Chocolate Chips – Introduces a melty chocolate element; dark chocolate chips offer a deeper flavor or go with dairy-free for a vegan treat.
You’ll love the quick preparation and delightful taste of these No-Bake Chocolate Peanut Butter Oat Bars!
Step‑by‑Step Instructions for No-Bake Chocolate Peanut Butter Oat Bars
Step 1: Prep Base
In a large mixing bowl, combine 2 cups of rolled oats, 1/2 cup of unsweetened cocoa powder, and a pinch of salt. Use a whisk to blend the dry ingredients thoroughly, breaking up any clumps of cocoa powder. This will ensure a uniform texture throughout your No-Bake Chocolate Peanut Butter Oat Bars, setting a solid foundation for the recipe.
Step 2: Combine Wet Ingredients
In a separate bowl, whisk together 1 cup of creamy peanut butter and 1/2 cup of honey or maple syrup until the mixture is smooth and glossy. This may take about 2-3 minutes, and the warmth of the peanut butter will help mix everything together seamlessly. This step is crucial as it binds the bars, adding sweetness and depth to your chocolatey treat.
Step 3: Mix Together
Pour the creamy peanut butter mixture into the bowl with the oats and cocoa powder. Stir them together using a spatula until all ingredients are evenly combined and sticky. This may take about 2-4 minutes; you’ll know it’s ready when the mixture looks cohesive and holds together well—like a dough perfect for shaping your No-Bake Chocolate Peanut Butter Oat Bars.
Step 4: Add Chocolate Chips
Gently fold in 1/2 cup of chocolate chips into the mixture, ensuring they are evenly distributed without breaking apart. This step adds an extra layer of chocolatey goodness to your bars, enhancing their flavor. Aim for a good mix, so every bite of your finished No-Bake Chocolate Peanut Butter Oat Bars has that delightful melty chocolate bliss.
Step 5: Form Bars
Line a baking dish (approximately 8×8 inches) with parchment paper for easy removal later. Transfer the mixture into the dish and use the back of a spatula to press it down firmly and evenly. Ensure the mixture is tightly compressed to maintain bar structure, making a flat top that looks inviting and ready to chill. This should take about 3-5 minutes of pressing for optimal results.
Step 6: Chill
Place the prepared dish in the refrigerator and let it chill for at least 1 hour, or until the mixture is set and firm to the touch. This cooling period is essential for your No-Bake Chocolate Peanut Butter Oat Bars to hold their shape when cut. After chilling, you’ll see that they have firmed up nicely, ready for slicing into delicious bars.
BBQ Chicken Flatbread Variations
Feel free to explore these delightful twists on your BBQ Chicken Flatbread for an even more personalized taste experience!
-
Spicy Kick: Add diced jalapeños or a drizzle of sriracha for a zesty and heat-packed version. Perfect for those who like their flavors bold and vibrant!
-
Veggie Boost: Top your flatbread with sautéed bell peppers, onions, or spinach for added nutrients and crunch. This variation not only enhances flavor but also makes your meal more colorful and satisfying.
-
Cheesy Delight: Swap your usual cheese for feta, blue cheese, or a blend of smoked gouda for a gourmet touch. Each cheese brings its unique flavor, taking your BBQ Chicken Flatbread to the next level!
-
Grains Galore: Use whole wheat or cauliflower flatbreads for a healthier base, adapting to your specific dietary needs. Cauliflower flatbreads are especially great for lowering carbs while boosting vegetable intake.
-
Sweet Crunch: Incorporate pineapple or mango slices for a touch of sweetness that contrasts beautifully with the savory BBQ sauce. This tropical twist makes each bite an exciting adventure!
-
Herb Infusion: Add fresh cilantro or basil to elevate the aroma and flavor. Herbs add a bright, fresh note that can truly transform your flatbread experience.
For more delicious chicken ideas, check out my Honey BBQ Chicken which can complement your BBQ cravings perfectly! Want to try something different? My Greek Tzatziki Chicken is another crowd-pleaser!
Make Ahead Options
These No-Bake Chocolate Peanut Butter Oat Bars are perfect for meal prep enthusiasts! You can mix the base (rolled oats, cocoa powder, and salt) up to 3 days in advance, storing it in an airtight container to maintain freshness. Additionally, the wet ingredients (peanut butter and honey/maple syrup) can be combined and refrigerated for up to 24 hours. When you’re ready to enjoy your bars, simply follow the final steps: combine the wet and dry mixtures, fold in the chocolate chips, press into your baking dish, and chill for at least 1 hour until set. This way, you’ll have delicious, homemade snacks ready to grab on busy days!
What to Serve with No-Bake Chocolate Peanut Butter Oat Bars
Imagine indulging in a sweet yet wholesome snack while complementing it with delightful sides that elevate your experience.
- Fresh Fruit Salad: A light and colorful mix of seasonal fruits adds a refreshing contrast to the rich bars, enhancing both flavor and nutrition.
- Greek Yogurt Parfait: Creamy yogurt layered with berries and granola makes for a deliciously satisfying pairing, perfect for breakfast or a snack.
- Nutty Trail Mix: A crunchy blend of your favorite nuts and seeds pairs beautifully with the soft texture of the bars, providing a delightful crunch and varied flavor.
- Chilled Milk or Nut Milk: The classic pairing—milk (dairy or plant-based) complements the chocolate and peanut butter, offering a creamy balance to every bite.
- Chocolate Hummus Dip: For a fun twist, serve with a bowl of chocolate hummus for dipping. It adds a unique flavor while maintaining that sweet tooth satisfaction.
- Herbal Iced Tea: Refreshing and light, iced herbal tea offers a soothing balance to the rich flavors of the bars, making it an ideal afternoon treat.
Feel free to mix and match these suggestions—each one brings its unique charm to elevate your snacking experience!
Expert Tips for No-Bake Chocolate Peanut Butter Oat Bars
-
Tightly Compressed: Ensure the mixture is pressed firmly in the baking dish; this helps the bars hold together and prevents them from crumbling.
-
Chilling Time: If the bars are too soft after chilling for an hour, leave them in the refrigerator longer to achieve the perfect firmness.
-
Nutty Additions: For added flavor and crunch, consider mixing in some chopped nuts or seeds before pressing the mixture into the dish.
-
Parchment Paper: Line your baking dish with parchment paper for easy removal; it keeps the bars intact and makes cleanup a breeze.
-
Flavor Variations: Feel free to swap in almond or cashew butter for a tasty twist, or add dried fruits to enhance sweetness in these No-Bake Chocolate Peanut Butter Oat Bars.
Storage Tips for No-Bake Chocolate Peanut Butter Oat Bars
Fridge: Store bars in an airtight container in the refrigerator for up to 2 weeks. This keeps them fresh and ready for snacking!
Freezer: For longer storage, wrap individual bars in plastic wrap and freeze for up to 3 months. Just thaw before enjoying.
Room Temperature: If you opt to keep them out, store in a cool place, but they’re best chilled. Consume within 4–5 days to maintain texture.
Reheating: No need to reheat, but if you prefer warm bars, a quick 10-15 seconds in the microwave will melt the chocolate chips for a delightful treat!
No-Bake Chocolate Peanut Butter Oat Bars Recipe FAQs
How do I choose the right ingredients for my bars?
Absolutely! For the best texture and flavor, opt for fresh, gluten-free rolled oats. Make sure your peanut butter is creamy and natural, as it adds a smooth richness to the bars. When selecting cocoa powder, go for unsweetened varieties, which provide a deep cocoa flavor without added sugars.
What’s the best way to store these bars?
I recommend storing your No-Bake Chocolate Peanut Butter Oat Bars in an airtight container in the refrigerator for up to 2 weeks. This helps them stay fresh and maintain their delicious texture. If you want to keep them longer, wrap each bar in plastic wrap and freeze them for up to 3 months. Just remember to thaw before you dig in!
Can I freeze the No-Bake Chocolate Peanut Butter Oat Bars?
Certainly! To freeze, wrap each bar individually in plastic wrap and place them in a freezer-safe bag. They can be stored like this for up to 3 months. When you’re ready to enjoy, just let them thaw in the refrigerator for a few hours or at room temperature for about 30 minutes. They’ll taste just as delightful as when freshly made!
What if my bars turn out too soft?
Very! If your bars are too soft after chilling for an hour, they may need additional time in the fridge. Leave them to chill for another 30 minutes or even longer until they firm up. Another tip is to ensure your mixture is tightly compressed in the baking dish; this helps maintain structure. If the issue persists next time, consider adding a bit more oats as a binding agent.
Are there any dietary considerations?
Absolutely! For a gluten-free version, ensure you’re using certified gluten-free rolled oats. If you’re dealing with allergies, be cautious with peanut butter; you can always swap it out for almond or cashew butter for a nut-free alternative, but check nut allergies among those you’ll serve. And if vegan, just replace honey with maple syrup!
BBQ Chicken Flatbread: A Savory Delight for Every Occasion
Ingredients
Equipment
Method
- In a large mixing bowl, combine rolled oats, cocoa powder, and a pinch of salt.
- In a separate bowl, whisk together peanut butter and honey/maple syrup until smooth.
- Pour the creamy peanut butter mixture into the bowl with oats and cocoa powder. Stir until combined.
- Gently fold in chocolate chips into the mixture.
- Line a baking dish with parchment paper. Transfer the mixture into the dish and press down.
- Place in the refrigerator and let it chill for at least 1 hour.
Leave a Reply