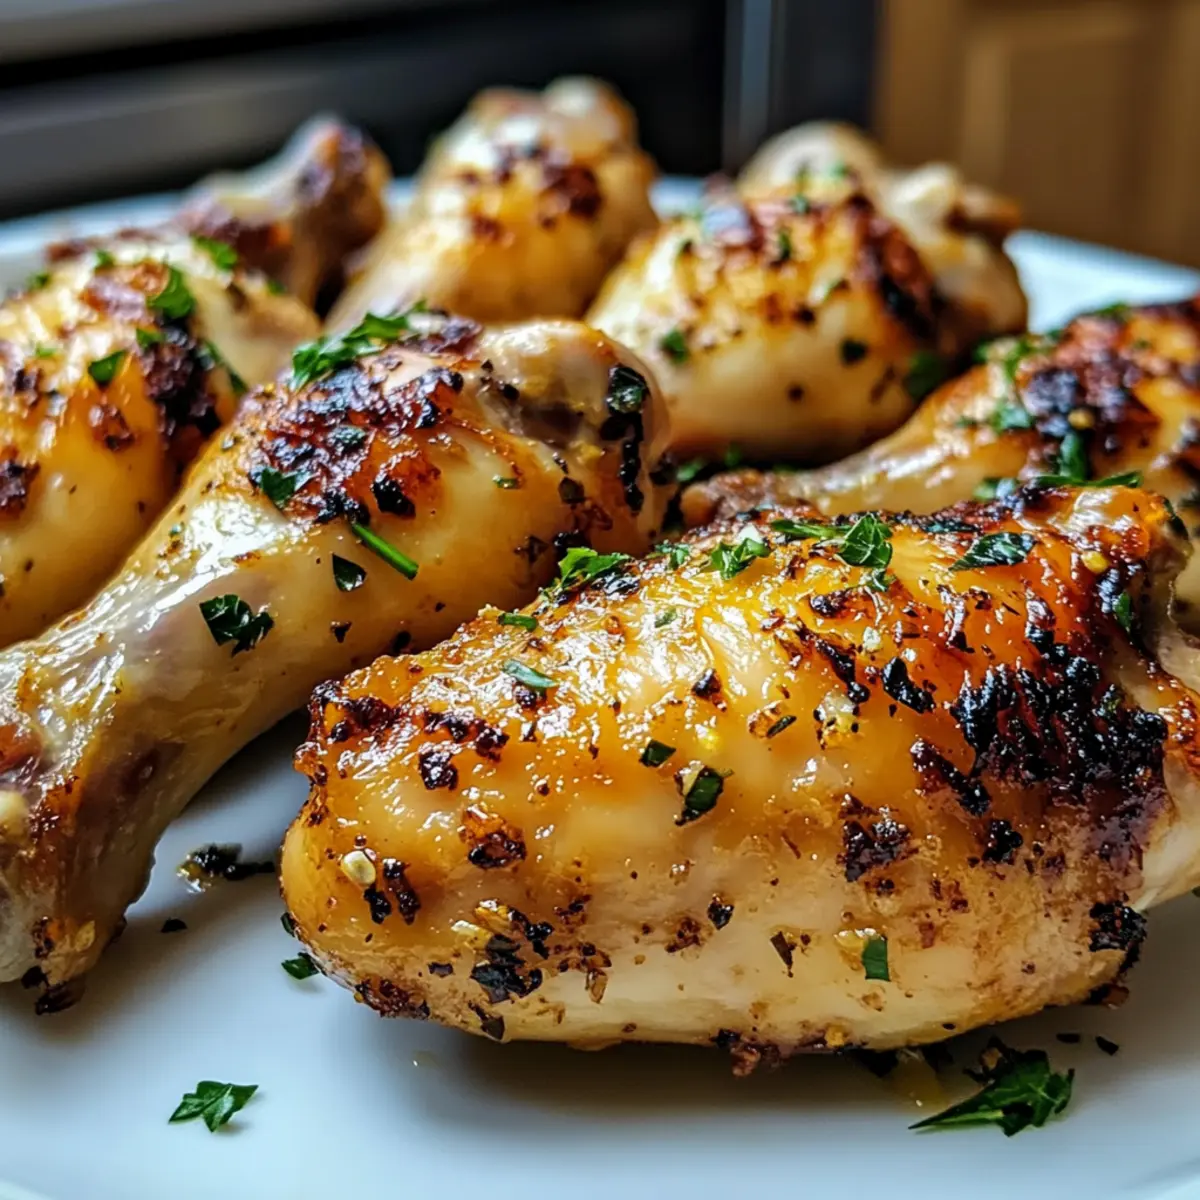
The aroma of garlic sizzling in olive oil always brings me back to my childhood kitchen, where warmth and love melted into every dish. Fast forward to today, and I’m excited to share my favorite comfort food: Garlic Parmesan Chicken Drumsticks: Tender, Juicy, and Flavorful. This easy, family-friendly recipe transforms ordinary weeknights into extraordinary feasts with its simple preparation and crowd-pleasing charm. Picture crispy, golden skin giving way to juicy, succulent meat infused with the irresistible combination of garlic and Parmesan. And the best part? You can whip it up in under an hour, making it the perfect solution for busy evenings or special gatherings. So, are you ready to elevate your next dinner and impress your loved ones? Let’s dive into this mouthwatering recipe that’s sure to become a staple in your home!
Why Are These Drumsticks The Best?
Unmatched Flavor: The aromatic garlic and rich Parmesan blend together to create a delectable taste that will have everyone coming back for seconds.
Effortless Preparation: With just a few simple steps, these drumsticks come together quickly, perfect for even the busiest weeknights.
Family-Friendly Appeal: Kids and adults alike will adore these crispy, juicy delights—ideal for a satisfying family meal.
Versatile Serving Options: Pair them with sides like creamy mashed potatoes or a fresh garden salad for a well-rounded feast, or check out a recipe for Sticky Chicken Bowls for a fun twist!
Meal Prep Delight: Marinate these drumsticks ahead of time and store them in the fridge for up to 24 hours—an easy way to save time without sacrificing flavor.
Crowd-Pleasing Goodness: Whether it’s a casual dinner or a special gathering, these Garlic Parmesan Chicken Drumsticks will steal the show every time!
Garlic Parmesan Chicken Drumsticks Ingredients
For the Drumsticks
• Chicken Drumsticks – The star of the dish; tender and juicy when cooked correctly.
• Olive Oil – Adds moisture and helps the seasonings stick; can swap for cooking spray for a lighter option.
For the Seasoning Blend
• Garlic – Provides a rich, aromatic flavor; use fresh garlic for the best results.
• Parmesan Cheese – Adds nuttiness and depth; freshly grated parmesan yields the best melt and taste.
• Paprika – Contributes subtle warmth and color; consider smoked paprika for an added kick.
• Dried Oregano – Infuses herby notes; switch to dried basil or rosemary if preferred.
• Dried Thyme – Brings earthy aromas; can be replaced with Italian seasoning for convenience.
• Salt and Black Pepper – Essential for enhancing flavors; adjust salt based on dietary needs.
For the Garnish
• Fresh Parsley – Offers a pop of color and freshness; optional but highly recommended for presentation.
Transform your dinner plans with these Garlic Parmesan Chicken Drumsticks—they’re sure to impress both family and friends!
Step‑by‑Step Instructions for Garlic Parmesan Chicken Drumsticks: Tender, Juicy, and Flavorful
Step 1: Preheat the Oven
Begin by preheating your oven to 425°F (220°C). While the oven is heating, prepare a baking sheet by lining it with aluminum foil for easy cleanup and lightly greasing it with cooking spray or a drizzle of olive oil. This setup will ensure your Garlic Parmesan Chicken Drumsticks cook evenly, and the foil will protect them from sticking.
Step 2: Prep the Chicken
Take your chicken drumsticks and pat them dry thoroughly with paper towels. This step is crucial as it helps achieve a crispy texture while baking. Once you’ve patted them dry, place the drumsticks in a large bowl. This will be their cozy home while they soak up all those mouthwatering flavors!
Step 3: Mix the Seasoning
In a separate bowl, mix together minced garlic, freshly grated Parmesan cheese, paprika, dried oregano, dried thyme, salt, and black pepper. Stir until all the ingredients are well combined, forming a fragrant seasoning blend. The classic combination of these flavors is what makes your Garlic Parmesan Chicken Drumsticks irresistible, ensuring a burst of taste in every bite.
Step 4: Coat the Chicken
Drizzle olive oil evenly over the chicken drumsticks in the bowl, ensuring each piece is slicked with oil. Next, sprinkle the seasoning mix over the drumsticks, pressing lightly to help it adhere well to the surface. Make sure each drumstick is generously coated, as this will create that delectable, crispy crust you’ll love.
Step 5: Arrange on the Baking Sheet
Carefully place the seasoned drumsticks on the prepared baking sheet, making sure to space them out evenly. This arrangement allows hot air to circulate, promoting even cooking and crispiness. Avoid overcrowding the baking sheet for the best results, keeping your Garlic Parmesan Chicken Drumsticks perfectly golden and juicy.
Step 6: Bake
Slide the baking sheet into your preheated oven and let the drumsticks bake for 35-40 minutes. Halfway through baking, turn the drumsticks over to achieve an even golden brown color on all sides. They’re done when they reach an internal temperature of 165°F (74°C) and have a delightful crispy skin that beckons to be devoured.
Step 7: Broil for Extra Crispiness
For the ultimate crispy finish, switch your oven to broil mode and broil the drumsticks for an additional 2-3 minutes, keeping a close eye to prevent burning. This step intensifies the flavors and creates a fabulous crunch that complements the juicy meat perfectly, making these Garlic Parmesan Chicken Drumsticks a crowd-pleaser.
Step 8: Serve and Garnish
Once done, remove the drumsticks from the oven and let them rest for a few minutes. Garnish with freshly chopped parsley for a burst of color and added flavor. Pair your juicy Garlic Parmesan Chicken Drumsticks with your favorite sides, like creamy mashed potatoes or a fresh garden salad, for a satisfying meal that everyone will enjoy.
Storage Tips for Garlic Parmesan Chicken Drumsticks
Fridge: Store leftovers in an airtight container for up to 3 days. Make sure they cool down to room temperature before sealing to maintain freshness.
Freezer: For longer storage, freeze the cooked drumsticks in a freezer-safe bag or container for up to 2 months. Ensure to remove as much air as possible.
Reheating: When ready to enjoy again, reheat directly from frozen by baking at 350°F (175°C) for about 25-30 minutes or until heated through.
Marinating: Enhance flavor by marinating the drumsticks in the seasoning for up to 24 hours before cooking. This step can be a game-changer for your Garlic Parmesan Chicken Drumsticks!
What to Serve with Garlic Parmesan Chicken Drumsticks
Elevate your dining experience with delectable pairings that bring harmony and balance to your meal.
- Creamy Mashed Potatoes: The smooth, buttery texture of mashed potatoes perfectly complements the crispy chicken, soaking up all those savory juices.
- Garlic Butter Green Beans: Crisp-tender green beans sautéed in garlic butter add a refreshing pop of color and flavor, balancing the richness of the drumsticks.
- Caesar Salad: Crisp romaine topped with crunchy croutons and tangy dressing offers a refreshing contrast, enhancing each bite of the flavorful chicken.
- Roasted Vegetables: Seasoned seasonal veggies not only bring vibrant colors to the plate but also their earthy essence pairs beautifully with the savory chicken.
- Herbed Rice Pilaf: Light and fluffy rice infused with herbs rounds out the meal with its subtle flavors, allowing the drumsticks to shine.
- Garlic Bread: Toasted, buttery garlic bread is a crowd favorite—a perfect vehicle for those juicy drippings that everyone craves!
- Sparkling Water: A fizzy drink like sparkling water cleanses the palate wonderfully, making each bite of chicken taste even better.
- Apple Pie: For dessert, a warm slice of apple pie, with its sweet-tart flavor and flaky crust, makes a luscious ending to this comforting meal.
Make Ahead Options
These Garlic Parmesan Chicken Drumsticks are a fantastic option for meal prep! You can marinate the drumsticks in the seasoning mix up to 24 hours in advance, allowing the flavors to penetrate deeply for even juicier results. Simply combine the garlic, Parmesan, and spices, then drizzle with olive oil before coating the chicken. Store them in an airtight container in the refrigerator until you’re ready to bake. On the day of serving, just preheat the oven, arrange the drumsticks on a baking sheet, and cook them as directed – you’ll have a delicious, crowd-pleasing meal on the table with minimal effort!
Expert Tips for Garlic Parmesan Chicken Drumsticks
• Dry the Chicken: Patting the drumsticks dry is crucial for achieving a crispy texture. Moisture prevents that beautiful golden crust you desire.
• Even Sizes: Cut the chicken into similar-sized pieces to ensure they cook evenly. This helps in reaching the perfect juiciness throughout.
• Fresh is Best: Always opt for fresh garlic and herbs over dried varieties to maximize flavor. Fresh ingredients make the Garlic Parmesan Chicken Drumsticks truly shine.
• Monitor the Broil: When broiling for extra crispiness, watch closely to prevent burning the cheese. A minute or two can make a big difference!
• Rest Before Serving: Let the drumsticks rest for a few minutes after baking. This allows the juices to redistribute, enhancing the overall flavor and moisture.
Garlic Parmesan Chicken Drumsticks Variations
Feel free to get creative and customize your Garlic Parmesan Chicken Drumsticks to suit your taste or dietary needs!
-
Spicy Twist: Add cayenne pepper to the seasoning mix for a delightful kick that tantalizes the taste buds. A little heat truly enhances the overall flavor profile!
-
Herb Lovers: Increase oregano and thyme quantities, and add fresh rosemary for an aromatic twist that lifts the dish to new heights. This variation brings a garden-fresh vibe right to your dinner table.
-
Zesty Addition: Incorporate lemon zest into the seasoning mix for a refreshing burst of citrus that contrasts beautifully with the savory flavors. This brilliant touch can brighten up any meal!
-
Extra Cheesy: Sprinkle additional Parmesan cheese halfway through baking for a thicker, gooier cheese layer that melts into delicious bliss. Cheese lovers will adore this fun enhancement!
-
Honey Glaze: Drizzle a bit of honey over the drumsticks during the last few minutes of baking for a sweet and savory flavor explosion. The caramelization creates a sticky, irresistible coating!
-
Asian-Inspired: Substitute the garlic and oregano with ginger and sesame seeds, bringing a unique flavor twist reminiscent of Asian cuisine. Serve with Sticky Chicken Bowls for a delightful fusion!
-
BBQ Bliss: Use a BBQ sauce glaze instead of the seasoning mix for a smoky, tangy flavor that’ll make your family cheer. This change transforms your drumsticks into summer BBQ memories!
-
Vegetarian Alternative: Swap chicken drumsticks for firm tofu or portobello mushrooms, following the same seasoning method. This alternative delivers rich flavors for a satisfying vegetarian option!
With these variations in hand, your dinner will become an exciting adventure, keeping everyone eagerly anticipating the next meal! For further inspiration, try pairing your drumsticks with sides like creamy mashed potatoes or even consider making Chicken Enchiladas for a fun twist!
Garlic Parmesan Chicken Drumsticks Recipe FAQs
What type of chicken drumsticks should I use?
Absolutely! When selecting chicken drumsticks, look for pieces that are plump and firm, with smooth skin free of any dark spots or blemishes. Fresh chicken drumsticks yield the best flavor and texture, so check the sell-by date to ensure you’re getting quality meat.
How should I store leftover Garlic Parmesan Chicken Drumsticks?
Sure thing! Store any leftovers in an airtight container in the refrigerator for up to 3 days. Allow them to cool to room temperature before sealing to maintain their crispy texture. When you’re ready to enjoy them again, I recommend reheating them in the oven for maximum crispiness!
Can I freeze Garlic Parmesan Chicken Drumsticks?
Yes indeed! To freeze your cooked drumsticks, first let them cool completely. Then, store them in a freezer-safe bag or container, making sure to remove excess air to prevent freezer burn. They can be frozen for up to 2 months. When you’re ready to enjoy, reheat them directly from frozen by baking at 350°F (175°C) for about 25-30 minutes or until heated through.
What can I do if my drumsticks aren’t crispy?
Very good question! If your Garlic Parmesan Chicken Drumsticks aren’t crispy, it might be due to excess moisture. Be sure to pat them completely dry before seasoning. If you still find they lack crispiness, you can broil them for a couple of minutes at the end of baking, monitoring closely to avoid burning.
Are these drumsticks safe for kids and pets?
Yes! These Garlic Parmesan Chicken Drumsticks are generally safe for children. However, it’s important to watch for any allergies to ingredients like garlic or Parmesan cheese. And while chicken is generally safe for dogs, remember to keep them away from the seasoning, and never offer them cooked bones!
What’s the best way to marinate these drumsticks?
Absolutely! To marinate the chicken drumsticks, combine your garlic, Parmesan, paprika, oregano, thyme, salt, pepper, and a drizzle of olive oil in a bowl. Coat the drumsticks evenly in this mix and let them marinate in the fridge for up to 24 hours. This extra step significantly enhances the flavor and tenderness of your Garlic Parmesan Chicken Drumsticks!
Garlic Parmesan Chicken Drumsticks: Crispy, Juicy Delight
Ingredients
Equipment
Method
- Preheat your oven to 425°F (220°C) and prepare a baking sheet with aluminum foil.
- Pat the chicken drumsticks dry with paper towels and place them in a large bowl.
- In a separate bowl, mix minced garlic, Parmesan cheese, paprika, oregano, thyme, salt, and black pepper.
- Drizzle olive oil over the chicken and sprinkle seasoning mix, ensuring each drumstick is coated.
- Arrange drumsticks on the baking sheet, ensuring even spacing.
- Bake for 35-40 minutes, turning halfway until reaching an internal temperature of 165°F (74°C).
- Broil for an additional 2-3 minutes for extra crispiness, monitoring closely.
- Remove from the oven, let rest for a few minutes, and garnish with parsley before serving.
Leave a Reply