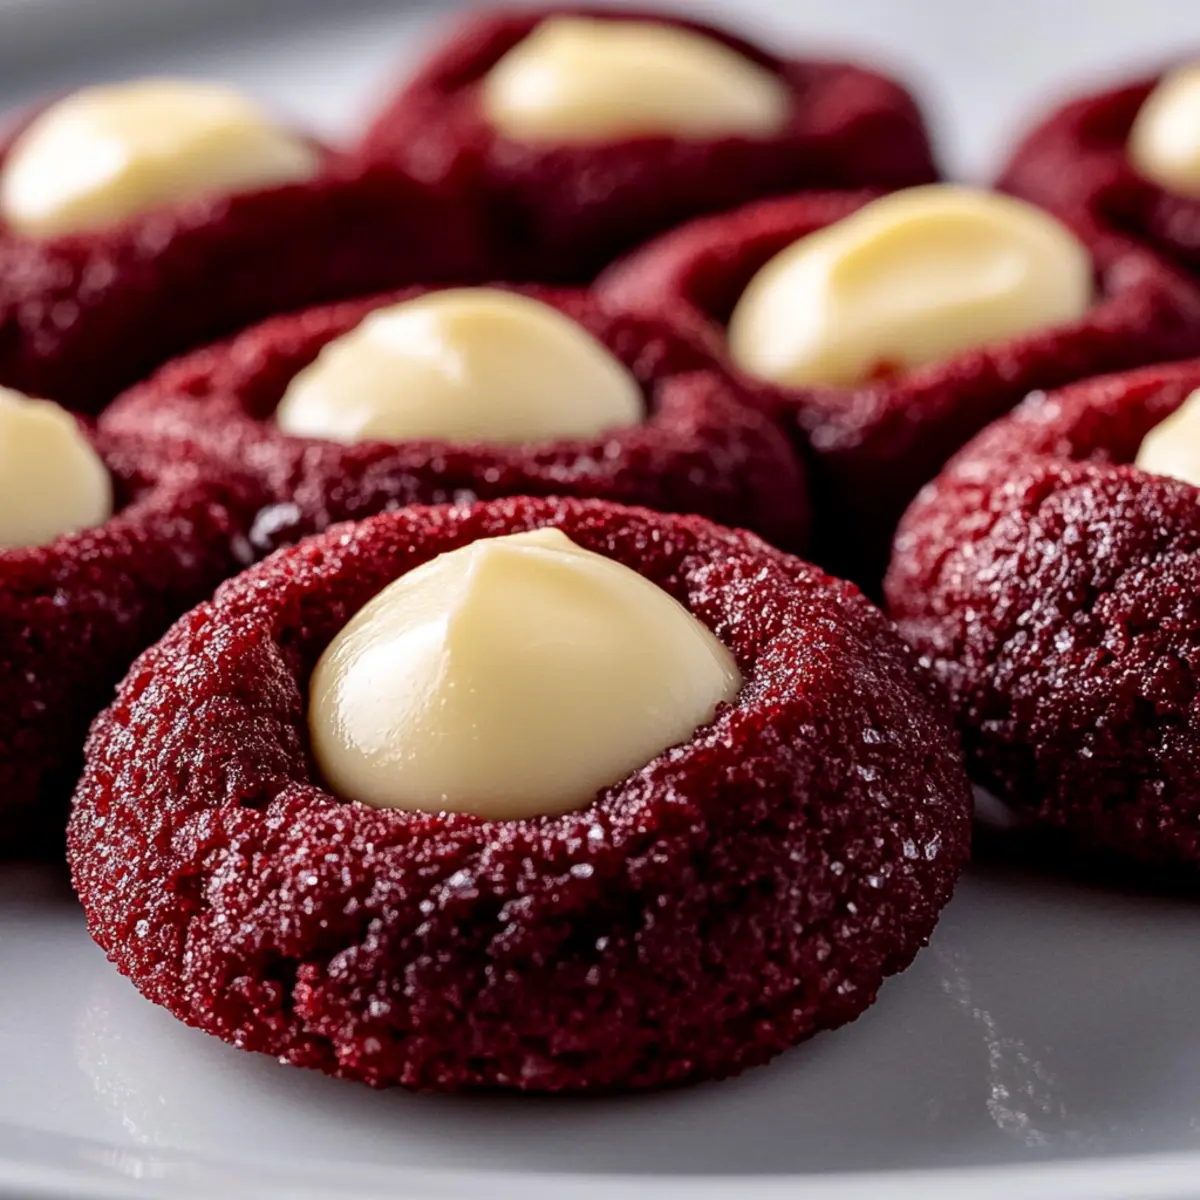
The kitchen echoed with the clinking of bowls as I whipped up a festive batch of Red Velvet Cream Cheese Thumbprint Cookies. The rich cocoa aroma filled the air, blending harmoniously with the sweet tang of cream cheese—truly a match made in dessert heaven! These cookies not only bring a stunning splash of crimson color to your holiday gatherings, but they also promise to delight with a tender texture and luscious creamy center. Whether you’re pulling them out for a cozy family movie night or impressing guests at your next soirée, they are a sure crowd-pleaser. Plus, they’re quick to make—perfect for any home chef looking to elevate their holiday cookie game. Curious about how to get that perfect thumbprint with the right balance of flavors? Let’s dive into the recipe!
How do these cookies stand out?
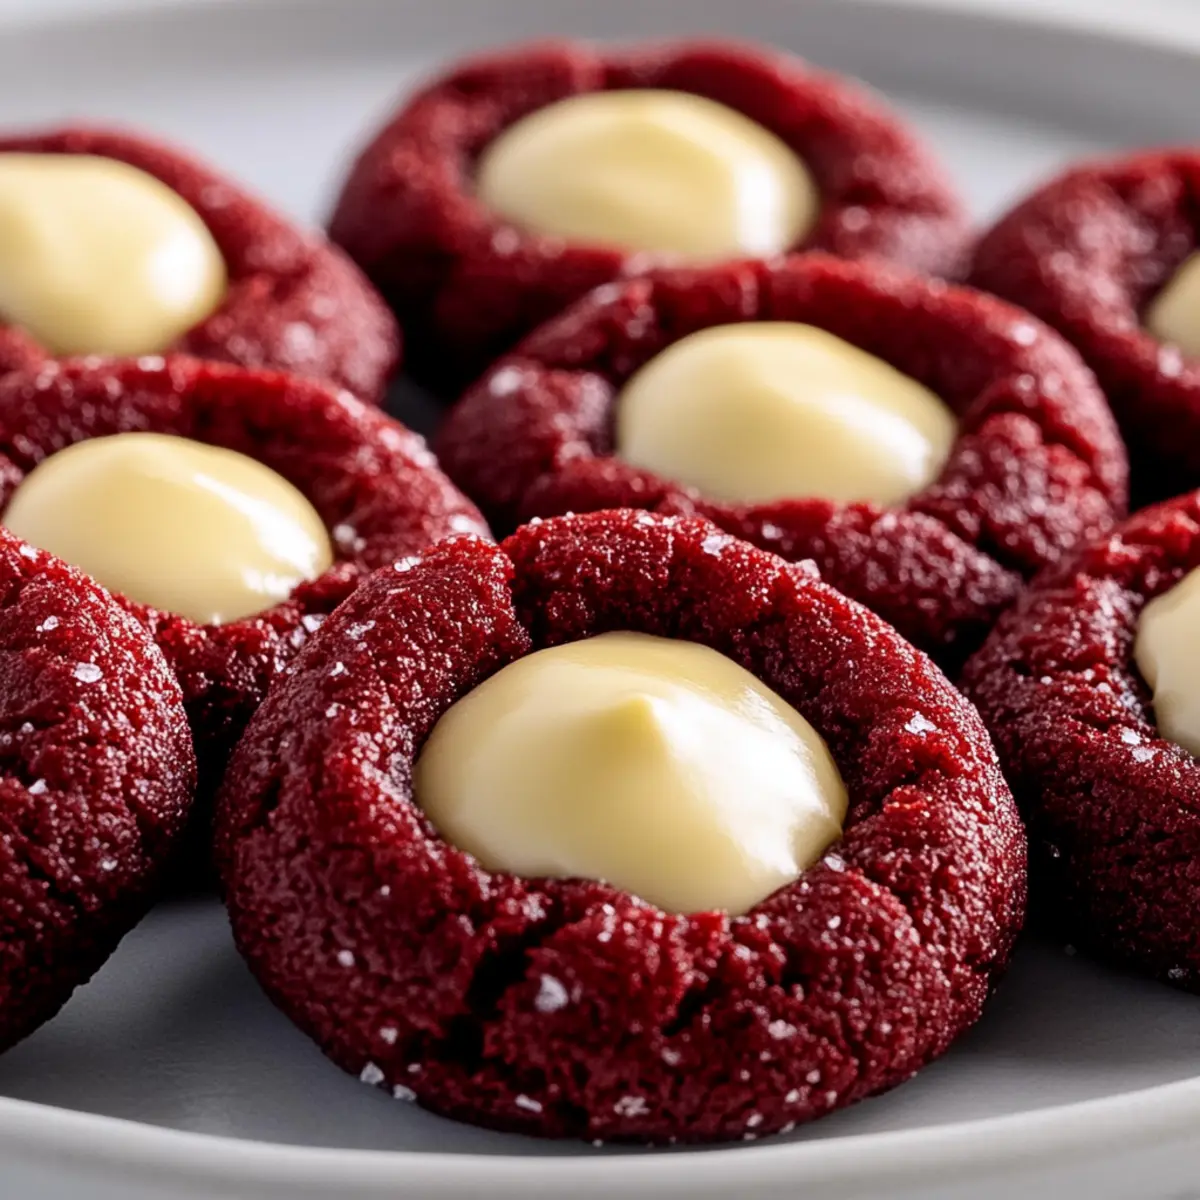
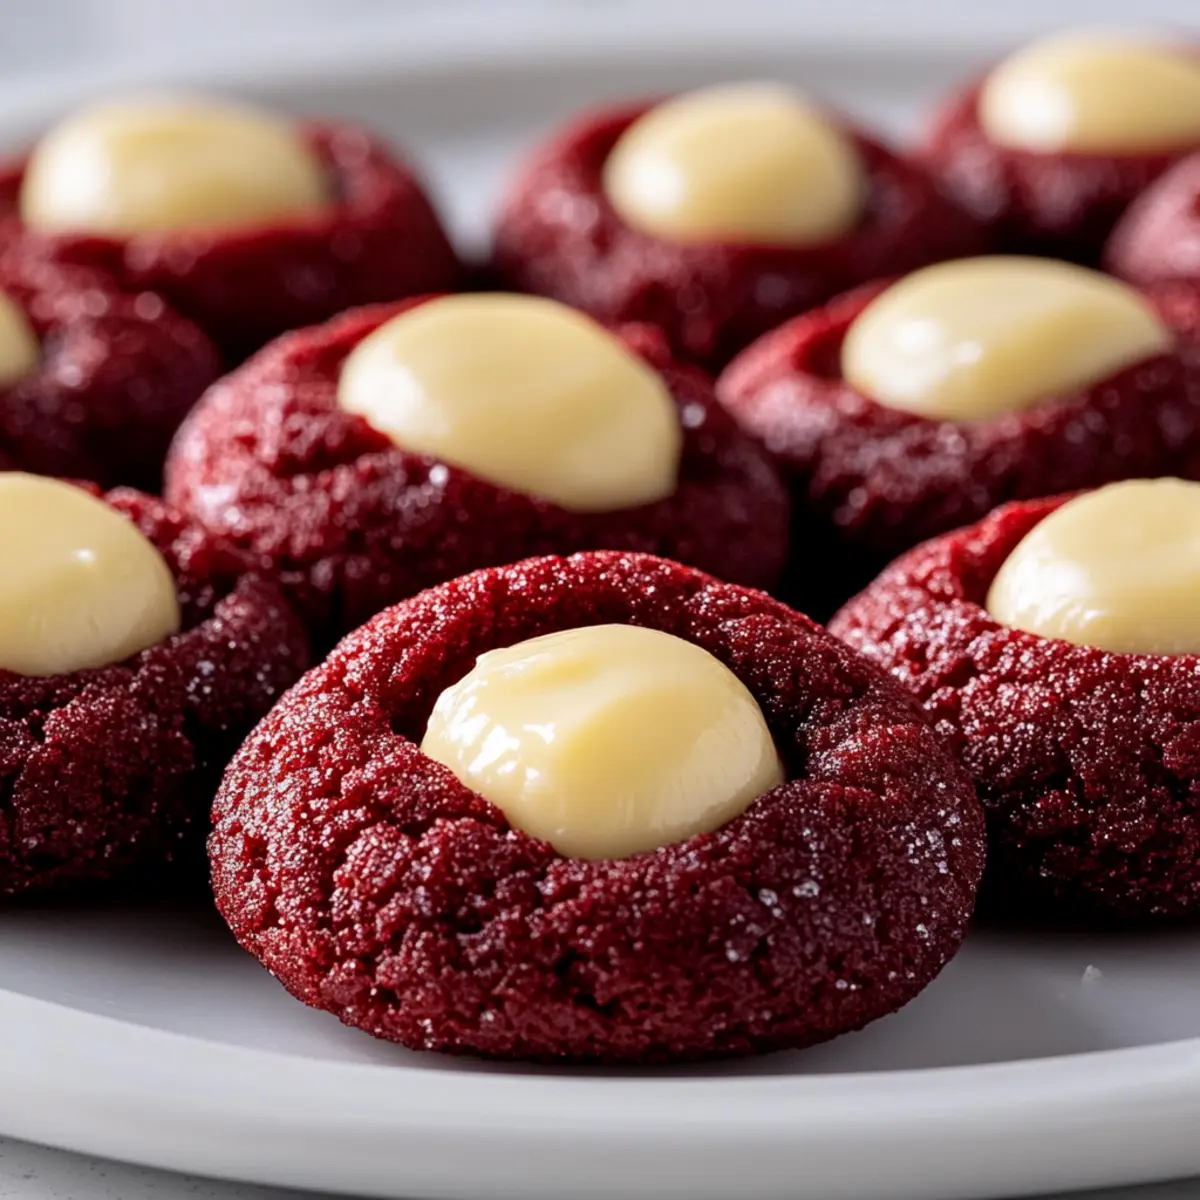
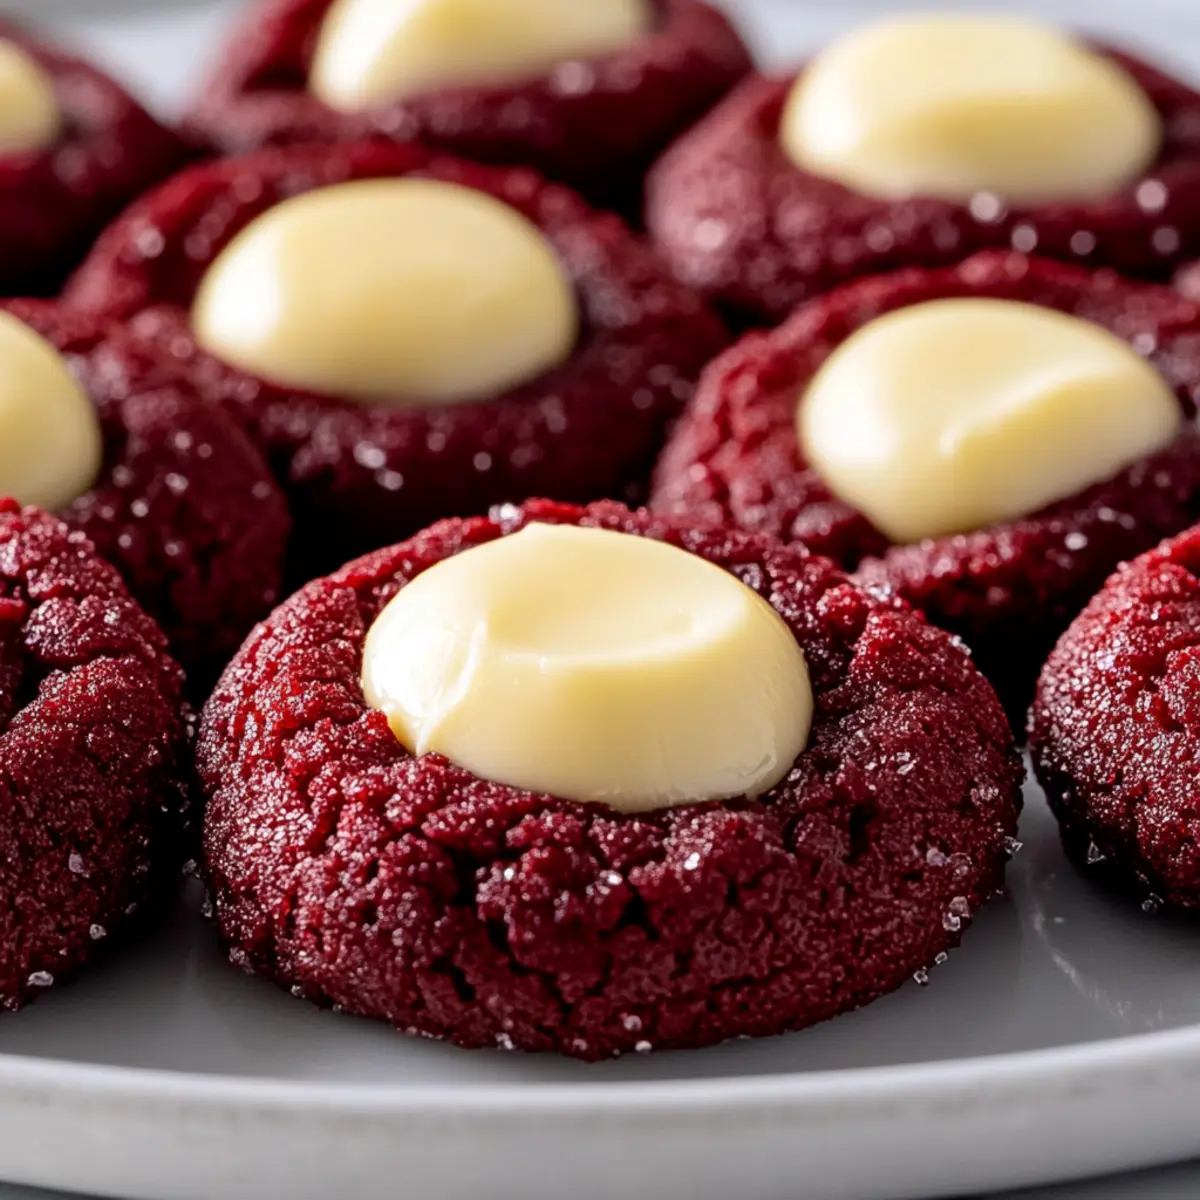
Festive Charm: The vibrant red hue adds a cheerful touch to any gathering, making these cookies perfect for festive occasions.
Irresistible Filling: Each cookie is a delightful surprise with a creamy, tangy cream cheese center, reminiscent of classic red velvet cake.
Versatile Variations: Feel free to play with flavors—add lemon zest for zestiness or opt for almond extract to elevate sophistication.
Easy to Make: Despite their impressive appearance, this recipe is simple enough for bakers of all skill levels.
Crowd-Pleaser: Whether served at holiday parties or a cozy family night, these cookies are sure to enchant your guests, just like my popular Creamsicle Mini Cheesecakes that everyone loves!
Red Velvet Cream Cheese Thumbprint Cookies Ingredients
For the Cookie Dough
• All-purpose flour – Provides structure to the cookies; substitute with gluten-free flour for a gluten-free option.
• Unsweetened cocoa powder – Adds rich chocolate flavor; ensure it is natural cocoa for the best taste.
• Baking soda – Acts as a leavening agent to help the cookies rise.
• Salt – Enhances the flavor of the cookies.
• Unsalted butter – Contributes to the richness and moisture; ensure it’s softened for easy mixing.
• Granulated sugar – Sweetens the cookie dough and helps achieve a tender texture.
• Large egg – Binds the ingredients and provides moisture; use a flax egg as a vegan substitute.
• Vanilla extract – Adds a warm, sweet flavor; opt for pure extract for the best taste.
• White vinegar – Reacts with baking soda to create lift in the cookies.
• Buttermilk – Adds moisture and a slight tang; make your own by mixing milk with lemon juice or vinegar.
• Red gel food coloring – Provides the vibrant red color characteristic of Red Velvet Cream Cheese Thumbprint Cookies.
For the Cream Cheese Filling
• Cream cheese – Forms the creamy center; use full-fat for better texture.
• Unsalted butter – Adds richness and helps achieve a smooth filling.
• Powdered sugar – Sweetens and thickens the cream cheese filling; sift for a smoother texture.
• Vanilla extract – Enhances the flavor of the cream cheese filling; make it the star!
• Pinch of salt – Balances the sweetness of the filling.
Optional Garnishes
• Additional powdered sugar – Perfect for dusting and adding a lovely presentation.
• Melted white chocolate – Use for drizzling as a decorative finish; it adds a delightful sweetness.
Let’s bring these gorgeous Red Velvet Cream Cheese Thumbprint Cookies to life in your kitchen!
Step‑by‑Step Instructions for Red Velvet Cream Cheese Thumbprint Cookies
Step 1: Preheat and Prepare
Preheat your oven to 375°F (190°C) and line baking sheets with parchment paper to prevent sticking. This will keep your Red Velvet Cream Cheese Thumbprint Cookies from spreading too much during baking. Ensure your baking sheets are ready to go, so you can transfer the cookies directly after shaping them.
Step 2: Mix Dry Ingredients
In a large bowl, whisk together 2 cups of all-purpose flour, 2 tablespoons of unsweetened cocoa powder, 1 teaspoon of baking soda, and a pinch of salt. This blend of dry ingredients will lay the foundation for your cookies’ flavor and texture. Set this mixture aside while you prepare the wet ingredients, ensuring a fluffier cookie batter.
Step 3: Cream Butter and Sugar
In a separate mixing bowl, beat 1 cup of softened unsalted butter and 1 cup of granulated sugar together until light and fluffy, which should take about 3-5 minutes. The mixture should become pale in color and noticeably aerated, setting the stage for your Red Velvet Cream Cheese Thumbprint Cookies to have a tender texture.
Step 4: Incorporate Wet Ingredients
Add 1 large egg, 1 teaspoon of vanilla extract, and 1 tablespoon of white vinegar to the creamed butter and sugar mixture. Mix until fully combined, which should take about 1-2 minutes. This combination of ingredients helps bind the dough together, adding moisture and a hint of tang that’s characteristic of red velvet treats.
Step 5: Add Food Coloring
Gradually incorporate 2 tablespoons of red gel food coloring into your wet mixture, mixing until the color is evenly distributed and vibrant. This step is crucial for achieving that stunning red hue that makes these cookies so festive. Don’t be shy with the color; the more vivid, the better!
Step 6: Combine Dry and Wet Mixtures
Slowly add the dry ingredients mixture into the wet ingredients, alternating with 1/2 cup of buttermilk. Mix just until combined, being careful not to overmix, as this could affect the texture of your cookies. You want the dough to be smooth with just a few small lumps remaining for the best Red Velvet Cream Cheese Thumbprint Cookies.
Step 7: Chill the Dough
Wrap the dough in plastic wrap and refrigerate for at least 30 minutes or up to 2 hours. This chilling step helps firm up the dough, making it easier to shape into balls and preventing the cookies from spreading while baking. Use this time to prepare your cream cheese filling.
Step 8: Prepare the Cream Cheese Filling
In a mixing bowl, beat together 8 ounces of softened cream cheese and 1/4 cup of unsalted butter until smooth and creamy. Gradually add 2 cups of powdered sugar, mixing well after each addition, and stir in 1 teaspoon of vanilla extract and a pinch of salt. This filling creates the luscious center for your cookies.
Step 9: Pipe the Filling
Transfer the cream cheese filling mixture into a piping bag or a zip-top bag with the corner snipped off. Refrigerate it for a short while to allow it to firm up, making it easier to pipe. This step will set you up for successfully filling the thumbprints with ease once the cookies are baked.
Step 10: Shape the Cookies
Once your cookie dough has chilled, scoop out tablespoon-sized portions and roll them into balls. Place the dough balls on your prepared baking sheets, then use your thumb or the back of a spoon to create an indentation in the center of each, creating the perfect spot for that cream cheese filling.
Step 11: Fill the Cookies
Using the piped cream cheese filling, carefully fill each thumbprint with the mixture, being generous but ensuring not to overflow. This step will give your Red Velvet Cream Cheese Thumbprint Cookies the signature look and delicious taste you and your loved ones will adore.
Step 12: Bake the Cookies
Place the filled cookie sheets into the preheated oven and bake for 10-12 minutes, or until the edges are set and the tops look slightly firm. Keep an eye on them to prevent overbaking; they should still be soft to the touch. The tempting aroma will fill your kitchen as they bake!
Step 13: Cool the Cookies
Once baked, let the cookies cool on the baking sheets for 5-7 minutes before gently transferring them to a wire rack. Allow them to cool completely, which will help the cream cheese filling to set perfectly. This little patience pays off with wonderfully delicious cookies!
Step 14: Garnish the Cookies
For an irresistible finish, dust your cookies with additional powdered sugar or drizzle them with melted white chocolate if desired. This adds a lovely touch and enhances their festive presentation, making your Red Velvet Cream Cheese Thumbprint Cookies as delightful to look at as they are to taste.
Step 15: Store the Cookies
Keep your cookies in an airtight container in the refrigerator for 3-5 days to maintain their freshness. Alternatively, they can be frozen for up to 2-3 months. No matter how you choose to store them, these cookies are sure to stay delicious and ready to impress!
Tips for the Best Red Velvet Cream Cheese Thumbprint Cookies
-
Softened Butter: Make sure your butter is at room temperature for easy mixing, ensuring a well-incorporated dough that results in tender Red Velvet Cream Cheese Thumbprint Cookies.
-
Avoid Overmixing: Be careful not to overmix the dough once you add the flour; this can lead to tough cookies. Mix just until combined for light and airy treats.
-
Chill for Success: Don’t skip the chilling step! Chilling the dough helps maintain the shape of the cookies and improves texture, preventing too much spreading in the oven.
-
Uniform Indentions: Use your thumb gently to create uniform thumbprints; too deep can lead to overflow of the cream cheese filling, while too shallow may not hold enough.
-
Cool Completely: Allow the cookies to cool completely before piping in the filling, as this facilitates a perfect set and ensures the delicious cream cheese mixture holds beautifully.
-
Flavor Variations: Don’t hesitate to experiment with variations in the filling; try adding lemon zest or almond extract for a personal touch to your Red Velvet Cream Cheese Thumbprint Cookies.
Red Velvet Cream Cheese Thumbprint Cookies Variations
Feel free to let your creativity shine as you customize these delightful cookies with your favorite flavors and textures!
-
Gluten-Free: Substitute all-purpose flour with a 1:1 gluten-free flour blend for a gluten-free version that still delivers on taste.
-
Citrusy Twist: Add 1 tablespoon of lemon zest to the cream cheese filling for a fresh and vibrant flavor that brightens every bite. It’s a refreshing surprise!
-
Almond Elegance: Replace vanilla extract in the filling with almond extract for a nutty, sophisticated touch that will elevate your Red Velvet Cream Cheese Thumbprint Cookies.
-
Colorful Fun: Swap the red gel food coloring with teal, pink, or green for themed events or holidays—just imagine those colorful confections on your dessert table!
-
Jam Surprise: Incorporate a tablespoon of raspberry jam into the cream cheese filling for a sweet and tangy surprise that complements the cookies beautifully.
-
Extra Crunch: Toss in some finely chopped nuts or crushed candy canes into the cookie dough for added texture and festive flair, perfect for delightful crunch.
-
Double Chocolate: Stir in a handful of mini chocolate chips into the dough before chilling for a rich, chocolatey decadence that will have chocolate lovers swooning.
-
Heat it Up: For a touch of warmth, add a pinch of cayenne pepper to the cookie dough for a subtle kick. It’s a unique twist that balances the sweetness!
Each variation brings a special touch to these beloved cookies, just like how my Baked Mac and Cheese captures the essence of comfort food. Explore these ideas and make them your own!
What to Serve with Red Velvet Cream Cheese Thumbprint Cookies
Indulge your senses by pairing these delightful cookies with complementary sides that enhance their festive charm and mouthwatering flavors.
-
Creamy Mashed Potatoes: The creamy texture and buttery flavor provide a delicious contrast to the cookies’ sweetness, perfect for a comforting meal.
-
Vanilla Ice Cream: A scoop of vanilla ice cream creates a delightful balance with the tangy cream cheese filling, turning each bite into a decadent treat.
-
Hot Cocoa: Rich and warm, a cup of velvety hot cocoa complements the cocoa notes in the cookies, making for a cozy pairing during chilly evenings.
-
Fruity Salad: A fresh fruit salad, featuring berries and citrus, adds bright flavors and a refreshing touch to balance the rich cookie experience.
-
Coffee: A cup of freshly brewed coffee enhances the flavors of the cookies, creating a warm atmosphere for afternoon gatherings or dessert after dinner.
-
Sparkling Water: A crisp sparkling water with a twist of lemon can cleanse the palate between bites, allowing the cookie’s flavors to shine more vibrantly.
-
Cheesecake Bites: Serve mini cheesecake bites alongside for a creamy indulgent experience that echoes the cream cheese filling of the cookies while offering a new flavor.
-
Chocolate Drizzled Popcorn: The sweet and salty combination of chocolate drizzled popcorn adds a fun texture and playful element to your dessert table.
-
Holiday Punch: A festive punch filled with fruits and spices can elevate the celebration atmosphere and pair perfectly with the cookies’ vibrant colors and flavors.
How to Store and Freeze Red Velvet Cream Cheese Thumbprint Cookies
Fridge: Keep your cookies in an airtight container in the refrigerator for up to 3-5 days. This preserves the freshness and the creamy texture of the cream cheese filling.
Freezer: To freeze, place the cookies in a single layer on a baking sheet until firm, then transfer to an airtight container or freezer bag. Properly stored, they can last for 2-3 months.
Thawing: When ready to enjoy, thaw the cookies in the refrigerator overnight. Allow them to come to room temperature before serving for the best flavor and texture.
Reheating: If you’d like a warm treat, heat them in the microwave for about 10-15 seconds. This will slightly soften the cookies and enhance their delightful flavors.
Make Ahead Options
These Red Velvet Cream Cheese Thumbprint Cookies are perfect for busy home cooks looking to save time while still delighting their loved ones! You can prepare the cookie dough up to 24 hours in advance by wrapping it tightly in plastic wrap and storing it in the refrigerator. The cream cheese filling can also be made ahead and refrigerated for up to 3 days. To maintain the quality, ensure you cover both the dough and filling to prevent drying out. When you’re ready to bake, simply shape the chilled dough into balls, make the thumbprints, and fill them with the cream cheese mixture before baking. You’ll have delicious, freshly baked cookies with minimal effort!
Red Velvet Cream Cheese Thumbprint Cookies Recipe FAQs
What type of flour should I use for the cookies?
You should use all-purpose flour to provide the perfect structure for your cookies. If you’re looking for a gluten-free option, feel free to substitute it with a gluten-free flour blend that works well for baking.
How long can I store these cookies?
Store your Red Velvet Cream Cheese Thumbprint Cookies in an airtight container in the refrigerator for up to 3-5 days. This helps maintain their freshness and the delightful texture of the cream cheese filling. For longer storage, consider freezing them!
What’s the best way to freeze the cookies?
To freeze your thumbprint cookies, first place them in a single layer on a baking sheet and freeze until firm. After that, transfer them to an airtight container or freezer bag. Properly frozen, they can last for about 2-3 months without losing their deliciousness. When you’re ready to enjoy, simply thaw them in the refrigerator overnight!
Can I make these cookies vegan?
Absolutely! To make your Red Velvet Cream Cheese Thumbprint Cookies vegan, you can substitute the large egg with a flax egg by mixing 1 tablespoon of flaxseed meal with 2.5 tablespoons of water—let it sit until it thickens. Additionally, choose vegan cream cheese and butter alternatives for the filling.
What should I do if the cream cheese filling is too runny?
If your cream cheese filling turns out runny, try adding a bit more powdered sugar to thicken it. Start with just a tablespoon at a time until you reach your desired consistency. If it feels a bit soft then chill it in the refrigerator for about 30 minutes; this will help it firm up before piping into the cookies.
How can I enhance the flavor of the cream cheese filling?
You can elevate the flavor of your filling by adding a teaspoon of lemon zest for a bright touch, or a splash of almond extract for a nutty twist. These small additions can provide a delightful variety and enrich the overall taste of your Red Velvet Cream Cheese Thumbprint Cookies!
Red Velvet Cream Cheese Thumbprint Cookies That Wow Every Time
Ingredients
Equipment
Method
- Preheat your oven to 375°F (190°C) and line baking sheets with parchment paper.
- In a large bowl, whisk together the dry ingredients.
- In a separate bowl, cream the softened butter and sugar until light and fluffy.
- Mix in the egg, vanilla extract, and vinegar until fully combined.
- Gradually incorporate the red gel food coloring.
- Combine the dry and wet mixtures, alternating with buttermilk until smooth.
- Chill the dough for at least 30 minutes.
- Prepare the cream cheese filling by beating together all filling ingredients until smooth.
- Fill a piping bag with the cream cheese filling.
- Shape the cookies and create thumbprints.
- Fill each thumbprint with the cream cheese mixture.
- Bake for 10-12 minutes.
- Cool on baking sheets for 5-7 minutes before transferring to a wire rack.
- Garnish with powdered sugar or melted chocolate if desired.
- Store cookies in an airtight container in the fridge.
Leave a Reply