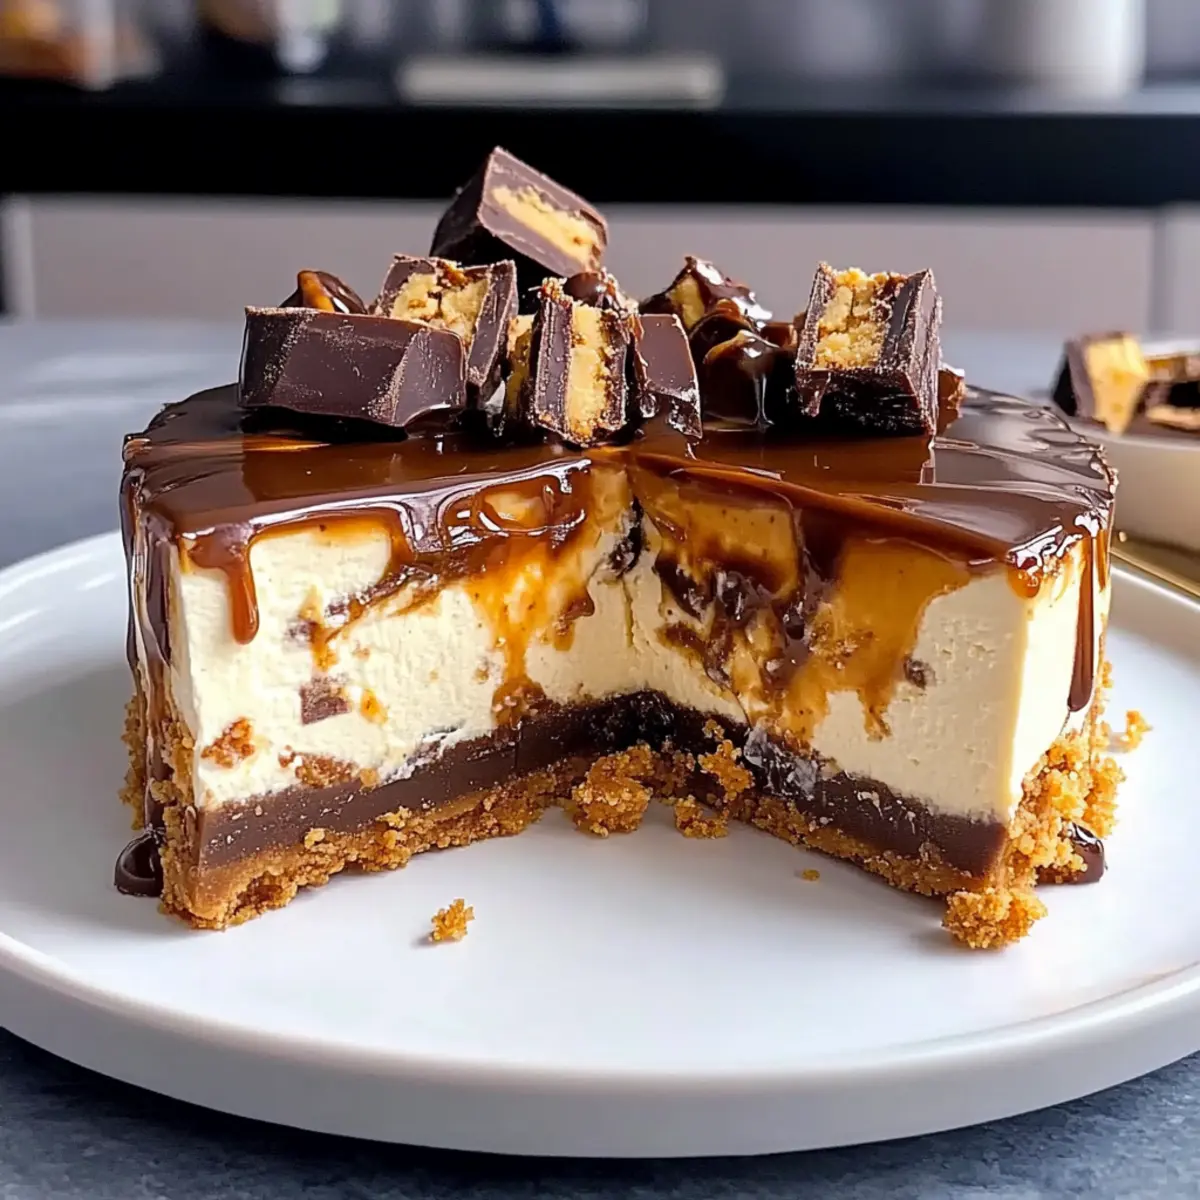
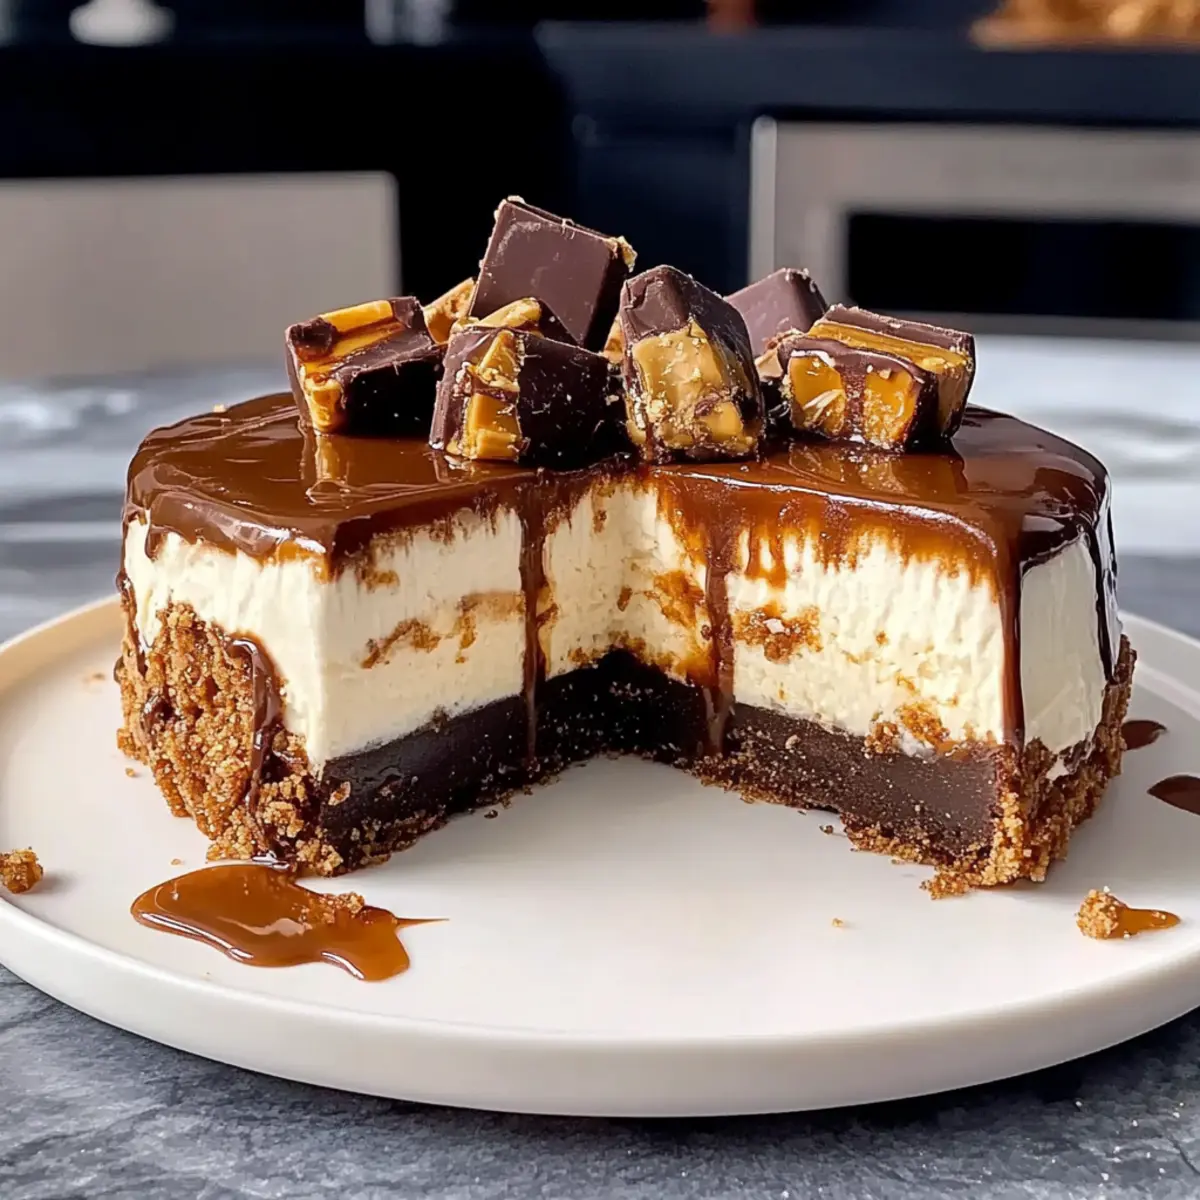
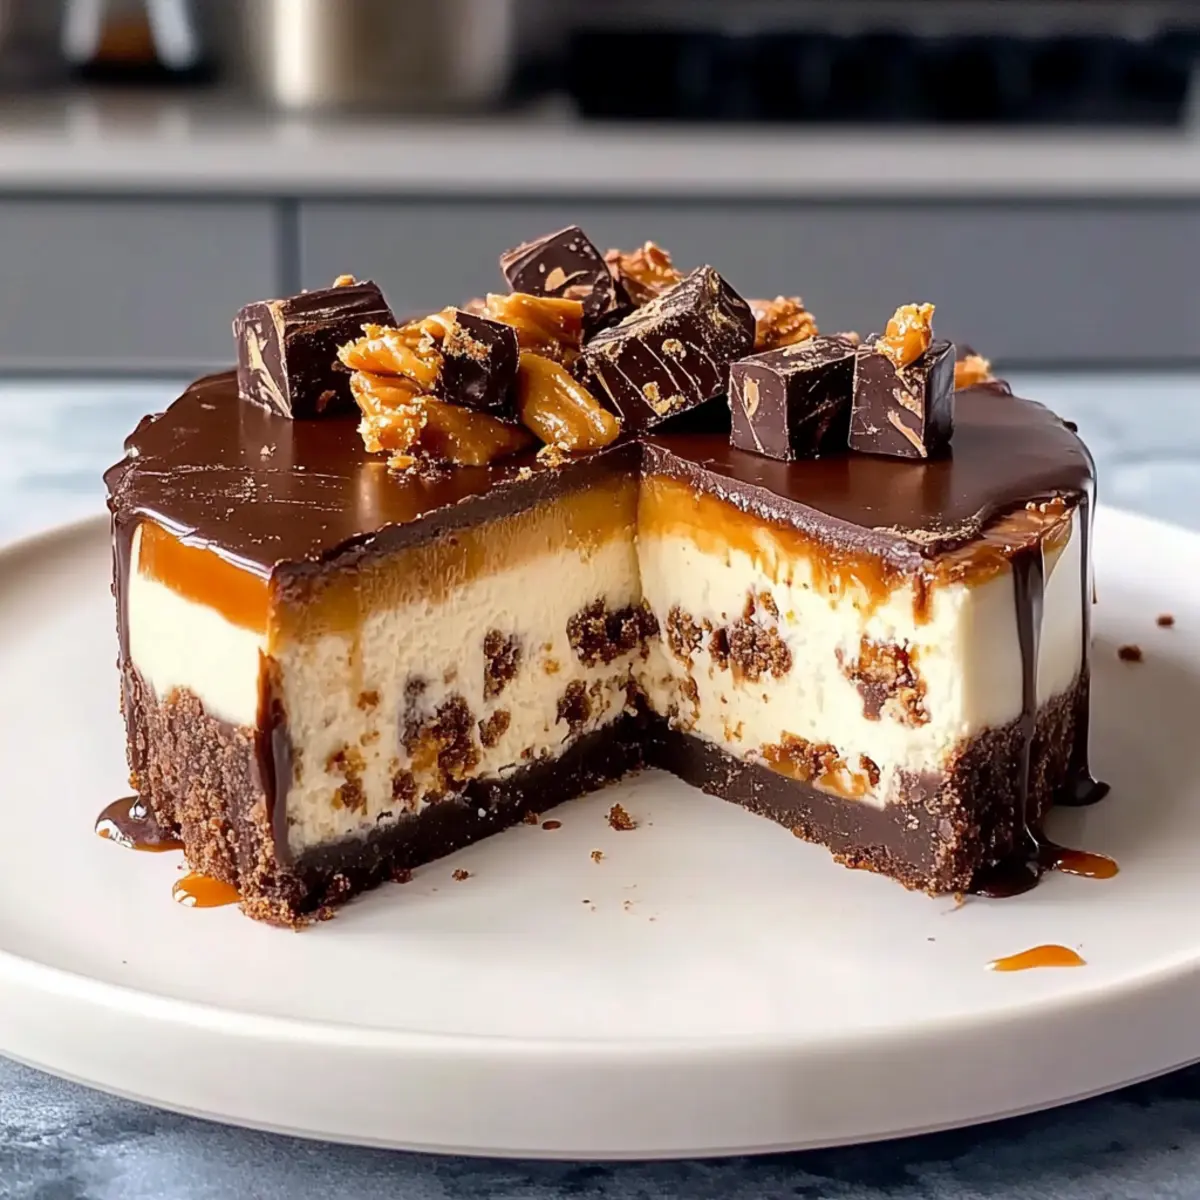
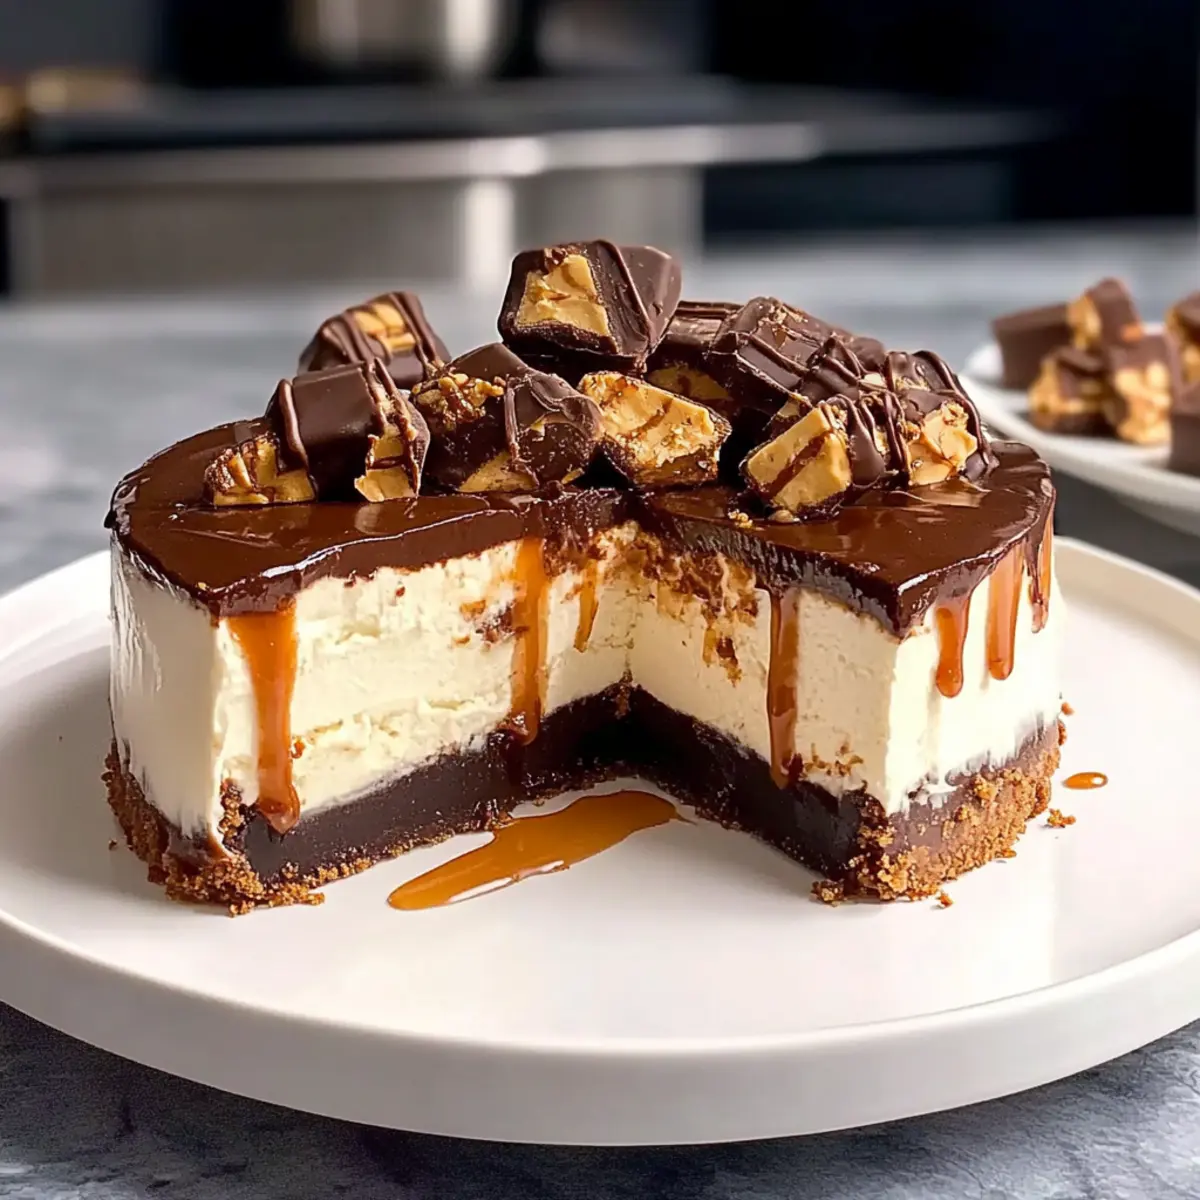
As I pulled the rich, creamy No Bake Twix Cheesecake from the fridge, I was met with the sweet scent of chocolate and caramel, instantly bringing back those carefree childhood days indulging in my favorite candy bars. This recipe is not only an indulgent dessert that combines a buttery biscuit crust and layers of luscious cheesecake, but it’s also an easy, no-bake delight that will impress guests at any gathering. With the best No Bake Twix Cheesecake, you can enjoy a treat that’s satisfying and surprisingly quick to prepare—perfect for busy weekdays or special occasions. Imagine the joy on your friends’ faces as they take their first bite of this delightful creation! Are you ready to be the star of your next dessert table?
Why is This Twix Cheesecake Irresistible?
Decadent flavor: Each slice bursts with rich chocolate and creamy caramel, creating a dessert that feels luxurious and indulgent.
No Baking Required: This easy recipe saves you time and hassle, giving you a stunning cheesecake without the need for an oven.
Perfect for Sharing: Impress your guests with a crowd-pleasing treat that’s sure to spark nostalgia and delight.
Gorgeous Presentation: The layers of ganache, caramel, and Twix bits create an eye-catching dessert that will wow any gathering.
Mix and Match: Experiment with different candy bars like Snickers for a fun twist, or try a classic pairing with your morning coffee. For more delicious cheesecake inspiration, check out my Cherry Pistachio Cheesecake or Chocolate Raspberry Cheesecake.
Best No Bake Twix Cheesecake Ingredients
For the Crust
- Digestive Biscuits – The base structure for the crust; substitute with graham crackers for a different flavor.
- Unsalted Butter – Binds the crust together; use salted butter if that’s what you have on hand.
For the Caramel Sauce
- Sugar – Sweetens the caramel; consider brown sugar for a deeper flavor profile.
- Water – Used to dissolve sugar when making caramel; no substitutes needed.
- Whipping Cream – Provides creaminess; ensure it’s cold for optimal whipping.
- Sea Salt – Balances sweetness in caramel; switch to kosher salt if sea salt is unavailable.
- Vanilla Extract – Enhances flavor; pure vanilla extract is best for this cheesecake.
For the Filling
- Cream Cheese – Gives the cheesecake its creamy texture; opt for full-fat brick-style cream cheese for the best results.
- Sifted Powdered Sugar – Sweetens the filling; avoid granulated sugar to keep the mixture smooth.
- Twix Bars – Adds sweet, chewy texture and flavor; swap for other candy bars for a fun twist.
For the Ganache
- Semisweet Chocolate – Topped for ganache; feel free to use milk chocolate or dark chocolate depending on your taste.
- Whipping Cream – For ganache; warm it until steaming to achieve the perfect consistency.
Optional Garnishes
- Twix Pieces – Great for decoration and added crunch.
- Caramel Shards – Create a stunning look and add texture.
- Crushed Biscuits – Sprinkle on top for extra crunch and flavor.
This rich and decadent No Bake Twix Cheesecake is sure to become one of your favorite indulgent desserts!
Step‑by‑Step Instructions for Best No Bake Twix Cheesecake
Step 1: Prepare the Crust
Start by crushing about 200g of digestive biscuits into fine crumbs using a food processor or a rolling pin. Melt 100g of unsalted butter in a small saucepan over low heat. In a mixing bowl, combine the crumbs with the melted butter, stirring until evenly moistened. Press the mixture firmly into the bottom of an 8-inch springform pan. Chill the crust in the refrigerator for at least 30 minutes until set.
Step 2: Make the Caramel Sauce
In a medium saucepan, combine 200g of sugar and 60ml of water. Heat over medium-high, swirling gently until the mixture turns a deep amber color (about 10-12 minutes). Carefully add 120ml of whipping cream into the boiling mixture, which will bubble vigorously. Once settled, stir in 50g of butter, a pinch of sea salt, and 1 teaspoon of vanilla extract. Allow it to cool completely.
Step 3: Create the Filling
In a large mixing bowl, beat 400g of softened cream cheese, 100g of sifted powdered sugar, and 1 teaspoon of vanilla extract until smooth and creamy. Gradually fold in the cooled caramel sauce for a delightful flavor. In another bowl, whip 240ml of cold whipping cream until stiff peaks form. Gently fold the whipped cream into the cheesecake mixture, then fold in roughly chopped Twix bars (about 3 bars) for that sweet, chewy texture.
Step 4: Layer the Cheesecake
Once the filling is ready, pour it over the chilled crust in the springform pan. Use a spatula to smooth out the top. Cover the cheesecake with plastic wrap and refrigerate for at least 4 to 6 hours, or ideally overnight, to ensure it sets properly and achieves the best texture.
Step 5: Add Caramel Layer
After the cheesecake has set, drizzle the reserved caramel sauce over the top, spreading it evenly to create a luscious layer. Return the cheesecake to the refrigerator for another hour to allow the caramel to firm slightly but remain gooey and delicious.
Step 6: Make the Ganache
In a small saucepan, heat 120ml of whipping cream until it’s steaming but not boiling. Pour it over 200g of semisweet chocolate pieces in a bowl and let it sit for a few minutes. Stir the mixture gently until smooth and glossy. Allow it to cool slightly before pouring it over the caramel layer of the cheesecake.
Step 7: Chill Again
Return the cheesecake to the refrigerator once again, allowing it to chill for about 30 minutes. This final chilling will help set the ganache layer, ensuring a beautiful finish that’s easy to slice.
Step 8: Serve
When ready to serve the Best No Bake Twix Cheesecake, run a knife around the edges of the springform pan to loosen. Release the springform and slice using a knife dipped in hot water for clean cuts. Garnish with extra Twix pieces, caramel shards, or crushed biscuits for added texture, and serve chilled to delight your guests!
What to Serve with Decadent No Bake Twix Cheesecake
Savoring a slice of this luxurious cheesecake calls for delightful companions to enhance your dining experience.
-
Fresh Berries: The tartness of berries like raspberries or strawberries contrasts beautifully with the sweet richness, adding a refreshing note.
-
Whipped Cream: A dollop of lightly sweetened whipped cream provides a light, airy contrast that balances the cheesecake’s dense texture.
-
Coffee: Brewed coffee or a rich espresso complements the sweetness, creating a perfect after-dinner pairing that’s both cozy and satisfying.
-
Chocolate Ice Cream: Indulge your dessert cravings by serving with a scoop of chocolate ice cream for an extra layer of creamy decadence.
-
Caramel Sauce Drizzle: A simple drizzle of caramel sauce over the cheesecake intensifies the sweet flavors, making every bite blissfully rich.
-
Mint Tea: A warm cup of mint tea not only aids digestion but also introduces a refreshing finish that perfectly balances the dessert’s richness.
-
Graham Cracker Crumbs: Scatter a few crumbs on top before serving to add a crunchy texture that echoes the cheesecake’s buttery crust.
-
Sparkling Water: A refreshing sparkling water with a slice of lemon perks up the palate, balancing the sweetness and cleansing the taste buds.
Make Ahead Options
These decadent No Bake Twix Cheesecakes are perfect for meal prep enthusiasts! You can prepare the crust and filling up to 24 hours in advance, storing them separately in the refrigerator to maintain freshness. For the crust, press the mixture into the springform pan and cover it; for the filling, keep it in an airtight container. When you’re ready to finish, simply layer the filling over the crust, add the caramel and ganache, and chill for at least one hour before serving. This approach not only saves you time but ensures your cheesecake stays just as delicious and indulgent when it’s time to enjoy!
How to Store and Freeze Best No Bake Twix Cheesecake
Fridge: Store the cheesecake in an airtight container in the refrigerator for up to 5 days to maintain its creamy texture and rich flavors.
Freezer: For longer storage, wrap the cheesecake tightly in plastic wrap and then in aluminum foil. It can be frozen for up to 2 months.
Thawing: When ready to enjoy, transfer the cheesecake to the fridge and let it thaw overnight. This helps maintain the best texture for your indulgent dessert.
Reheating: There’s no need to reheat the cheesecake; serve it chilled straight from the fridge for the best experience of the Best No Bake Twix Cheesecake.
Best No Bake Twix Cheesecake Variations
Feel free to get creative and customize this delightful cheesecake to your taste buds’ delight!
-
Gluten-Free: Use gluten-free digestive biscuits or graham crackers to make this cheesecake accessible for everyone.
-
Nutty Flavor: Add crushed hazelnuts or almonds to the crust for an extra crunch and a nutty twist that complements the Twix wonderfully.
-
Chocolate Lovers: Swap out the Twix bars for your favorite chocolate bar, such as Milky Way or Snickers, to give the cheesecake your personal touch.
-
Less Sweet: Reduce the amount of sugar in the filling for a less sweet, more balanced dessert that still pleases the palate.
-
Veggie Twist: Try using silken tofu blended until smooth in place of cream cheese for a lighter, plant-based version.
-
Flavor Boost: Add a tablespoon of espresso powder to the cheesecake filling to enhance the chocolate flavor without overpowering sweetness.
-
Fruity Layer: Top with fresh berries, like raspberries or strawberries, for a refreshing contrast to the rich chocolate and caramel.
-
Festive Touch: Layer in some crushed peppermint candies during the holidays for a delightful peppermint twist that pairs beautifully with chocolate.
These variations let your creativity shine! If you’re seeking more unique cheesecake ideas, don’t forget to check out my Crisp Mini Cheesecakes or the indulgent Sugar Cookie Cheesecake for something different!
Expert Tips for the Best No Bake Twix Cheesecake
- Room Temperature Cheese: Allow cream cheese to reach room temperature to prevent lumps while mixing; a smooth filling is key to your cheesecake’s success.
- Mind the Caramel: Avoid stirring the sugar while it melts to prevent crystallization and achieve a silky caramel sauce that enhances the no bake cheesecake.
- Avoid Over-Whipping: When whipping cream, stop once you achieve stiff peaks; over-whipping can lead to a grainy texture, affecting the overall creaminess.
- Chill Well: Always refrigerate the cheesecake for the full recommended time to ensure it sets properly; slicing too early may result in a messy presentation.
- Decorate with Care: Garnish the cheesecake with Twix pieces or caramel shards right before serving for the best visual appeal and maximum crunch.
Best No Bake Twix Cheesecake Recipe FAQs
How do I select the best Twix bars for this cheesecake?
Absolutely! When choosing Twix bars, look for ones with fresh packaging. They should be firm and not past their expiration date, ensuring the caramel is gooey and the chocolate is smooth. If you prefer a different flavor, consider the peanut butter-filled Twix for an exciting twist.
What’s the best way to store leftovers of this cheesecake?
Very! Store your No Bake Twix Cheesecake in an airtight container in the fridge, where it should last up to 5 days. If you have a large batch, you can also cover it with plastic wrap to keep it fresh. Make sure to keep it well covered to prevent it from absorbing any odors from the fridge!
Can I freeze No Bake Twix Cheesecake, and how?
Absolutely! To freeze your cheesecake, wrap it tightly in plastic wrap, then aluminum foil to prevent freezer burn. You can freeze it for up to 2 months. When you’re ready to enjoy it, place it in the fridge to thaw overnight for best results.
What if my cheesecake doesn’t set properly?
Don’t worry! If your cheesecake doesn’t set as expected, it might be due to under-whipped cream or not chilling it long enough. For the best results, ensure your whipped cream has reached stiff peaks before folding it into the mixture. Additionally, a minimum chill time of 4-6 hours is essential. If you cut into it too soon, you may end up with a gooey mess rather than perfectly sliced pieces.
Can I make this recipe gluten-free?
Very! To convert this No Bake Twix Cheesecake into a gluten-free dessert, simply swap out the digestive biscuits for gluten-free digestive cookies or graham crackers. Additionally, check the packaging on your Twix bars, or replace them with gluten-free candy options if necessary. Enjoying a delicious dessert shouldn’t mean compromising on your dietary needs!
Is it pet-safe to have Twix cheesecake?
No, it’s best to keep this delectable cheesecake away from pets. Ingredients like chocolate and certain sweeteners can be harmful, even fatal, to dogs and cats. Always store it securely out of reach from your furry friends to ensure they stay safe while you enjoy your delicious cheesecake!
Indulge in the Best No Bake Twix Cheesecake Ever
Ingredients
Equipment
Method
- Start by crushing about 200g of digestive biscuits into fine crumbs using a food processor or a rolling pin. Melt 100g of unsalted butter in a small saucepan over low heat. In a mixing bowl, combine the crumbs with the melted butter, stirring until evenly moistened. Press the mixture firmly into the bottom of an 8-inch springform pan. Chill the crust in the refrigerator for at least 30 minutes until set.
- In a medium saucepan, combine 200g of sugar and 60ml of water. Heat over medium-high, swirling gently until the mixture turns a deep amber color (about 10-12 minutes). Carefully add 120ml of whipping cream into the boiling mixture, which will bubble vigorously. Once settled, stir in 50g of butter, a pinch of sea salt, and 1 teaspoon of vanilla extract. Allow it to cool completely.
- In a large mixing bowl, beat 400g of softened cream cheese, 100g of sifted powdered sugar, and 1 teaspoon of vanilla extract until smooth and creamy. Gradually fold in the cooled caramel sauce. In another bowl, whip 240ml of cold whipping cream until stiff peaks form. Gently fold the whipped cream into the cheesecake mixture, then fold in roughly chopped Twix bars (about 3 bars).
- Once the filling is ready, pour it over the chilled crust in the springform pan. Use a spatula to smooth out the top. Cover the cheesecake with plastic wrap and refrigerate for at least 4 to 6 hours, or ideally overnight.
- After the cheesecake has set, drizzle the reserved caramel sauce over the top, spreading it evenly. Return the cheesecake to the refrigerator for another hour.
- In a small saucepan, heat 120ml of whipping cream until it's steaming but not boiling. Pour it over 200g of semisweet chocolate pieces in a bowl and let it sit for a few minutes. Stir until smooth. Allow it to cool slightly before pouring it over the caramel layer of the cheesecake.
- Return the cheesecake to the refrigerator once again, allowing it to chill for about 30 minutes.
- When ready to serve, run a knife around the edges of the springform pan to loosen. Release the springform and slice using a knife dipped in hot water for clean cuts. Garnish with extra Twix pieces, caramel shards, or crushed biscuits and serve chilled.
Leave a Reply