Ingredients
Equipment
Method
Step-by-Step Instructions
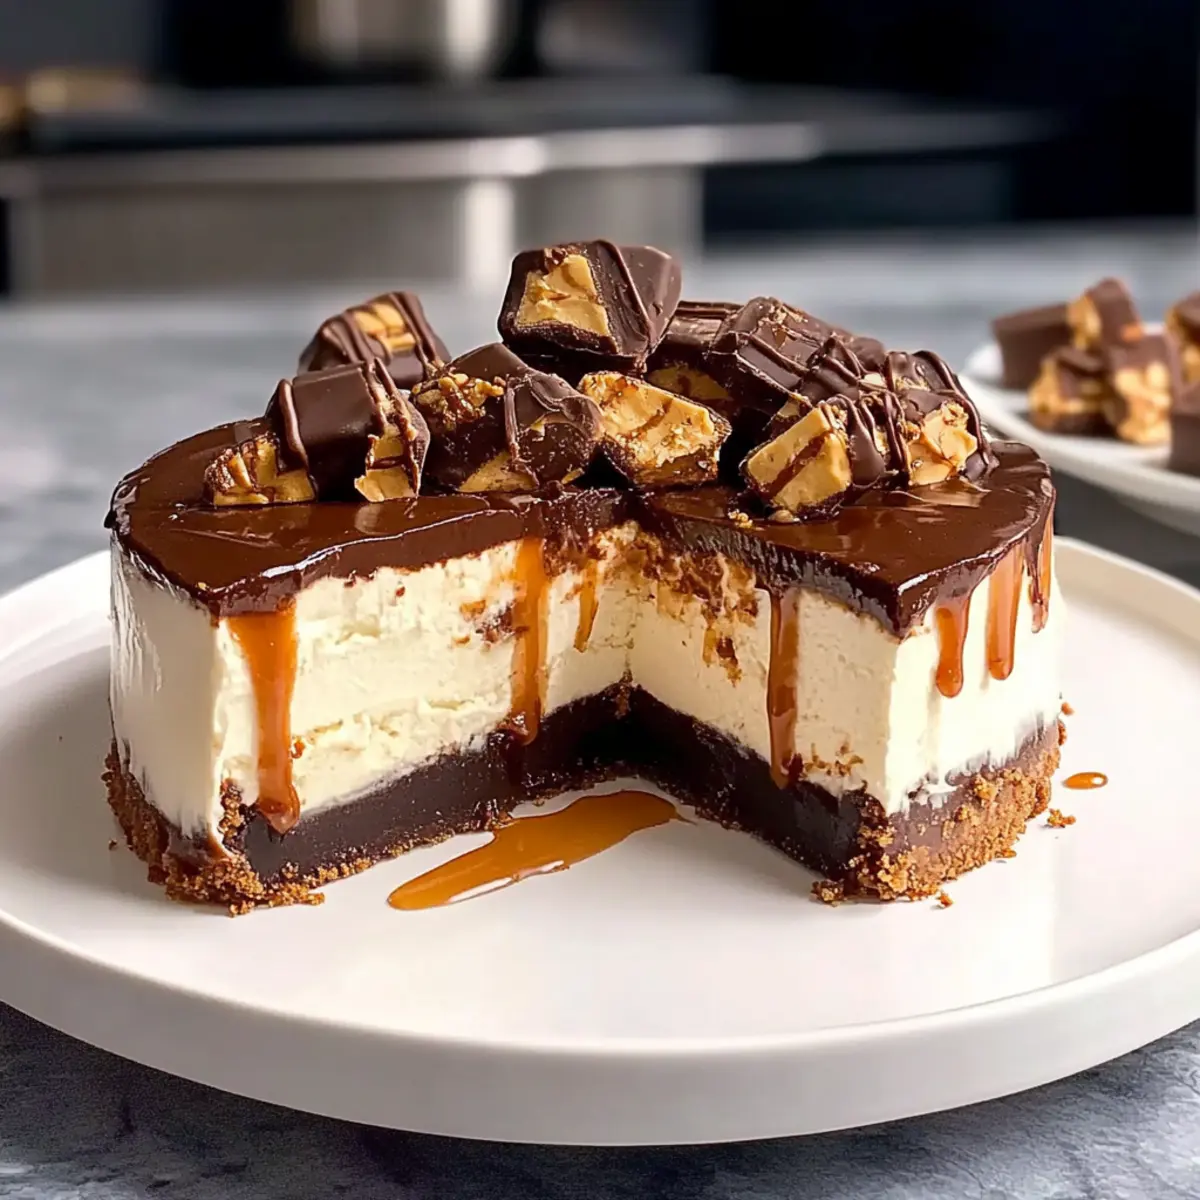
- Start by crushing about 200g of digestive biscuits into fine crumbs using a food processor or a rolling pin. Melt 100g of unsalted butter in a small saucepan over low heat. In a mixing bowl, combine the crumbs with the melted butter, stirring until evenly moistened. Press the mixture firmly into the bottom of an 8-inch springform pan. Chill the crust in the refrigerator for at least 30 minutes until set.
- In a medium saucepan, combine 200g of sugar and 60ml of water. Heat over medium-high, swirling gently until the mixture turns a deep amber color (about 10-12 minutes). Carefully add 120ml of whipping cream into the boiling mixture, which will bubble vigorously. Once settled, stir in 50g of butter, a pinch of sea salt, and 1 teaspoon of vanilla extract. Allow it to cool completely.
- In a large mixing bowl, beat 400g of softened cream cheese, 100g of sifted powdered sugar, and 1 teaspoon of vanilla extract until smooth and creamy. Gradually fold in the cooled caramel sauce. In another bowl, whip 240ml of cold whipping cream until stiff peaks form. Gently fold the whipped cream into the cheesecake mixture, then fold in roughly chopped Twix bars (about 3 bars).
- Once the filling is ready, pour it over the chilled crust in the springform pan. Use a spatula to smooth out the top. Cover the cheesecake with plastic wrap and refrigerate for at least 4 to 6 hours, or ideally overnight.
- After the cheesecake has set, drizzle the reserved caramel sauce over the top, spreading it evenly. Return the cheesecake to the refrigerator for another hour.
- In a small saucepan, heat 120ml of whipping cream until it's steaming but not boiling. Pour it over 200g of semisweet chocolate pieces in a bowl and let it sit for a few minutes. Stir until smooth. Allow it to cool slightly before pouring it over the caramel layer of the cheesecake.
- Return the cheesecake to the refrigerator once again, allowing it to chill for about 30 minutes.
- When ready to serve, run a knife around the edges of the springform pan to loosen. Release the springform and slice using a knife dipped in hot water for clean cuts. Garnish with extra Twix pieces, caramel shards, or crushed biscuits and serve chilled.
Nutrition
Notes
Allow cream cheese to reach room temperature to prevent lumps while mixing; refrigerate the cheesecake for the full recommended time to ensure it sets properly.