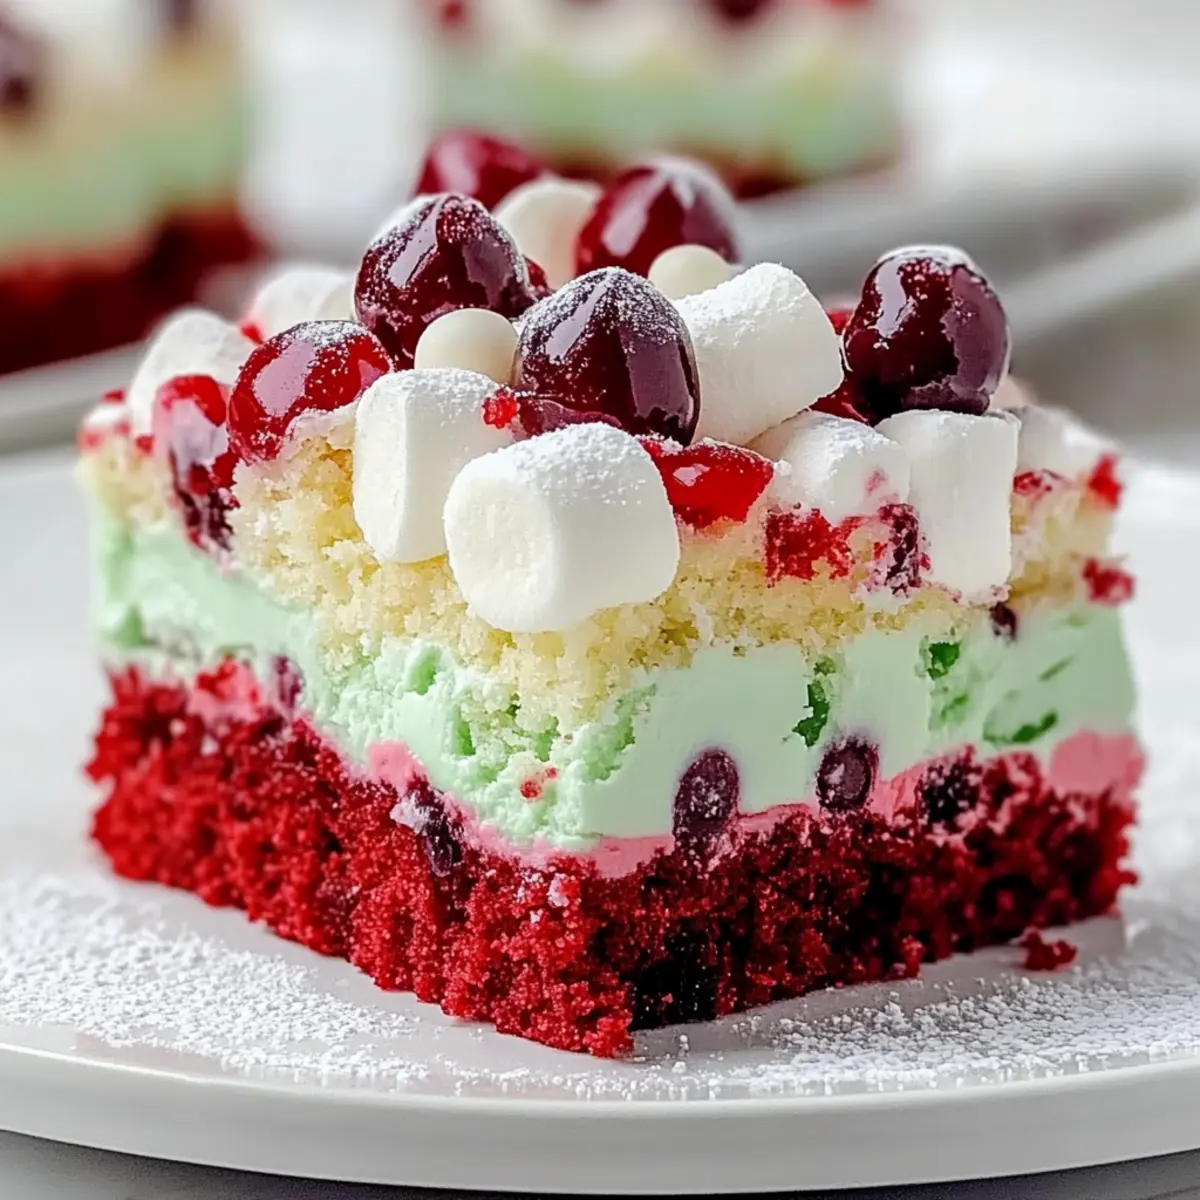
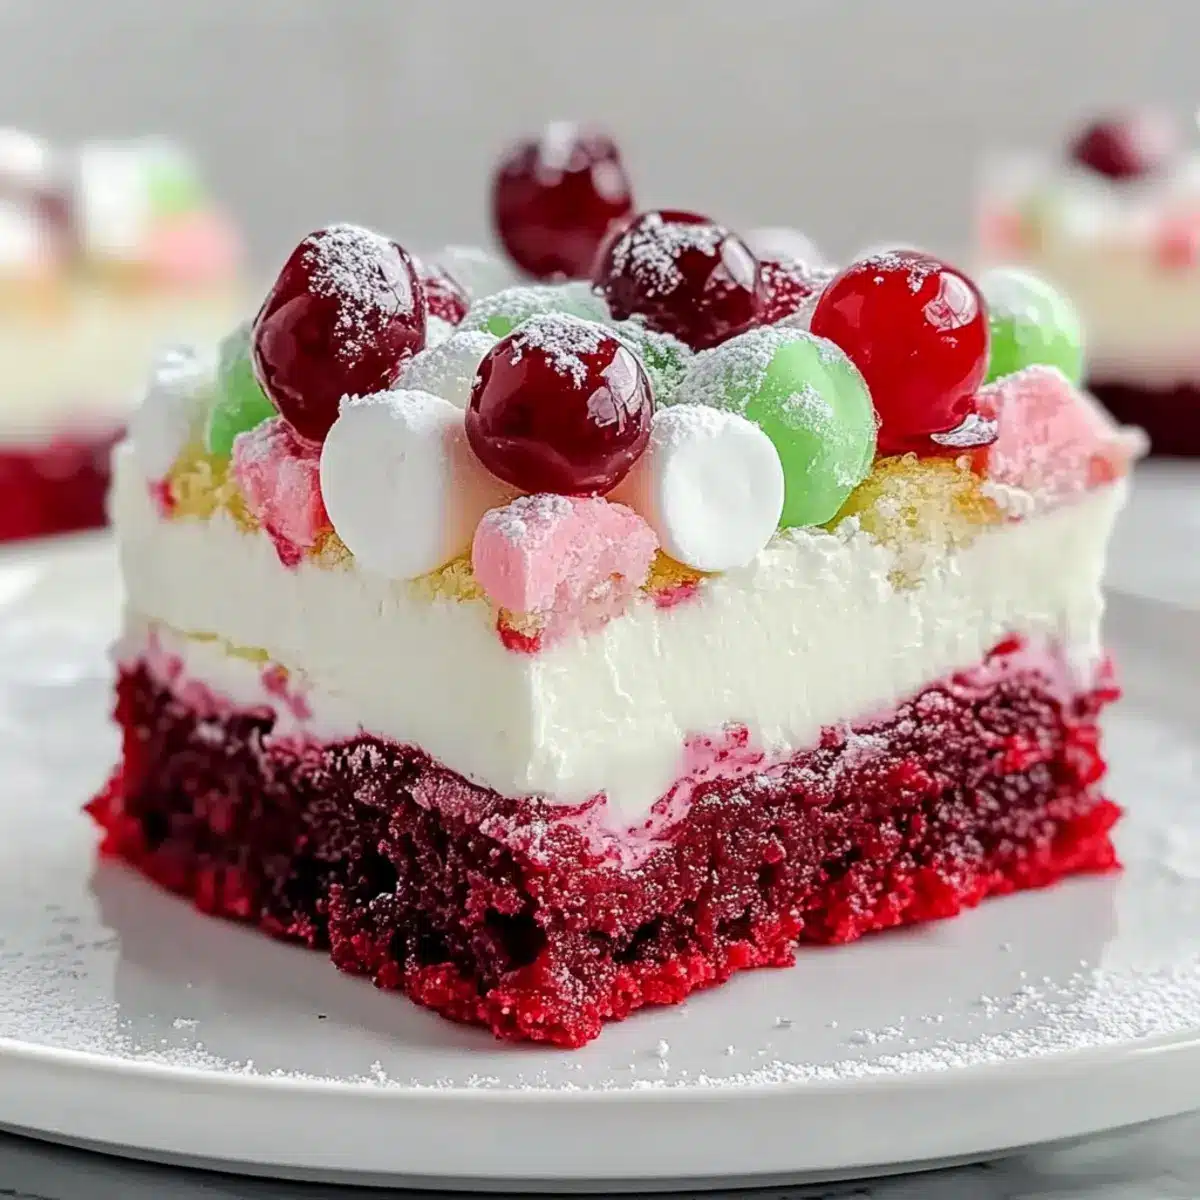
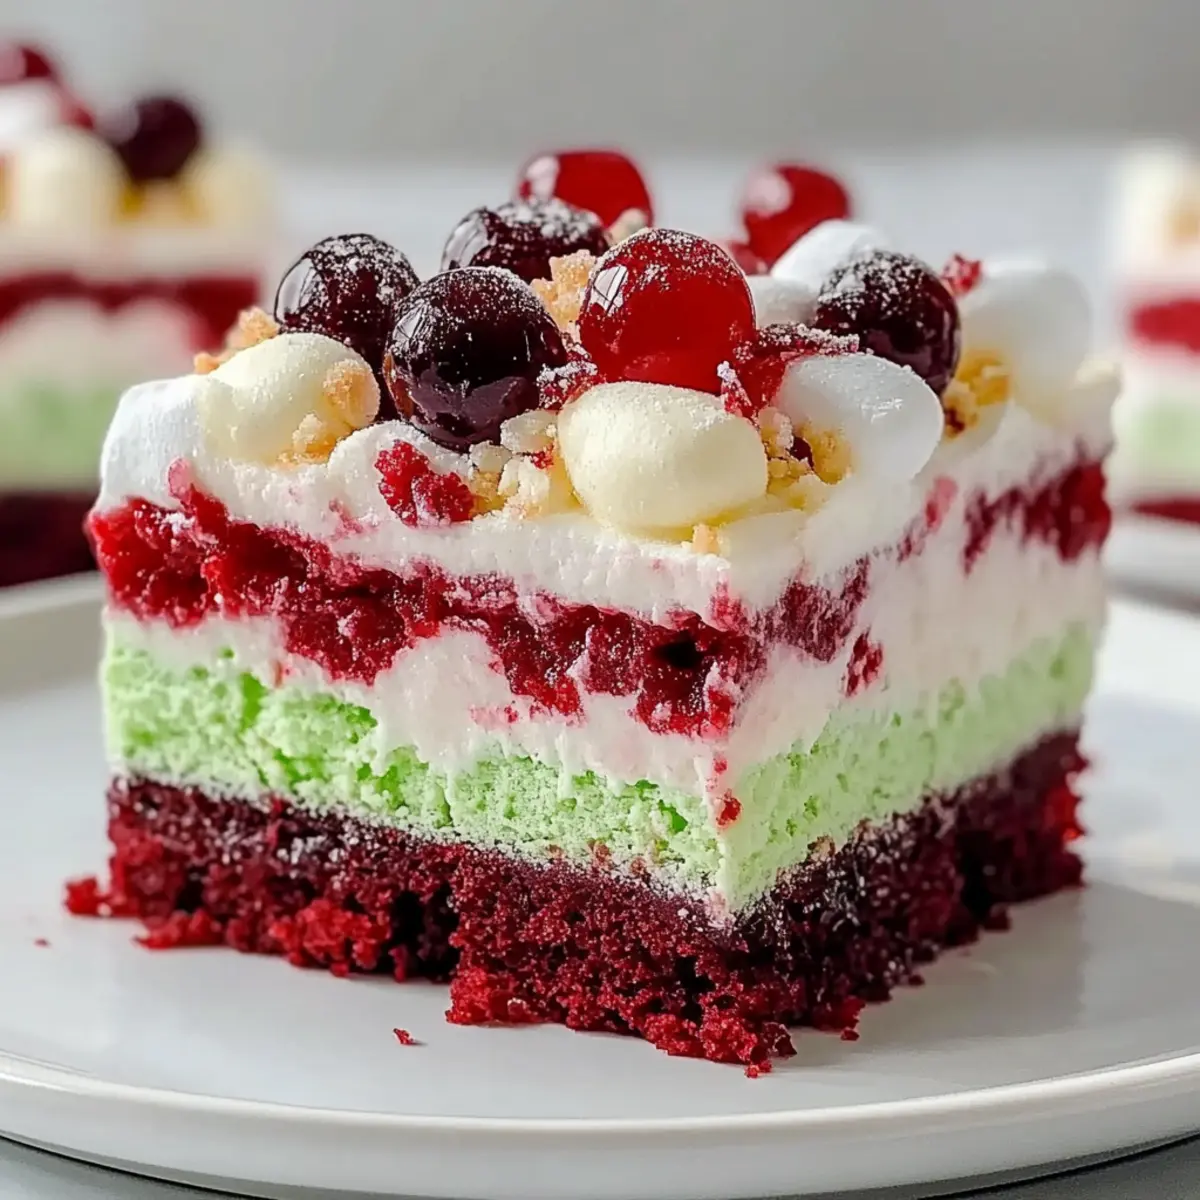
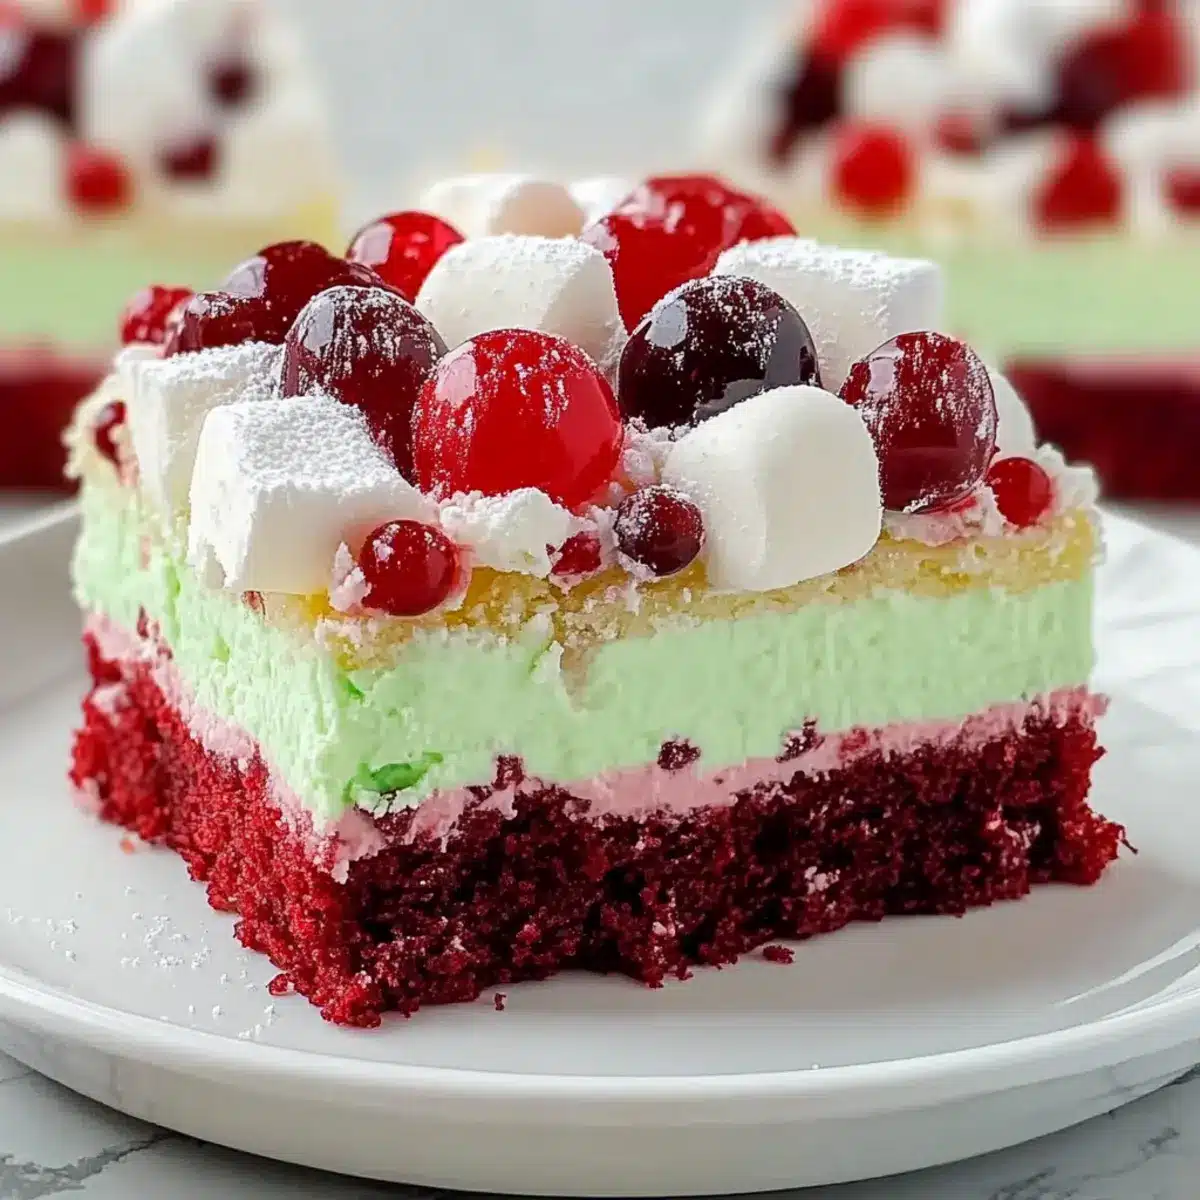
As I browsed through old family recipe books, I stumbled upon a hidden gem: the Christmas Layered Marshmallow Delight Bars. This vibrant dessert embodies the festive spirit with its rich red velvet layers, creamy filling, and a fruity cherry topping. What I love about these bars is not just their eye-catching appearance, but also the fact that they bring together both flavors and textures in a way that feels indulgent yet manageable to make. You can whip them up quickly, which is a blessing during the busy holiday season, and they’re perfect for impressing guests at your holiday gatherings. Are you ready to create a stunning dessert that will have everyone asking for seconds?
Why are these bars a holiday must-have?
Visually Stunning: The layers of vibrant red velvet and creamy filling make for a show-stopping dessert that captures the holiday spirit.
Flavor Symphony: Enjoy a delightful blend of rich, creamy, and fruity flavors that dance on your palate, making each bite memorable.
Easy to Make: Quick preparation means you can spend less time in the kitchen and more time celebrating with loved ones.
Versatile Options: Feel free to switch up the fruit toppings or layers to suit your taste or dietary needs, just like my Cheesy Christmas Lasagna!
Crowd-Pleaser: These bars are bound to impress guests of all ages at any festive gathering, ensuring everyone leaves with a smile and a sweet memory.
Make-Ahead Friendly: Prepare them a day in advance to save time and allow the flavors to meld beautifully, making life easier during the busy holiday season.
Christmas Layered Marshmallow Delight Bars Ingredients
• Get ready to create a festive indulgence!
For the Red Velvet Layer
• All-Purpose Flour – Provides structure; substitute with gluten-free flour for a gluten-free option.
• Granulated Sugar – Sweetens the dessert; use coconut sugar for a less refined taste.
• Cocoa Powder – Infuses rich chocolate flavor; unsweetened cocoa works perfectly too.
• Baking Soda & Salt – Essential leaveners; ensure freshness for the best rise.
• Egg – Binds the batter together; a flax egg is a great vegan alternative.
• Vegetable Oil – Keeps the cake moist; melted coconut oil is a suitable substitute.
• Buttermilk – Adds tanginess and moisture; can replace it with milk mixed with vinegar.
• Vanilla Extract – Enhances overall flavor; opt for pure vanilla for the best results.
• White Vinegar – Reacts with baking soda for fluffiness; recommended for optimal texture.
• Red Food Coloring – Delivers vibrant color; explore natural dye alternatives for a healthier choice.
For the Creamy Filling
• Cream Cheese – Creates a deliciously creamy filling; vegan cream cheese is a nice substitute.
• Powdered Sugar – Sweetens and thickens the filling; try erythritol for a lower-sugar option.
• Whipped Cream – Lightens the cream cheese layer; consider coconut whipped cream for a dairy-free treat.
For the Fruity Topping
• Cherry Pie Filling/Chopped Maraschino Cherries – Adds a fruity finishing touch; blueberry or raspberry fillings can be great alternatives.
For the Green Pudding Layer
• Pistachio Pudding Mix – Forms a striking green layer; vanilla pudding works if you want to mix it up.
For the Topping
• Heavy Cream – Whipped to perfection; use dairy-free cream as an alternate option.
• Mini Marshmallows & Red/Green Candies – Festive garnishes for that extra holiday cheer; use as desired!
These Christmas Layered Marshmallow Delight Bars will not only dazzle your guests but also satisfy your holiday cravings!
Step‑by‑Step Instructions for Christmas Layered Marshmallow Delight Bars
Step 1: Preheat and Prepare
Preheat your oven to 350°F (175°C) and grab a 9×13-inch baking dish. Grease the dish generously with butter or non-stick spray to ensure easy removal later. This will be the foundation for your beautiful Christmas Layered Marshmallow Delight Bars, so take a moment to set everything in place for a smooth baking process.
Step 2: Mix Dry Ingredients
In a large mixing bowl, whisk together 1 ½ cups of all-purpose flour, 1 cup of granulated sugar, 2 tablespoons of cocoa powder, 1 teaspoon of baking soda, and ½ teaspoon of salt. Make sure all the dry ingredients are evenly combined for a consistent bake. Their vibrant colors will hint at the deliciousness that’s to come in your festive layers.
Step 3: Combine Wet Ingredients
In another bowl, crack 1 large egg and add ½ cup of vegetable oil, 1 cup of buttermilk, 1 teaspoon of vanilla extract, 1 tablespoon of white vinegar, and 1 tablespoon of red food coloring. Mix well until all the wet ingredients are blended and smooth. This mixture will bring your red velvet batter to life, creating a rich flavor and eye-catching color.
Step 4: Combine and Bake
Pour the wet ingredients into the dry mixture and stir gently until no lumps remain. This batter should be thick and vibrant. Transfer it into your prepared baking dish, spreading it evenly. Bake for 25-30 minutes or until a toothpick inserted in the center comes out clean. Let it cool completely in the baking dish after removing it from the oven.
Step 5: Prepare the Creamy Filling
Once the red velvet layer is cool, beat together 8 oz of cream cheese and 1 cup of powdered sugar in a medium bowl until smooth. Gently fold in 1 cup of whipped cream, mixing just until incorporated. This creamy filling will provide a delightful contrast to the richness of your Christmas Layered Marshmallow Delight Bars.
Step 6: Layer It Up
Spread the cream cheese mixture evenly over the cooled red velvet layer, smoothing it out with a spatula. Then, top with 1 can of cherry pie filling (or your preferred fruit filling). This fruity addition balances the creaminess, adding a refreshing note to your lovely bars.
Step 7: Optional Cake Crumble
If you prefer more texture, you may wish to add a layer of vanilla cake crumble on top of the cherry filling. To create this, crumble an extra slice of vanilla cake finely and gently spread it over the fruit layer. This step is optional but adds an enjoyable crunch to your Christmas Layered Marshmallow Delight Bars!
Step 8: Prepare the Green Pudding Layer
Next, prepare the pistachio pudding mix according to package instructions. This should take just a few minutes as you whisk together the mix and milk until it thickens. Once ready, spread the pistachio layer evenly over the cherry filling. This beautiful green layer adds a festive touch to your delicious creation.
Step 9: Make the Whipped Topping
In a clean bowl, whip 1 cup of heavy cream with 2 tablespoons of powdered sugar until stiff peaks form. This fluffy topping will be the crowning glory of your bars, so take your time to achieve that perfect whipped texture. Spread this luscious whipped cream layer over the pistachio pudding layer, smoothing it gently.
Step 10: Garnish and Chill
For a festive finish, sprinkle mini marshmallows and red/green candies on top of the whipped cream. Chill in the refrigerator for at least 2 hours before serving to let the flavors meld together beautifully. Your Christmas Layered Marshmallow Delight Bars are now ready to impress and delight everyone at your holiday gathering!
How to Store and Freeze Christmas Layered Marshmallow Delight Bars
Fridge: Store leftovers in an airtight container for up to 3 days to keep them fresh and delicious. The flavors will continue to develop, making each bite a festive treat!
Freezer: Wrap individual bars tightly in plastic wrap and place them in an airtight container. They can be frozen for up to a month. Thaw in the fridge before serving for the best taste and texture.
Before Serving: For the best experience, ensure the bars are chilled for at least 2 hours after assembly. This allows the layers to set beautifully and enhances the overall flavor of your Christmas Layered Marshmallow Delight Bars.
Reheating: If desired, you can allow the bars to come to room temperature before serving, but they are best enjoyed cold for that delightful, refreshing taste!
Christmas Layered Marshmallow Delight Bars Variations
Feel free to let your creativity shine by customizing these festive bars with your favorite twists and alternatives!
- Gluten-Free: Substitute all-purpose flour with a gluten-free flour blend for an equally delightful, safe-to-enjoy treat.
- Dairy-Free: Use coconut whipped cream and vegan cream cheese in the creamy filling to make a deliciously dairy-free version without sacrificing flavor.
- Low-Sugar: Swap out the powdered sugar for erythritol to create a lower-sugar option that still tastes indulgent and festive.
- Fruit Twist: Instead of cherry pie filling, opt for blueberry or raspberry to bring a burst of different fruity flavors and colors.
- Minty Surprise: Use mint-flavored pudding mix instead of pistachio for a refreshing mint cheesecake layer that will delight your taste buds.
- Extra Crunch: Add a layer of vanilla cake crumble over your cherry filling for a delightful texture contrast, elevating your bars to a new level of indulgence.
- Flavor Boost: Enhance the cream cheese mixture with a splash of almond extract for a unique flavor twist that pairs beautifully with the other elements.
- Heat It Up: For those who love a spicy kick, add a pinch of cinnamon or cayenne pepper to the red velvet batter for a flavorful surprise that warms the soul.
These variations will not only personalize your Christmas Layered Marshmallow Delight Bars but also make them sure to impress, just like my festive Cheesy Christmas Tree or the delicious Chocolate Marshmallow Swirl Cookies!
Make Ahead Options
These Christmas Layered Marshmallow Delight Bars are perfect for meal prep! You can prepare the red velvet layer and the creamy filling up to 24 hours in advance; just cover them tightly and store them in the refrigerator to maintain freshness and flavor. Additionally, you can top the red velvet with the cherry filling and store it as well, but it’s best to add the pistachio pudding and whipped cream layer on the day of serving to ensure they stay fluffy. When you’re ready to enjoy this festive treat, simply layer the elements in your baking dish, chill for a couple of hours, and you’ll have a delightful dessert that’s just as delicious as if made fresh!
Expert Tips for Christmas Layered Marshmallow Delight Bars
• Prepping in Advance: Get ahead of the game by preparing these bars a day in advance. This allows the flavors to meld beautifully and saves you time on the day of your gathering.
• Perfecting Texture: To ensure a moist red velvet layer, avoid overmixing your batter. Gently combine dry and wet ingredients until just mixed for light, fluffy results in your Christmas Layered Marshmallow Delight Bars.
• Fruit Filling Alternatives: Experiment with different fruit fillings like blueberry or raspberry to customize the flavor profile. This not only adds variety but also caters to different tastes!
• Clean Cuts: For beautifully presented slices, use a sharp knife and wipe it clean between cuts. This helps preserve the layers and enhances the visual appeal of your bars.
• Chill Well: Allow the bars to chill for at least two hours before serving. This not only firm up the layers but also lets the flavors develop more intensely, making every bite memorable.
• Dairy-Free Options: If needed, consider using vegan cream cheese and coconut whipped cream for a delicious dairy-free version. Everyone will love the creamy indulgence, regardless of dietary preferences!
What to Serve with Christmas Layered Marshmallow Delight Bars
Elevate your holiday gatherings by pairing these colorful, creamy bars with delightful accompaniments that perfectly complement their festive flavors.
-
Fresh Fruit Salad: A light and zesty fruit salad brings a refreshing contrast to the sweet layers of the bars, balancing the richness beautifully. Consider a mix of berries and citrus for an added pop of color.
-
Peppermint Hot Chocolate: This warm, spiced drink envelopes you in nostalgia while harmonizing with the creamy layers of the dessert. The minty twist elevates the festive vibe, making each sip a cozy reminder of holiday cheer.
-
Gingerbread Cookies: Classic gingerbread adds a holiday favorite flavor profile alongside the sweetness of your bars. The spicy notes create a delicious contrast that’ll have everyone eager for a taste.
-
Coffee or Espresso: The bold, rich flavors of coffee or espresso provide a delightful balance, allowing the sweetness of the bars to shine without overwhelming your taste buds. Enjoying these together brings a familiar comfort to any gathering.
-
Ice Cream: A scoop of vanilla or peppermint ice cream is a delightful pairing that melts beautifully over the Christmas Layered Marshmallow Delight Bars. The creaminess adds an indulgent touch, enhancing their overall appeal.
-
Mulled Wine: The warm spices of mulled wine pair beautifully with the festive spirit of these bars. The fragrant blend of cinnamon, cloves, and orange zest adds an aromatic experience to your dessert, creating a cozy atmosphere for your celebration.
Christmas Layered Marshmallow Delight Bars Recipe FAQs
What type of flour should I use for the red velvet layer?
You can use all-purpose flour for the red velvet layer, but if you’re looking for a gluten-free option, a gluten-free flour blend works wonderfully! Just be sure to choose one that contains xanthan gum for the best texture.
How should I store the leftover Christmas Layered Marshmallow Delight Bars?
Store the bars in an airtight container in the refrigerator for up to 3 days. The flavors will continue to deepen, making the bars even more delightful as they sit. Just be sure to keep them covered to maintain their freshness!
Can I freeze these bars? If so, how?
Absolutely! To freeze your Christmas Layered Marshmallow Delight Bars, wrap them tightly in plastic wrap and place them in an airtight container. They will keep well in the freezer for up to a month. When you’re ready to enjoy, thaw them in the fridge overnight for the best taste and texture.
What can I do if the red velvet layer is too dry?
If your red velvet layer turns out too dry, it may be due to overmixing or baking too long. For next time, be careful not to overmix the batter after combining wet and dry ingredients. Baking time can also vary based on your oven, so start checking a few minutes early to avoid dryness.
Are there any dietary considerations for these bars?
Yes! For a dairy-free version, you can substitute regular cream cheese and whipped cream with vegan alternatives. Additionally, check the cherry pie filling for potential allergens, opting for brands that are gluten-free and vegan-friendly if those are concerns for your guests.
How can I ensure my bars have clean cuts when serving?
For perfectly clean slices of your Christmas Layered Marshmallow Delight Bars, use a sharp knife that’s been warmed in hot water. Wiping it clean between cuts helps maintain the beautiful layers without smearing them together. Enjoy those perfectly crafted bars!
Christmas Layered Marshmallow Delight Bars That Wow Your Guests
Ingredients
Equipment
Method
- Preheat your oven to 350°F (175°C) and grease a 9x13-inch baking dish.
- In a large bowl, whisk together the dry ingredients.
- In another bowl, mix the wet ingredients together until smooth.
- Combine the wet and dry mixtures, then pour into the prepared baking dish and bake for 25-30 minutes.
- Let the red velvet layer cool completely.
- Beat together cream cheese and powdered sugar, then fold in whipped cream.
- Spread the creamy filling over the cooled red velvet layer and top with cherry pie filling.
- Prepare pistachio pudding mix according to package instructions and layer it on top.
- Whip heavy cream and spread it over the pudding layer.
- Garnish with mini marshmallows and red/green candies, then chill for at least 2 hours before serving.
Leave a Reply