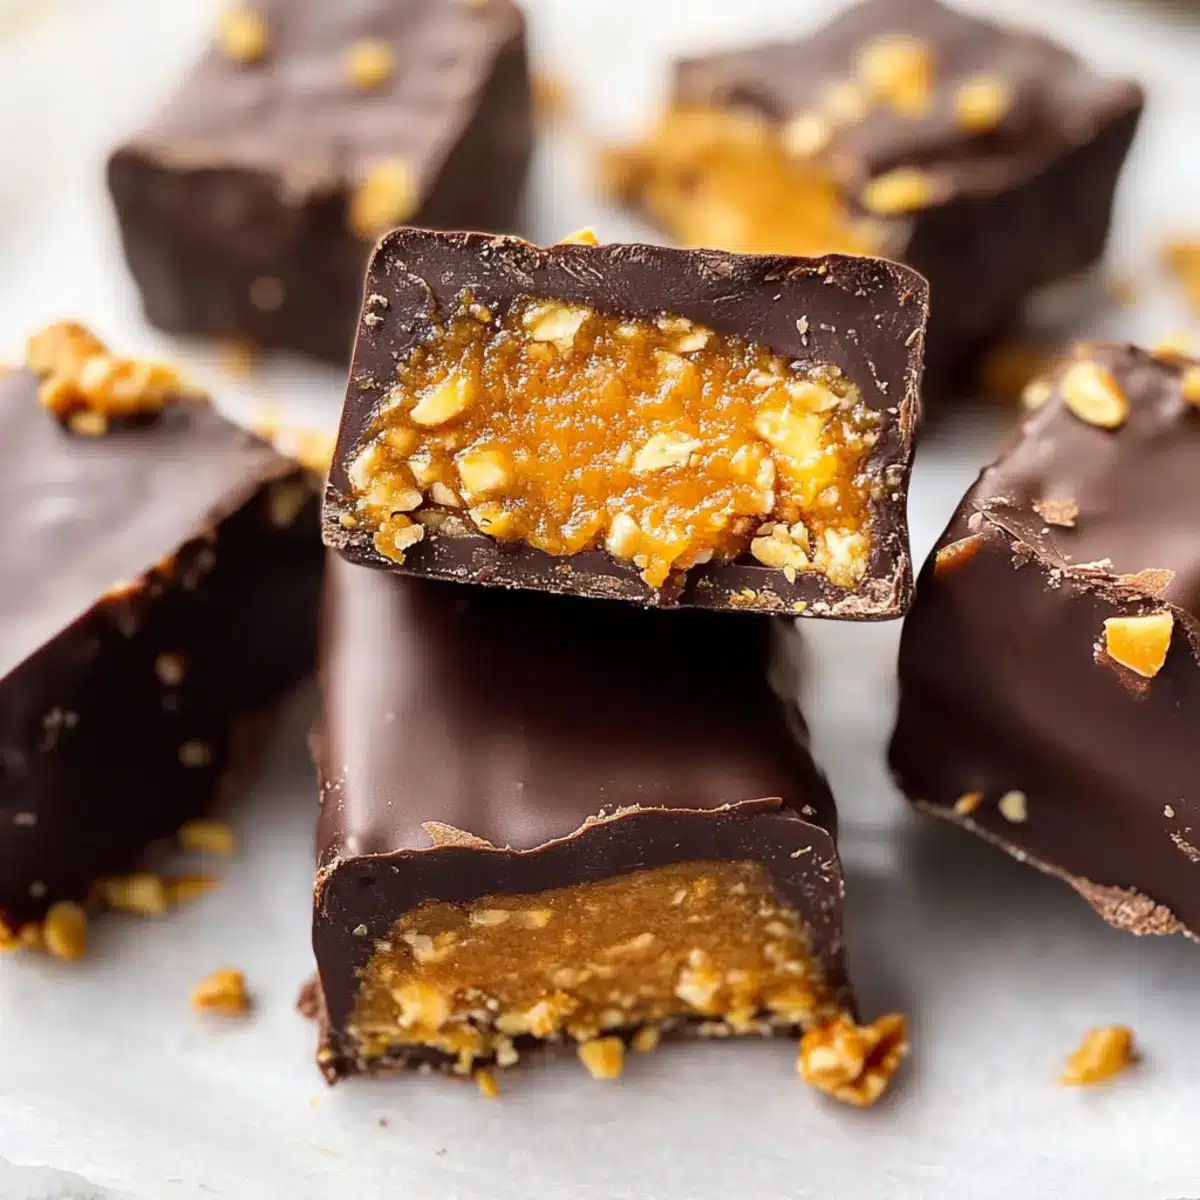
As I rummaged through my pantry, I stumbled upon a treasure trove of wholesome ingredients just waiting to be transformed into something delightful. Thus began my adventure into crafting these Healthy Homemade Butterfingers. Combining just five simple ingredients, this recipe allows you to savor a guilt-free version of a beloved classic. The pairing of crunchy corn flakes and creamy peanut butter, sweetened naturally with maple syrup, results in a delicious treat that’s both nourishing and satisfying. Not only are these bars gluten-free and dairy-free, but they also serve as a quick and easy snack or a wholesome dessert option that’s perfect for any occasion. I’m excited to share this recipe with you—ready to indulge without the guilt?
Why Are These Butterfingers Irresistible?
Simplicity: With just five ingredients, you can whip up a delicious treat that won’t consume your day.
Naturally Sweetened: Using maple syrup or honey means no refined sugars here—just wholesome sweetness!
Crunchy Delight: The crunch from corn flakes is an exciting contrast to the smoothness of chocolate, creating the perfect bite.
Crowd-Pleaser: These healthy homemade butterfingers are sure to impress your friends—just like my Healthy Pumpkin Spice or Chicken Wonton Soup!
Versatile Option: Customize them with different nut butters or toppings for a personal twist. Treat yourself to something satisfying and wholesome today!
Healthy Homemade Butterfingers Ingredients
For the Base
- Peanut Butter – Provides creaminess and binds the mixture together; choose natural varieties for a nutritious boost.
- Maple Syrup or Honey – Acts as a natural sweetener, enhancing flavor; maple syrup is vegan while honey adds a lovely floral note.
- Corn Flakes – Offers crunch and structure to the bars; opt for gluten-free certified corn flakes for a wholesome treat.
For the Coating
- Chocolate Chips – Provides a rich chocolate flavor; using dairy-free chips makes these healthy homemade butterfingers entirely dairy-free.
- Coconut Oil – Helps melt the chocolate smoothly and adds a hint of tropical flavor; substitute with any neutral oil if needed.
Step‑by‑Step Instructions for Healthy Homemade Butterfingers
Step 1: Crush Corn Flakes
Begin by placing about 2 cups of corn flakes into a zip-top bag. Use a rolling pin or your hands to crush the flakes into small pieces until they resemble coarse crumbs. This process should take about 2–3 minutes. Once crushed, set the bag aside while you prepare the peanut butter mixture.
Step 2: Mix Peanut Butter and Sweetener
In a large mixing bowl, combine 1 cup of natural peanut butter with 1/3 cup of maple syrup or honey. Using a spatula, stir the mixture thoroughly for about 2 minutes until it is smooth and fully combined. The creamy consistency should help bind the ingredients together, resulting in a delicious base for your Healthy Homemade Butterfingers.
Step 3: Incorporate Corn Flakes
Add the crushed corn flakes from Step 1 into the peanut butter mixture. Fold the corn flakes in gently, ensuring they are evenly coated with the peanut butter and syrup mix. This should take about 1–2 minutes. The mixture will become thicker and chunky, creating that wonderful texture that makes these butterfingers a delight.
Step 4: Prepare the Pan
Line a loaf pan with parchment paper, allowing some overhang for easy removal later. Pour the mixture into the prepared pan, spreading it evenly with a spatula. Press down firmly to create a compact layer, ensuring there are no air pockets. This should take about 3 minutes. Once done, it’s time for the mixture to chill and set!
Step 5: Freeze the Mixture
Place the loaf pan in the freezer and allow it to set for at least 1 hour. This will ensure the layers firm up nicely, making them easier to cut into perfect bars later. You’ll know it’s ready when the top feels solid to the touch and doesn’t stick to your finger.
Step 6: Cut the Bars
After an hour, carefully lift the mixture out of the pan using the parchment overhang. Place it on a cutting board and use a sharp knife to cut it into 12 equal bars. This should take about 3–5 minutes. Each bar should have a nice thickness to hold up well when dipped in chocolate.
Step 7: Melt Chocolate Coating
In a microwave-safe bowl, combine 1 cup of chocolate chips with 2 tablespoons of coconut oil. Microwave in 30-second intervals, stirring between each until the mixture is smooth and fully melted, which should take about 1–2 minutes. The chocolate should be glossy and fluid, perfect for coating your Healthy Homemade Butterfingers.
Step 8: Dip Each Bar
Dip each butterfinger bar into the melted chocolate, ensuring it’s coated evenly. It helps to let the excess chocolate drip back into the bowl. This step should take about 5 minutes. Once dipped, place the chocolate-covered bars on a parchment-lined plate to set.
Step 9: Freeze to Hardening
Return the dipped bars to the freezer for about 10 minutes, allowing the chocolate coating to harden completely. Once firm, they’ll have a beautiful, shiny finish, and you can enjoy the irresistible combo of crunchy, creamy, and chocolaty goodness from your Healthy Homemade Butterfingers.
What to Serve with Healthy Homemade Butterfingers
Treat your taste buds to an indulgent experience by crafting a complete meal around these delightful, guilt-free bars.
- Creamy Yogurt Parfait: A dollop of Greek yogurt topped with fresh berries complements the sweetness of the butterfingers while adding a creamy texture.
- Nutty Granola: Serving a handful of granola alongside enhances the crunch factor, providing a satisfying contrast to the smooth chocolate coating of the bars.
- Chilled Almond Milk: This refreshing drink balances the richness of the butterfingers, perfect for washing down this healthier treat without feeling heavy.
- Fruit Salad Medley: A vibrant mix of seasonal fruits adds freshness and acidity, giving a burst of flavor that rounds out the sweetness of the bars.
- Dark Chocolate Drizzle: For an extra touch, drizzle some melted dark chocolate over the fruit salad, creating a luscious merging of flavors that echoes the butterfinger bliss.
- Coconut Chia Pudding: This creamy, subtly sweet pudding pairs beautifully with the nutty profile of the butterfingers, adding a delightful contrast in textures.
- Matcha Green Tea: A warm cup of matcha offers earthy notes that balance the sweetness, making it a sophisticated pairing to elevate your treat moment.
- Coconut Macaroons: These chewy, delightful bites bring a burst of coconut flavor that complements the butterfingers’ richness—perfect for a dessert platter.
- Zesty Lemon Bars: The tang of citrus cuts through the sweetness, providing a refreshing contrast that will leave your palate refreshed and satisfied.
- Fruit-Infused Sparkling Water: Enhance your meal’s festivities with a bubbly, fruity drink that contrasts the dense texture of the butterfingers and keeps it light.
Healthy Homemade Butterfingers Variations
Feel free to let your creativity shine and customize these Healthy Homemade Butterfingers to your liking!
- Nut-Free: Substitute peanut butter with sunflower seed butter for a nut-free treat that’s equally delicious.
- Maple-Free: Replace maple syrup with agave nectar for a light sweetness that works just as well.
- Extra Crunch: Mix in a handful of chopped nuts or seeds for an added crunch that enhances both texture and flavor.
- Flavor Infusion: Stir in a teaspoon of vanilla extract or a sprinkle of cinnamon to elevate the taste profile.
- Dairy-Free Delight: Use dairy-free chocolate chips to ensure every bite is completely free of dairy—perfect for sensitive tummies!
- Chocolate-Coconut: Sprinkle shredded coconut on top of the chocolate coating for a tropical twist that deliciously contrasts with the smooth chocolate.
- Cereal Swap: Swap corn flakes for brown rice cereal to change the texture while still maintaining that satisfying crunch.
- Savory Touch: Add a pinch of sea salt to the chocolate mixture for a sweet-savory flavor explosion that takes it to a whole new level.
These Healthy Homemade Butterfingers can be made uniquely yours! Pair them with a warm cup of tea or enjoy them alongside a batch of my Healthy Pumpkin Spice for a cozy snack moment. Don’t forget to try them as a delightful addition to your dessert spread with my easy Homemade Cinnamon Twists.
Expert Tips for Healthy Homemade Butterfingers
• Melt Chocolate Smoothly: Ensure your chocolate mixture is fully melted and smooth to avoid clumps; use a microwave-safe bowl and stir frequently.
• Compound Flavor: For a touch of flair, consider adding a pinch of sea salt to the melted chocolate, enhancing the overall flavor of your Healthy Homemade Butterfingers.
• Proper Freezing: Allow the butterfingers to freeze completely before cutting them into bars for clean edges; this will make dipping them in chocolate easier too.
• Storage Guidelines: Keep your bars in an airtight container in the freezer. They stay fresh for up to 3 months, perfect for satisfying those sweet cravings anytime!
How to Store and Freeze Healthy Homemade Butterfingers
Freezer: Store the healthy homemade butterfingers in an airtight container in the freezer for up to 3 months. This keeps them fresh, ready to satisfy your sweet tooth at any moment.
Fridge: If you prefer a softer texture, transfer the bars to the fridge, where they can last up to 1 week. Ensure they are wrapped or stored in an airtight container to maintain their quality.
Reheating: If you enjoy them warm, let the bars sit at room temperature for a few minutes before enjoying. Alternatively, you can microwave each bar for about 10–15 seconds to melt the chocolate slightly.
Make Ahead Options
These Healthy Homemade Butterfingers are a fantastic option for busy home cooks looking to save time during the week! You can prepare the base mixture and freeze it for up to 3 days in advance. Simply follow the steps to create the mixture, press it into the prepared loaf pan, and allow it to freeze. When you’re ready to finish, remove and slice the bars, then melt the chocolate and dip each bar for a delicious coating. Just remember, to maintain quality, store the prepped mixture in an airtight container or tightly wrap it with plastic to prevent freezer burn. You’ll have tasty, homemade treats ready, perfect for quick snacking or dessert!
Healthy Homemade Butterfingers Recipe FAQs
How do I select the right peanut butter?
Absolutely! When choosing peanut butter for your Healthy Homemade Butterfingers, look for natural, no-sugar-added varieties. This ensures a healthier treat without any hidden sugars or additives. The best peanut butters contain just peanuts and salt, providing that creamy texture and delicious flavor.
How should I store my butterfingers?
I recommend storing your butterfingers in an airtight container in the freezer for up to 3 months to maintain their freshness. If you want them a bit softer, you can place them in the fridge, where they will last up to 1 week. Make sure they are well-wrapped or sealed to prevent freezer burn.
Can I freeze the butterfingers?
Absolutely! To freeze your Healthy Homemade Butterfingers, place them in a single layer in an airtight container, separating any layers with parchment paper to prevent sticking. They can be kept in the freezer for up to 3 months. Just be sure to let them thaw in the fridge or at room temperature for a few minutes before enjoying!
What should I do if my chocolate coating is clumpy?
Very! If your chocolate mixture becomes clumpy while melting, allow it to cool slightly, then stir in a teaspoon of coconut oil or vegetable oil to help smooth it out. If you microwave it again, make sure to do so in short intervals, stirring in between, so it doesn’t burn and turns silky smooth for dipping your Healthy Homemade Butterfingers.
Are there any allergy considerations for this recipe?
Absolutely! This recipe is naturally gluten-free and can easily be modified to be nut-free by substituting the peanut butter with sunflower seed butter. However, if anyone in your household has nut allergies, be sure to double-check ingredients on all packaging. Always consult with those who will be eating these treats to ensure everyone can enjoy them safely!
Satisfy Your Sweet Tooth with Healthy Homemade Butterfingers
Ingredients
Equipment
Method
- Crush Corn Flakes by placing about 2 cups into a zip-top bag and crush until they resemble coarse crumbs.
- Mix Peanut Butter and Sweetener by combining 1 cup of peanut butter with 1/3 cup of maple syrup or honey; stir thoroughly until smooth.
- Incorporate Corn Flakes by adding the crushed corn flakes into the peanut butter mixture and fold gently.
- Prepare the Pan by lining a loaf pan with parchment paper and pour the mixture in, pressing down firmly to create a compact layer.
- Freeze the Mixture for at least 1 hour until solid.
- Cut the Bars into 12 equal pieces after lifting from the pan.
- Melt Chocolate Coating by combining 1 cup of chocolate chips with 2 tablespoons of coconut oil; microwave until smooth.
- Dip Each Bar into the melted chocolate, ensuring an even coat.
- Freeze to Hardening for about 10 minutes to allow the coating to harden.
Leave a Reply