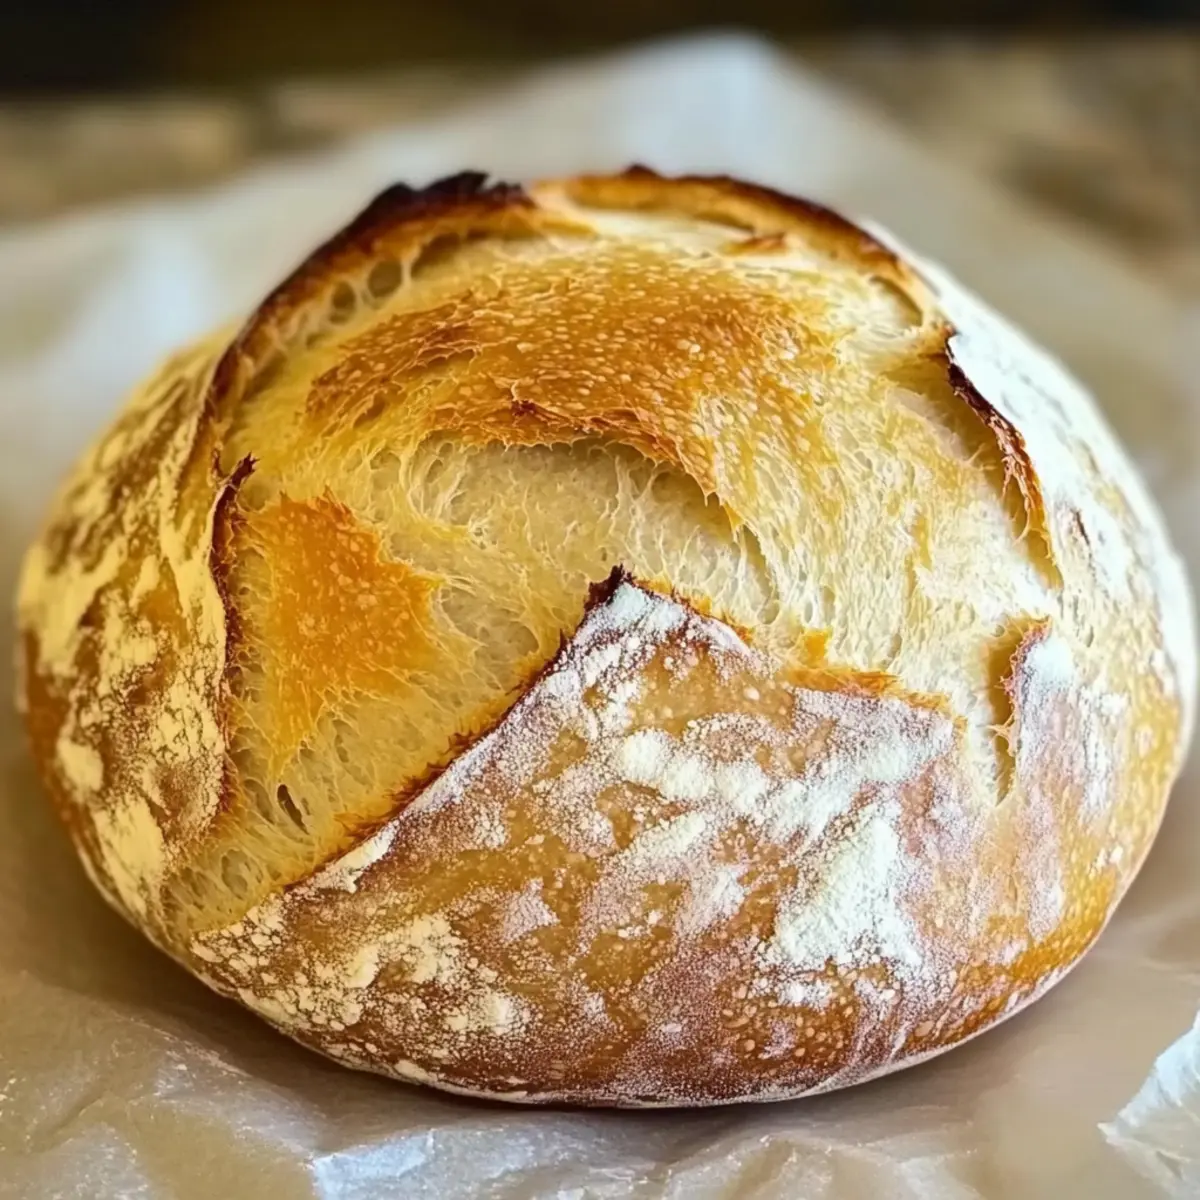
Every time I step into my kitchen, there’s something magical about the scent of baking bread wafting through the air. Today, I’m excited to share my go-to recipe for No Knead Gluten Free Bread. This is not just another recipe; it’s a game-changer for busy home chefs who crave the comfort of homemade bread without the fuss. With just a few simple ingredients and minimal hands-on time, you can achieve a lovely crusty exterior and a wonderfully soft interior—perfect for toasting or enjoying on its own! Plus, it’s gluten-free, making it an excellent option for those with dietary restrictions. So, are you ready to get your hands delightfully messy and fill your home with irresistible aromas? Let’s dive into this effortless culinary adventure!
Why is No Knead Gluten Free Bread a Must-Try?
Effortless Preparation: With minimal kneading required, this recipe is perfect for anyone looking to bake without the hassle.
Versatile Use: Enjoy it as toast for breakfast, alongside your favorite soups, or a canvas for your gourmet avocado toast creations.
Rustic Charm: The beautiful crust and airy crumb mimic artisanal loaves, making it a delightful addition to any meal.
Healthy Alternative: Being gluten-free means everyone can indulge, letting those with dietary restrictions enjoy wholesome, homemade goodness.
Quick Turnaround: With just 8-12 hours of rising time, you’ll have fresh bread ready to pair with meals or satisfy a late-night craving.
Endless Customization: Add herbs, seeds, or even spices to make this bread uniquely yours—just like with my Cinnamon Honey Cornbread for a sweet twist!
No Knead Gluten Free Bread Ingredients
For the Dough
- Gluten-free all-purpose flour – This flour is essential for structure; choose a blend designed specifically for baking.
- Salt – Enhances flavor and controls yeast activity for a successful rise.
- Instant yeast – Allows for fermentation without kneading, contributing to that lovely bread rise.
- Warm water – Activates the yeast; ensure it’s between 110°F to 115°F for optimal results.
- Olive oil (optional) – Adds moisture and richness; skip it for a lower-fat bread.
- Apple cider vinegar (optional) – Boosts flavor and helps improve the dough’s rise, especially in gluten-free baking.
Step‑by‑Step Instructions for No Knead Gluten Free Bread
Step 1: Combine Dry Ingredients
In a large mixing bowl, whisk together 3 cups of gluten-free all-purpose flour, 1 teaspoon of salt, and 1 packet of instant yeast until well blended. This mixture will form the base of your No Knead Gluten Free Bread. Make sure there are no lumps, and enjoy the aroma of the dry ingredients as they come together.
Step 2: Add Wet Ingredients
Gradually pour in 1 and 1/2 cups of warm water, along with 1 tablespoon of olive oil and 1 teaspoon of apple cider vinegar if using. Stir with a wooden spoon or spatula until all the dry flour is absorbed and the dough is sticky and slightly shaggy. A well-mixed dough is essential for achieving the bread’s delightful texture.
Step 3: Let the Dough Rise
Cover the bowl tightly with plastic wrap or a clean kitchen towel and place it in a warm spot in your kitchen. Allow the dough to rise for 8-12 hours, preferably overnight. You’ll know it’s ready when the dough has doubled in size and bubbles appear on the surface, setting the stage for a beautifully airy loaf.
Step 4: Preheat the Oven
When you’re ready to bake, preheat your oven to 450°F (232°C). As the oven heats up, place a Dutch oven or a heavy, oven-safe pot with a lid inside to get hot. This will create the perfect environment for baking your No Knead Gluten Free Bread, giving it that irresistible crust.
Step 5: Shape the Dough
Once the oven and pot are preheated, lightly dust a clean work surface with gluten-free flour. Gently scrape the risen dough onto the surface, taking care not to deflate it too much. Fold it over itself a few times, shaping it into a rough ball without excessive kneading, ensuring the air pockets remain intact.
Step 6: Rest the Dough
Transfer the shaped dough onto a sheet of parchment paper and cover it with a kitchen towel. Let it rest for an additional 30 minutes while the oven continues to preheat. This resting period allows the bread to develop further flavor and structure, vital for that perfect texture.
Step 7: Bake the Bread
Using oven mitts, carefully remove the hot Dutch oven from the oven. Carefully lift the dough with the parchment paper and place it inside the hot pot. Cover with the lid and bake for 30 minutes. This initial baking phase traps steam, resulting in a wonderfully crusty exterior.
Step 8: Finish Baking
After 30 minutes, remove the lid from the Dutch oven and continue baking the bread for another 15 minutes. Keep an eye on it as it turns golden brown and becomes irresistibly fragrant. The crust should be deeply browned for a rustic finish that’s simply mouthwatering.
Step 9: Cool Before Slicing
Once the bread is done baking, transfer it to a wire rack using the parchment paper to cool. Allow it to cool for at least 30 minutes before slicing. This cooling time is essential for letting the internal crumb set properly, ensuring each slice is perfect for toasting or sandwich-making.
What to Serve with No Knead Gluten Free Bread
There’s something so comforting about a homemade loaf; pair it with the right sides, and you’ll create a meal that warms the heart.
-
Creamy Tomato Soup: This classic combination brings out the savory flavors of your bread while providing a warm, satisfying addition. Dip each crusty slice for a delightful experience.
-
Garlic Butter Shrimp: The rich buttery sauce and savory shrimp pair beautifully with the airy texture of the bread, perfect for soaking up every last drop.
-
Mixed Green Salad: A fresh, zesty salad adds a crunch and brightness to the meal, balancing the hearty bread and enhancing its flavors.
-
Avocado Toast Creation: Top your slices with smashed avocado, lemon, and chili flakes for an invigorating spread that’s both nutritious and delicious.
-
Cheesy Cauliflower Bake: This creamy, cheesy dish complements the crusty bread and adds a substantial, comforting element to your meal.
-
Homemade Hummus & Veggies: Serve your bread with a side of smooth, rich hummus and fresh veggies for a healthy and colorful addition to your spread.
-
Sparkling Lemonade: To wash it all down, a chilled glass of sparkling lemonade adds a refreshing twist and a hint of zest that pairs wonderfully with your homemade loaf.
Make Ahead Options
No Knead Gluten Free Bread is a fantastic choice for meal prep! You can mix the dry ingredients (3 cups of gluten-free all-purpose flour, 1 teaspoon of salt, and 1 packet of instant yeast) and store them in an airtight container for up to 3 days. Alternatively, prepare the entire dough and let it rise at room temperature for up to 24 hours before shaping it. To maintain its quality, cover the bowl tightly and ensure it remains in a warm spot. When you’re ready to bake, simply follow the shaping and baking instructions as usual, and you’ll enjoy fresh bread with minimal last-minute effort!
No Knead Gluten Free Bread Variations
Feel free to get creative with this No Knead Gluten Free Bread recipe; your taste buds will thank you!
-
Coconut Oil: Swap olive oil with melted coconut oil for a subtle, tropical twist that enhances flavor and moisture.
-
Herb Infusion: Mix in dried herbs like rosemary or Italian seasoning for a delightful aromatic surprise in every bite.
-
Seed Power: Incorporate seeds such as chia, sunflower, or pumpkin for added crunch and nutrition—your bread becomes a superfood!
-
Cheesy Delight: Add a cup of shredded cheese (like cheddar or mozzarella) to the dough for a savory, cheesy crumb that’ll wow any taste tester.
-
Spicy Kick: Create some heat by adding red pepper flakes or diced jalapeños to the mix; it’s a fun way to spice things up!
-
Sweet Twist: For a sweeter version, fold in dark chocolate chips or dried fruits like cranberries or raisins; perfect for breakfast or as an indulgent snack. Just think of how delicious that warm loaf will taste!
-
Nutty Flavor: Stir in finely chopped nuts (like walnuts or almonds) for a rich, nutty flavor and delightful texture, making your bread extra special.
-
Honey Drizzle: If you enjoy a hint of sweetness, you can also add a tablespoon of honey to the dough for a subtle yet satisfying addition, perfectly balancing the savory elements.
As you explore these variations, think about how they can elevate your experience, much like my Banana Bread Cajun introduces a fun twist to a classic. Have fun experimenting!
Expert Tips for No Knead Gluten Free Bread
-
Rising Time: Allow a full 8-12 hours for fermentation; this creates a unique texture and flavor in your No Knead Gluten Free Bread.
-
Water Temperature: Use a kitchen thermometer to ensure warm water is between 110°F to 115°F, which activates the yeast without killing it.
-
Avoid Overmixing: When shaping the dough, resist the urge to knead too much. Gentle folds maintain air pockets crucial for a light loaf.
-
Steam Effect: Baking in a preheated Dutch oven traps steam, creating that desired crust—don’t skip this step!
-
Cooling Importance: Wait at least 30 minutes after baking before slicing; this helps set the crumb for optimal texture.
-
Flavor Boost: Add your favorite herbs or spices to the dry mix for a customized No Knead Gluten Free Bread that’s all your own!
Storage Tips for No Knead Gluten Free Bread
Room Temperature: Store your No Knead Gluten Free Bread in an airtight container at room temperature for up to 3 days to keep it fresh and delicious.
Freezer: For longer storage, slice the bread and freeze it in a single layer. Once frozen, transfer slices to a freezer bag for up to 3 months.
Reheating: When you’re ready to enjoy, toast individual slices directly from the freezer or let them thaw at room temperature before warming in the oven for a few minutes for that freshly baked taste.
Avoid Stale Bread: Keep the bread away from direct sunlight or heat sources, as this can lead to drying out more quickly.
No Knead Gluten Free Bread Recipe FAQs
What type of gluten-free flour should I use?
Absolutely! For the best results in your No Knead Gluten Free Bread, choose a gluten-free all-purpose flour blend that contains xanthan gum or other stabilizers. This ensures that your bread rises well and achieves a nice structure. Brands like Bob’s Red Mill or King Arthur Baking are typically reliable and work beautifully in this recipe.
How should I store the bread after baking?
After you’ve baked your scrumptious loaf, store your No Knead Gluten Free Bread in an airtight container at room temperature for up to 3 days. If you have leftovers, consider slicing the bread and freezing it. Simply wrap slices tightly in plastic wrap, then place them in a freezer bag for up to 3 months—perfect for enjoying anytime!
Can I freeze the dough before baking?
Certainly! If you want to prepare in advance, you can freeze the shaped dough before the final rise. After shaping, wrap it tightly in plastic wrap and store it in the freezer for up to 3 months. When you’re ready to bake, thaw the dough in the fridge overnight, let it come to room temperature for about 30 minutes, and then proceed with the baking instructions.
How can I troubleshoot a dense loaf?
If your No Knead Gluten Free Bread turns out dense, it may be due to a few factors. Ensure your yeast is fresh and active by checking the expiration date before using it. Also, make sure your water temperature falls within the 110°F to 115°F range during mixing. Lastly, allowing sufficient rising time (8-12 hours) helps the dough develop properly, yielding that airy texture you’re aiming for.
Are there any dietary considerations for this recipe?
Yes! Since this No Knead Gluten Free Bread is naturally gluten-free, it’s an excellent option for those with celiac disease or gluten sensitivities. However, if you’re preparing for someone with allergies, always check that your gluten-free flour is processed in a gluten-free facility to avoid cross-contamination. Additionally, you can omit the olive oil for a lower-fat option. Be sure to enjoy this delightful bread with loved ones!
No Knead Gluten Free Bread: Your Simple Baking Joy
Ingredients
Equipment
Method
- Combine Dry Ingredients: In a large mixing bowl, whisk together the gluten-free flour, salt, and instant yeast until well blended.
- Add Wet Ingredients: Gradually pour in warm water, olive oil, and apple cider vinegar if using. Stir until the dough is sticky.
- Let the Dough Rise: Cover the bowl and let it rise for 8-12 hours in a warm spot until doubled in size.
- Preheat the Oven: Heat your oven to 450°F and place a Dutch oven inside to get hot.
- Shape the Dough: Dust a surface with flour, scrape the risen dough out, and shape it into a ball.
- Rest the Dough: Transfer to parchment paper and cover, letting it rest for 30 minutes.
- Bake the Bread: Bake covered for 30 minutes, then uncover and bake for an additional 15 minutes.
- Cool Before Slicing: Transfer to a wire rack and cool for at least 30 minutes before slicing.
Leave a Reply