I never imagined that making a guilt-free treat could be this easy! These No-Bake Oreo Protein Balls are my go-to solution for those chaotic days when sweet cravings strike. Combining the beloved flavors of cookies and cream, they’re a delightful snack that doesn’t compromise on indulgence. Packed with high protein, gluten-free, and ready in just ten minutes, they make for an ideal quick energy boost. Whether you’re in need of a post-workout pick-me-up or a satisfying treat during the afternoon slump, these Oreo Protein Balls deliver both satisfaction and nourishment. Plus, with customizable ingredient options like different protein powders or gluten-free Oreos, you can tailor them to fit your dietary needs. Who wouldn’t want to whip up these dreamy bites and feel like a kitchen superstar? Ready to dive into the recipe and discover the magic?

Why Are Oreo Protein Balls the Best Snack?
Quick and Easy: You can whip up these no-bake treats in just ten minutes, making them perfect for busy lifestyles.
Indulgent Flavor: Enjoy the classic cookies and cream taste that satisfies your sweet cravings without the guilt.
High-Protein Punch: With each protein ball packed with around 5g of protein, they’re an excellent post-workout snack to fuel your day.
Customizable Options: Want to change it up? Substitute ingredients like almond flour or vegan cream cheese to suit your dietary needs! If you love easy, delicious snacks, you might also enjoy my Chocolate Chip Cookies for an evening treat!
Crowd-Pleaser: Whether for a snack at home or to impress friends, these bites appeal to everyone looking for a delicious yet healthy snack.
Oreo Protein Balls Ingredients
• For the Batter
- Vanilla Protein Powder – Provides protein content and structure; feel free to swap for your favorite flavor for variety.
- Coconut Flour – Acts as a binding agent and adds texture; almond flour works too, but may yield a softer result.
- Monk Fruit Sweetener – Adds sweetness while keeping the recipe low-carb; you can use your preferred granulated sugar alternative as well.
- Cream Cheese – Provides creaminess and moisture; low-fat or vegan options are perfect substitutes.
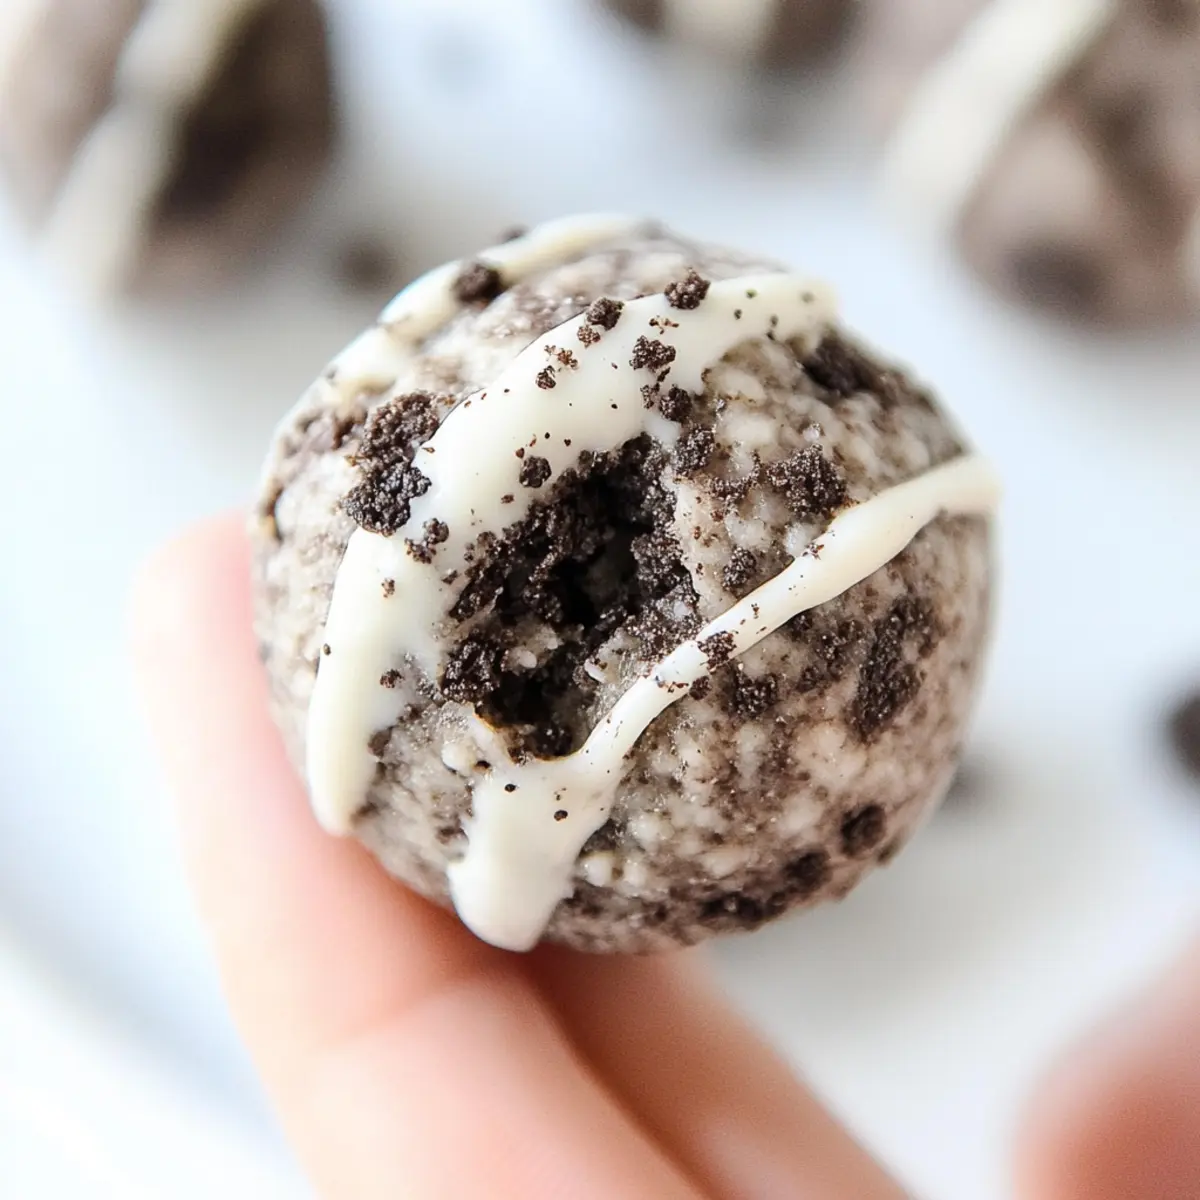
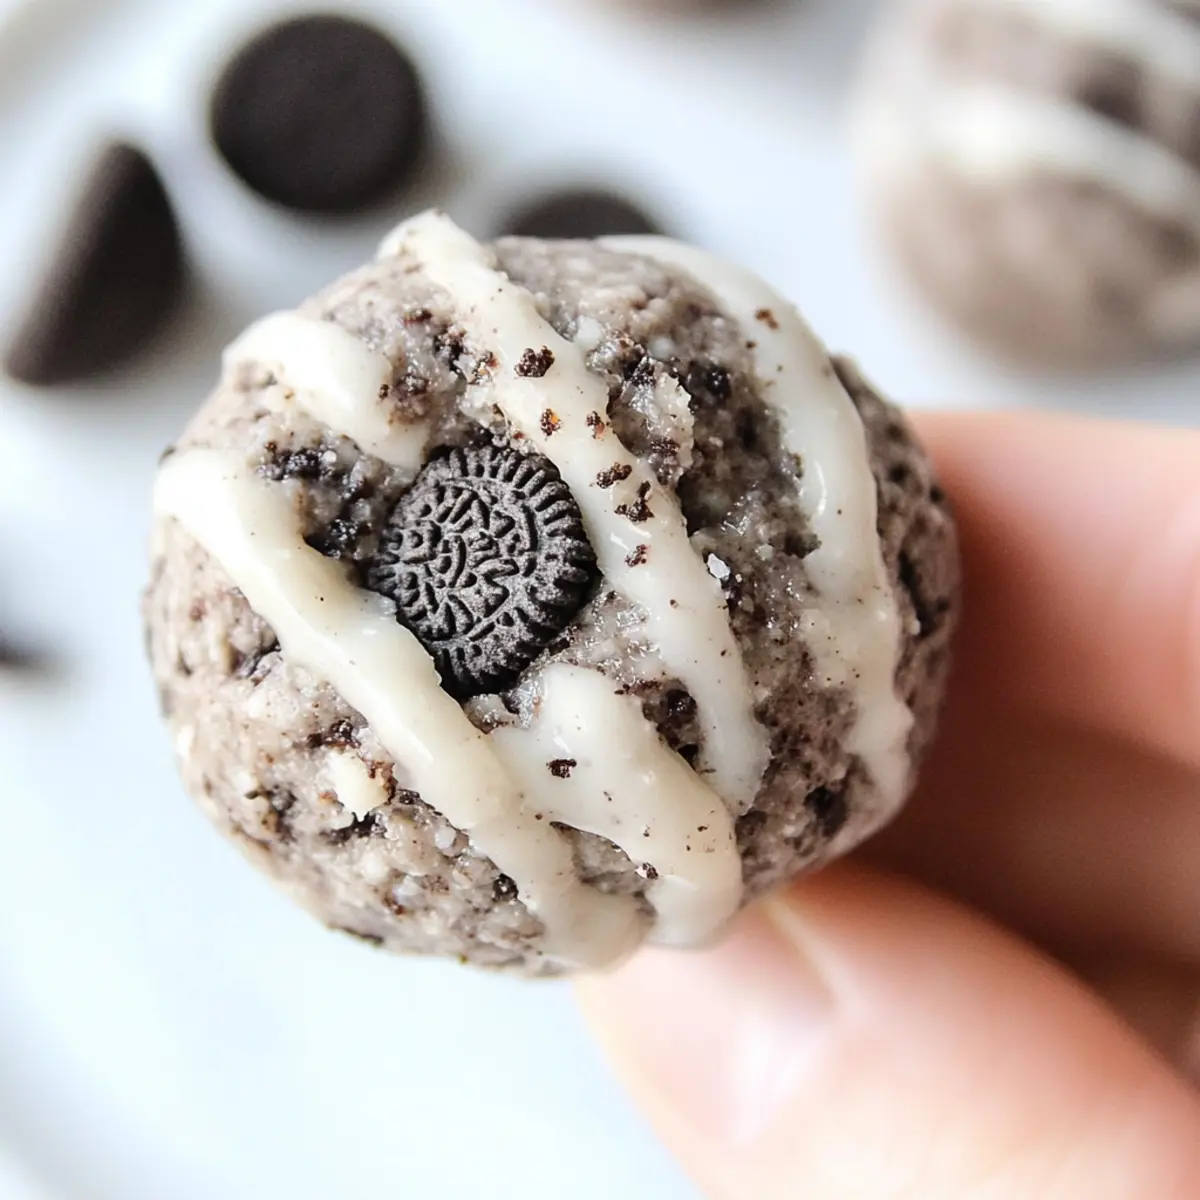
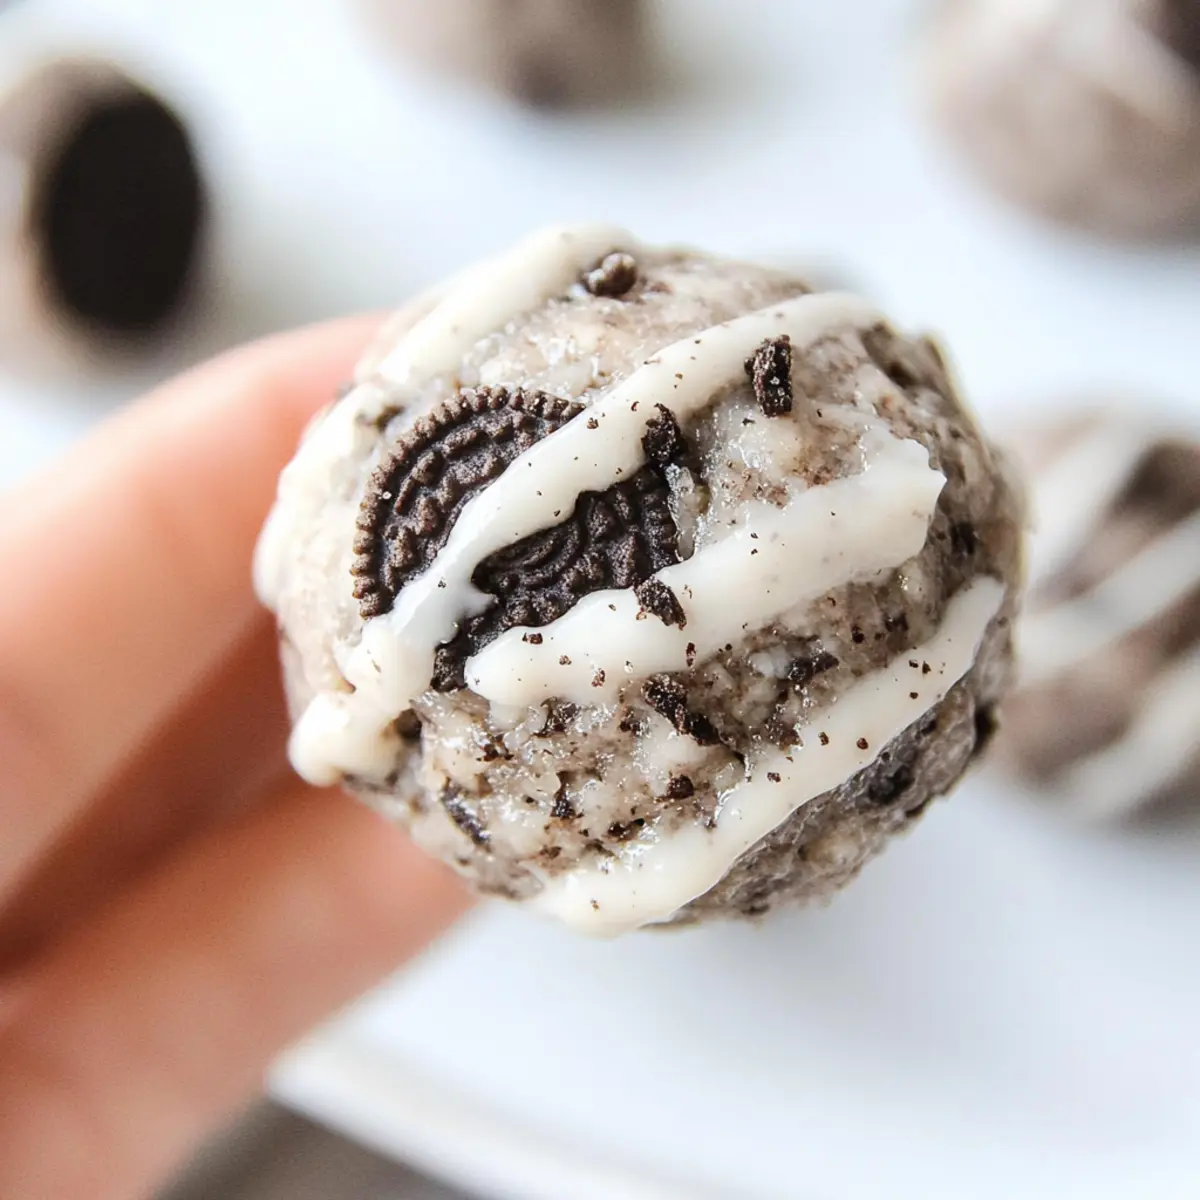
- Oreo Cookies – Delivers that classic cookies and cream flavor; use gluten-free Oreos for a gluten-free twist!
- White Chocolate Chips – Optional drizzle for extra sweetness and flair; feel free to skip or replace with dairy-free chocolate.
• For Optional Drizzle
- White Chocolate Chips – Melt and drizzle on top for an extra touch of decadence; choose dairy-free options if preferred.
Step‑by‑Step Instructions for Oreo Protein Balls (Easy, Cookies & Cream Cheese Energy Bites)
Step 1: Prepare the Oreo Cookies
Start by finely chopping 4 Oreo cookies. Ensure that the crumbs are small but still have some texture for a flavorful crunch. This should take about 2-3 minutes. Set aside the chopped cookies to blend into your batter later.
Step 2: Mix the Dry Ingredients
In a mixing bowl, combine 1 cup of vanilla protein powder, 1/4 cup of coconut flour, and 1/4 cup of monk fruit sweetener. Whisk these dry ingredients together until evenly blended, which should take about 1 minute. This step will ensure that your Oreo Protein Balls have a consistent flavor.
Step 3: Combine Wet Ingredients
Add 4 ounces of cream cheese and the prepared Oreo cookie crumbs into the dry mixture. Using a spatula or your hands, mix thoroughly until all ingredients are well incorporated. If the mixture feels too thick, add 1-2 tablespoons of milk or almond milk to achieve a slightly sticky texture; this should take about 2 minutes.
Step 4: Form the Protein Balls
Once mixed, scoop out about a tablespoon of the mixture and roll it into a ball shape between your palms. Place each ball onto a lined baking sheet as you go. You should be able to make around 12-15 protein balls, depending on how big you roll them. This process will take about 5-7 minutes.
Step 5: Chill to Firm Up
Refrigerate the baking sheet with the rolled protein balls for about 15 minutes. This chilling time allows the oil from the cream cheese to solidify, helping the bites firm up and hold their shape better. After 15 minutes, they should feel firmer to the touch.
Step 6: Optional White Chocolate Drizzle
If desired, melt 1/4 cup of white chocolate chips in the microwave for about 30 seconds, stirring until smooth. Once melted, drizzle the chocolate over the chilled protein balls using a fork. Let them set for a few minutes before serving—this adds a delightful sweetness and presentation to your Oreo Protein Balls!
Storage Tips for Oreo Protein Balls
Room Temperature: Store the Oreo Protein Balls at room temperature for up to 1 day, but it’s best to keep them in a cool, dry place to maintain freshness.
Fridge: These protein balls can be refrigerated for up to 5-7 days in an airtight container; this helps retain their delightful texture and flavor.
Freezer: For longer storage, freeze the protein balls in an airtight container for up to 3 months. Just remember to separate them with parchment paper so they don’t stick together.
Reheating: If desired, thaw frozen Oreo Protein Balls in the fridge overnight before enjoying; they’re best served chilled for a refreshing treat!
Expert Tips for Oreo Protein Balls
• Fine Crumbs Matter: Ensure your Oreo cookies are finely chopped for even distribution in your mixture; uneven sizes can lead to inconsistent flavor.
• Adjust Mixture Consistency: If your mixture is too dry, add a splash of milk. If it’s too soft, increase your coconut flour slowly for the perfect Oreo Protein Balls texture.
• Chill for Firmness: Don’t skip the refrigeration step! Chilling for at least 15 minutes solidifies your dough, making it easier to form and giving a delightful bite.
• Batch Storage: These protein balls freeze beautifully! Keep them in an airtight container; they’ll stay delicious for up to three months.
• Flavor Variations: Experiment with different sandwich cookies for unique flavor profiles in your Oreo Protein Balls; this simple change can keep your snacks exciting!
What to Serve with Oreo Protein Balls
These delightful treats are the perfect nibble to elevate your snack time, whether you’re in need of a quick pick-me-up or something sweet to share.
-
Fresh Fruit Salad: A mix of vibrant fruits like berries and melons adds a refreshing contrast to the rich flavors of the protein balls.
-
Creamy Yogurt Parfait: Layer some Greek yogurt with granola and honey for a protein boost that complements the sweetness of the Oreo Protein Balls.
-
Nut Butter Dippers: Pair with almond or peanut butter for a satisfying crunch and extra protein, creating a delicious contrast in texture.
-
Sparkling Water: A fizzy drink enhances the sweet indulgence of the protein balls, adding a refreshing twist that keeps your palate excited.
-
Dark Chocolate Squares: For a more decadent touch, serve alongside small pieces of dark chocolate to indulge in a luxurious treat.
-
Coffee or Espresso: The rich, bold flavors of coffee bring out the cookie and cream notes in the protein balls, creating a delectable pairing for your afternoon break.
-
Chilled Almond Milk: A glass of creamy almond milk can offer a smooth finish, making it a delightful complement to each bite of the Oreo Protein Balls.
Make Ahead Options
These Oreo Protein Balls are a fantastic choice for meal prep, saving you time and ensuring you have a delicious snack ready when cravings hit! You can prepare the mixture and roll the protein balls up to 24 hours in advance. Simply follow the instructions through Step 4 and store the formed balls in an airtight container in the refrigerator. This keeps them fresh and maintains their delightful texture. When you’re ready to enjoy, just pop them out of the fridge and proceed to chill for about 15 minutes before serving to firm them up. For even longer storage, you can freeze the protein balls for up to 3 months—thaw them in the refrigerator overnight before enjoying. With these make-ahead tips, your Oreo Protein Balls will be just as delicious and ready for any snacking occasion!
Oreo Protein Balls Variations & Substitutions
Feel free to get creative with these no-bake protein balls and customize them to suit your taste buds!
-
Alternative Cookies: Swap out Oreo cookies for any flavored sandwich cookies; think chocolate mint or peanut butter for a delightful twist. Go wild with the options!
-
Protein Powder Switch: Use chocolate protein powder instead of vanilla to infuse the balls with an extra layer of rich flavor. Decide your favorite protein for a unique taste!
-
Nut Butter Option: Replace cream cheese with your favorite nut butter for a creamy texture and added flavor. Almond or cashew butter makes these bites even more indulgent.
-
Coconut Flour Substitute: Almond flour can be used instead of coconut flour; however, keep in mind that it will yield a softer mixture. That’s a great option if you’re looking for a nutty flavor!
-
Sweetness Adjustment: If monk fruit sweetener isn’t available, feel free to use honey or agave syrup. Just reduce the liquid in your recipe slightly for a balanced consistency.
-
Vegan Variation: For a completely vegan variant, swap cream cheese with vegan cream cheese and use dairy-free chocolate chips for an equally delectable snack without the animal products.
-
Texture Twist: Add a handful of chopped nuts or seeds, such as walnuts or chia seeds, for extra crunch and nutrition. Each bite will surprise your senses!
-
Flavor Explosion: Consider mixing in a pinch of cinnamon or a splash of vanilla extract for a warm flavor profile. It’s an unexpected delight that elevates every bite!
You might also enjoy these delicious variations in my Baked Mac Cheese for a twist on comfort food!
Oreo Protein Balls Recipe FAQs
What kind of protein powder should I use?
Absolutely! You can use any flavor of protein powder you prefer, but vanilla works best to complement the Oreo flavor. If you want to experiment, chocolate protein powder can add a rich twist!
How do I know if my ingredients are fresh?
Look for coconut flour that’s bright white and free from clumps. For cream cheese, it should be smooth and free from discoloration. If your Oreo cookies have dark spots all over, they might be past their prime!
How do I store my Oreo Protein Balls?
Store these protein balls in an airtight container in the fridge for up to 5-7 days. If you want to keep them longer, they freeze great! Just place them in a single layer, separated by parchment paper, in a freezer-safe container, and they will last for up to 3 months.
Can I make these without cream cheese?
Very! If you prefer to skip the cream cheese, feel free to substitute it with the same amount of nut butter, such as almond or peanut butter. This will change the texture slightly and will make the protein balls creamier and richer in flavor.
What if my mixture turns out too dry?
No worries! If your mixture feels too dry, simply drizzle in a tablespoon or two of milk or almond milk until you reach a sticky consistency. This will help your balls hold together while still being delicious!
Are these Oreo Protein Balls suitable for kids?
Definitely! These high-protein snacks are a fun and healthy treat for kids. Just make sure to substitute the monk fruit sweetener with regular sugar if you prefer a sweeter taste. Always check for allergies, particularly with cream cheese and any added ingredients.
Oreo Protein Balls: Easy Cookies & Cream Energy Bites
Ingredients
Equipment
Method
- Finely chop 4 Oreo cookies and set aside.
- In a mixing bowl, combine 1 cup of vanilla protein powder, 1/4 cup of coconut flour, and 1/4 cup of monk fruit sweetener; whisk together for about 1 minute.
- Add 4 oz of cream cheese and prepared Oreo cookie crumbs into the dry mixture; mix thoroughly until well incorporated.
- Scoop about a tablespoon of the mixture and roll into balls, placing each on a lined baking sheet; make around 12-15 balls.
- Refrigerate for about 15 minutes to firm up the protein balls.
- If desired, melt 1/4 cup of white chocolate chips in the microwave; drizzle over chilled protein balls and let set before serving.
Leave a Reply