The intoxicating aroma of warm pita wafts through my kitchen, instantly whisking me away to a sun-drenched Mediterranean market. There’s something undeniably magical about making your own bread, especially when it’s as simple as my Best Ever Greek Pita. This delightful recipe not only yields soft, pillowy pockets perfect for wraps and dips, but it’s also incredibly quick to whip up—ready in just under twenty minutes! Whether you’re looking for a fresh, home-cooked alternative to fast food or want to impress friends with an authentic touch to your meals, these pitas are a game-changer. In addition to being a crowd-pleaser, you’ll love the option to adapt the recipe for gluten-free diets, making them accessible for everyone at the table. So, are you ready to bring a taste of Greece into your kitchen? Let’s dive in!
Why Is This Greek Pita Unforgettable?
Simplicity: This recipe is straightforward, requiring only basic mixing and cooking skills.
Quick to Make: In under twenty minutes, you can have warm, fluffy pitas, making it perfect for busy weeknights.
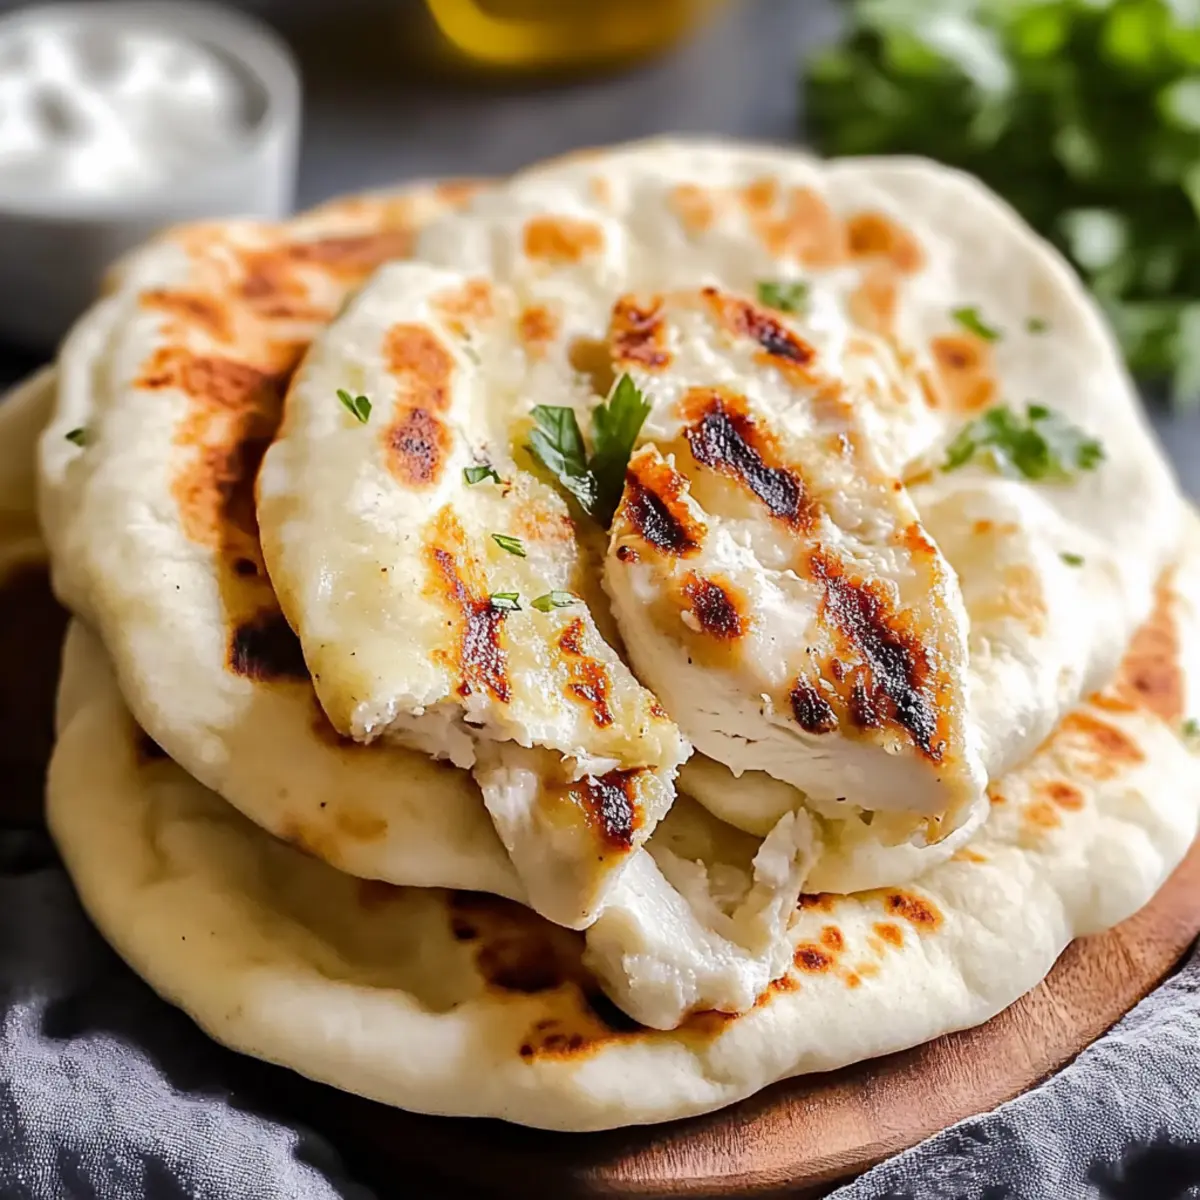
Versatile Base: Ideal for wraps, gyros, or even as a side for your favorite dip, like hummus or Greek Tzatziki Chicken, enhancing any meal.
Customizable: Feel free to play with flavors by adding herbs or spices directly to the dough, or opt for a gluten-free version for dietary needs.
Crowd-Pleasing: Everyone loves homemade bread; these pitas will impress friends and family, elevating your meal from ordinary to extraordinary.
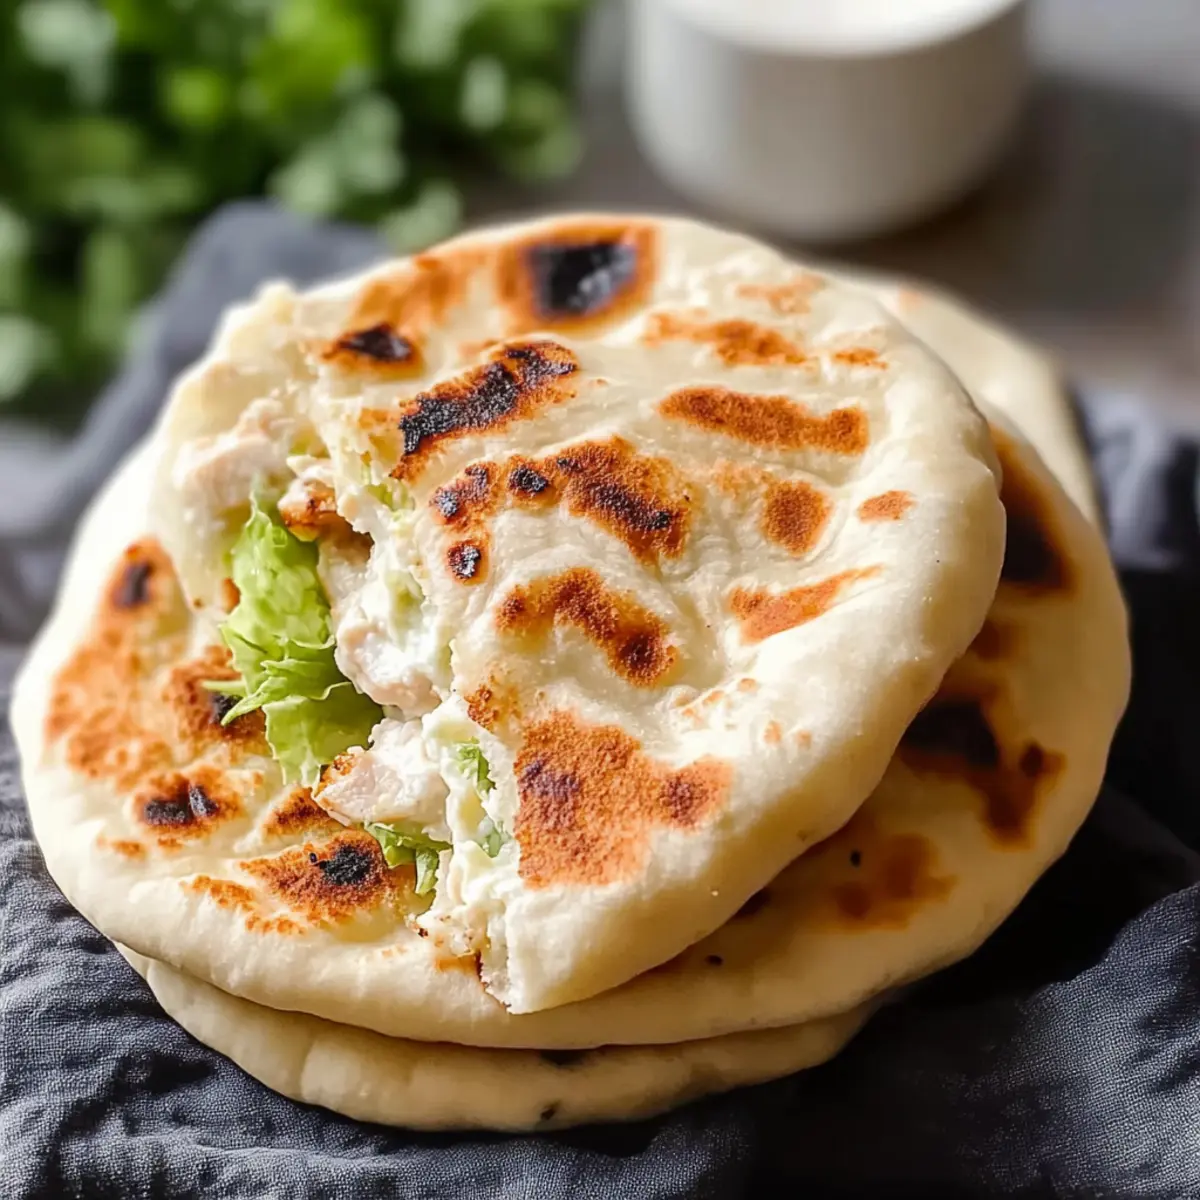
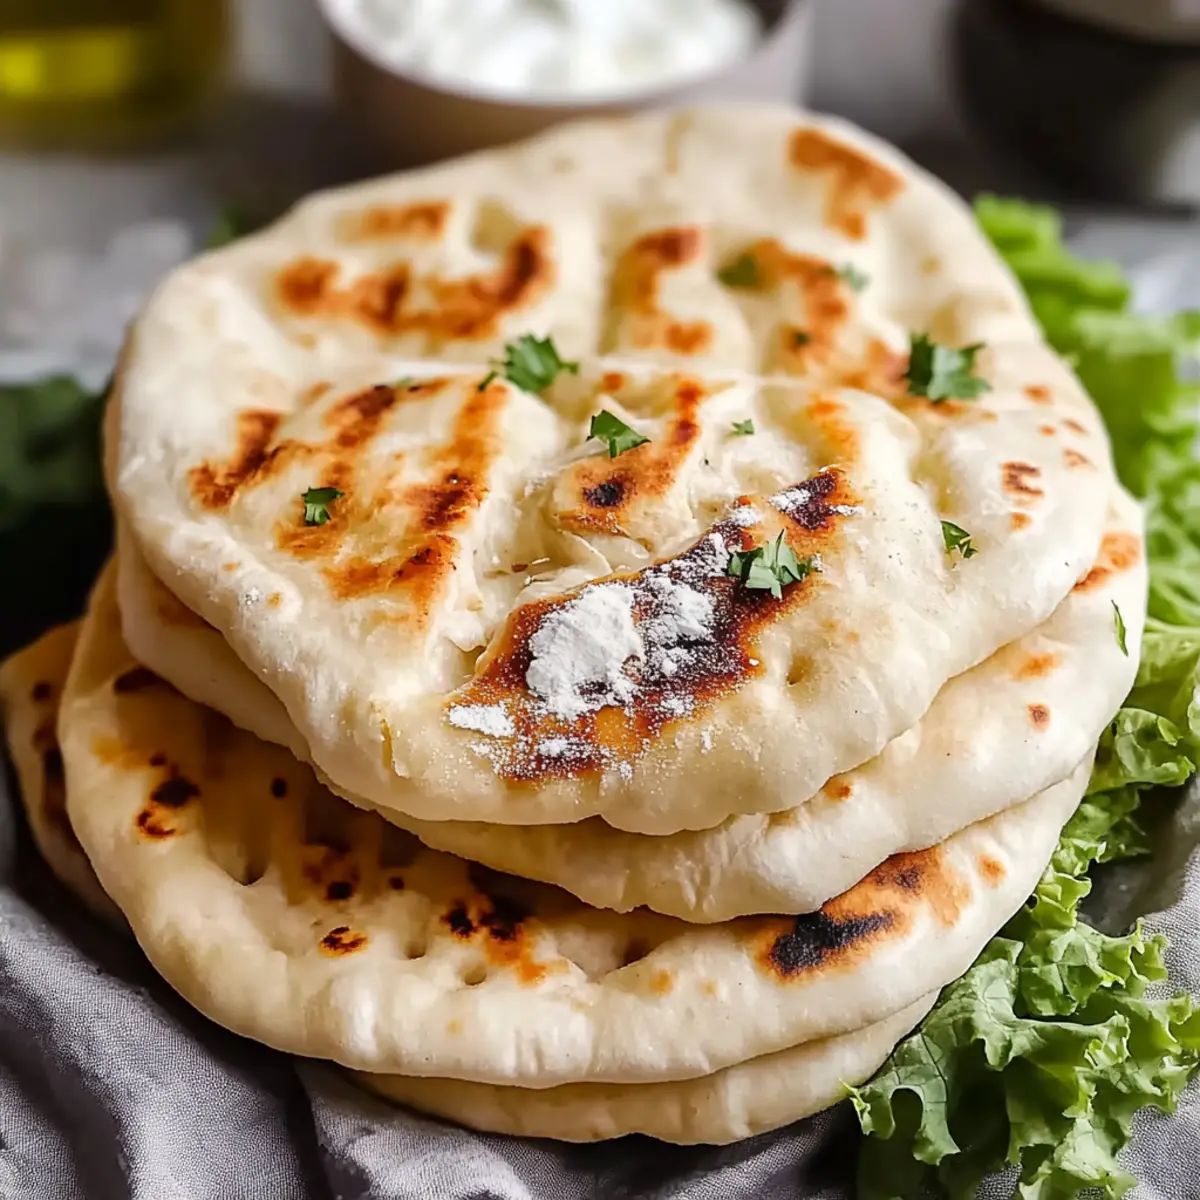
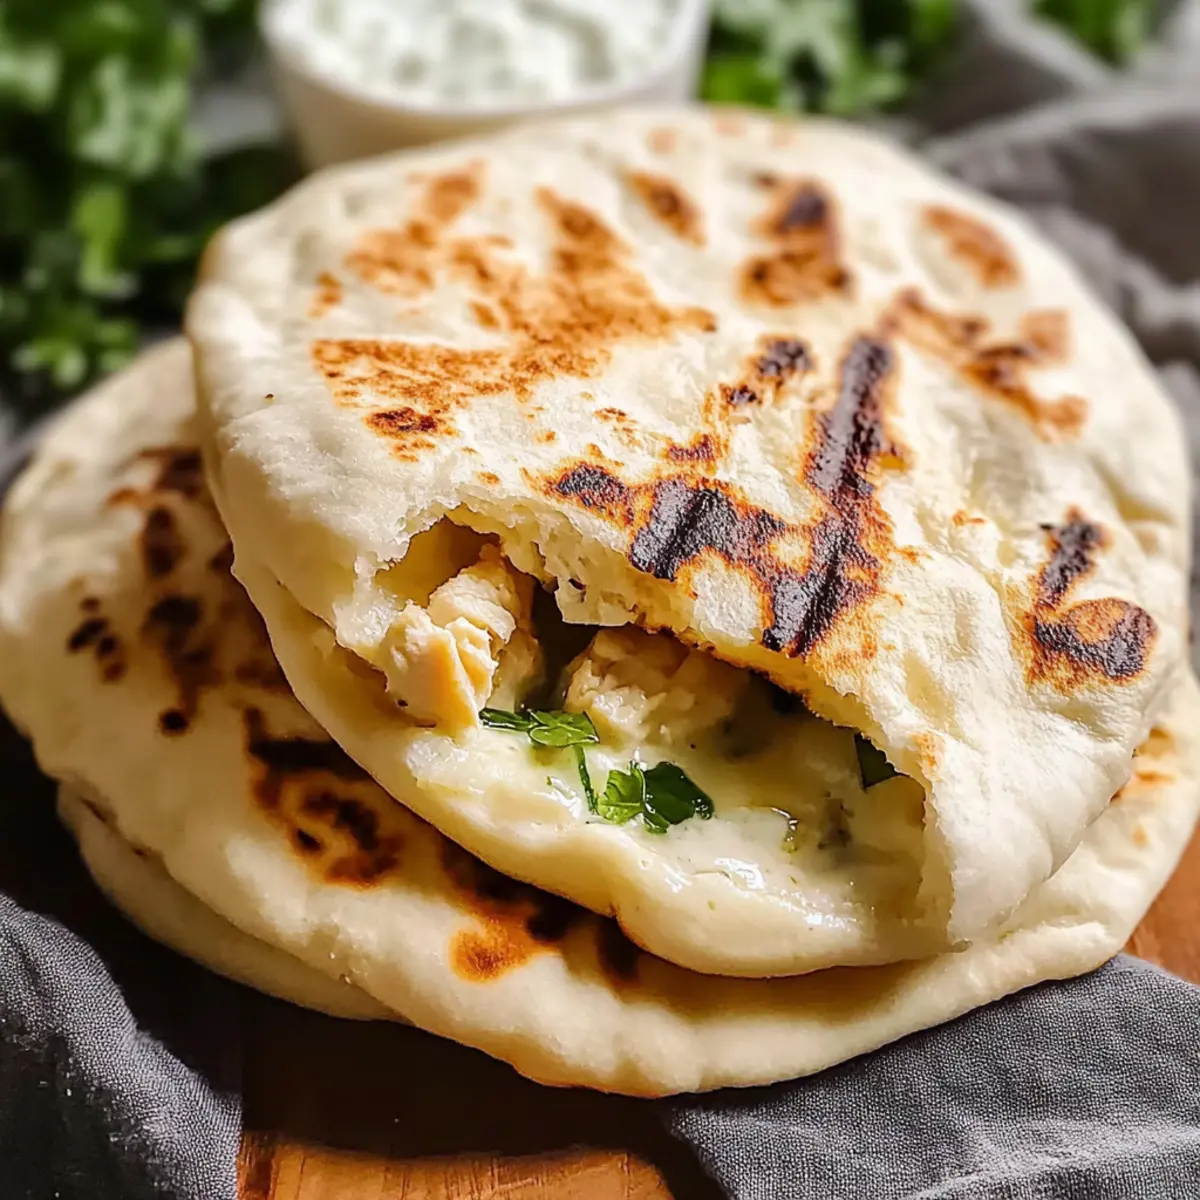
Comforting Texture: Soft, pillowy, and slightly charred, the pitas provide an irresistible bite, perfect for encasing savory fillings or sopping up delicious sauces.
Best Ever Greek Pita Ingredients
For the Dough
- All-purpose flour – Provides structure and chewiness; use gluten-free flour for the gluten-free option.
- Active dry yeast – Activates the dough, ensuring a light and airy texture.
- Kosher salt – Balances flavors and strengthens the dough’s structure.
- Warm milk – Activates the yeast when warmed; unsweetened plant-based milk works as a substitute.
- Warm water – Ensures proper dough formation by activating the yeast.
- Olive oil – Adds richness and moisture; additional oil is required for kneading and cooking.
Step‑by‑Step Instructions for Best Ever Greek Pita
Step 1: Combine Dry Ingredients
In a large mixing bowl, whisk together 2 cups of all-purpose flour, 1 packet of active dry yeast, and 1 teaspoon of kosher salt. This dry mixture forms the base for your Best Ever Greek Pita. Make sure to combine them well until evenly mixed, ensuring that the yeast is distributed throughout for optimal rising.
Step 2: Add Warm Liquids
Gradually pour in 3/4 cup of warm milk and 1/4 cup of warm water into your dry ingredients. Stir using a wooden spoon until the dough begins to come together. If the mixture seems too dry, add a bit more warm water, striving for a shaggy but cohesive dough that will form the perfect pita.
Step 3: Knead the Dough
Add 1 tablespoon of olive oil to the bowl and knead the dough right in the bowl for about 5 minutes. You want a smooth and elastic texture, so don’t hesitate to get your hands a bit messy! The dough should be soft and slightly tacky but not stick to your fingers excessively.
Step 4: Let It Rise
Transfer the kneaded dough to a lightly oiled bowl, cover it with a kitchen towel, and let it rise in a warm place for about 1 hour. You’re looking for the dough to double in size, which is essential for achieving that light, airy texture in your Best Ever Greek Pita.
Step 5: Shape the Pitas
After the rise, punch down the dough gently to release the air. On a floured surface, divide the dough into 8 equal pieces and shape each into a ball. Roll each ball out into thin circles about 7-8 inches wide, making sure to keep the surface floured to prevent sticking during this shaping process.
Step 6: Heat the Skillet
Preheat a cast iron skillet or heavy frying pan over high heat and add about 1 teaspoon of olive oil. Allow the skillet to get sufficiently hot—the oil should shimmer, indicating it’s ready for cooking your pitas, and you can hear a sizzle when the pitas touch the surface.
Step 7: Cook the Pitas
Place one rolled out pita in the preheated skillet and cook for 1 minute until it starts to puff and develop slight char marks. Flip the pita and cook for an additional minute on the other side. Repeat with the remaining pitas, adding more oil to the skillet as needed, ensuring each one is fluffy and warm.
Step 8: Optional Flavor Boost
For an extra burst of flavor, melt some butter and stir in minced garlic and herbs of your choice. Once your Best Ever Greek Pita is cooked, brush this melted mixture onto each pita to elevate their taste, making them irresistible alongside your favorite spreads or entrees.
Storage Tips for Best Ever Greek Pita
Fridge: Place your cooled Best Ever Greek Pita in an airtight container and store in the fridge for up to 1 week to maintain freshness and softness.
Freezer: For longer storage, freeze the pitas individually wrapped in plastic wrap and placed in a freezer-safe bag for up to 3 months. This keeps them fresh and ready when you need them.
Reheating: To enjoy your pitas warm, reheat from frozen in a preheated oven at 350°F (175°C) for about 10-15 minutes or in a skillet over medium heat until warmed through.
Avoiding Sogginess: Always let the pitas cool completely before storing to prevent moisture buildup that can lead to sogginess.
What to Serve with Best Ever Greek Pita?
There’s nothing quite like complementing freshly made pita with delightful accompaniments that elevate your meal experience.
-
Creamy Hummus: This smooth dip adds rich nutty flavors, perfectly complementing the soft, fluffy pita while balancing its texture. Spread it generously for a satisfying bite.
-
Tangy Tzatziki: A classic Greek dip made with yogurt and cucumber, tzatziki brings a refreshing coolness that wonderfully contrasts with warm pita, enhancing every delicious bite.
-
Grilled Chicken Souvlaki: Tender, spiced chicken skewers wrapped in pita make for a filling meal, marrying grilled flavors with the pita’s soft texture—perfect for picnics or gatherings.
-
Garden Salad: Bright, vibrant veggies tossed in a light dressing add freshness and crunch, beautifully balancing the pitas and creating a wholesome meal.
-
Roasted Red Pepper Dip: This savory dip provides a smoky sweetness that pairs wonderfully with the pita. You’ll love how each bite bursts with flavor!
-
Olive Oil & Dukkah: A drizzle of quality olive oil with a sprinkle of dukkah brings earthiness and richness, transforming your pita into a no-fuss, gourmet delight that’s utterly irresistible!
-
Feta and Olive Platter: Serve with an assortment of olives and crumbled feta for a Mediterranean-inspired appetizer that enhances the pita experience while offering a variety of flavors and textures.
-
Chilled White Wine: A crisp white wine, such as Sauvignon Blanc, makes for a refreshing sip that complements the flavors of the pita and its accompanying dips elegantly.
Indulge in these pairings, and watch your Best Ever Greek Pita become the star of your next meal!
Expert Tips for Best Ever Greek Pita
-
Warm Liquids: Ensure that your liquids are warm (not hot) to properly activate the yeast; too hot can kill it.
-
Dough Consistency: If your dough feels too dry, a splash more warm water will help achieve the perfect silky texture for your Best Ever Greek Pita.
-
Resting Time: Let the dough rise in a slightly warm area—this will help it double in size, crucial for that fluffy, airy pita.
-
Cooking Temperature: Preheat your skillet well; a hot skillet is essential for achieving those characteristic bubbles and charred spots in your pitas.
-
Cooling Tips: Remember to let your pitas cool completely before storing; this prevents them from becoming soggy in storage.
-
Flavor Variations: Consider adding herbs or spices directly into the dough for a unique twist on your Best Ever Greek Pita!
Make Ahead Options
These Best Ever Greek Pita are ideal for meal prep, saving you valuable time on busy weeknights! You can prepare the dough up to 24 hours in advance by kneading it, allowing it to rise, and then refrigerating it while covered with plastic wrap. When you’re ready to enjoy, simply remove the dough from the fridge, let it rest for 30 minutes at room temperature, and then divide and roll it out before cooking. Alternatively, you can fully cook the pitas and store them in an airtight container in the fridge for up to 3 days or freeze them for up to 3 months. Just reheat on a skillet or in the oven before serving to ensure they maintain their soft, pillowy texture. Enjoy homemade pitas with minimal effort and maximum flavor!
Best Ever Greek Pita Variations
Feel free to explore these creative twists and substitutions to make your Best Ever Greek Pita even more enticing and tailored to your palate!
-
Gluten-Free: Substitute regular flour with your favorite gluten-free all-purpose flour blend for easy adaptations that cater to dietary needs.
Embrace the fluffiness without sacrificing flavor! Just ensure the blend includes xanthan gum if needed. -
Herbed Dough: Incorporate finely chopped fresh herbs like oregano or rosemary into the dough to elevate the flavor profile.
The aroma and taste will transport you straight to a sun-kissed Greek garden! -
Oil Swap: Change olive oil for melted butter or another oil to explore different flavor profiles.
Butter adds richness, while coconut oil brings a subtle tropical hint. -
Spiced Pitas: Add a teaspoon of cumin or smoked paprika into the dry ingredients for an exciting flavor boost.
These spices create a warm, aromatic character in your pitas that’s hard to resist. -
Sweet Twist: Brush with honey and sprinkle a pinch of cinnamon after cooking for a sweet dessert option.
This unexpected combo makes lovely, fluffy pitas that serve beautifully with yogurt or fresh fruit. -
Stuffed Pitas: Roll out the pitas slightly thicker and stuff them with cheese or your favorite ingredients before cooking for a hearty meal.
Imagine melting cheese oozing from the soft, warm pita—perfect for lunch! -
Dipping Delight: Grill or toast the pitas slightly before serving to crisp them up, perfect for dipping into homemade Tomato Soup or hearty stews.
The delightful crunch adds a new layer to your dining experience! -
Savory Touch: Top with a sprinkle of za’atar or sesame seeds before cooking for a nutty flavor and a bit of crunch.
This subtle change can turn your pitas into an irresistible snack all on their own!
Best Ever Greek Pita Recipe FAQs
What type of flour should I use for the Best Ever Greek Pita?
You can use all-purpose flour for traditional pitas, as it provides the best structure and chewiness. For a gluten-free option, substitute the all-purpose flour with a good quality gluten-free flour blend. Be sure to check that it contains xanthan gum for the best results.
How long can I store my Best Ever Greek Pita in the fridge?
Your homemade pitas can be stored in an airtight container in the refrigerator for up to 1 week. Make sure they are completely cooled before sealing to maintain their soft texture. If you notice any condensation inside the container, consider using paper towels to absorb excess moisture.
Can I freeze the Best Ever Greek Pita?
Absolutely! To freeze, wrap each cooled pita in plastic wrap and place them inside a freezer-safe bag. They can be stored for up to 3 months. When you’re ready to enjoy them, simply reheat straight from the freezer in a preheated oven at 350°F (175°C) for about 10-15 minutes until warmed through.
What should I do if my dough isn’t rising?
If your dough isn’t rising, it may be due to the yeast being inactive. Make sure your warm liquids aren’t too hot, as temperatures above 130°F (54°C) can kill the yeast. You might want to also check the expiration date on your yeast. If everything seems fine and you’re still not seeing action, try letting the dough rise in a warm, draft-free area. Using an oven with the light on or placing it near a warm (not hot) stove are great tricks!
Can I make the Best Ever Greek Pita ahead of time?
Yes! You can prepare the dough a day in advance. After kneading, cover it tightly and refrigerate it. When you’re ready to use it, simply bring it back to room temperature before shaping and cooking. This method can add an even deeper flavor to your pitas!
Is this recipe suitable for people with nut allergies?
Yes! The Best Ever Greek Pita recipe doesn’t contain any nuts, making it a safe choice for those with nut allergies. If you choose to use plant-based milk, ensure it’s made from nuts-free sources like oat or soy milk. As always, check for cross-contamination if allergies are a concern.
Best Ever Greek Pita: Soft, Pillowy Perfection at Home
Ingredients
Equipment
Method
- In a large mixing bowl, whisk together 2 cups of all-purpose flour, 1 packet of active dry yeast, and 1 teaspoon of kosher salt.
- Gradually pour in 3/4 cup of warm milk and 1/4 cup of warm water into your dry ingredients. Stir until the dough begins to come together.
- Add 1 tablespoon of olive oil to the bowl and knead the dough in the bowl for about 5 minutes.
- Transfer the kneaded dough to a lightly oiled bowl, cover it with a kitchen towel, and let it rise in a warm place for about 1 hour.
- After the rise, punch down the dough gently to release the air. On a floured surface, divide the dough into 8 equal pieces and shape each into a ball.
- Preheat a cast iron skillet or heavy frying pan over high heat and add about 1 teaspoon of olive oil.
- Place one rolled out pita in the preheated skillet and cook for 1 minute until it starts to puff. Flip and cook for an additional minute.
- For an extra burst of flavor, brush melted butter mixed with minced garlic and herbs onto each cooked pita.
Leave a Reply