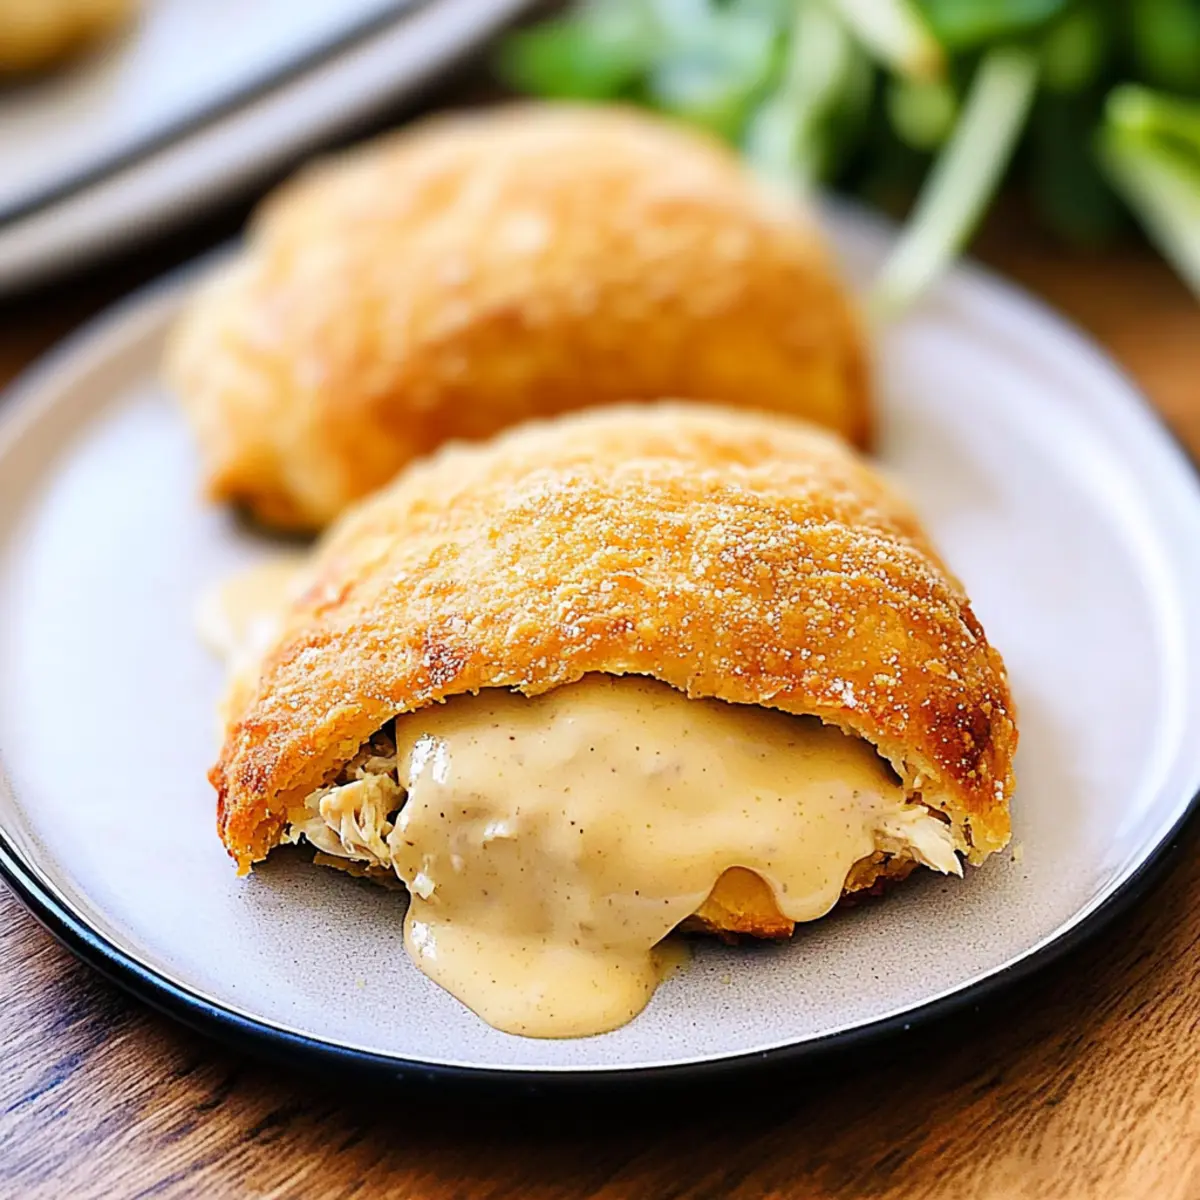
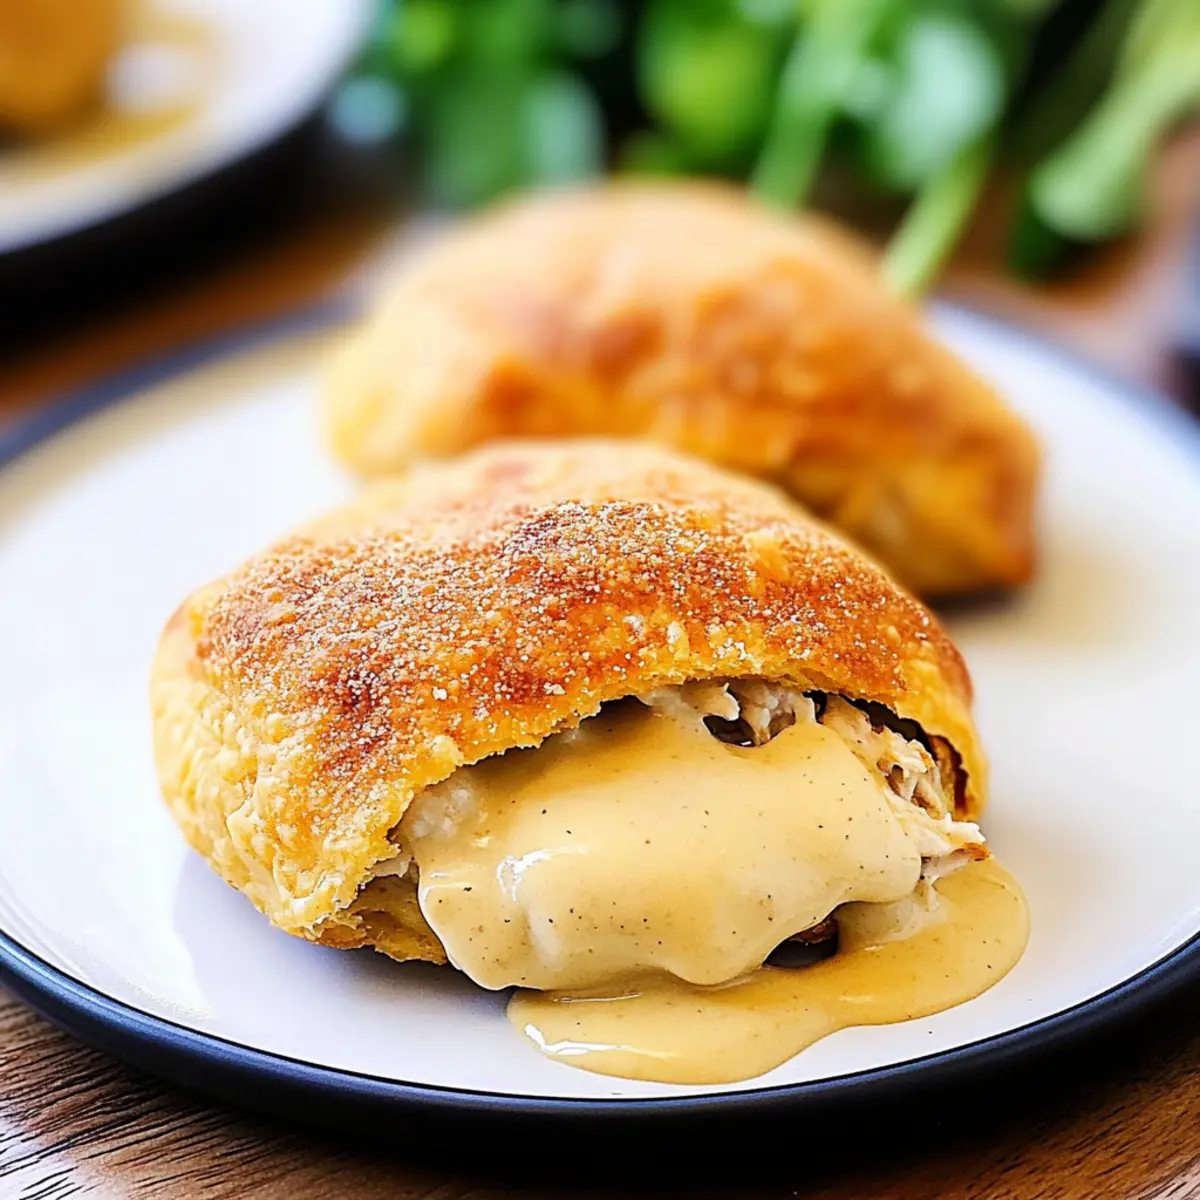
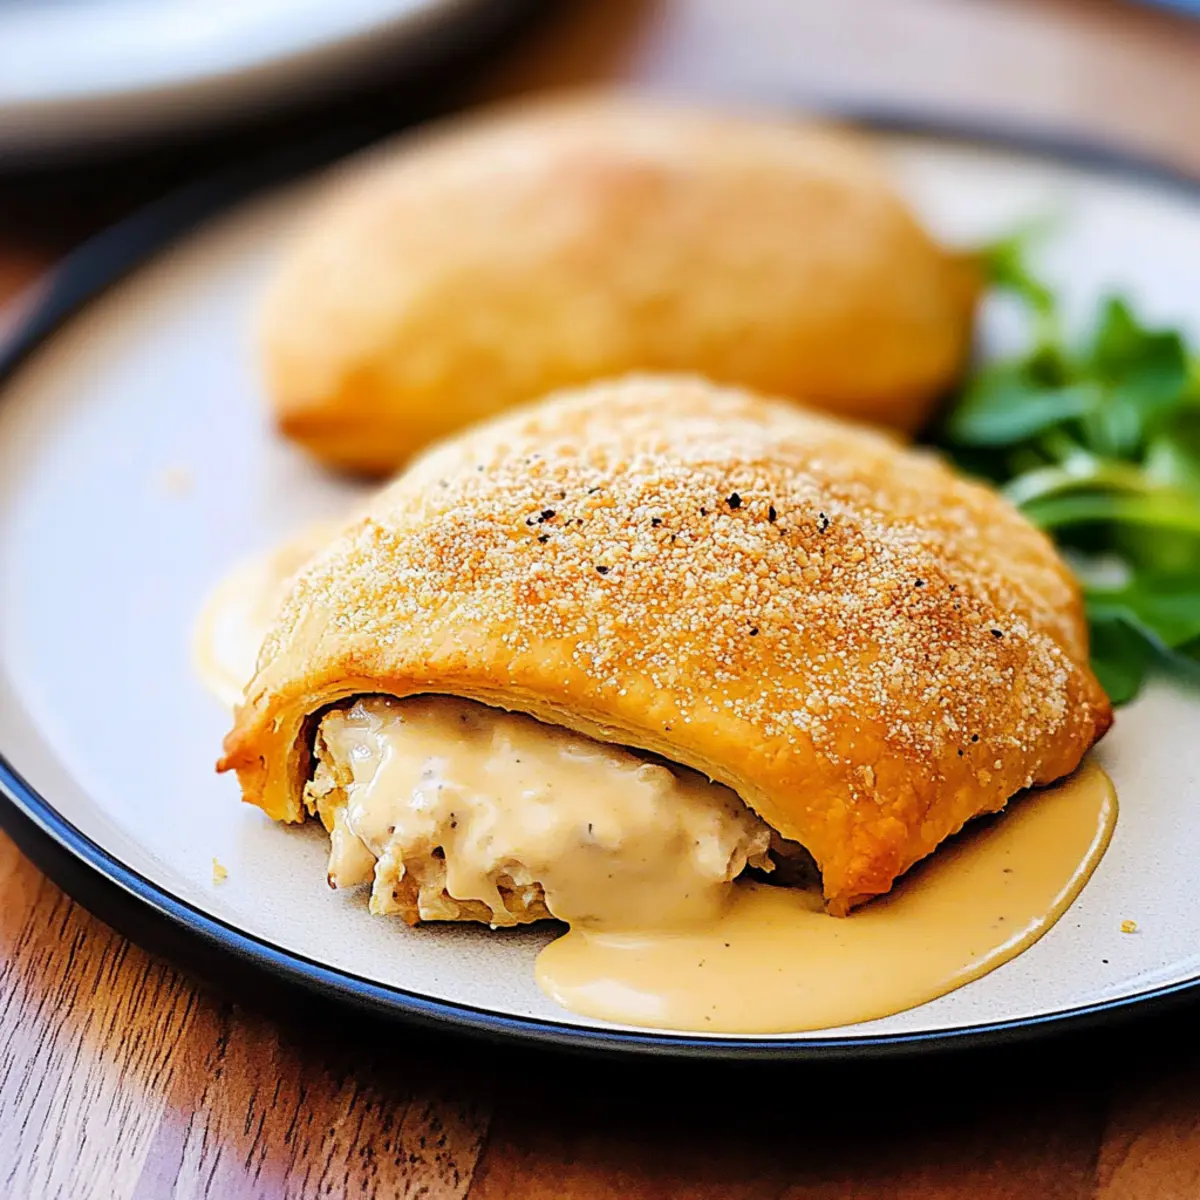
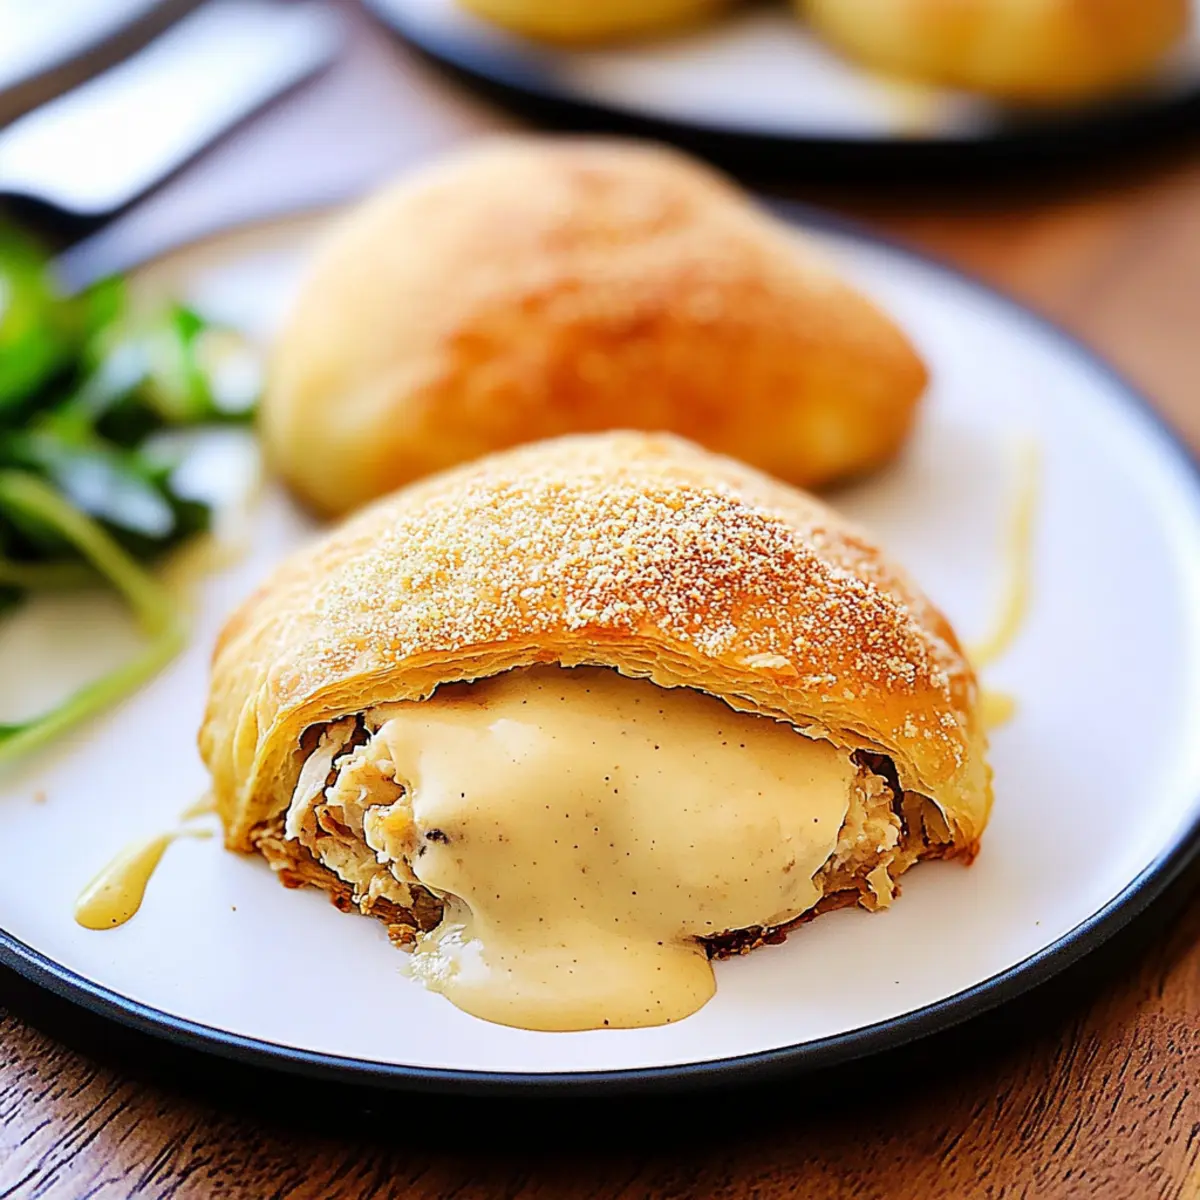
As I pulled a steaming tray from the oven, the enticing aroma of golden-brown, flaky pastry wrapped around a creamy chicken filling danced through the air and beckoned me closer. These Chicken Pillows have quickly become a cherished staple in my home; their combination of ease and comfort is simply unbeatable. This easy recipe is perfect for busy weeknights or cozy Sunday dinners, offering a delightful main course that brings everyone around the table. With a crispy exterior and a savory filling, it’s a dish that pleases both kids and adults alike—no one can resist the allure of this warm, creamy goodness! Are you ready to create your next favorite comfort food? Let’s dive into the recipe!
Why are Chicken Pillows so irresistible?
Flaky Perfection: The crescent dough forms a delightfully crisp shell, giving each bite a satisfying crunch.
Creamy Comfort: Inside, you’ll find a rich and savory filling that’s simply divine, satisfying even the pickiest eaters.
Time-Saving: Quick to prepare, this dish is perfect for busy weeknights when you need something delicious without the hassle.
Versatile Ingredient Use: Feel free to customize the filling—throw in some fresh spinach or even substitute the gravy with flavors from your favorite Marry Chicken Pasta for a twist!
Crowd-Pleaser: Ideal for family dinners or social events, these Chicken Pillows will have everyone asking for seconds!
Chicken Pillows Ingredients
Get ready to savor the joy of homemade comfort food with these Chicken Pillows!
For the Filling
- Cooked, shredded chicken breast – Provides the protein base for the filling. (Substitute rotisserie chicken for convenience.)
- Cream cheese – Adds creaminess and richness to the filling. (Substitute ricotta for a lighter version.)
- Salted butter – Used to enhance flavor in both the filling and breadcrumb coating. (Unsalted butter can be used if monitoring sodium.)
- Dried chives – Imparts a mild onion flavor. (Fresh chives can be substituted, using about three times the amount.)
- Dried minced onion – Contributes depth of flavor to the filling. (Fresh onions can be used but adjust for moisture.)
- Salt and pepper – Essential for seasoning. (Adjust to taste.)
For the Dough
- Refrigerated crescent roll dough – Forms the outer layer, creating a flaky texture. (Avoid using pizza dough; the texture and flavor differ.)
- Italian breadcrumbs – Provides a crunchy coating for the pillows. (Panko breadcrumbs can be used for extra crunch.)
For the Gravy
- Cream of chicken soup – Forms the base for the gravy. (Can use cream of mushroom soup as a substitute.)
- Chicken gravy mix – Enhances the flavor of the homemade gravy. (Homemade gravy can replace the mix for a fresher taste.)
- Water – To thin the gravy to desired consistency.
Now that you’ve got everything you need, let’s whip up some Chicken Pillows that will win hearts and fill stomachs!
Step‑by‑Step Instructions for Chicken Pillows
Step 1: Preheat and Prepare
Preheat your oven to 350 degrees F (175 degrees C) while you prepare a baking sheet. Lightly grease the baking sheet to prevent sticking, ensuring that your Chicken Pillows will come out easily once baked. This simple step sets the stage for the preparation that’s about to unfold, so you’re ready to get cooking!
Step 2: Make the Creamy Filling
In a mixing bowl, combine the softened cream cheese and butter until fully blended, creating a smooth base for the filling. Mix in the shredded chicken, dried chives, minced onion, salt, and pepper. Stir well to ensure all ingredients are evenly incorporated, yielding a rich and creamy mixture that will perfectly envelop your crescent dough.
Step 3: Roll out the Dough
Unroll the refrigerated crescent roll dough on a clean surface, carefully separating it into triangles. To form four rectangles, press two triangles together along the perforated edges, sealing them tightly. Keep the dough on a floured surface to avoid sticking, ensuring it’s now ready to cradle your delightful chicken filling.
Step 4: Fill the Dough
Spoon a generous portion of the creamy chicken filling into the center of each prepared rectangle. Carefully fold the corners over the filling, creating a tidy package, and pinch all edges securely to enclose the filling completely. Shape each filled dough into a ball for a consistent look, ensuring that every bite contains that delicious creamy center.
Step 5: Dip and Coat
Melt some butter in a small bowl, then dip each filled dough ball into the melted butter, ensuring they are fully coated. After that, roll them in Italian breadcrumbs to achieve a crunchy outer layer. This step not only adds flavor but also creates a beautiful, golden-brown crust when baked, enhancing the overall enjoyment of your Chicken Pillows.
Step 6: Bake to Perfection
Place the coated Chicken Pillows on the greased baking sheet, spacing them about an inch apart to allow for even baking. Slide the baking sheet into your preheated oven and bake for 22 to 25 minutes, or until the pillows are puffed and golden brown. Keep an eye on them as they bake, enjoying the enticing aroma filling your kitchen.
Step 7: Prepare the Gravy
While the Chicken Pillows are baking, prepare the gravy by combining cream of chicken soup, chicken gravy mix, and water in a small saucepan. Stir the mixture over medium heat, allowing it to come to a gentle simmer. This rich and creamy gravy will elevate your Chicken Pillows, ensuring each bite is satisfying and scrumptious.
Step 8: Serve and Enjoy
Once the Chicken Pillows are golden and bubbly, remove them from the oven and let them cool for a minute before serving. Top each warm Chicken Pillow with a generous ladle of the homemade gravy, and don’t be shy about offering extra on the side. This delightful dish is best enjoyed hot, bringing warmth and comfort to your family dinner!
Expert Tips for Chicken Pillows
-
Seal Well: Ensure that the crescent dough rectangles are tightly sealed to prevent the creamy filling from leaking during baking, keeping every bite delicious.
-
Avoid Greasiness: Use melted butter and breadcrumbs sparingly to ensure the Chicken Pillows remain light and not overly greasy, enhancing the flavor instead of masking it.
-
Customize Filling: Feel free to experiment with your chicken filling by adding veggies like spinach or swapping in different types of gravy; just keep the chicken filling balanced.
-
Perfect Baking Time: Monitor the Chicken Pillows as they bake, aiming for a golden brown color; under-baking can lead to a doughy texture, while over-baking might dry out the filling.
-
Rest Before Serving: Let the Chicken Pillows rest for a minute after baking; this allows the filling to set slightly, making them easier to serve and enjoy.
Make Ahead Options
These Chicken Pillows are perfect for meal prep enthusiasts! You can prepare the creamy chicken filling up to 3 days in advance by mixing together the cooked shredded chicken, cream cheese, butter, chives, minced onion, salt, and pepper. Simply refrigerate the mixture in an airtight container. The crescent dough can be prepped up to 24 hours before baking; just form the dough balls, coat them in butter and breadcrumbs, and place them on a baking sheet covered with plastic wrap in the fridge. When ready to enjoy, bake directly from the fridge; it may take a few extra minutes to reach that golden perfection, but you’ll have a warm, comforting dish that’s just as delicious with minimal effort!
What to Serve with Chicken Pillows
Delightful Chicken Pillows create the perfect cozy meal, and pairing them with just the right sides elevates your dining experience to new heights.
-
Creamy Mashed Potatoes: This classic comfort food adds a velvety texture to your plate, soaking up excess gravy and enhancing every bite. There’s something special about the combination of fluffy potatoes and the rich chicken filling.
-
Steamed Green Beans: These crisp greens add a fresh, vibrant element to your meal, balancing the richness of the Chicken Pillows. Toss with a little olive oil, salt, and lemon for a bright finish.
-
Fresh Garden Salad: A light mix of greens, tomatoes, and cucumbers brings a refreshing crunch, complementing the savory flavors. Drizzle with a balsamic vinaigrette to add a tangy brightness to the dish.
-
Roasted Carrots: Sweet, caramelized roasted carrots offer a pop of color and natural sweetness, which contrasts beautifully with the savory pillows. Their warm, earthy flavor will delight your taste buds.
-
Homemade Bread Rolls: Fluffy bread rolls or buttered dinner rolls are perfect for mopping up gravy, adding a comforting touch to your meal. Everyone will appreciate this warm and inviting addition.
-
Apple Crisp: Treat your family to a warm dessert by finishing off the meal with warm apple crisp. Its sweet and slightly tart profile creates a comforting end, wrapping up your chicken-filled feast in style.
Chicken Pillows Variations & Substitutions
Feel free to get creative with your Chicken Pillows and truly make them your own with these delicious twists.
-
Creamy Spinach: Add a handful of fresh spinach to the filling for a pop of color and added nutrients. It complements the creaminess beautifully!
-
Broccoli Delight: Mix in cooked, chopped broccoli for a satisfying crunch and an extra layer of flavor. It’s a comforting addition that makes these pillows even heartier.
-
Cheesy Twist: For extra richness, fold in shredded cheddar or mozzarella cheese into the filling. The melty surprise will have everyone raving about your dish!
-
Dairy-Free: Substitute cream cheese with a dairy-free alternative and use vegan butter to make this dish suitable for dairy-free diets. The taste will still be delicious!
-
Spicy Kick: Mix a teaspoon of hot sauce or cayenne pepper into the creamy filling for those who love a bit of heat. Just the right amount can transform the flavors!
-
Mushroom Gravy: Swap out chicken gravy mix for homemade mushroom gravy to enhance the flavor profile. It adds an earthy depth that pairs wonderfully.
-
Herb Infusion: Incorporate fresh herbs like parsley or thyme into the filling for a fragrant twist. The freshness brightens the overall flavor profile!
-
Buffalo Style: Change it up by using shredded buffalo chicken or adding ranch seasoning to your filling. This adds a fun, zesty flavor reminiscent of classic buffalo wings.
These variations invite you to personalize your Chicken Pillows experience. For a twist on flavors, consider serving them with creamy Greek Tzatziki Chicken or elevate your dinner with Honey BBQ Chicken. Enjoy the journey of cooking, and savor every bite!
How to Store and Freeze Chicken Pillows
Fridge: Store leftover Chicken Pillows in an airtight container in the refrigerator for up to 3 days. Reheat in the oven for about 10-15 minutes at 350°F for the best texture.
Freezer: Freeze unbaked Chicken Pillows in a single layer on a baking sheet until solid, then transfer to a zip-top freezer bag for up to 3 months. Bake directly from frozen, adding a few extra minutes to the baking time.
Reheating: For best results, reheat baked Chicken Pillows in the oven rather than the microwave to maintain their flaky crust. Heat at 350°F for about 15-20 minutes until warmed through.
Wrapping: If storing in the fridge or freezer, ensure each Chicken Pillow is sealed tightly to prevent freezer burn and preserve that creamy filling.
Chicken Pillows Recipe FAQs
What type of chicken should I use?
Absolutely! You can use cooked, shredded chicken breast for the filling. For convenience, I often opt for a rotisserie chicken that saves time while still packing in flavor!
How do I store Chicken Pillows?
Refrigerate any leftovers in an airtight container for up to 3 days. To reheat, simply pop them back in the oven at 350°F for 10-15 minutes to regain that crispy texture—trust me, it makes a world of difference!
Can I freeze Chicken Pillows?
Yes! To freeze unbaked Chicken Pillows, arrange them in a single layer on a baking sheet until solid. Once frozen, transfer them to a zip-top freezer bag for up to 3 months. When you’re ready to bake, simply place them in the oven (no need to thaw!) and add about 5 extra minutes to the baking time.
How can I prevent the filling from leaking?
Ensure the edges of the crescent dough rectangles are well-sealed by pinching them securely after folding over the filling. Keeping an eye on them while they bake will also help—if you notice any openings, gently press them closed with a fork as they puff up.
Are there dietary considerations for pets?
It’s best to avoid sharing Chicken Pillows with pets, particularly due to the cream cheese and possible seasoning, which may not be suitable for their digestion. Stick to pet-safe treats to keep your furry friends happy!
Can I use a different type of gravy?
Very much! While cream of chicken soup and chicken gravy mix are classic, you can always swap them for cream of mushroom soup or a homemade gravy for a fresh taste that matches your preferences—experiment and find your favorite twist!
Delicious Chicken Pillows: Your New Comfort Food Obsession
Ingredients
Equipment
Method
- Preheat your oven to 350 degrees F (175 degrees C) and lightly grease a baking sheet.
- In a mixing bowl, combine softened cream cheese and butter, then mix in shredded chicken, chives, onion, salt, and pepper.
- Unroll the crescent roll dough and press two triangles together to form rectangles.
- Spoon a generous portion of the creamy chicken filling into each rectangle and seal the edges.
- Dip each filled dough ball in melted butter, then roll in Italian breadcrumbs.
- Place the coated Chicken Pillows on the baking sheet and bake for 22 to 25 minutes until golden brown.
- Prepare the gravy by combining cream of chicken soup, chicken gravy mix, and water in a saucepan over medium heat.
- Serve the baked Chicken Pillows hot, topped with gravy.
Leave a Reply