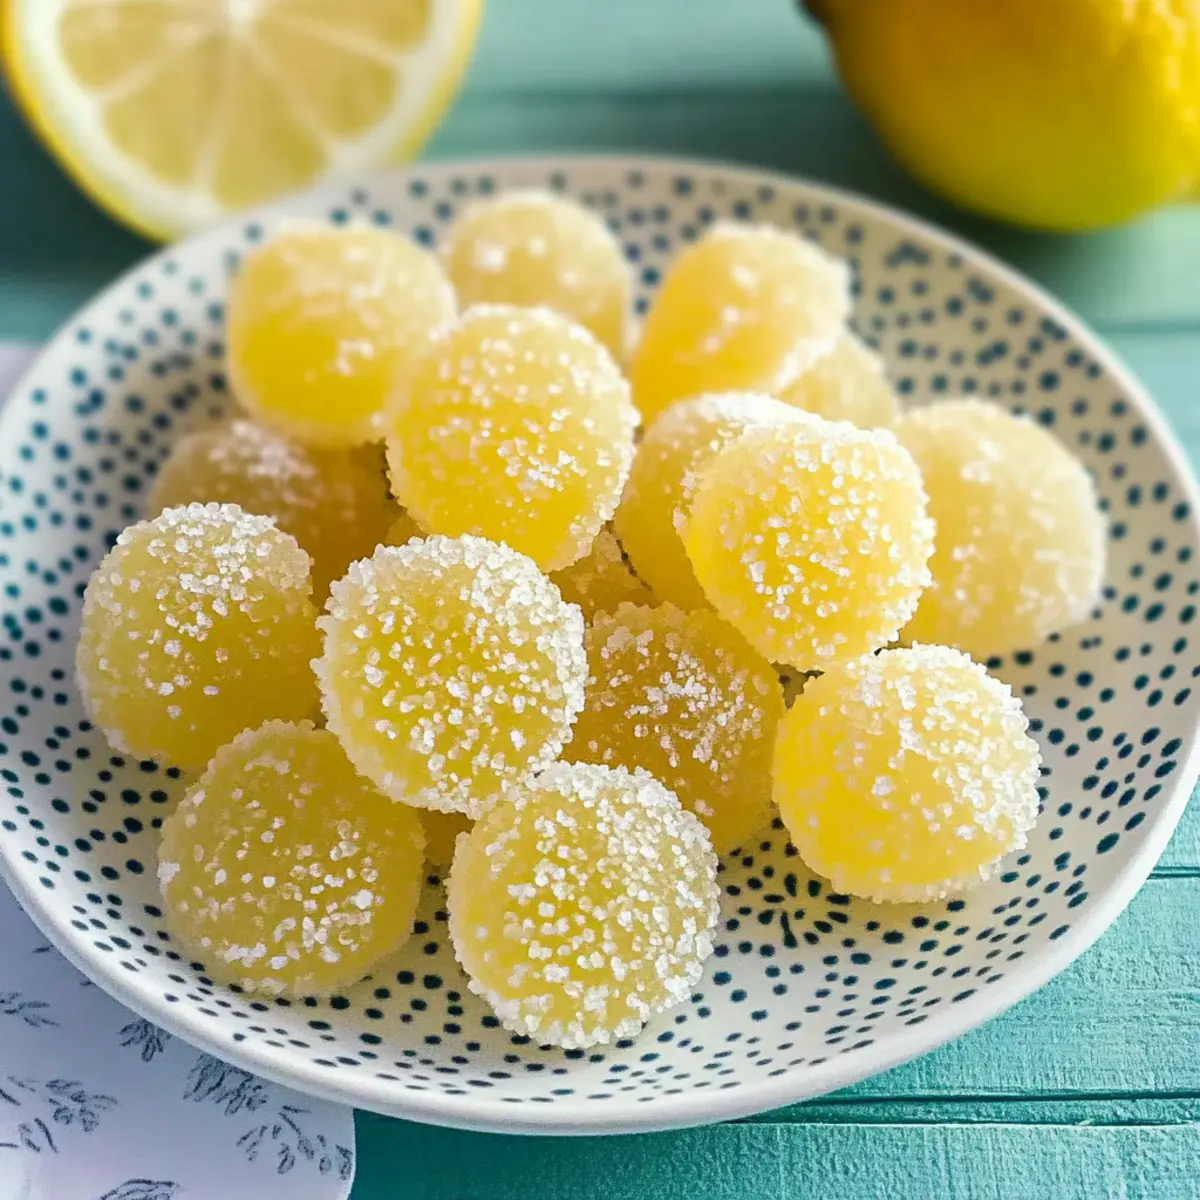
As I unwrapped my favorite childhood candy, I couldn’t help but smile at the bright lemon hue beckoning me. That moment sparked a journey back to the kitchen where I decided to create my own Homemade Lemon Drops, a zesty candy delight that captures the essence of sunny days and sweet memories. These delightful treats strike the perfect balance between tangy lemon notes and sugary crunch, making them a quick and rewarding project that even novice bakers can tackle. Not only are they an impressive addition to any gathering or celebration, but they also offer a refreshing alternative to store-bought sweets. Get ready to bring a taste of nostalgia to life—who’s ready to savor the joy of making these homemade lemon drops?
Why Are Homemade Lemon Drops So Irresistible?
Zesty Flavor Explosion: The bright and tangy lemon flavor dances on your tongue, delivering a delightful citrus kick that leaves you craving more.
Easy to Make: Even if you’re a kitchen novice, this simple recipe requires minimal ingredients and straightforward steps, making it an accessible project for everyone.
Perfect for Sharing: These lemon drops shine in social settings—whether it’s a party or a family gathering, they’re sure to impress and bring smiles.
Customizable Treat: Feeling adventurous? Mix things up by trying different citrus fruits or adjusting sweetness levels to create your unique twist!
Nostalgic Experience: Enjoying these candies is not just about flavor; it’s a journey back to childhood memories, evoking warmth and nostalgia in every bite.
Want to complement these with some homemade goodies? Check out my delicious recipe for Gluten Free Lemon Muffins to enhance your dessert table!
Homemade Lemon Drops Ingredients
For the Candy Mixture
- Lemon Juice – Adds bright, tangy flavor; fresh lemons provide the best taste for homemade lemon drops.
- Granulated Sugar – Sweetens the mixture; ensure sufficient quantity to prevent stickiness in your candy.
- Water – Necessary for dissolving the sugar; use it to create a syrup with the sugars and lemon juice.
- Corn Syrup – Prevents crystallization; vital for achieving a smooth texture in your lemon drops.
- Salt – Enhances flavor; just a pinch will help balance the sweetness.
- Citric Acid (optional) – Enhances tartness; use to intensify the lemon flavor if you desire a more zesty kick.
For Coating
- Powdered Sugar – Used for dusting to prevent sticking; dust lemon drops after setting for better handling.
Step‑by‑Step Instructions for Homemade Lemon Drops
Step 1: Gather Ingredients
Start by assembling all necessary ingredients for your homemade lemon drops: 1 cup of fresh lemon juice, 2 cups of granulated sugar, 1/4 cup of water, and a pinch of salt. Make sure your lemons are ripe for maximum flavor. Having everything on hand will streamline your cooking process and keep the momentum going as you create your zesty candy.
Step 2: Prepare Lemon Juice
Squeeze fresh lemons until you have 1 cup of lemon juice, straining it through a fine mesh sieve to remove any seeds and pulp. This step is crucial as it ensures a smooth texture in your final product. The bright aroma of freshly squeezed lemon will invigorate your kitchen and set the tone for making these delightful homemade lemon drops.
Step 3: Combine Ingredients
In a medium saucepan, combine the prepared lemon juice, granulated sugar, water, and a pinch of salt. Stir the mixture well to ensure that the sugar dissolves completely. Turn on the heat to medium and allow the sweet and tangy components to mingle while keeping an eye on it for a moment of bubbly magic to begin.
Step 4: Heat the Mixture
Bring the mixture to a gentle boil, stirring frequently to prevent any sugar from burning. You’ll want to see a cheerful simmer, with small bubbles forming along the edges of the pan. This process typically takes about 5 minutes. The goal here is to dissolve the sugar and create the syrup base for your homemade lemon drops.
Step 5: Simmer for Thickness
Reduce the heat to low and let the mixture simmer gently for 10-15 minutes. You’ll notice the syrup thickening as it cooks down. Stir occasionally, watching for a glossy texture that coats the back of a spoon. This is when the vibrant flavors deepen, creating the essence of your homemade lemon drops.
Step 6: Cool the Mixture
Remove the saucepan from the heat and let the mixture cool slightly, allowing it to become warm but not hot to the touch. This will help avoid any burns when you pour it into molds later. Take a moment to savor the zesty aroma filling your kitchen; it’s a delightful prelude to the treat you’re about to create.
Step 7: Pour into Molds
Carefully transfer the cooled mixture into your candy molds or a lined baking dish. If you’re using a baking dish, ensure it is spread evenly to promote uniform cooling. This step is key to achieving that classic lemon drop shape, which brings a nostalgic feel to your homemade candy.
Step 8: Set the Mixture
Allow the candy to sit at room temperature for several hours until it fully sets. This time can vary depending on humidity and temperature, but you’re looking for a firm, jelly-like texture that can hold its shape. During this waiting period, you can start dreaming about how delightful these homemade lemon drops will taste!
Step 9: Cut and Coat
If you used a baking dish, once the candy has set, remove it from the dish and cut it into squares or desired shapes. Roll each piece in powdered sugar to prevent sticking and enhance sweetness. This final touch will give your homemade lemon drops a lovely finish and a soft, inviting feel as they are handled.
Step 10: Savor the Goodness
Your homemade lemon drops are now ready to be enjoyed! Share them with friends and family, or keep them as a sweet treat for yourself. Each bite is a delightful burst of tangy flavor and sweetness, making them the perfect nostalgic candy to brighten anyone’s day.
How to Store and Freeze Homemade Lemon Drops
Room Temperature: Store your homemade lemon drops in an airtight container at room temperature, where they will remain fresh for up to 2 weeks. Keep them away from sunlight and humidity.
Fridge: If you prefer a firmer texture, you can store them in the fridge, where they can last for up to 3 weeks. Just make sure they’re well-packaged to prevent moisture.
Freezer: For longer storage, freeze your lemon drops in an airtight container. They can last for up to 3 months. Thaw in the refrigerator before enjoying them again.
Reheating: Homemade lemon drops are best enjoyed chilled or at room temperature. There’s no need to reheat; simply let them sit out for a few minutes before indulging!
Expert Tips for Homemade Lemon Drops
-
Use Fresh Juice: Fresh lemon juice is key to achieving vibrant flavor. Bottled juice may not have the same zesty punch, so squeeze your own for the best results.
-
Avoid Stickiness: Ensure your sugar is adequately dissolved and cool your lemon drops completely before storing. Dusting with powdered sugar helps keep them separate and easy to handle.
-
Check Consistency: Simmer until the mixture coats the back of a spoon. If it’s too watery, your homemade lemon drops may not set properly, so monitor closely as it thickens.
-
Storage Matters: Store in an airtight container at room temperature, avoiding humidity, to maintain texture and flavor. This helps your homemade lemon drops stay fresh longer.
-
Experiment with Flavors: Don’t hesitate to modify the recipe! Adding a bit of citric acid or trying different citrus fruits can elevate your homemade lemon drops to new levels.
Homemade Lemon Drops Variations & Substitutions
Feel free to mix and match these ideas and create your own take on the classic flavors of homemade lemon drops!
-
Citrus Twist: Substitute lemon juice with lime or orange juice for a refreshing twist. Each citrus brings its unique zing to your candy.
-
Herb-Infused: Add a few fresh mint or basil leaves while simmering for a delightful herbal note. The combined flavors will transport you to a sunny garden!
-
Sweet & Sour: Adjust the sweetness by reducing sugar or adding extra citric acid for a punch. It’s all about balancing that tangy-sweet profile to your taste!
-
Spiced Delight: Incorporate a pinch of ground ginger or cayenne pepper to introduce some heat. This unexpected twist will surprise and tantalize your taste buds!
-
Berry Burst: Blend in a puree of raspberries or strawberries for a fruity flavor infusion. The colorful addition elevates both taste and presentation beautifully.
-
Chocolate Drizzle: After setting, drizzle melted dark or white chocolate over the top for a decadent finish. It adds a lovely layer of richness to your lemony delights.
-
Sugary Coating: Instead of powdered sugar, roll your lemon drops in coconut flakes or crushed nuts for a fun textured outer layer. This adds a delightful crunch!
-
Gift-Worthy Presentation: Package your lemon drops in a clear bag tied with a ribbon for charming homemade gifts. Share the joy of these zesty delights with friends and family!
And if you’re looking for more delicious homemade treats to complement your lemon drops, check out my delightful recipe for Homemade Cinnamon Twists—it’s the perfect pairing for a tempting dessert spread!
What to Serve with Homemade Lemon Drops
Enhance your candy experience by pairing these vibrant treats with delectable sides and drinks that complement their zesty flavor.
-
Creamy Vanilla Ice Cream: The rich creaminess balances the tartness of the lemon drops, creating a delightful contrast that melts in your mouth. Imagine a warm afternoon, where a scoop of ice cream provides a refreshing chill alongside the tangy taste of your candy.
-
Sweet Citrus Salad: A mix of oranges, grapefruits, and mint creates a refreshing salad that mirrors the lemony sweetness of the drops while adding a burst of freshness. This vibrant dish offers a crunchy texture and lightness that is perfect for a summer gathering.
-
Sparkling Lemonade: Cool and refreshing, a glass of sparkling lemonade echoes the lemony notes in your candy, providing a fizzy counterpart that is utterly satisfying. This bubbly drink will leave everyone feeling refreshed, perfect for warm days spent laughing with friends.
-
Lemon Tart: Serve a smooth, creamy lemon tart for a sophisticated dessert option that enhances the citrus theme. The buttery crust and sweet-tart filling harmonize beautifully with the tangy lemon drops, creating an evocative sunshine-infused experience.
-
Chocolate Dipped Strawberries: The sweetness of chocolate will delightfully contrast with the zesty candy, offering a playful combination that sends taste buds on an adventure. This pairing gives a luxurious feel to your dessert table while maintaining an air of lightness.
-
Herbal Iced Tea: A fragrant herbal iced tea, such as chamomile with a splash of lemon, will balance the sweetness and brighten your palate. The soothing flavors of the tea will complement the zesty candy while making it a delightful treat for relaxation.
-
Berry Compote: A rich berry compote drizzled over your lemon drops will bring a hint of sweetness and a pop of color, creating a visually stunning presentation. The acidity from the berries enhances the lemon, making for an exciting flavor experience.
-
Almond Cookies: Light, buttery almond cookies provide a delightful textural contrast to the chewy lemon drops, offering a nutty flavor that complements their brightness. These are perfect for snacking while enjoying the citrus sweets!
-
Mojito Mocktail: Refreshing mint combined with lime and soda creates a non-alcoholic drink that perfectly complements the tangy notes of your homemade lemon drops. Each sip refreshes and reinvigorates, bringing a tropical vibe to your gathering.
Make Ahead Options
These Homemade Lemon Drops are perfect for busy cooks looking to save time while still enjoying a delightful treat! You can prepare the candy mixture up to 24 hours in advance by following the first six steps of the recipe and then refrigerating the cooled mixture in an airtight container. When you’re ready to finish the candy, simply pour it into molds and let it set at room temperature as directed. To maintain the quality, ensure the mixture is completely cooled before storing and that you keep it airtight to prevent moisture. This way, you can have fresh, zesty lemon drops at a moment’s notice, making your sweet cravings easier to satisfy!
Homemade Lemon Drops Recipe FAQs
How do I choose the best lemons for my homemade lemon drops?
Absolutely! For the best flavor, look for lemons that are heavy for their size, with smooth, shiny skin and a bright yellow color. Avoid lemons that are hard or have dark spots all over, as they may be overripe or dried out. When possible, buy organic lemons to ensure you’re getting the freshest taste without any unwanted pesticides.
How should I store homemade lemon drops for optimal freshness?
To keep your homemade lemon drops fresh, store them in an airtight container at room temperature, away from sunlight and humidity. They will stay good for up to 2 weeks. If you prefer a firmer candy, you can store them in the refrigerator where they’ll last for up to 3 weeks, just ensure they are well packaged to prevent moisture.
Can I freeze homemade lemon drops and how?
Yes, you can freeze your homemade lemon drops! Simply place them in an airtight container or a freezer-safe bag and freeze them for up to 3 months. When you’re ready to indulge again, thaw them in the refrigerator overnight for the best texture. This method keeps them deliciously tangy and sweet for longer, so you can enjoy a taste of summer anytime!
What if my lemon drops are too sticky or don’t set properly?
Very good question! If your lemon drops are too sticky, it might be due to insufficient sugar or not cooking them long enough. If they don’t set properly, it’s essential to check the consistency while simmering—make sure it coats the back of a spoon and has a glossy texture. If needed, you can re-cook the mixture to thicken it, stirring constantly and boiling for an additional few minutes.
Are homemade lemon drops safe for people with allergies?
While homemade lemon drops primarily contain lemon juice, sugar, and corn syrup, it’s essential to check for allergies to any ingredients, especially if you add extras like citric acid. For those with gluten allergies, rest assured that this recipe is naturally gluten-free. Always keep in mind ingredients when sharing with others to ensure they are safe for everyone to enjoy!
How do I prevent my lemon drops from sticking together?
To prevent sticking, I recommend dusting your lemon drops with powdered sugar after they have set, which creates a barrier that keeps them from coming together. Also, ensure they are completely cool before packing them away. If humidity is high, consider storing them with a piece of parchment paper between layers in the container to keep them separated!
Zesty Homemade Lemon Drops You Can’t Resist Making
Ingredients
Equipment
Method
- Gather all necessary ingredients for your homemade lemon drops.
- Squeeze fresh lemons until you have 1 cup of lemon juice and strain it.
- Combine prepared lemon juice, granulated sugar, water, and salt in a saucepan.
- Bring the mixture to a gentle boil, stirring frequently.
- Reduce the heat and let the mixture simmer for 10-15 minutes.
- Remove from heat and let the mixture cool slightly.
- Pour the cooled mixture into candy molds or a lined baking dish.
- Allow the candy to sit at room temperature until fully set.
- If using a baking dish, cut the candy into squares and roll in powdered sugar.
- Enjoy your homemade lemon drops!
Leave a Reply